I'd Crumble For You: Blackout Crumb Bars Recipe

So. There may be something that makes me happier than a good bar cookie, but just at the moment, nothing is coming to mind.

That having been said, let's discuss the Blackout Crumb Bar, a recipe I discovered on the inside label of Love N Bake's "Chocolate Schmear" filling. 

But first things first. What is this chocolate schmear business? I came into this bounty not long ago when aforementioned company sent me a sample. It comes in a can sort of like almond paste that you'll find in the grocery store baking aisle--only it's chocolate. It's got this incredibly thick texture, and in the name of science I felt it necessary to take a spoonful before baking with it (it tastes good on its own. Whew!).

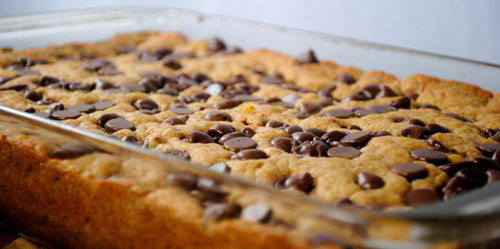
But it has found its perfect vehicle with the Chocolate Blackout Crumb Bar. Kind of like a cross between crumb cake and fudge bar cookies, these babies are dense, chocolate, crumbly and buttery--that is to say, pretty delicious. And while it's a slight stretch, I still think these bars are a very appropriate way to celebrate National Coffee Cake Day.

Chocolate Blackout Crumb Bars

Adapted from Love N Bake

Ingredients

  • 1 1/2 sticks (3/4 cup) unsalted butter
  • 1 cup all purpose flour
  • ¼ cup brown sugar, tightly packed
  • 1 teaspoon salt (original recipe calls for just 1/4 teaspoon but I like salt)
  • 1 can (minus a spoonful or two) Love'n Bake Chocolate "Schmear" Filling

 Procedure

Grease a 9-inch square pan with butter and line with parchment paper. Set aside. Beat the butter in a large mixing bowl until creamy. Beat in the flour, sugar and salt until well mixed. Reserve ½ cup of the crumb mixture. With floured hands press the remaining crumbs into the bottom of the prepared pan.

Bake in a preheated 350ºF oven until edges are golden brown, approximately 10 to 12 minutes. Spread the baked crust with the "Schmear" Chocolate Filling. Sprinkle the reserved crumbs over the chocolate. Continue baking the pastry until the crumbs have browned approximately 25 to 30 minutes. Cool completely on a wire rack then cut into bars.

Sweet Seconds: Leftover Easter Candy Cookies for Serious Eats

In my mind, Easter candy falls into one of two categories. There are the show pieces—the chocolate bunny, Cadbury Creme eggs, and those addictive Reese's peanut butter eggs, for instance—which tend to disappear rapidly. And then there's the filler—the jelly beans, the Peeps, and those little malted eggs, which look pretty in the basket but aren't consumed quite as quickly.

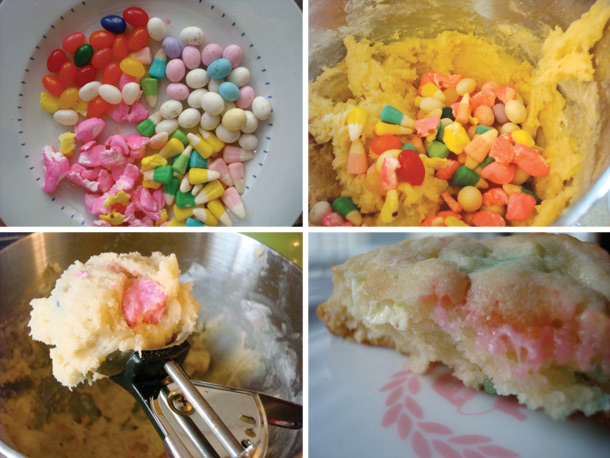
But I feel for the filler, really I do, and so I tried my hand at designing a desirable delivery vehicle for these assorted pastel leftovers: the Leftover Easter Candy Cookie. I started out with a basic drop cookie recipe and added in a cup of assorted leftovers, including Easter corn, jelly beans, cut-up Peeps, and malted egg candies.

To read the full entry and find the recipe, visit Serious Eats!

Out Like a Lamington: A Sweet Recipe from Joy of Baking

You know what they say about March: in like a Lion, out like a Lamington. At least, that's what I say. OK, technically I've never said that before today.

Nonetheless, I couldn't imagine a sweeter way to say "smell ya later" to March than with these traditional Australian treats, named after Lord Lamington (Governor of Queensland from 1896 - 1901) comprised of dense cake absolutely coated in rich fudge coating and feathered with sweet coconut on top of everything.

My suggestion? Make some today. No fooling, it's a sweet way to end one month and go into another--and nobody would call an April that began with a leftover Lamington breakfast "the cruelest month".

This recipe is lightly adapted from the one on Joy of Baking.

Lamingtons

For the cakes

  • 2 cups all purpose flour
  • 2 teaspoons baking powder
  • 1/4 teaspoon salt
  • 1/2 cup unsalted butter, at room temperature
  • 3/4 cup sugar
  • 2 eggs
  • 1 teaspoon vanilla extract
  • 1/2 cup cream or milk (I used cream) 

For the chocolate Frosting:

  • 4 cups (1 pound) confectioners' sugar, sifted
  • 1/3 cup cocoa powder
  • 4 tablespoons unsalted butter
  • 1/2 cup cream or milk

For the coating: 

  • 2 cups shredded coconut

Procedure


  1. Preheat oven to 350 F. Place oven rack to middle position. Grease an 8x8-inch baking pan and set to the side.
  2. In a large bowl, sift together the flour, baking powder, and salt. Set to the side.
  3. In the bowl of an electric mixer, beat the butter until soft. Add sugar and beat until light and fluffy--2 or 3 minutes. Add the eggs one at a time, beating well after each addition. Scrape down the sides of the bowl occasionally. Add the vanilla and beat until combined.
  4. With the mixer on low speed, add the flour mixture and milk in alternating increments, beginning and ending with flour.
  5. Spread the batter into the prepared pan and smooth the top with an offset spatula. Bake in your preheated oven for about 25-30 minutes, or until a cake tester or toothpick comes out clean.
  6. Cool the cake in the pan on a wire rack for 10 minutes. Place a wire rack on top of cake and invert, lifting off pan. Once the cake is cool, cut it into 16 2-inch squares. Wrap the cake (as one unit is fine) in plastic wrap and refrigerate for several hours or even overnight--this makes it much easier to coat with chocolate later on.
  7. Make the chocolate frosting. Place the confectioners' sugar, cocoa powder, butter and milk in a double boiler. Heat on low, stirring the mixture until it becomes smooth and of pouring consistency.
  8. Assemble your Lamingtons. Make a production line; put the 16 squares of cakes on a wire rack that is placed over a baking sheet (to catch the dripping chocolate).  Have the coconut ready on a large plate and the chocolate frosting. Ladle the chocolate frosting over each square of cake, making sure you cover all sides. (It is best to do a few squares at a time.)  With a small offset spatula or knife transfer the chocolate covered cake to the plate of coconut and roll the cake in the coconut, covering all sides.  Gently transfer the lamington to a clean wire rack to set.  Repeat with the rest of the cake squares.  Once the Lamingtons have set, store in an airtight container for several days.


Note: Also, Joy of Baking has a helpful tip: When you ladle the frosting over the cake, some of the frosting will drip onto the pan. Pour this frosting back in your bowl and reuse (strain if necessary).  If the icing becomes too thick to pour, simply place the frosting back over the saucepan of simmering water and reheat until it is of pouring consistency. (You may have to do this a few times as the frosting has a tendency to thicken over time.  Add a little more milk to frosting if necessary to get pouring consistency.)


Sticky Business: Sandra Lee Pillsbury Sticky Buns Recipe

Some people may rankle at the idea of using pre-packaged cinnamon rolls, but not me. I have some fond memories of them from growing up, and choose to take the "just don't read the ingredients or nutritional info" point of view.

But if you do need a way to justify them, fancying them up a bit can't work.

So I have to admit I was intrigued when I heard of the recipes for Pillsbury that Sandra Lee had created starting with their sweet rolls (you know, the ones in the tube that pop open) and adding a few simple ingredients to make them unique--it kind of seemed like Pillsbury's answer to The Cake Mix Doctor. And when they sent me a coupon for some free Pillsbury products so I could test 'em out, I figured: why not?

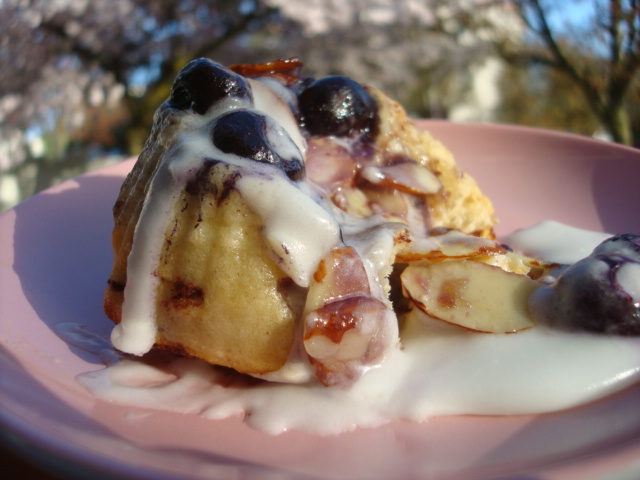
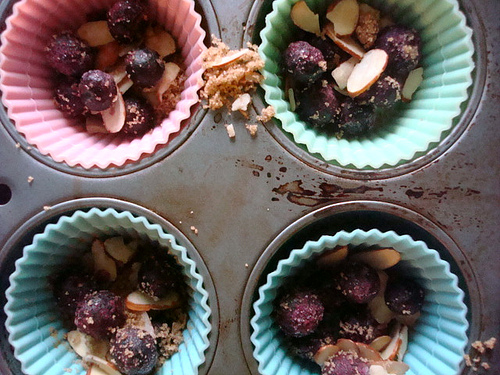
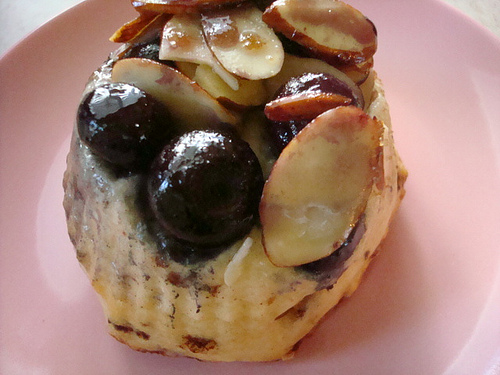
So I tested out the Apple Walnut Sticky Buns recipe...only, because I had neither apples nor walnuts, mine substituted blueberries and almonds. It worked out fine in terms of quantities and very nicely in terms of flavor, too.

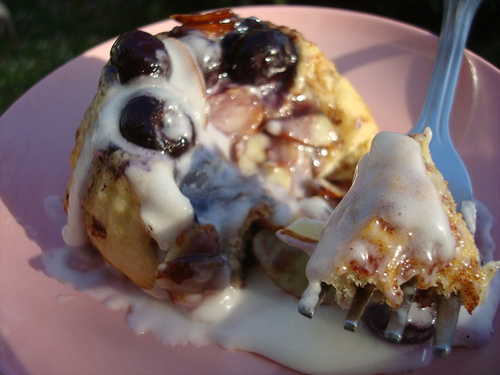
And you know what? Even that small bit of baking really did make the store-bought rolls better and a bit more grandiose than simply poppin' and baking. Not a bad option for a quick brunch side or impromptu sweet breakfast.
Adapted from Sandra Lee's Apple Walnut Sticky Buns from Pillsbury.com

Ingredients

  • 2 tablespoons butter, softened
  • 1/2-1 cup blueberries (or, per the original recipe, 1 medium Granny Smith apple, peeled, cut into 1/2-inch cubes)
  • 3/4 cup chopped almonds (or, per the original recipe, walnuts)
  • 1/2 cup packed brown sugar
  • 1 can (12.4 oz) Pillsbury refrigerated cinnamon rolls with icing

  1. Heat oven to 375°F. Generously butter 8 regular muffin cups with softened butter.
  2. In bowl, mix blueberries and almonds (or apples/walnuts) and brown sugar; divide evenly among muffin cups. Separate cinnamon rolls; reserve icing.
  3. Place 1 cinnamon roll in each cup. Bake 12 to 14 minutes or until tops are golden brown.
  4. Cool 5 minutes. Place cookie sheet upside down over muffin pan; turn over. Remove pan.
  5. Remove lid from icing; microwave on Medium (50%) 5 to 10 seconds or until thin enough to drizzle. Drizzle over warm buns. Serve warm.

Fail, Saved: Making Good of a Bad Recipe

Last week I bought this adorable Springtime Linzer Cookie Cutter Set from Cookies in Seattle, for my weekly Serious Eats post (which you can check out here).

However, before I found recipe success, I had to deal with recipe failure.

Being infinitely curious about back-of-the-box recipes, I decided to first try the recipe printed on the back of the kit.

Here's what they looked like before they went in the oven:

and here's what they looked like when they came out.

Noooo! Where could I have gone wrong? The original recipe suggested letting the dough rest for 2 hours; I let it rest overnight. Too long?

Regardless of appearance, the cookies still did taste good: almost like sugar cookie crackers.

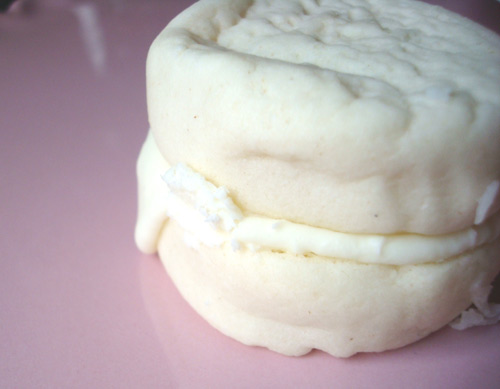
And when sandwiched with a thick dollop of lemon curd in the middle, these crunchy cookie sandwiches would almost have you believe they'd been made this way on purpose.

Here's the recipe (which, by the way, I would not suggest if you want perfectly formed cutout cookies--rather, try this one instead). I am writing it as it appeared on the package, but with steps 4 and 5 the perfect cutouts might not work the way you'd like, if my experience was any indication:

Failed Linzer Cookies (AKA Sugar Cookie Crackers)

Ingredients

  • 1 cup butter
  • 1 teaspoon orange extract
  • 1 1/2 cups sugar
  • 2 cups sifted cake flour

to fill:

  • 1 jar lemon curd (or whatever preserves you'd like, or frosting, etc)

 Procedure

  1. Mix butter, orange extract and sugar.
  2. Stir in one cup of flour at a time, mixing well.
  3. Chill the dough for at least 2 hours.
  4. Roll out 1/2 of dough on a cookie sheet to 1/4 inch thick and chill 30 more minutes. Cut with the Linzer cutter without an insert. Remove excess dough and bake at 350 for 12 minutes.
  5. Roll out the other half of the dough on a second cookie sheet, once again chilling for 30 minutes. Cut with the Linzer Cutter fitted with the insert or inserts of your choice. Remove excess dough and bake at 350 for 12 minutes. Cool completely.
  6. If your cookies came out Linzer-iffic, then good for you (jerk). If not, sandwich them with lemon curd or your choice of filling and enjoy.

Sweet Sandwich: Peeps Fluffernutter for Serious Eats

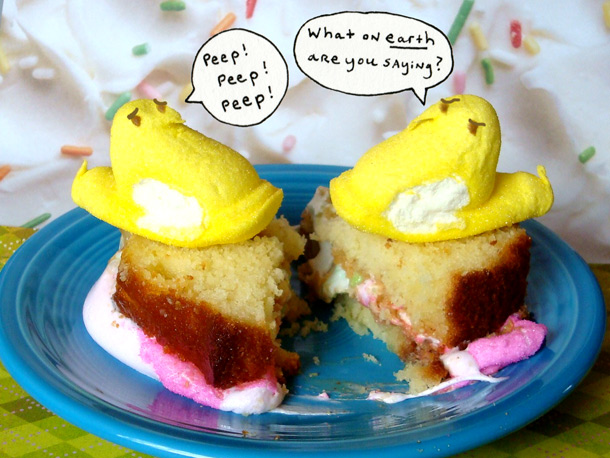
Oh, don't act surprised. It was really only a matter of time before Peeps, those pillowy pastel harbingers of spring, met the classic marshmallowy sandwich called Fluffernutter.

What may surprise and delight you, however, is that in my version, the peanut butter-and-Peeps mixture is sandwiched between two hefty slices of pound cake rather than white bread, to form a delectably decadent dessert sandwich.

The pound cake works beautifully on several levels—the sweetness works harmoniously with the Peeps, and the rich butteriness is perfect with the peanut butter. In fact, I'd like to humbly submit that it just may be the perfect lunchtime followup to a breakfast of Cadbury Creme Eggs Benedict.

King Corn: Cornmeal Blueberry Cookie Bars

So, when I first encountered a review copy of the book Good to the Grain: Baking with Whole-Grain Flours, I have to confess, I had my doubts. The concept--a book of recipes for baked goods (both sweet and savory) using whole grain flours sounded vaguely...virtuous.

But once assured that they still did include plenty of sugar and butter, I figured it was worth a try.

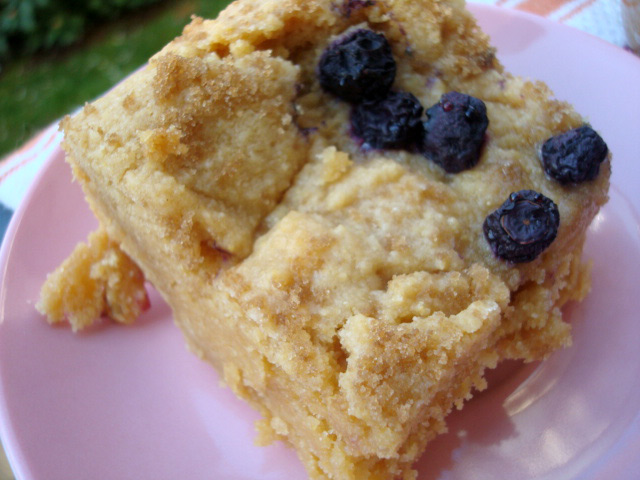
And after looking through the book (and lovingly, at some of the pictures), I decided to try the cornmeal blueberry cookies. Why? Well, for one thing, I like cookies, and I like corn muffins, and these kind of sounded somewhere in between. Plus, I happened to have all of the ingredients on hand.

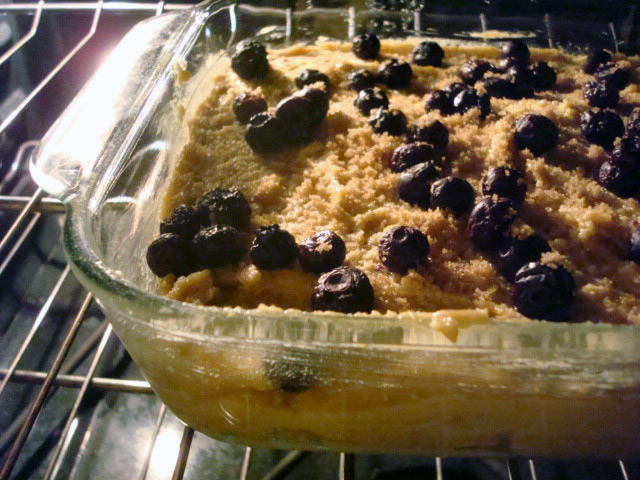
Well, I veered a little from the original recipe: for one thing, I used frozen instead of dried blueberries, dehydrating them by baking them at 200 degrees farenheit for a few hours to dry them out; and second, instead of cookies I made my batch as bars, using an 8x8-inch pyrex baking sheet. Because I had dehydrated the berries and they weren't completely dried, I placed them on top of the batter rather than mixing it in; however, even with these changes, the yield was a very dense and pleasing bar, like cornbread meets sugar cookie, with a nice tart edge from the berries.

Here's the recipe.

Cornmeal Blueberry Cookie Bars

Adapted from Good to the Grain: Baking with Whole-Grain Flours

Dry mix:

  • 2 cups corn flour
  • 2 cups all-purpose flour
  • 1 cup finely ground cornmeal
  • 1 1/2 teaspoons baking soda
  • 2 teaspoons cream of tartar
  • 2 teaspoons kosher salt (I used Secret Stash Sea Salt's Pistachio cherry)

Wet Mix:

  • 8 ounces (2 sticks) cold unsalted butter, cut into 1/2 inch cubes
  • 2 cups dark brown sugar
  • 1 cup dried blueberries (I had frozen; I baked them for a couple of hours at 200 degrees to dehydrate them)

Finish:

1/2 cup sugar (I used brown sugar)

Procedure

  1.  Preheat the oven to 350 F. Rub your baking pan with butter.
  2. Sift the dry ingredients into a large bowl and set aside.
  3. Add the butter and brown sugar to the bowl of a standing mixer fitted with a paddle attachment. Turn the mixer to low speed and mix until the butter and sugar are combined, then increase the speed to medium and cream for 2 minutes. Use a spatula to scrape down the sides and the bottom of the bowl.
  4. Add the eggs, one at a time, mixing until each is combined. Add the flour mixture to the bowl and blend on low speed until the flour is just barely combined, about 20-30 seconds (it's very pretty to watch). Scrabe down the sides and bottom of the bowl. Add the milk (and if you're using dried, add the blueberries now). Slowly mix until the dough is evenly combined.
  5. Spoon your batter (it will be thick) into your prepared pan, spreading with a spatula to even out the top. Sprinkle the dehydrated blueberries and finishing sugar on top. (or, if you want to make cookies, pour the sugar into a bowl scoop mounds of dough, each about 3 tablespoons in size, form into balls, and set on a plate; dip each ball into the sugar, coating it lightly; arrange the balls on baking sheets, leaving about 3 inches between them--balls that don't fit on the first baking sheet can be dipped in the sugar and chilled til ready to bake).
  6. Bake the bars for somewhere between 20-30 (possibly a few more) minutes depending on your pan size (more minutes for a taller pan, less for a shallower pan); (20-22 for cookies), rotating the sheet at about 10 minutes. The bars will puff up and crack at the top and are ready to come out when the sugar crustis golden brown and the cracks still faintly yellow.
  7. These bars / cookies are best eaten warm from the oven or the same day. But, if you must, they'll keep in an airtight container (at room temperature) for up to 3 days.

Spring in Your Step: Springtime Cutout Sandwich Cookies for Serious Eats

In case you couldn't tell by the proliferance of Cadbury Creme Eggs, Peeps, and pastel-hued jelly beans in grocery stores, Easter is coming.

Now, it's not to say that I don't enjoy these adorable seasonal sweets, but when push comes to shove, I simply prefer baked goods. So, in an effort to get a piece of that pastel-hued cuteness while also enjoying a delicious, buttery, and substantial sugary treat, I've created these Springtime Cutout Sandwich Cookies.

These were made using an adorable Springtime Linzer Cookie kit I found at Cookies, a thimble-sized shop chock full of all manner of cookie cutters in Seattle, but I veered a bit from the traditional Linzer cookie construction. These sweet sandwiches start with a buttery sugar cookie cutout recipe, filled with lemon curd for a sweet and rich zing, and topped with pastel sugar for a sweet springtime palette.

For the full writeup and recipe, visit Serious Eats!

Sweets for the Sweet: Samoa Cupcakes by Rainy Day Gal

CakeSpy Note: This is a guest post from Rainy Day Gal (a.k.a. Jenny Miller), a fellow Seattle blogger with a major sweet tooth.

Right now Samoas are here. As are Thin Mints. And Tagalongs. And some weird new flavors that nobody wants. But I'll forgive them their dried-cranberries-in-a-cookie misstep just this once. I just can't resist those cute little gals in uniform in front of the grocery store. I'm their best customer, and especially so this year because I decided to take on a baking project involving my all time fave---the aforementioned Samoas. Crunchy cookie covered in chocolate, caramel and toasted coconut? What could be better? Making it into a cupcake, of course. You could do this with any of your favorite cookies, Girl Scout or non---see my suggestions at the end of this post. To match the flavors of the Samoa, I chose a basic vanilla cupcake and a frosting lightly flavored with coconut. I now accept that I am ready to begin. So I will.

First we need to get some coconut milk reducing to make it more concentrated. Pour a can into a saucepan, bring to a boil, and simmer over medium heat for about a half hour. Give it a stir once in a while. It will froth and get really big, but the liquid is really reducing in there. Meanwhile, grab the basics: flour, cake flour, sugar, baking powder, salt.

4 eggs. Hippie eggs. I wrote a song about them earlier but I felt it would be inappropriate to share with you. Unsalted butter. 2 sticks. Cubed.
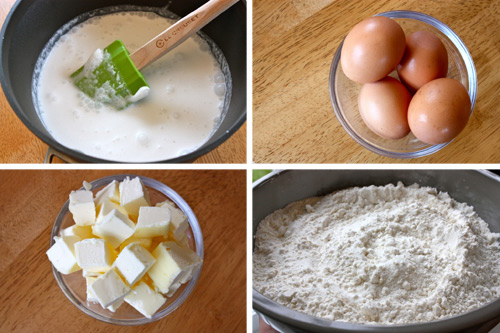
One cup of whole milk. And I'm definitely not going to share my song about hippie milk with y'all.

Pure vanilla extract. Don't ever buy imitation vanilla flavoring, pretty please. I will come over and throw it out your window. And, most importantly? The cookies.
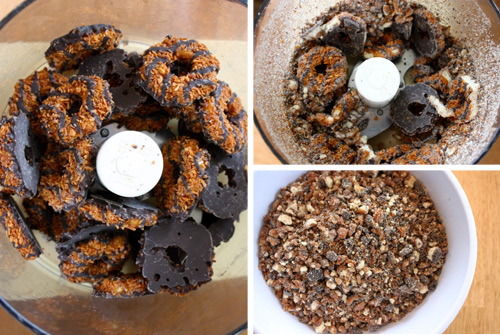
I used two boxes for 24 cupcakes. I accept that there are far too many calories in Samoas alone, let alone in a Samoa cupcake. Somewhere Jillian Michaels is doing push-ups in her magical trainer castle and plotting what she'll have in store for me tomorrow. Stick 'em in your food processor and pulse away. Not even close. Getting closer.... ...perfect.
Toss 'em in a shallow bowl and let's get ready to make our cupcake batter. Toss your dry ingredients in the bowl of a stand mixer fitted with the paddle attachment. Give it a quick spin on low to combine the powdery stuff. Throw in your butter... ...and mix just until those little buttery chunks are coated with flour. Crack your 4 hippie eggs into the milk and add one tablespoon of vanilla. Mix well. Add the milk/egg/vanilla mixture to the dry ingredients a third at a time, stopping before each addition to scrape down the sides of the bowl. One... two.... ...three. It's alright if it's a little lumpy. Those little chunks of butter will serve to keep the cupcakes moist.
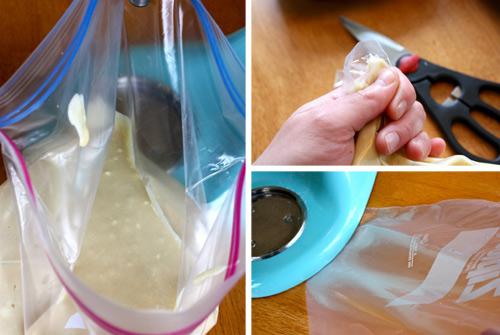
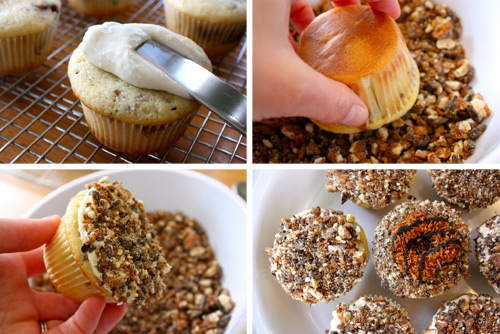
Now here's my trick for filling cupcake liners. Grab a big freezer bag and anchor 3 inches of one of the bottom corners under something heavy. Your stand mixer works perfectly for this. Pour in the batter (I usually hook one edge of the bag onto the little metal thingie that the mixer attachments hook onto. Yes, that is it's proper name.). Seal the bag, hold at the corner and cut off the tip. This is for those of us ghetto-fabulous chefs who don't own pastry bags. Fill your liners about 1/3 full...
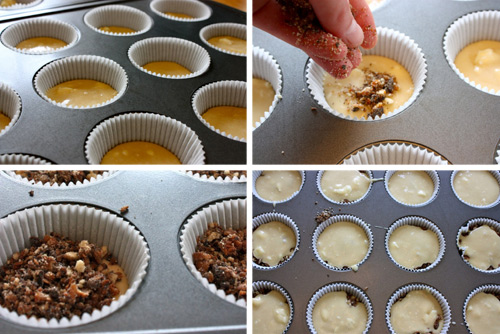
...and then sprinkle on a light layer of the crumbled cookies. Then squeeze more batter over the top so that the entire thing is about 3/4 full. Throw into a preheated 325F oven for 17-20 minutes.

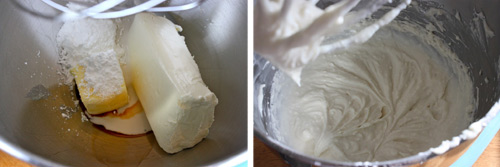
By now your coconut milk should be about a quarter of what it once was. It's also creamy and thick---perfect! Refrigerate for at least 30 minutes. Ready to make frosting? Combine cream cheese, butter, vanilla, powdered sugar and reduced coconut milk in your mixer fitted with the whisk attachment.

Mix until light and creamy.

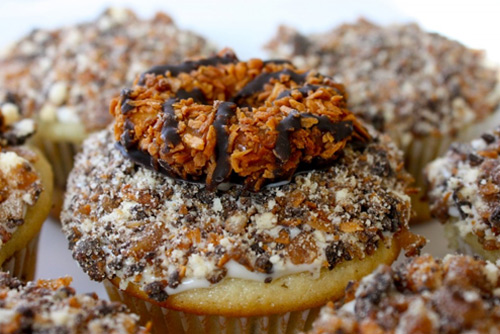
Once the cakes are done, set them on a rack to cool completely before frosting. I'm fairly certain my cupcake army is plotting to take over my home. Once they're cool enough, frost with about 1 tablespoon of frosting each. We're really using frosting in this case to serve as "glue" for the cookie crumbs---we don't want to overdo it. After frosting, give 'em a light dunk in the cookie crumbles. Perfect! I found one stray cookie in the box, so he gets the seat of honor (pictured top). Uh oh. Maybe he's commander of the army.
I think I've just done myself in. And, just because I feel like being sued for copyright infringement*, I stuck a purdy little Girl Scout logo on one of these beauties. *Rainy Day Gal has no affiliation with the Girl Scouts. She admires and respects the organization and hopes that they will not sue her, but instead send her boxes and boxes of cookies. 

Alright, let's get down to it: how did they taste? Pretty darn good. The cake was moist and a tad on the dense side, with a crunchy little layer of cookie halfway down. The frosting added to the flavor of the cake, but didn't overpower the taste of the cookies on top. I simply loved the texture: crunch is always good. These cakes are not for the faint of heart, however---they are incredibly rich. I would make two Girl Scouts share one. A chaser of milk is definitely in order. I now accept that this post has come to an end. But before you go here are some ideas I have for making cupcakes using other flavors of GS Cooks (that's my new nickname for them. Go with it.):

I hope you're enjoying Girl Scout cookie season as much as I am! Well, who am I kidding---I don't think anyone enjoys Girl Scout cookie season as much as I do. Have a totes fab wed, y'all. -RDG Samoa Cupcakes

  • One batch Vanilla Vanilla Cupcake batter
  • 2 boxes Samoas cookies, pulsed in a food processor until crumbly
  • One batch Slightly Coconut Frosting (see below)

Preheat oven to 325F. Fill cupcake liners 1/3 full of batter. Sprinkle a light layer of cookie crumbs on top of batter. Pour the remaining batter on top until liners are about 3/4 full. Bake for 17-20 minutes. Transfer to a wire rack and let cool completely. Once cool, spread one tablespoon of frosting on top and then lightly press frosted side of cupcake into cookie crumbs. Makes 24 cupcakes. Slightly Coconut Frosting

  • 1 can coconut milk
  • 4 oz cream cheese, softened
  • 4 tbsp butter, softened
  • 1/2 tsp vanilla extract
  • 1 1/2 cup powdered sugar

Pour coconut milk into a saucepan, bring to a boil, and simmer over medium heat, stirring occasionally, until reduced by 75%. Let cool. Combine 4 tablespoons of the reduced coconut milk and remaining ingredients and beat until light and creamy. Refrigerate any unused frosting.

The Bomb: Filled Cupcakes a la Smitten Kitchen for Serious Eats

Here in Seattle, every March something extremely joyful happens: all of the cupcake shops debut their individual takes on boozy Irish-themed cupcakes.

However, for those of you not in Seattle (or someplace that embraces Irish-inspired cake flavors as readily), fear not, because I've found a recipe to share.

It's an adaptation of the now legendary version first found last year on Smitten Kitchen, with some small liberties taken. Amazingly, while the alcohol is very much present in these cakes, it somehow manages to not be overpowering, instead imparting sophisticated flavor to the frosting and filling and a decadent fudgy texture to the cake.

For the full writeup and recipe, visit Serious Eats!


Poires from Paris: Bagatelle de Poires Pochees Recipe

Totally sweet: a recipe from an actual French person! Here's a guest post from the wonderful and talented Helene, whose work you can find over here.

Well, today you will be able to amazed every one by cooking: "une bagatelle de poires pochées" for 8. How to make it? Nothing easier... I'll show you right now.

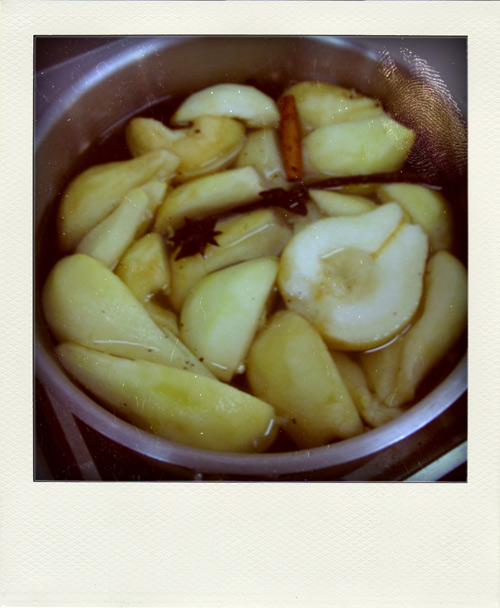
First, you have to prepare your pears by dousing them in a delicious sugar and spice coating.

For 4 pears, mix into a big pan:

  • 1 liter of water
  • 500 g of sugar
  • 3 or 4 cinnamon stick
  • Some star anise
  • 4 g. of vanilla

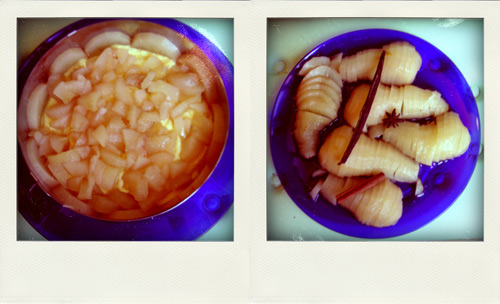
Let the mixture heated and dip your peeled pears, drained and cut in 2 pieces.

Let it cook slowly...

Second, prepare the biscuit

This is a cheap and easy recipe for a biscuit very Frenchy and so good.... This is the basis of our fruits or chocolate charlotte cake. For our recipe we need to prepare it in 2 plain circles. But first of all... the recipe :

Ingredients

  • 4 eggs
  • 100 g of sugar
  • 100 g of flour

 Procedure

  1. Separate the white from the egg yolk. Mix the yolk and 80 g of sugar in a bowl: whisk strong enough to lather and bleach everything.  
  2. Beat the egg whites until stiff and mixed with the remaining 20g sugar. Whisk again to smooth everything.
  3. Mix it gently with the yolk. Stir very slowly so as not to « break » our preparation.
  4. Add in once the flour and mixed it still gently.
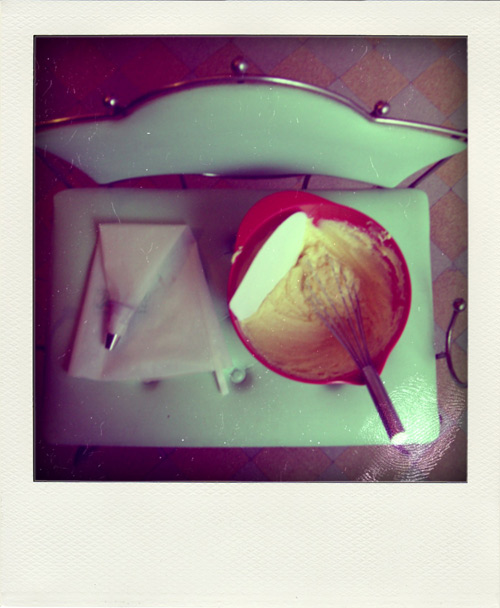
  5. The batter is ready ! take your pastry tip and bag...
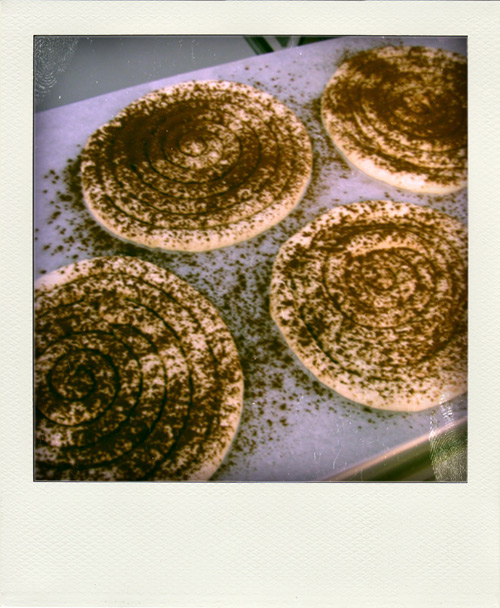
  6. Make 2 regular spiral, the size of your dessert circles.
  7. Sprinkle with icing sugar or cocoa powder twice.
  8. And presto! : bake them, 15 min. à 180°C

And third, the mousseline cream!

We have to start with our pear mixture.

Once it cooled, we will have to mix it with butter cream.

Ingredients

  • 300 g of whole milk 
  • 1 egg
  • 40 g of sugar
  • 30 g of fecule de pomme de terre (I don't know the word for this)
  • 1/2 vanilla pod

Faire un pâtissière :

  1. Heat the milk with the vanilla until it bowled.
  2. In the mean time, whisk together egg, sugar, powdered cream with a little hot milk (to relax the mixture).
  3. Once the milk is boiling, mixed everything in the pan and thicken everything, whisking bluntly!
  4. Be careful not to burn the preparation
  5. Once ready, take the mixture away from the fire and put it down a plate to the freezer for 20 minutes to cool it completely.
  6. Meanwhile, get your 170g soft butter!    I mean  a soft butter (not melted)  and whip  it into cream . 
  7. When your mixture is cooled, mix butter whipped with it.

Your mousseline  is ready!

Fourth, assembly ...

  1. Your pears are drained and  cutted 
  2. Place your first biscuit in the bottom and wet it with syrup poached pears. 
  3. Put your cream into a first layer and place a pear slice on the side of your circle.
  4. Fill with half a pear cutted in small pieces! be generous and cover with cream mousseline.
  5. Cover it with your second wet biscuit !
  6. The circle is completed ...chill for at least 2 hours.
  7. Once cooled, here is a great cake nearly done!
  8. It is better to eat the next day, so the flavors will be stronger and better "soaked" !  

C'est formidable...

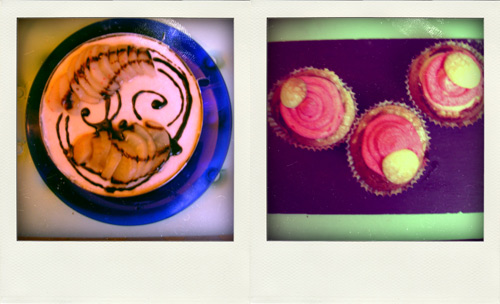
Finally,  some decorating suggestions!

In France, it is common to add a thin layer of almond paste and write the name of the cake  on it.  

But I prefer that you use your imagination. If you're afraid of spoiling, prefer simplicity! For example, use your last poached pears into slices and place it on your decor, or the spices from the syrup...or maybe you'd like to make them into little "cupcakes" ...the sky's the limit!

Thank you very much! I hope you love this "bagatelle" French pear cake !  

Tartelets of the Table: Chocolate Tartelet Recipe from Alabama Studio Style

When I received a sample copy of Alabama Studio Style: More Projects, Recipes, & Stories Celebrating Sustainable Fashion & Living in the mail, I was initially perplexed--although it is beautiful, it seemed like it was a book of sewing and home projects.

But then I found it: the recipes. Scattered throughout the creative sewing and home projects are several delicious recipes--most notably this one, for chocolate tartelets. Filled with creamy chocolate that falls somewhere between custard and ganache, these are an extremely delicious dessert, and they've definitely made me curious about some of the other recipes in the book, including coconut cupcakes. And there is a DIY project for homemade cake plates...

Chocolate Tartelets

Adapted from Alabama Studio Style by Natalie Chanin

You'll need: one pie crust, separated into 12 3-inch tartlet servings (use your favorite recipe for a 9-inch pie)

Note: a similar full size pie recipe is on the Alabama Studio Style site!

For the filling:

  • 1 cup granulated sugar
  • 1/3 cup all-purpose flour
  • 1 cup buttermilk
  • 2 large egg yolks, beaten
  • 1/3 cup unsweetened cocoa
  • 1 tablespoons unsalted butter
  • 1/4 teaspoon vanilla

For the meringue

  • 2 large egg whites
  • 1/4 teaspoon cream of tartar
  • 1/4 cup granulated sugar
  • 1/4 teaspoon vanilla

Filling procedure

In the top of a double boiler, combine 1 cup sugar and the flour. Add buttermilk and simmer over boiling water for about 15 minutes, until thick. Remove from heat. Beat the egg yolks, and then add them to the milk mixture. In a separate bowl, mix cocoa with enough boiling water to form a paste, and then whisk this paste into the double boiler mixture. Return to heat and simmer over boiling water until thick. Remove from heat, and add butter and vanilla. Cool, then transfer to prebaked pastry tartlet shells.

Meringue topping procedure

While filling is cooling, preheat oven to 325, and prepare meringue as follows: in a medium sized bowl, beat the egg whites and cream of tartar until mixture stands in a peak. Beat in 1/4 cup sugar, 1 tablespoon at a time, and continue beating until stiff and glossy. Gently fold in 1/4 teaspoon vanilla. Spread on top of prepared tartlets and bake until lightly browned, about 5-10 minutes.

Big Funfetti: Funfetti Cake Mix Cookie Sandwiches for Serious Eats

Cookie sandwiches involve so much awesome. In one single unit, you to get two cookies and delicious filling, and you get to eat them all at once.

But there's always room for more awesome at the cookie sandwich party, as I learned when I prepared a batch of sweet sandwiches using Betty Crocker's Cooky Book and the finest of cake mixes—the kind with a built-in rainbow. What better pick-me-up for dull winter days than a double dose of dense, moist, lightly tangy, cakey cookies sandwiched with rich, sweet, buttery frosting?

Here's the recipe, but you can also find it (and more) over at Serious Eats!

Funfetti Cake Mix Cookies

Ingredients

For the cake mix cookies

  • 1/4 cup butter, softened
  • 1 package (8 ounces) cream cheese
  • 1 egg
  • 1/4 teaspoon vanilla
  • 1 package funfetti or rainbow chip cake mix

For for the filling (optional):

  • 1 1/2 sticks of butter
  • 1 teaspoon vanilla
  • 2 to 4 cups confectioners' sugar, depending on your desired consistency

Procedure


  1. Preheat oven to 350°F. Note: the original cookie recipe called for 8 to 10 minutes at 375°F, but I found that baking slightly longer at 350°F worked better for my cookies.
  2. Cream the butter and cream cheese. Blend in egg and vanilla.
  3. Add cake mix in two parts, mixing well (it will be a super thick batter—if it is too stiff, add a small quantity of heavy cream to the batter and mix well).
  4. Using a small cookie scoop, drop balls of cookie dough on an ungreased baking sheet. Leave about 2 inches between the cookies.
  5. Bake for 8 to 12 minutes, or until lightly browned. Cool cookies for at least 15 minutes on the cookie sheet before transferring to a wire cooling rack; the cookies are very delicate when they first come out of the oven and they will break if you try to transfer them too soon.
  6. Once completely cool, add a generous dollop of frosting to the bottom of half the cookies, and then sandwich the rest of the cookies on top to form something that vaguely resembles a whoopie pie, but tastes like something else entirely.
  7. If you want the filling, go ahead and prepare it by mixing the butter until fluffy in your electric mixer; add the vanilla and then the confectioners' sugar, bit by bit, until it has reached your desired consistency. Thin with cream or milk if desired, and adding a few drops of pink food coloring never hurts.


Gimme More: Pisco-Infused Alfajores Recipe

C is for Cookie, but A is for Alfajor.

Say what?

If you've never heard of them, alfajores are definitely one to add to your alphabet of sweets: a delectable type of crumbly cookie commonly sandwiched with indulgent dulce de leche.

Though most commonly associated with South American countries such as Argentina, Uruguay, Ecuador, Paraguay, Chile, Perú and the South of Brazil, these cookies actually take their roots in the Arab World: per Wikipedia, "the name alfajor is derived from Arabic الفاخر, which means "fancy" or "great" sweets. The archetypal alfajor entered Iberia during the period of al-Andalus."

Though this sweet treat has a long history, I took a more modern approach by making a Pisco-infused batch (with thanks to Gran Sierpe, who kindly donated some Pisco, a Peruvian brandy, with which to test out some recipes). The brandy adds a slightly sophisticated bite to the sweet cookies, compelling you to take bite after bite to try to figure out the source of the je ne sais quoi.

Want to make your own? Here's the recipe I used.

Alfajores

Adapted from About.com's South American Food

Ingredients

  • 1 cup cornstarch
  • 1 3/4 cups flour
  • 1/2 teaspoon baking powder
  • 1 teaspoon salt 1 cup butter
  • 1/2 cup powdered sugar
  • 1 tablespoon Pisco (I used Gran Sierpe)
  • 1 teaspoon vanilla
  • 1 cup dulce de leche, OR 1 cup vanilla buttercream, for filling
  • 1/2 cup toasted coconut, finely chopped (optional)


Procedure


  1. Preheat oven to 350 degrees.
  2. Place the cornstarch, flour, baking powder, and salt in a bowl and mix briefly.
  3. Cut the butter into small pieces and add to the flour mixture, blending with your fingers until the mixture is smooth.
  4. Add the powdered sugar, vanilla, and Pisco, and mix with your hands until the dough is homogeneous and smooth. Let the dough rest in the refrigerator for 30 minutes.
  5. For this step, either follow the original recipe by rolling out dough to 3/8" thickness, and cutting into 2 inch circles--OR, do as I did and roll the dough into a log and then slice cookies to your desired thickness (I liked fat ones, maybe 1/4 inch thick).  Place cookies on baking sheet lined with parchment paper.
  6. Bake cookies for 10-15 minutes, until they are barely golden brown. Let cookies cook 5 minutes, then carefully transfer to rack to cool completely (they are quite fragile until they cool).
  7. To fill the cookies, spread one cookie with dulce de leche and top with second cookie (note: as I found out, buttercream works beautifully too--picture below). If desired, roll the edges in the coconut. Store in an airtight container.

Peppermint Sweet: Homemade Thin Mints a la Baking Bites for Serious Eats

Smug, smug little Girl Scouts. Those sweet little sugar pushers can be found all over around this time of year, lurking outside of drugstores and markets with their addictive little missives of sweet cookies.

Oh, they seem so friendly and accommodating now. But what happens in a month or so, when they're gone and you've got a serious jonesing for some Samoas or Thin Mints?

You make your own, that's what you do.

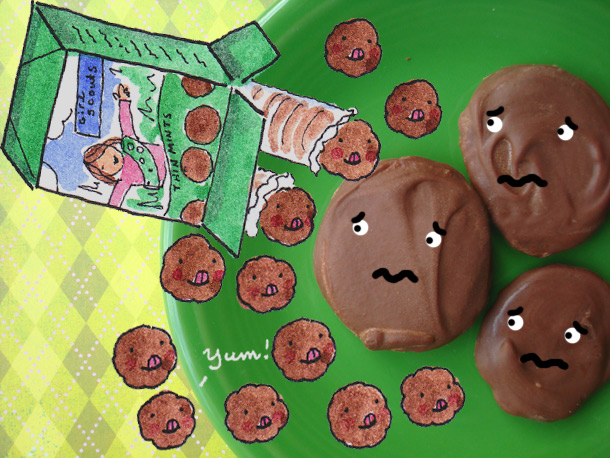
Armed with a recipe from Baking Bites, I tested out a batch of my favorite, Thin Mints. While I wouldn't say that they're a clone version of the boxed kind (the texture is a little different, and the taste a little...fancier), they will indeed give you that much needed fix. Now if only I could figure out how to make a little plastic sleeve for them to fit in...

For the full writeup and recipe, visit Serious Eats!

Up, Up, and Away: 7-Up Cake for Serious Eats

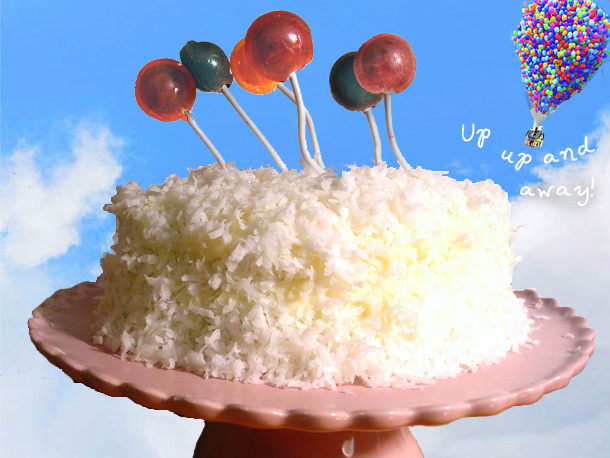
Up is a sweet film of dreams realized: by tying thousands of balloon to his home, main character Carl Fredricksen sets out to fulfill his lifelong desire to see the great wide world. But when it comes to a cake inspired by the movie, you're going to want all of the charm but none of that floating away business.

While this 7-Up Cake may be infused with the buoyant lemon-lime soda bubbles, it's far from light-as-air. This is actually a rich, decadent pound cake made with five sticks of butter.

Coloring the cake a gentle sky blue and topping it with a fluffy, cloud-like coating of rich coconut frosting lends an air of drama when it's sliced into, and a garnish of lollipops (the "balloons") add a bit of whimsy. So good, it'll disappear into thin air.

For the full entry and recipe, visit Serious Eats!

Egg-stra Special: Cadbury Creme Eggs Benedict for Serious Eats

Eggs Benedict is like pleasure overload: savory little stacks of delicious excess, topped with a crowning glory of Hollandaise.

But could this brunch classic be recreated in a totally sweet form?

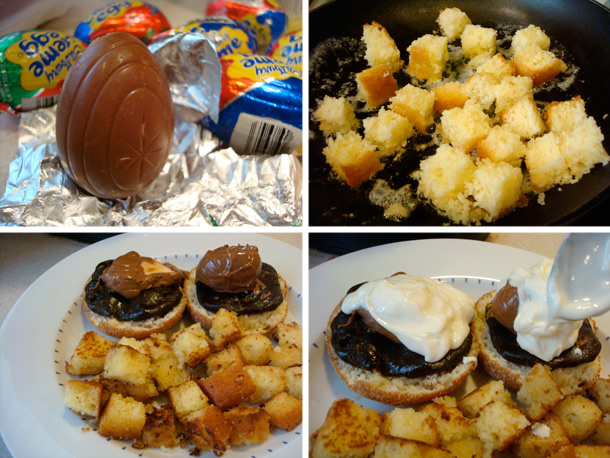
You bet your bottom silver dollar pancake. It's time to say hello to a new classic: Cadbury Creme Eggs Benedict. It combines all of the excess of the savory dish, but in completely sweet form, comprised of stacks made of doughnut, brownie, melty Creme Eggs (complete with oozing yolk!), and a topping of rich frosting, all accompanied by a mound of fried pound cake to give the effect of side potatoes.

It's a sweet egg-stravaganza.

  • 2 Cadbury creme eggs
  • 1 plain cake doughnut
  • 1 brownie, the fudgier the better
  • 1 large slice pound cake, cut into small cubes
  • 1 tablespoon butter, such as Challenge Butter
  • Red sugar sprinkles, to garnish

Prepare your plate. Slice your doughnut in half; place the halves, cut side up, side by side on your plate.

Cut your brownie in half, the way that you would slice a bagel (so that you have two fully sized but thin brownie pieces). Either cut or shape each piece into a circle so that it is slightly smaller in circumference than the doughnut halves. Place the circles on top of the doughnut halves.

Prepare the Creme Eggs. The idea here is to get them lightly melty, but not so much that the yolk oozes out. I found that the best way to do this was to either put them on a sheet of aluminum foil atop a baking sheet and put them in either a toaster oven on high or a preheated moderate oven for about a minute. As soon as the tops of the chocolate eggs starts to get a bit shiny, remove them from heat, and very carefully (so as to not puncture the chocolate and let the yolk ooze out) transfer each egg to the top of your two prepared brownie and doughnut stacks. Top with lightly melty frosting.

Sprinkle each finished stack with red sugar sprinkles; serve immediately.

For the full post and how-to, visit Serious Eats!

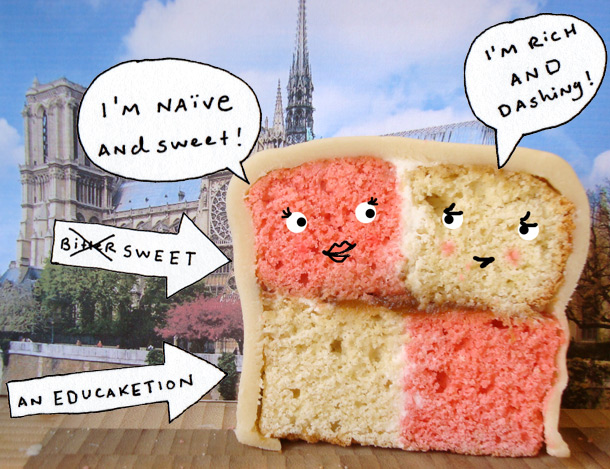
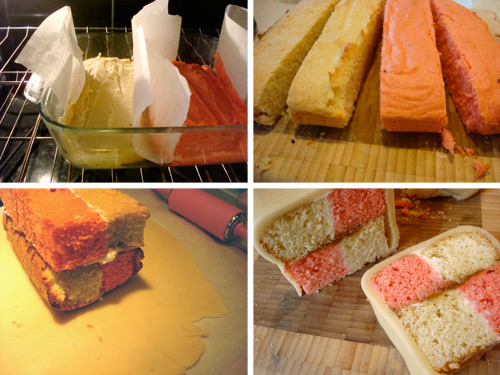
An Educaketion: An Oscar-inspired Battenberg Cake for Serious Eats

Really, Battenberg Cake is a perfect food analogy for the film An Education.

It starts out with an unlikely pairing—only instead of May-December lovers, it's two cakes, one a light, girly pink; the other a rich, refined Madagascar vanilla (which in my version includes worldly splash of amaretto).

And like the film's main characters, both flavors breathe new life when put together. You get a delicious shot of sweetness from the pink cake paired with the intensity of the amaretto-infused cake. It's beautifully rounded out by a thick slather of preserves (and, if you're feeling decadent, a smear of buttercream frosting), all blanketed in a rich layer of marzipan.

Of course, unlike the film, you don't have to take the bitter with this sweetness. Dramatic, layered with sweet subtleties, and ever-so-British: consider this An Educaketion.

For the full writeup and recipe, visit Serious Eats!

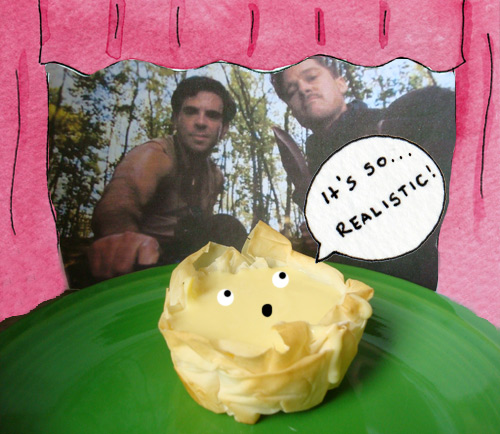
Cinematic Sweets: Inglourious Custards for Serious Eats

In the film Inglourious Basterds, a group going by the same name is set on taking down an evil regime in a blaze of glory. It's pretty intense.

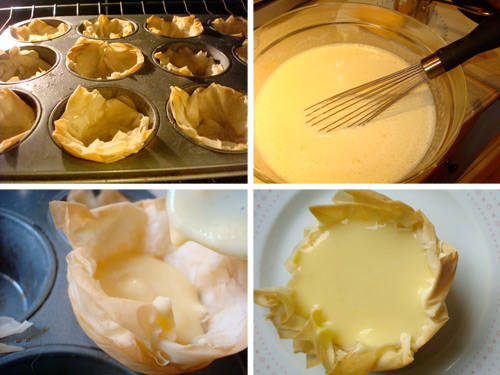
And should you desire something intensely delicious as you watch, I couldn't imagine a more enjoyable treat than these Inglourious Custards.

These mini custards are an ideal cinematic snack: perfect portions of smooth, creamy vanilla custard in lightly crunchy phyllo cups which act as a vessel (a forgiving one, at that, if your custard hasn't set completely) as well as adding taste and flavor contrast. They're compulsively eatable: in fact, they go down so easily you'll be ready for a sequel in no time.

For the full scoop and recipe, visit Serious Eats!

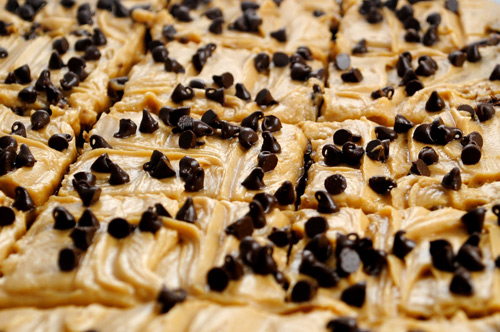
Go Nuts: Peanut Butter Blondies with Peanut Butter Frosting Recipe

CakeSpy Note: This is a guest post and recipe from Cake Gumshoe Julia, a 26 old wife, exercise fiend, and baking enthusiast. Her writing can be find at her site, Fat Girl Trapped in a Skinny Body.

 Do you love peanut butter?

Did you know I love peanut butter?

I mean LOVE peanut butter. Not in a romantic way, but in a mouth watering, makes my taste buds sing kinda way. As I am getting older, not old, just older, I'm growing out of the idea that a dessert has to be based around chocolate. I now understand that a freaking amazing, mouth watering, makes you jump in the air with excitement, dessert can be based on something other than chocolate: peanut butter.

Saturday morning I woke up super early with lots of excitement and anticipation about what I would bake that day--and I realized it must be Blondies. And I could add peanut butter and make them extra delicious. I felt content with my decision. And after you make these, you will understand why I was so content. I can't say I am in love with these, because I am in love with my husband (ahh, how romantic of me). But I can say, with confidence, that these are one of my all time favorite desserts.

Peanut Butter Blondies

Recipe adapted from My Kitchen Addiction

 Ingredients

  • 1/2 cup (1 stick) unsalted butter
  • 2 cups dark brown sugar
  • 1/2 cup peanut butter
  • 2 eggs 
  • 1 teaspoon vanilla extract
  • 2 1/2 cups all purpose flour
  • 1 teaspoon baking powder
  • 1/4 teaspoon baking soda
  • 1/2 teaspoon salt
  • 1 cup milk chocolate chips

Peanut Butter Frosting

Recipe adapted from Ina Garten

 Ingredients

  • 1 cup peanut butter
  • 1 cup powdered sugar
  • 1/3 cup half and half
  • 1 tsp vanilla extract
  • 2 tbsp butter, softened
  • 1/8 tsp kosher salt

 Procedure

  1. Preheat the oven to 350°F. Grease a 9-inch by 13-inch pan and set aside.
  2. In a saucepan over medium heat, melt the butter and brown sugar, stirring constantly until smooth.
  3. Remove from the heat, and stir in the peanut butter.
  4. Allow to cool while combining the dry ingredients – flour, baking powder, baking soda, and salt – in a large mixing bowl.
  5. Add the eggs, one at a time, to the brown sugar and peanut butter mixture, mixing well after each addition.
  6. Add the vanilla extract and stir to combine.
  7. Pour the mixture into the prepared dry ingredients, and stir to create a thick, smooth batter.
  8. Transfer the batter to the prepared pan, spreading the batter evenly to the edges of the pan.
  9. Sprinkle with the milk chocolate chips, lightly pressing them into the batter.
  10. Bake for 25 minutes. Allow to cool in the pan.
  11. Mix all the frosting ingredients in a bowl with a hand mixer. Beat for about 2-3 minutes; until all the ingredients are incorporated. Spread onto the cooled blondies.
  12. Sprinkle with mini chocolate chips. Cut into 15 large squares, serve and enjoy with a glass of ice cold milk!

These are rich, dense, and simply delicious!