Pucker Up: Delicious Lemon Meringue Cupcake Recipe from Cake Gumshoe Megan Seling

On the occasion of her recent birthday, Megan Seling provided a dessert spread of epic proportions at her party.

And while usually I would object that the birthday girl shouldn't have to lift a finger on her special day, opting to simply eat cakes that others have made, I have to admit that as a guest, I was kind of glad that she did. Because it was a most delicious spread.

And the highlight of the table? In my humble spy's opinion, the Lemon Meringue Cupcakes. Made of a light cake filled with lightly tart and very flavorful lemon curd, these cakes were capped with a punk rocker hairstyle of a meringue topping which tasted just as good as it looked.

And happily, she was willing to share the recipe, which she got here, which I am now passing on to you. You're welcome. It can also be found in the book Cake Art.

Lemon Chiffon Cupcakes

Makes 24 cupcakes

  • 3 cups cake flour
  • 2 teaspoons baking powder
  • 1 cup sugar, divided
  • 4 large egg yolks
  • 1 cup vegetable oil
  • 1 cup water
  • 1/2 teaspoon vanilla extract
  • Zest of 1 lemon
  • 4 large egg whites

Lemon Curd

  • 1 cup butter, cubed
  • 1 cup sugar
  • 1 cup lemon juice
  • Zest of 3 lemons
  • 10 large egg yolks

Swiss Meringue Buttercream

  • 4 large egg whites
  • 1 cup sugar

Procedure

Prepare the Lemon Chiffon Cupcakes. Preheat the oven to 375°F. Prepare pans with cupcake liners. Sift the flour, baking powder, and half the sugar together into a large mixing bowl or stand mixer and reserve. In another large mixing bowl or stand mixer bowl, combine the egg yolks, oil, water, vanilla, and zest. Mix with a handheld mixer or whip attachment until thoroughly combined, about 1 minute. Add the egg yolk mixture gradually to the dry ingredients, mixing with a handheld mixer or whip attachment on medium speed until a paste forms. When a paste has formed, scrape down the sides of the bowl, and continue adding the remainder of the yolk mixture until it is all incorporated. Beat for an additional 2 minutes on medium speed. In a separate mixing bowl or stand mixer bowl, whip the egg whites with a clean whip attachment on medium speed until soft peaks form. Gradually add the remaining sugar while beating the egg whites and continue to beat until medium peaks form. Gently blend one-third of the beaten egg whites into the egg yolk mixture to lighten it. Gently fold in the remaining egg whites. Divide the batter evenly among the prepared pans. Bake at 375°F until the top of the cupcakes spring back to the touch, about 20 minutes. Let the cupcakes cool in the pans for a few minutes before turning out onto a wire rack to finish cooling before decorating.

Prepare Lemon Curd. Combine half of the butter, half of the sugar, the lemon juice, and zest and bring to a boil over medium heat, stirring gently to dissolve the sugar. Meanwhile, blend the egg yolks with the remaining sugar. Temper the mixture by gradually adding about one-third of the lemon juice mixture, stirring constantly with a whip. Return the tempered egg mixture to the saucepan. Continue cooking, stirring constantly, until the whisk leaves a trail in the curd. Remove from the heat. Stir in the remaining butter. Strain the curd into a shallow container or bowl. Cover with plastic wrap placed directly on the surface of the curd. Cool over an ice bath. Store the curd, covered, in the refrigerator for up to 3 days.

Prepare Swiss Meringue Buttercream. Put the egg whites and sugar in the clean, grease-free bowl of a stand mixer fitted with the whisk attachment and stir together until the sugar is blended into the egg whites. Place the bowl over a saucepan of simmering water and stir frequently until the sugar dissolves and the mixture reaches 140°F. Transfer the bowl to the mixer and beat on high speed until the meringue is thick and glossy and has a stiff peak.

Finish the cupcakes. Fill a piping bag fitted with a large plain tip two-thirds full with lemon curd. Insert the tip as far as it will go inside the center of the cupcake and apply gentle pressure. Try not to squeeze too hard or lemon curd will squirt out the top of the cupcake. Stop filling once you see any lemon curd around the base of the tip. Repeat with the remaining cupcakes. Clean the piping bag and tip and fill it two-thirds full with Swiss meringue. Pipe a large pearl of meringue on top of each cupcake. Use the back of a spoon to lift up areas of the meringue, creating spikes. Lightly toast the meringue with a kitchen torch or under the broiler until the tips of the meringue are golden brown.

Sweet Excess: Glazed Cinnamon Rolls Stuffed With Chocolate Chip Cookie Dough

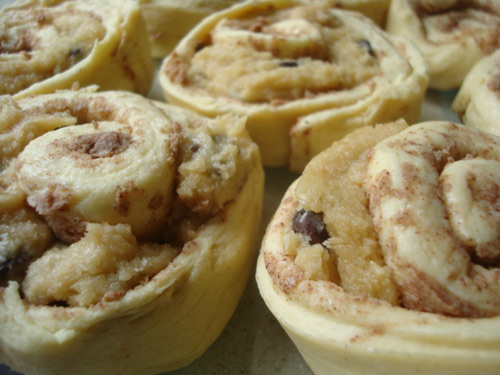
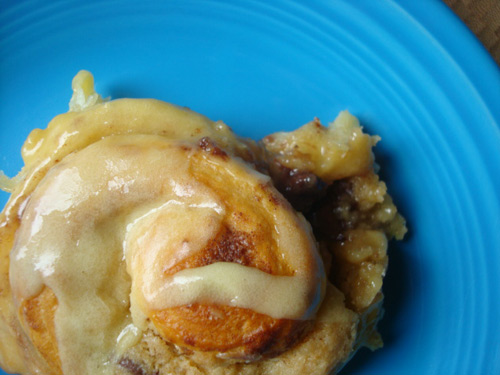
Just in case you'd ever wondered: as it turns out, stuffing cinnamon rolls with chocolate chip cookie dough really does make them more delicious.

I know this because yesterday, finding myself with a free coupon for some Pillsbury Sweet Rolls, I went to the store and picked up a pack of Orange Cinnamon Rolls with which I set to experimenting. Now, I'm not adverse to enjoying these sweeties in their natural state, but while preparing some cookie dough for my annual Memorial Day Cookie Cake Pie, it occurred to me that stuffing them with cookie dough might just make them even better.

And you know what? They were amazing: gooey, high-fat, high-carb heaven. But don't worry if you're counting calories: I'm pretty sure that the orange glaze made them healthier.

Here's how you do it at home.

Glazed Cinnamon Rolls Stuffed with Chocolate Chip Cookie Dough

Ingredients

  • 1 package Pillsbury cinnamon rolls with glaze (I used orange sweet rolls)
  • 1 teaspoon chocolate chip cookie dough per cinnamon roll (if uneasy about if it will cook thoroughly, use an egg-free version)

Procedure

  1. Preheat the oven to 400.
  2. Unwrap the roll of cinnamon rolls until you get that jarring "pop" that means the feast has been unleashed.
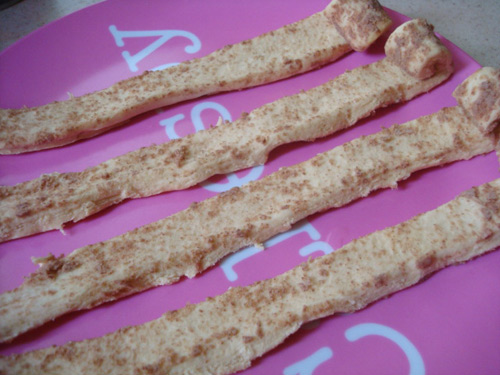
  3. Separate the rolls, and unroll each one gently.
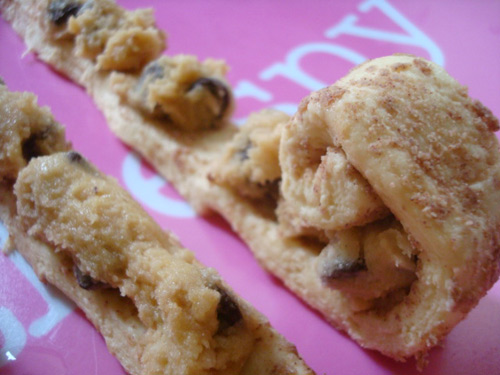
  4. Roll each teaspoon of cookie dough into a thin log (use floured hands), slightly thinner than the thickness of the unrolled cinnamon roll.
  5. Place the log of dough on top of the unrolled cinnamon roll, and gently re-roll. Repeat with the rest of the rolls.
  6. Place the rolls in a lightly greased pie plate (it keeps it all contained) and bake according to the package directions, 15 minutes or so.
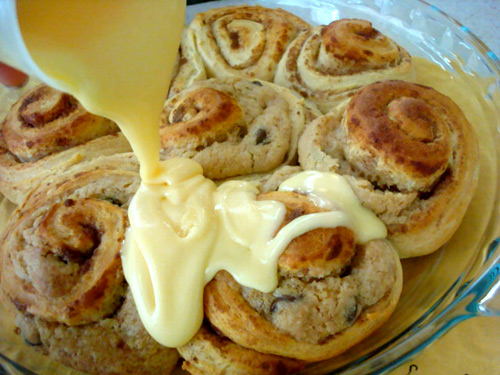
  7. Once the rolls are out of the oven, gently heat the glaze in the microwave for about 10 seconds, or until pourable. Liberally glaze your cinnamon rolls with it.
  8. Enjoy.


Biscuit Time: Easy Biscuits with Chocolate Gravy

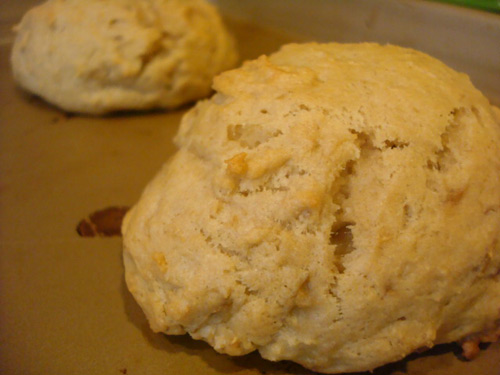
Ever since I heard that it was one of Dolly Parton's favorite things to eat, I've been obsessed with the very idea of biscuits and chocolate gravy. So when I recently made Biscuits with Sugar Butter from the new Rosanna Bowles Cookbook , I took advantage of the moment and saved a few biscuits so that I could try this sweet dish for myself.

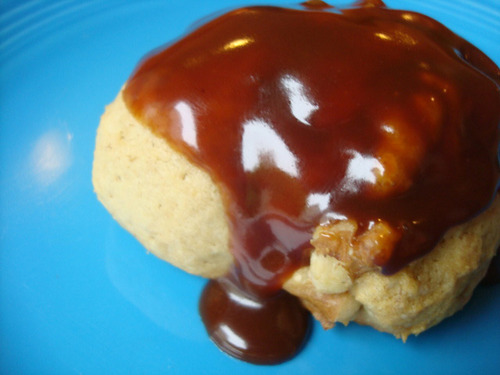
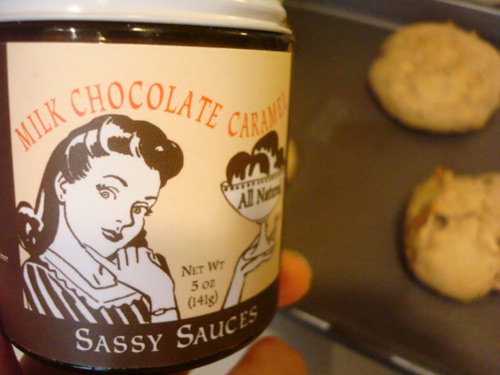
Although there are plenty of recipes out there for chocolate gravy (isn't life wonderful?), I decided to go the easy route and used the bittersweet chocolate topping from Sassy Sauces. When lightly heated and generously poured on top of the biscuits in a viscous, chocolatey mess, it might not have made for a beautiful dish to serve, but it sure was delicious. I'm sure that the hot fudge sauce of your choosing would work beautifully as well, if you're not inclined to make the gravy yourself.

For the Paula Deen version of this dish, you can find a recipe here; for my version, combine the biscuit recipe from this posting with a big ol' jar of warm bittersweet chocolate sauce by Sassy Sauces (it's tasty), or a generous heaping of your favorite (preferably very thick) hot fudge sauce. Top with some shredded coconut or sprinkles if you're feeling festive.

Breakfast of Champions: Biscuits and Sugar Butter from Coming Home by Rosanna Bowles

With her book Coming Home: A Seasonal Guide to Creating Family Traditions, author Rosanna Bowles (who, in addition to writing books, also owns a dishware empire--and yes, that's her real name) has a mission: to bring people together through real, live, human connection--by establishing year-round traditions, many of them featuring delicious food.

And the first tradition I'm ready to embrace? Biscuits with Sugar Butter.

As the recipe intro states,

This recipe has its origins in the pioneer era and has been handed down through four generations in my family. My mother's classic biscuit is very much like the version that is eaten widely throughout the South. I believe that the sugar butter may come from Virginia, where my great-grandparents settled after emigrating from Wales. Like many truly great recipes, this is one that has survived many generations and carries with it the love with which the food is made.

And after preparing it for breakfast, I can firmly attest that these lightly salty biscuits smothered in sweet, praline-y butter is the type of stuff that glues families together, makes people fall in love, and makes bellies very happy. Ready to taste the love? Here's the recipe.

Pat's Biscuits and Sugar Butter

Adapted from Coming Home by Rosanna Bowles

Ingredients

For the biscuits

  • 1 3/4 cups flour
  • 2 1/2 teaspoons baking powder
  • 1 teaspoon fine sea salt
  • 6 tablespoons salted butter, at room temperature, plus three tablespoons melted butter (for glazing the biscuits)
  • 1/2 to 1 cup whole milk
  • pats of butter, for serving (in case the sugar butter isn't enough)

 For the sugar butter

  • 1 cup (2 sticks) unsalted butter
  • 1 cup brown sugar, packed
  • 1/2 cup heavy cream (more if necessary, to your desired consistency)

 Procedure

  1. Preheat oven to 450. Grease a baking sheet or line with parchment paper.
  2. Put the flour, baking powder, and salt in a bowl. Cut in the room temperature butter with two forks (pie crust style!)--or go ahead and do this with a food processor if you've got one, mixing until the mixture is about the consistency of cornmeal. 
  3. Add 1/2 cup milk and mix (or pulse) until combined. Add more milk if needed until the dough has reached a consistency where you can form it into a large, soft ball (it will be sticky; handle with floured hands on a floured surface).
  4. Lightly knead the dough on a floured surface for 30 seconds--about 10 folds. The dough should be fairly moist and light--overworking will make the biscuits tougher (though still pretty tasty!).
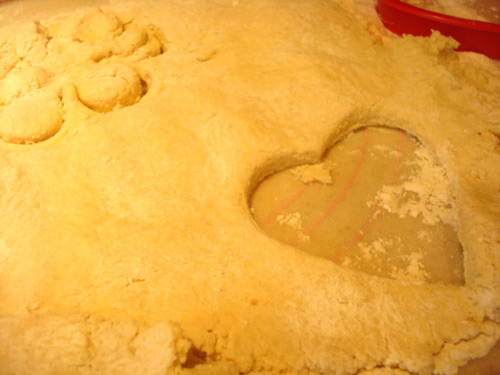
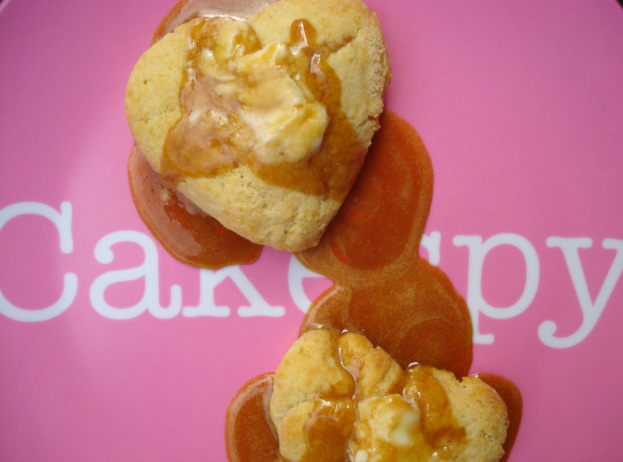
  5. Form a ball with the dough, and then roll it out into a half-inch sheet on your floured surface using a well floured rolling pin. Using a biscuit cutter, larger cookie cutter, or a mid-sized drinking glass, cut into rounds or shapes. I used a heart-shaped cookie cutter, because I, you know, love biscuits.
  6. Put the biscuits on your prepared sheet. Brush the tops with the melted butter and bake for 10-15 minutes or until lightly browned. Remove from the oven, but keep the biscuits on the baking sheet until the sugar butter is ready--this will keep them warm. Nom.
  7. Prepare the sugar butter. In a small saucepan over medium heat, melt the butter, then stir in the brown sugar and cook until the mixture bubbles. Add the cream, and turn down the heat to keep the cream just below a simmer. Cook for about 20 minutes on low heat, ur until the sugar is dissolved, the mixture has started to reduce and thicken, and the flavors are working for you (you'll have to taste it for this part. Be brave.)
  8. Add a bit more cream if the sugar butter is too thick for your liking and stir to combine.
  9. Get ready to serve. Put a pat of butter on top of your biscuits, and ladle a big ol' spoonful of the sugar butter on top. Enjoy.

Great Pear-ing: Brown Sugar Ginger Cream Cake with Five Spice Pecans and Caramelized Pears

With my first attempt at baking from the new book Seasonal Fruit Desserts by Deborah Madison, I managed to do something rather unlikely: I made a dessert which contained absolutely no fruit, seasonal or otherwise.

What I did, of course, was I flipped right to the back of the book where there is a section entitled "cakes to go with fruit"--and I chose the most rich and delicious-sounding one, the Brown Sugar-Ginger Cream Cake, which was described as having a "poundcake-like personality". Sold! I baked it up, using part almond flour for fun (it made the texture slightly more coarse, I think, but not in such a bad way), and it came out beautifully.

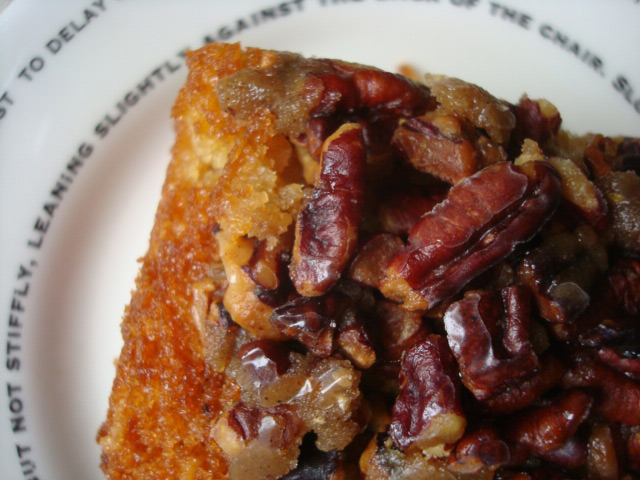
But how to top it? Flipping to another section of the book, I came across a recipe for Candied Five-Spice Pecans, suggested as a great accompaniment to ripe pears; they sounded good, so I made a batch and put them on top of the cake, completely ignoring that pesky and vaguely healthy-sounding pear part. And oh, are they divine on top of the buttery, rich cake.

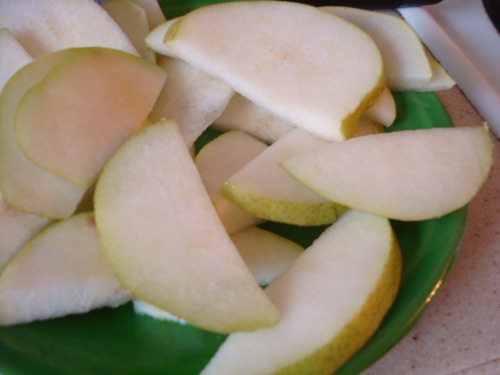
But ultimately I realized it wouldn't necessarily be honoring the book's, ah, entire mission, to not include fruit, so I sliced up a ripe Washington pear in a skillet with 2 tablespoons of butter and 3 tablespoons of brown sugar, stirring frequently over medium heat until the liquid had reduced and the pear had been battered into sweet, buttery submission.

And you know what? The fruit made it even better, and made me feel a whole lot better about eating it for breakfast (It has fruit! And nuts! It's practically health food!)

Here's how you do it at home. 

Brown Sugar Ginger Cream Cake with Five Spice Pecans and Caramelized Pears

For the cake

  • 1 cup all-purpose flour
  • 1/2 cup almond flour (you could use cake or all purpose flour here instead, the original recipe called for 3/4 cup each AP and cake flour, respectively)
  • 1 1/2 teaspoons baking powder
  • 1/4 teaspoon salt
  • 2 eggs, at room temperature
  • 1 cup heavy cream
  • 1 cup dark brown sugar
  • 1 1/2 teaspoons ground ginger
  • 1/8 teaspoon freshly ground pepper
  • 1 teaspoon vanilla

For the five spice pecans

  • 1 cup pecan halves or pieces
  • 1 tablespoon butter
  • 1 tablespoon sugar
  • 1 teaspon five-spice powder

For the caramelized pears 

  • 1 large ripe pear, sliced thinly
  • 2 tablespoons butter
  • 2 tablespoons brown sugar

Procedure 

  1. Butter and flour a loaf pan. Line the bottom and ends with parchment paper (it will make your life so much easier). Preheat oven to 350 F.
  2. Combine the flours, baking powder, and salt in a large bowl; whisk together. Make a well in the middle.
  3. Using the whisk attachment of an electric mixer, beat the eggs till foamy, then add the cream, sugar, and flavorings. Beat until you have what resembles a soft whipped cream. Pour the mixture into the center of the flour mixture and whisk together just until well combined and lump-free. Scrape batter into the pan and even it out.
  4. Bake until a cake tester inserted in the center comes out clean, 40-50 minutes (original recipe called for 50-60 minutes, but I think using the almond flour might have altered the baking time).
  5. Let cool for about half an hour in the pan before loosening the sides with a knife and turning out onto a wire rack to cool.
  6. Prepare the candied five-spice pecans. Adjust the oven to 300 F. Toast pecans until they are fragrant, about 15-20 minutes. Turn them at about 10 minutes to ensure that they brown evenly.
  7. Heat your butter in a skillet over medium heat. Add your pecans, and sprinkle the sugar on top. Stir and cook until the sugar melts and covers the nuts. Remove them to a bowl and toss with the five-spice powder. Gently put them on top of the cake (it's ok if the cake is still warm); they will crisp up a bit as they cool.
  8. Go ahead and use the same skillet and melt some more butter over medium heat; add your slivered pear pieces, and once you've turned the slices once or twice and they're a bit wilty around the edges, add the sugar. Continue to heat until the juices have begun to reduce and the mixture is thick and caramel-y. Serve on top of cake slices.

Sweet Banana Manna: Banana Cream Pie in a Chocolate Peanut Butter Cookie Crust for Serious Eats

Please, please stop using banana bread as the final resting place for your ripe bananas. Because there's a much sweeter option: namely, banana cream pie. In a chocolate peanut butter cookie crust.

This concoction combines the classic idea of combining rich, creamy banana pudding with cookies, but in a far more decadent way. Rather than the classic Nilla wafer pairing, this pie capitalizes on the fact that both peanut butter and chocolate taste excellent with bananas—and brings all these harmonious flavors together, in one delicious place.

When topped with a healthy dollop of whipped cream, this is not merely the stuff that dreams are made of, but the stuff of waking fantasy as well.

For the full entry and recipe, visit Serious Eats!

Muffin Top: A Massive Banana Skillet Muffin

I have a deep distrust of muffins.

They strike me as a baked good that really wants to be cake, but for some reason feels the need to masquerade under the cover of vague healthiness (the one exception to this, of course, being the doughnut muffin).

However, this all changed for me when I received a totally sweet sample from Katom--a 9-inch pre-seasoned skillet. I love this thing. First off, it's adorable--it's like a baby skillet! But even so, it has a satisfying heft--there's no doubt about it, this baby could be used as a weapon. If you chose to, that is.

But I chose to use it as a weapon of deliciousness, using it to bake one massive banana muffin.

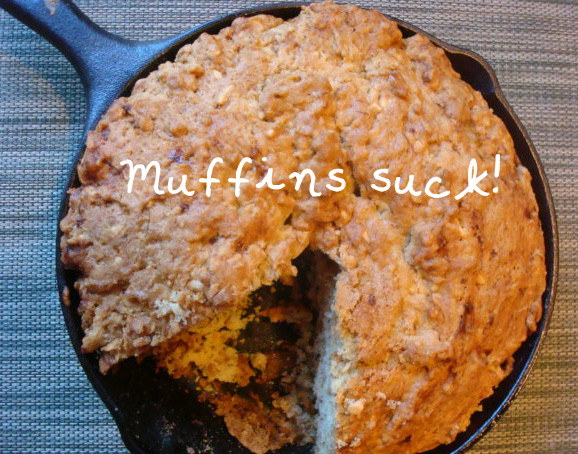
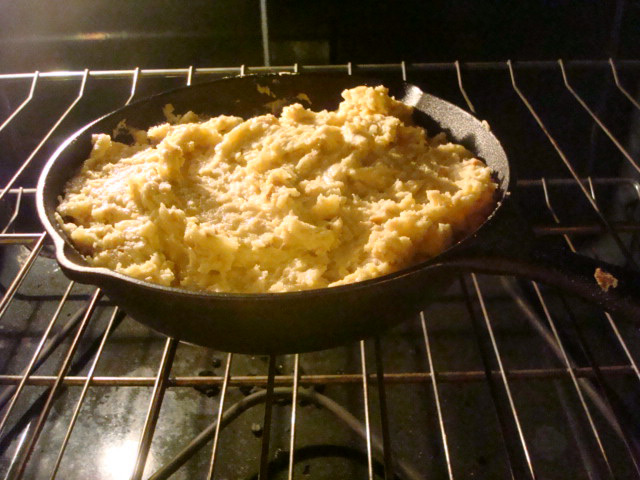
Starting with the banana muffin recipe from the Cupcake Cafe Cookbook , I simply baked the whole batch as one mass in the skillet, and it came out beautifully. It baked perfectly in the skillet, moist and lightly crumbly on the edges, with a wide expanse of craggy crust on top. When cut in thick wedges and served with a healthy smear of lightly melted butter and brown sugar, it is delicious, and so much better than a muffin. In fact, I wouldn't even blame you if you wanted to top it with a smear of cream cheese or peanut butter buttercream frosting.

Ready for this tastiness in your own home? Here's the recipe.

Banana Muffins, Baked in a Skillet

Adapted from Cupcake Cafe Cookbook

You'll need: a skillet

Ingredients

  • 2 1/2 cups flour
  • 2 teaspoons baking powder
  • 1 teaspoon baking soda
  • 1/2 teaspoon salt
  • 2/3 cup chopped walnuts
  • 1/4 pound (1 stick) butter
  • 3/4 cup sugar (I used brown sugar)
  • 3 eggs
  • 1 1/2 cups very ripe, mashed bananas

Procedure

  1. Grease your skillet.
  2. Preheat the oven to 350 F.
  3. Sift together the flour, baking powder, baking soda, and salt. Add the walnuts.
  4. Cream together the butter and sugar in a stand mixer. Beat in the eggs, one at a time. Mix the banana into the egg mixture. Fold in the dry ingredients until just blended. Fill your skillet with the mixture, it should be about 2/3 full.
  5. Bake for 25 to 35 minutes; they are done when a cake tester or toothpick comes out clean when inserted in the center.

Sweet Obsession: Chocolate Peanut Butter Cookies Inspired by David Lebovitz

Being a good baker is one thing, but being a baker worthy of stalking is completely another.

I'm talking, of course, about David Lebovitz, who introduces the recipe for Peanut Butter Cookies in his new book, Ready for Dessert: My Best Recipes, in this way:

Shortly after my first book came out, my phone rang one night a little after 10:30 p.m. A reader had tracked me down to let me know, with urgency, that she loved these cookies, but that they took 10 minutes to bake in her oven instead of the 9 minutes indicated in the recipe.

When in doubt, err on the side of underbaking so your peanut butter cookies remain moist. Take them out when they are still a bit soft, as they'll continue to firm up a bit after cooling. This time, I've given a bit more latitude to the timing so as to avoid any late-night baking-related emergency phone calls.

Though he never quite says it, the message is pretty clear: this baking rock star has serious stalkers--er, groupies.

But were these cookies really stalker-worthy? I had to see for myself.

I've only made one change from the recipe as printed in the book: instead of using regular creamy peanut butter, I've used Peanut Butter and Company's Dark Chocolate Dreams, figuring that if anything, chocolate will make the recipe even better.

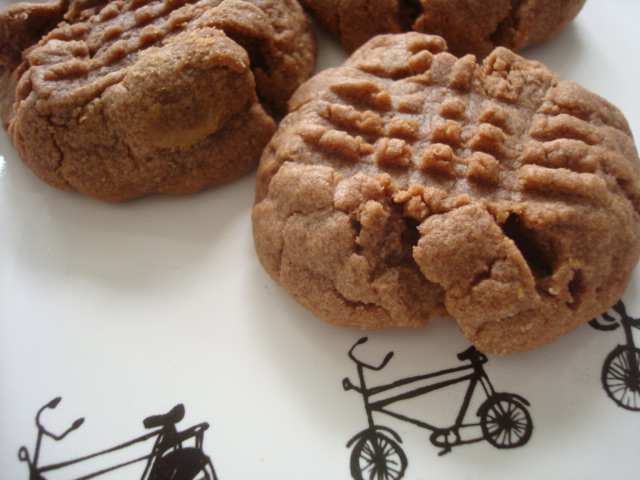
The result? A cookie that is very much the dictionary definition of what a peanut butter cookie should be: moist at the center, lightly crumbly just around the edges, with every bite rich in peanut buttery (accent on the butter) goodness.

These cookies will disappear quickly. Worthy of the worship? Well, let's just say you're gonna need the sugar-and-protein burst of energy to stand outside of Mr. Lebovitz's Parisian pad, clutching boombox a la Lloyd Dobler. Just remember whose idea it was to add the chocolate, sweeties.

Peanut Butter Cookies Worth Stalking

Adapted from Ready for Dessert: My Best Recipes

Makes about 30 cookies

Ingredients

  • 1 1/4 cups flour
  • 1 tablespoon baking powder
  • 1/4 teaspoon salt
  • 1/2 cup (1 stick) unsalted butter, melted
  • 1/2 cup granulated sugar
  • 1/2 cup packed light brown sugar
  • 1 cup creamy peanut butter, or to take my variation, 1 cup Dark Chocolate Dreams peanut butter
  • 1 large egg, at room temperature

Procedure


  1. In a small bowl, whisk together the flour, baking powder, and salt.
  2. In a stand mixer, beat together the butter, sugars, and peanut butter on medium speed just until smooth. Beat in the egg. Add the flour mixture and mix just until the dough comes together. It will be a thick, solid mass of dough.
  3. Cover and refrigerate the dough for at least two hours, but up to overnight.
  4. Remove the dough from the fridge and let it come to room temperature.
  5. Preheat oven to 350.
  6. Break off pieces of dough and roll them into 1-inch balls (the recipe calls for rolling them in granulated sugar, but I didn't do that. They were fine without this step, in my opinion, especially considering the added sweetness from the chocolate peanut butter).
  7.  Place on prepared (parchment-lined) baking sheets. Leave 3 inches between cookies. Lightly flatten and make a crosshatch pattern on each cookie using the tines of a fork (a spork doesn't work--no follow up questions).
  8. Bake, rotating the sheets midway through baking, until the cookies are dull and lightly browned around the edges but still lightly glossy/undercooked-looking in the middle (as they cool on the sheet they'll finish up). The bake time will be between 9-10 minutes.
  9. Let the cookies cool for a few minutes on the sheet (they will crumble if you try to remove them right away) and then transfer to a wire rack using a spatula. These cookies will keep for up to 3 days in an airtight container, if they last that long.

Want more? You can buy the most excellent book here , or for more recipes and "An American in Paris" type lore, visit David's website and follow him on Twitter!

Going Blonde: Blondie-Topped Brownies for Serious Eats

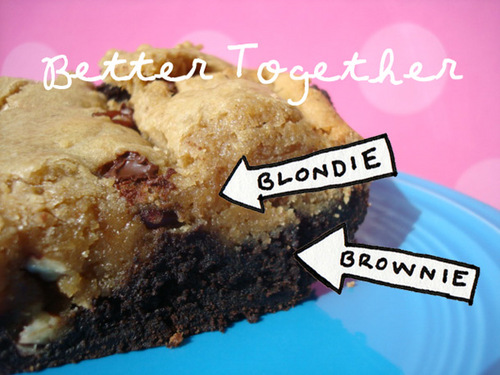
Blondies or brownies?

It's a delicious dilemma: they're both bar cookie classics, one rich in brown sugar, the other redolent of chocolate.

But why should you have to decide? Because they taste so much better when baked together, in layers.

How'd I do it? Well, since brownies generally have a longer bake time, I started out my pan with a batch of brownie batter which I put in the oven for 20 minutes while I put together the blondie batter. Since the half-baked brownies would have gotten messy had I spread the blondie batter on top, I simply spooned the batter as gently as I could right on top and put it back in the oven for about 25 more minutes; the oven's heat did a nice job of spreading the batter for a tasty two-layered treat.

For the full entry and recipe, visit Serious Eats!

Bananarama: The Banana Jumbo Cookie

It's no secret that Betty Crocker's Cooky Book is like, my favorite cookbook ever.But one of the most interesting sections? The one called "Heritage Cookies", which is introduced thusly:

Recipes we know and use today came from 'round the wrold to the thirteen isolated colonies of America. Plain and hearty cookies were the gustatory pleasure of our pioneers...though our tastes may now be trained...to select a fancy frosted cooky...these cookies of our forefathers have won an enduring place in our hearts.

The recipe for the Banana Jumbo comes from this section of the book. And though these humble cookies are flavorful on their own, I had happened to receive a sample of Sassy Sauces in the mail around the same time I made these, and I learned that they are even better with a thick dollop of milk chocolate caramel sauce. And I totally don't consider this disrespecting the original recipe, 'cos you know what? Bet our forefathers would have used the chocolate sauce too, had it been at their disposal.

Banana Jumbos

Adapted from Betty Crocker's Cooky Book

Ingredients


  • 1 cup (2 sticks) butter
  • 1 cup brown sugar, packed
  • 2 eggs
  • 2 large, or 3 small, mashed very ripe bananas
  • 1/2 cup milk
  • 1 teaspoon vanilla
  • 3 cups flour
  • 1 1/2 teaspoons baking soda
  • 1 teaspoon salt

 Procedure 

  1. Make the cookies. Mix butter, sugar, and eggs thoroughly. 
  2. Stir in the bananas, milk, and vanilla.
  3. In a separate bowl, combine the flour, soda, and salt; stir in, bit by bit, until the mixture is fully combined.  
  4. Let the dough chill for 1-2 hours in the refrigerator.
  5. Preheat oven to 375 F. 
  6. Using an ice cream scoop, drop rounds of dough onto a lightly greased baking sheet, leaving at least 2 inches between cookies as they will spread a bit. 
  7. Bake for about 10 minutes, or until lightly browned on the edges. Let cool completely on a wire sheet. Now, they are delicious as-is, but as I found out, they're even better when drizzled with some sort of glaze or frosting. 

Being Green: Vegan Green Granny Smith Cupcakes Recipe

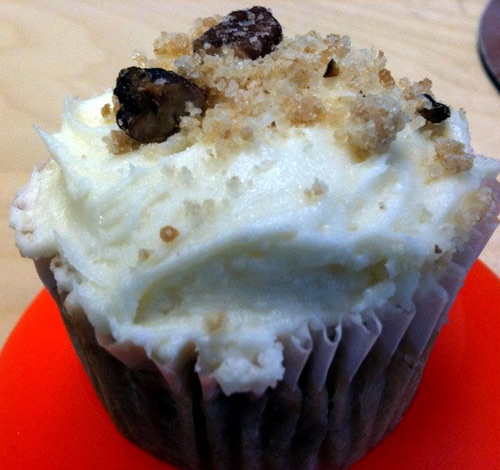
Just take a look at this Vegan Green Granny Smith Cupcake. Doesn't it look just heavenly?

Unfortunately, an evil cupcake-poacher ate this before I could sample it, but I was assured it was an intensely delicious experience, and happily, the recipe was shared.

If you'd like to taste the magic for yourself, here's the recipe:

Vegan Green Granny Smith Cupcakes

Adapted from Sinfully Sweet Confections

Makes about 30 cupcakes

Ingredients for cakes

  • 2 cups cake flour
  • 2 cups coarsely chopped Granny Smith apples
  • 1/2 cup chopped pecans
  • 1/2 cup rolled oats
  • 1 cup apple juice
  • 2/3 cup canola oil
  • 2 cups sugar
  • 1/2 teaspoon baking powder
  • 1/2 teaspoon salt
  • 1/2 teaspoon cinnamon
  • 1/2 teaspoon ground ginger
  • 6 ounces plain soy yogurt
  • 1 tablespoon vanilla extract
  • 1 1/2 teaspoon baking soda

Ingredients for Vegan Cream Cheese Frosting

  • 8 ounces vegan cream cheese, softened
  • 1 cup nonhydrogenated margarine, softened
  • 2 pounds powdered sugar
  • 2 tablespoons vanilla extract
  • 1/2 cup chopped pecans

Ingredients for Brown Sugar Streusel Topping

  • 1/2 cup flour
  • 1/2 cup organic evaporated cane juice (sugar)
  • 1/4 cup pecan pieces
  • 1/4 cup non-hydrogenated margarine, softened

Procedure


  1. Preheat oven to 325ºF.
  2. Peel and chop apples coarsely.
  3. In a electric mixer bowl fitted with a paddle attachment mix together the canola oil, baking powder, baking soda, salt, cinnamon, soy yogurt, vanilla extract, baking soda.
  4. Add flour and sugar; and mix on slow.
  5. In a slow steady stream add apple juice and continue to mix on slow.
  6. Fold in apples, oats, and pecan pieces. Pour into cupcake cups and bake for approximately 15 minutes or until a skewer comes out clean.
  7. Make the frosting. In an electric mixing bowl fitted with a paddle cream together cream cheese and margarine until smooth and creamy. Slowly add the confectioners' sugar 2 cups at a time, mixing and scraping down the sides. Add vanilla, and mix on medium speed for about 2 minutes. Gently fold in chopped pecans.
  8. Make the streusel topping. Preheat oven to 450ºF. In a medium size bowl add flour, sugar, and margarine. Mix together with a fork to create crumbs. Add pecans and toss. Spread out evenly onto cookie sheet covered with aluminum foil. Bake until golden brown. Once cooled toss and break up crumbs, use as topping for cream cheese frosting.
 

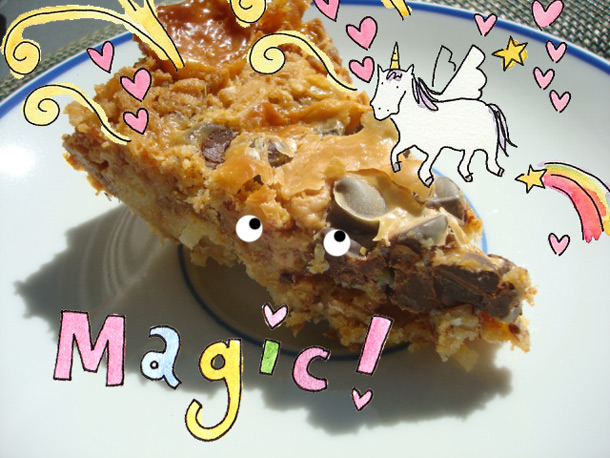
Taste the Magic: Magic Cookie Bar Pie for Serious Eats

Magic Cookie Bars are, as their name might imply, no ordinary treat. Starting with layer upon layer of unrelentingly rich layers of buttery graham cracker crumbs, toasted coconut, chocolate and butterscotch chips, and nuts, they get even better from a rich smothering in sweetened condensed milk.

With all that awesome, some might argue that a small serving is best. But I disagree, and to prove it, I've created it in a deliciously thick pie form.

Inspired by the construction of the delicious BakedBar from Baked in Brooklyn, I made my pie with a coconut-graham cracker crust which then got filled with the sweetened condensed milk slurry--the resulting confection attained a crust that was crispy, but the inside remains pleasingly gooey, making for a dessert that will likely displease your dentist, but will definitely make your mouth happy.

For more, plus a recipe, visit Serious Eats!

Baked Bliss: Chocolate Mudslide Cookies from The Newlywed Kitchen

I'm not a newlywed, but I sure do like to eat like one.

That is, ever since I discovered the Chocolate Mudslide Cookie recipe in the newly released book The Newlywed Kitchen: Delicious Meals for Couples Cooking Together by CakeSpy buddy Lorna Yee, Ali Basye, and photographed by Kathryn Barnard.

Now, I hear rumors that the savory recipes are good, and I can attest that the stories which accompany the recipes are sweet and engaging.

But what made me fall in love, so to speak, was the aforementioned Chocolate Mudslide Cookie. Comprised basically of chocolate on chocolate, with a little flour and butter thrown in, these cookies seemed not only easy to make, but sort of like a one-way ticket to pleasuretown.
Happily, the recipe lived up to all expectations, yielding a soft, rich, cookie which is absolutely redolent with chocolate and which is very nearly perfect. But I've found one way to make it even better: save a tiny bit of that warm chocolate mixture from step 2 (or better yet, make a little extra) and sandwich two of the cookies together with that. Now that's what I call sweet wedded bliss.

Chocolate Mudslide Cookies

Lightly adapted from The Newlywed Kitchen

Makes about 24 cookies

Ingredients

  • 8 ounces bittersweet chocolate, chopped coarsely
  • 3/4 cup sugar
  • 3 tablespoons unsalted butter
  • 1/4 cup flour
  • 2 tablespoons cocoa powder (I used Hershey's Special Dark)
  • 1/4 teaspoon kosher salt
  • 1/2 teaspoon baking powder
  • 2 large eggs
  • 1 teaspoon vanilla extract
  • 6 ounces semisweet chocolate chips


(Note: Original recipe calls for 1 1/2 cups walnuts, roughly chopped. I have nothing against walnuts but realized that I had none once I'd already started baking, and went without. They tasted fine!)

Procedure

  1. Preheat oven to 350 F.
  2. In a microwave safe bowl, melt the chopped chocolate with the sugar and butter. Microwave in 20 second intervals, until about 80 percent of the chocolate is melted. Stir the mixture, and the rest should melt from the heat of the melted chocolate. Let cool to room temperature while you do the following steps.
  3. In a small bowl, combine the flour, cocoa powder, salt, and baking powder. Stir to combine.
  4. In a large bowl, lightly beat the eggs with the vanilla. Slowly pour the microwaved mixture into the eggs in three additions, stirring between each addition. Stir the flour mixture into the chocolate batter until combined, then stir in the walnuts (if you're using them) and chocolate chips.
  5. On two baking sheets lined with parchment paper, drop heaping tablespoons of the cookie dough, leaving room for the cookies to spread (about 8 cookies per sheet). Use only the middle or upper rack for these cookies, as they may burn on the lower rack.
  6. Bake the cookies for 10-12 minutes. They will be slightly soft when they come out of the oven, but will become more firm as they cool. If they last that long.

 P.S. Interested in more of Lorna's recipes? Well, here's a little heads up: save the date for June 6, when we'll be having a Red Velvet Cake tasting at CakeSpy Shop! More details to come!

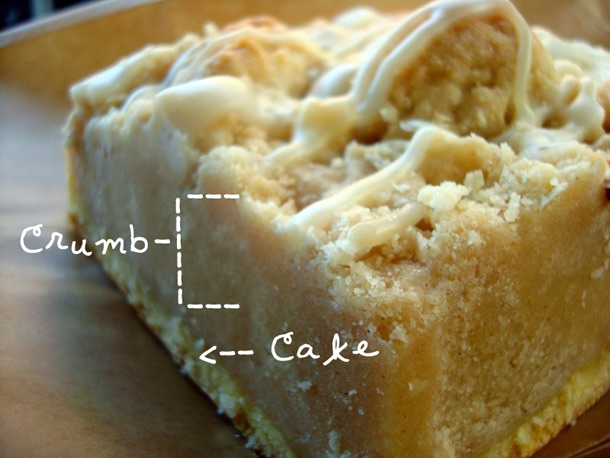
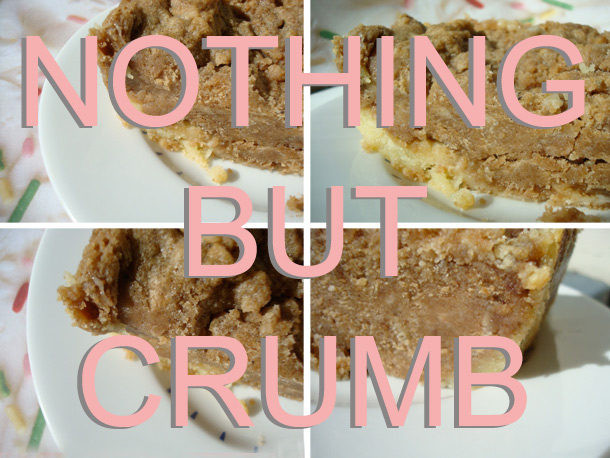
Crumb With a Side of Cake: Behemoth Crumb Cake for Serious Eats

When it comes to crumb, I have a theory: if some is good, more is better.

This theory was proven when I discovered something called the Colossal Crumb Cake at New Jersey's Ocean Grove Bake Shoppe. Their version had a ratio of roughly 9 parts crumb to 1 part cake, and it was just as amazing as it sounds (theirs is the one pictured above).

Could it be possible to recreate this magic at home? Well, I certainly wanted to try. Starting with a recipe from Arthur Schwartz, a.k.a. The Food Maven, I tried to make it even better by halving the cake part and tripling the crumb part. The result? A hulking behemoth of crumb, anchored by a little sliver of cake.

For more, plus a recipe, visit Serious Eats!

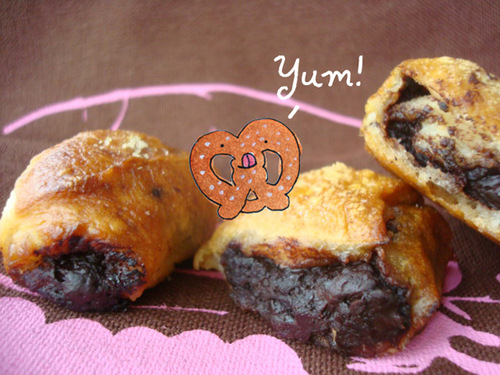
Sweet Combo: Chocolate-Filled Pretzel Nuggets for Serious Eats on National Pretzel Day

Guess what? Today is National Pretzel Day. But how to celebrate?

On the one hand the answer is painfully obvious--eat pretzels. But what kind of pretzels? After all, there are so many options: hard or soft, knotted or in stick form? Smothered in mustard or covered in chocolate?

Well, here's a suggestion for those who like plenty of sweet with their salty: chocolate-filled pretzel nuggets. These pillow-like nuggets are sort of like Combos meet chocolate covered pretzel--that is to say, the pinnacle of sweet and salty pretzel perfection.

For more, plus the full recipe, visit Serious Eats!

Full of Charm: Lucky Charms Treats Recipe

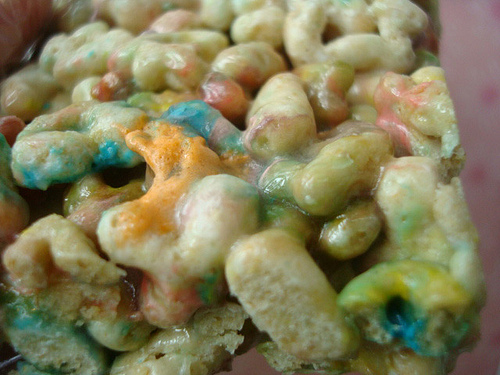
To tell you what a Lucky Charms Treat is--which basically amounts to a Rice Krispie Treat, but with Lucky Charms--really doesn't do it justice.

Because while this technically tells you what they are, it really doesn't tell you about the strange beauty of seeing how the marshmallow colors run into each other, and the surprise of coming across an extra marshmallowy pocket of flavor while crunching through these super sweet treats (which I made for the Great American Bake Sale).

But perhaps you might get a hint of the magic that is the Lucky Charms Treat if I show you the pan used to make them, which was streaked with marshmallow rainbows after being emptied into the pan to cool:

...or maybe that just sealed your resolve to never, ever go down this road.

But if you'd like to see for yourself, here's the recipe (oh, and if you like messing with cereal treats, you might like this too).

Lucky Charms Treats

Makes about 12

  • 3 tablespoons butter
  • 4 cups miniature marshmallows
  • 6 cups Lucky Charms

Procedure

  1. In large saucepan melt butter over low heat. Add marshmallows and stir until completely melted. Remove from heat. 
  2. Add cereal; stir until uniformly coated.
  3. Using a buttered spatula or wax paper evenly press mixture into 13 x 9 x 2-inch pan coated with cooking spray. Cool. Cut into 2-inch squares. Best if served the same day.

Chip off the Old Block: A Cookie Monster Guest Recipe from Vero NYC

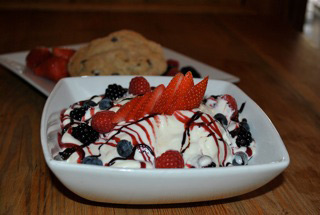
Cookie by Carol's CookiesStart working up an appetite: Chocolate Chip Cookie Day is coming up on May 15th. And from what I hear, there's a rather unexpected place to score a delicious dessert called The Cookie Monster in NYC: Vero, a wine bar with two locations in the city. As they tell it,

 Despite not being on the menu, the Cookie Monster is one of Vero’s most popular items and devoured by regulars and discovered each night at their two locations in Manhattan.  While this simple dessert may seem each to prepare, each day the cookies are flown fresh from Carol’s Cookies in Chicago, who was voted most popular chocolate chip cookie by People Magazine.

Cookie Monster dessert, photo c/o Vero NYCAnd I tend to believe them--any dessert that calls for ice cream and whipped cream respectively in 4 scoop quantities--in addition to the cookie--is probably going to be pretty good, in my opinion.

However, if you can’t make it in to Vero to try this bite of chocolate chip cookie heaven, Vero was kind enough to share a recipe to recreate the magic at home--of course, the Carol’s Cookie and Vero’s ambience are not included.

Vero's Cookie Monster

Ingredients

  • 1 plate-sized chocolate chip cookie (preferably from Carol’s Cookies in Chicago)
  • 4 scoops of vanilla ice cream
  • 4 scoops of fresh whipped cream 
  • Drizzle of rasberry coulis
  • Drizzle of chocolate coulis
  • ½ cup of blackberries, raspberries and blueberries

Procedure

Place warm cookie on plate, top with ice cream and whipped cream; drizzle with raspberry and chocolate coulis and garnish with fresh fruit.

The Cookie Monster is $12, and available for dinner every night at both location, ask for it by name at both Vero locations in Midtown and Uptown; for directions and more info, visit veronyc.com.

Crammed with Graham: Golden Grahams Cookies

Oh, I'm sorry. Are you still eating your cereal with a spoon, in a bowl, like a jerk?

Well, it's time to turn it around--instead of pouring milk on your cereal, you should be dunking it in milk--in cookie form, obvi.

When I came across the recipe for Trix Cookies in Betty Crocker's Cooky Book, I was curious to see how it might work out with other cereals --starting with what I happened to have on hand, Golden Grahams (a cereal which, as I recently learned, is associated with a grant). Turns out, it works just fine, yielding a lightly crisp, spicy cookie which gets a chewiness from the oats. A cookie that combines some of the finest breakfast carbo-loading in one compact cookie form? Count me in.

Here's the recipe.

Golden Grahams Cookies

Makes many cookies

  • 3/4 cup butter
  • 1 1/2 cups sugar
  • 1 egg
  • 1 tsp almond extract
  • 1/4 cup water
  • 1 1/2 cups flour
  • 1/2 teaspoon baking soda
  • 1 teaspoon salt
  • 1 cup rolled oats
  • 4 cups Golden Grahams

Procedure

  1. Heat oven to 350 (original recipe called for 375, but I found 350 with a slower bake made for softer cookies).
  2. Mix butter, sugar, egg, almond extract, and water well.
  3. Blend flour, soda and salt; mix in to the butter-sugar mixture gradually.
  4. Mix in rolled oats and cereal.
  5. Drop by rounded teaspoonfuls onto a parchment-lined baking sheet, making sure to leave about an inch and a half around each cookie. Bake 12-14 minutes or until lightly brown around the edges.

Sweet Combination: Whoopie Pie Cupcakes, Inspired by Audrey

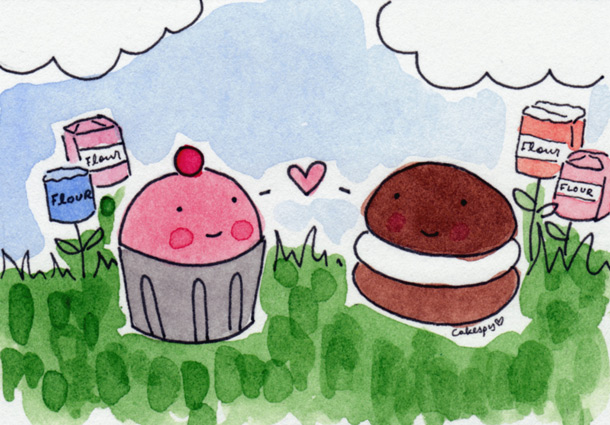
Whoopie pies are not the next cupcake...or are they?

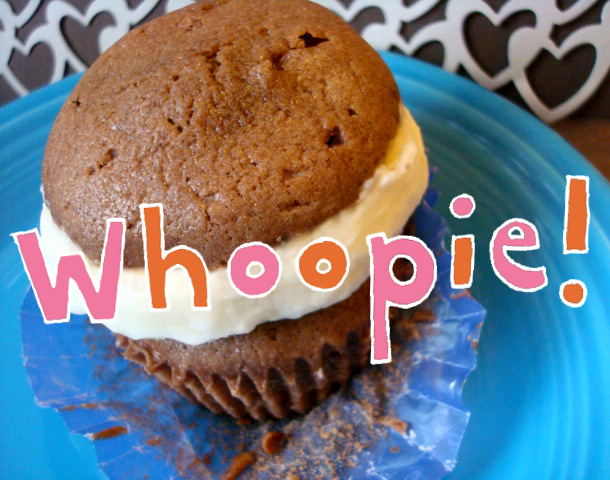
At the recent CupcakeCamp Seattle event, one cupcake submission (by talented amateur baker Audrey M. of Seattle's Babeland) made my eyes go wider than any other: the whoopie pie cupcake. Here it was: cold, hard proof that both are improved when combined. Yes!

Needless to say it was love at first bite, and I rushed home to try and recreate the magic in my own kitchen. I whipped up a batch of whoopie pie batter (using butter instead of the traditional shortening) and baked about two-thirds of it in cupcake cups, and the rest as regular whoopie pie cookies, and then sandwiched it all together with a generous dab of fluffy frosting.

The conclusion? Whoopie pies and cupcakes are definitely better together.

For the full entry and recipe, visit Serious Eats!

Mixing it Up: Inside Out Peanut Butter Cups for Serious Eats

Chocolate peanut butter cups are undoubtedly one of the finer things in life.

But I have my reservations about the construction: the chocolate gets your hands messy and there never seems to be enough peanut butter.

So what would happen if you turned a peanut butter cup inside-out? To find out, I started by using a peanut butter bar cookie crust recipe for the outer shell, then filled them with a peanut butter fudge mixture, thus increasing the peanut butter-to-chocolate ratio dramatically.

While the crumbly nature of the crust doesn't make them much neater to eat, taste-wise, it's a whole new ballgame. It's like the fudgy center is getting a big peanut butter bear hug from the cookie coating. And it's delicious.

For the full entry and recipe, visit Serious Eats!