Being Green: Zucchini Cake with Chocolate Cream Cheese Frosting Recipe for Serious Eats

It's not easy being green.

It is, however, exceedingly easy to eat green, especially when we're talking about zucchini cake. Now, you probably already knew that the abundant late summer fruit (yes, it's a fruit) yields a moist, dense, and delicious quick bread. But please, don't let the story end there—because when you take it into cake territory by adding a thick slathering of chocolate cream cheese frosting, you'll have a far sweeter finish.

The frosting prettily contrasts the color of the cake, and the triple-threat of complementary flavors—tangy cream cheese, rich chocolate, earthy zucchini—makes for a final product that leaves zucchini bread absolutely green with envy.


For the full entry and recipe, check out Serious Eats!


Sweet Excess: Chocolatey Kitchen Sink Cinnamon Rolls Recipe

Question: what happens when you raid your pantry while making cinnamon rolls late at night and top them with every sweet thing you can get your hands on?

Answer: Nothing good. Nothing good at all. It's awful. It's terrible. Here's how you do it at home.

Note: This is best done late at night, when things like this seem like good ideas.

Step 1: Get yourself some cinnamon rolls--you know, the kind from the can that pops when you open it.

Step 2: Set them all in a pie plate or in a baking pan.

Step 3: Raid fridge and pantry for any various sweet leftovers you might have. For me, these happened to be about 1 cup of chocolate fudge frosting, 3 almost-stale brownies, and half a can of chocolate fudge sauce.

Step 4: Put all foraged items on top of the cinnamon rolls (I broke the brownies into little crumbs). Bake as directed on container.

Step 5: Remove from oven. Admire handiwork. Remember the icing that comes with cinnamon rolls. Wonder to self: is it too much? Decide that no, it's not, and pour icing on top of the bubbling mass of a sugar-bomb.

Step 6: Top it all with the rainbow sprinkles that you found in the cupboard while the rolls were baking. Because...well, why not?

Step 7: Enjoy, preferably immediately and in front of bad TV for the ultimate terrible late-night indulgence.

Sweet Pop: Pat Benatart for Serious Eats

As any 1980s music lover knows, running with the shadows of the night burns a ton of calories. You're going to need a slice or six of Pat Benatart to maintain your energy.

Inspired by pop-rock princess Pat Benatar, this tart starts with a cookie crust (erring more toward crumbly than "real tough cookie with a long history"), a lemon-lime cream cheese filling (sweet and rich with a pleasing tartness, these flavors say that "We Belong" together), and is topped with whipped cream for a sweet finish. The crowning glory? A totally cheesy free-form portrait of Pat, accented with Pixie Stix powder, one of the star's favorite treats.

It's an ideal mix of awful and awesome—basically, before you put another notch in your lipstick case, you'd better make sure you give it a taste.

For the full entry and recipe, check out Serious Eats!

Everyone's Irish, Even in August: Whisky Maple Cupcakes Recipe

Thing I'm saddest about at this minute: I do not have a Whisky Maple cupcake from Cupcake Royale in my mouth. This is a fact that became all the more evident when I read the Seattle Weekly writeup on the delicious seasonal morsel, which is sadly available only during March. 

Happily, I uncovered the recipe in an issue of Edible Seattle, and you know what that means: you can be Irish any time you want now. And oh, how sweet to be Irish with a rich sour cream vanilla cupcakes with whisky maple buttercream. They're just as good made at home (although your frosting swirls might not be as perfect as the one shown above, which was made by Cupcake Royale!).

Here's the recipe.

Sour Cream Vanilla Cupcakes with Whisky Maple Buttercream

Adapted from Cupcake Royale

Cupcake ingredients 

  • 3/4 cup whole milk (I used half and half! heavy, but tasty)
  • 1/2 cup full fat sour cream
  • 2 teaspoons vanilla
  • 2 3/4 cups flour
  • 1 teaspoon baking powder
  • 1/2 teaspoon salt
  • 1 cup (2 sticks) unsalted butter, room temperature
  • 2 cups granulated sugar
  • 3 large eggs, room temperature 

Frosting ingredients

  • 1 cup unsalted butter, at room temperature
  • 1/4 cup whisky (CCR uses Jameson, I used some cheap brand, I'll be honest about it)
  • 5 tablespoons maple syrup
  • 1/2 teaspoon salt
  • 4 cups confectioners' sugar

Procedure

  1. Preheat oven to 350 F.
  2. Line a standard muffin tin with cupcake liners (this recipe yields 18-24 cupcakes, depending on size). 
  3. In a small mixing bowl, mix together the milk, sour cream, and vanilla. In a separate small bowl, whisk together the flour, baking powder, and salt. 
  4. In the bowl of an electric mixer, combine the butter and sugar. Beat together on medium spead until the mixture is light and fluffy, about one minute. Add the eggs one at a time, beating at medium speed for a full 30 seconds after each addition. Scrape down the sides of the bowl with a rubber spatula. Add half the dry mixture, and beat until incorporated. Repeat the process again, mixing until the liquid and dry ingredients are combined, the batter thick and smooth.
  5. For traditional cupcakes, fill each lined cup 2/3 of the way full with batter. For fat crowns on your cakes, fill each cupcake liner close to the top (this will make fewer cupcakes, but bigger and awesomer ones).
  6. Bake for 22-27 minutes, or until a cake tester comes out clean.
  7. Make the frosting. Using an electric mixer, beat butter, whiskey, syrup, salt, and one cup of the confectioners' sugar together until smooth. Add the rest of the sugar bit by bit until it has reached your desired consistency (you might not use all of it). Spread generously on cooled cupcakes.


Bar Hopping: Peanut Butter and Chocolate Chip Topped Bar Cookies Recipe

If I were, on this very day, pressed to answer the question "what treat would you most enjoy eating until you descend into morbid obesity?" I would have a ready answer: Peanut butter and Chocolate Chip-Topped Bar Cookies.

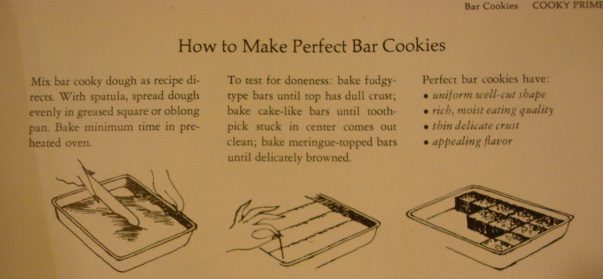
It all happened recently while baking the "Dream Bars" from Betty Crocker's Cooky Book and realizing that--duh--I basically had none of the ingredients for the top layer, which was meant to be made up of an almond-coconut topping. So there I was, with a somewhat sad expanse of beige batter for a bar cookie base.

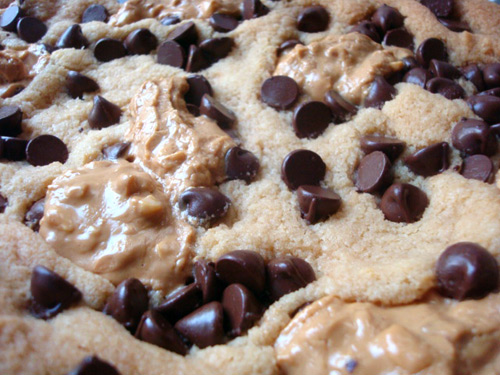
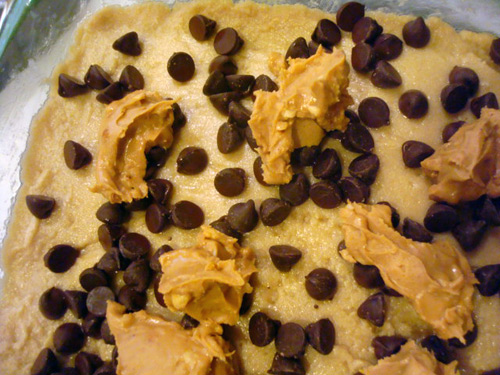
Turning to my pantry (OK, my cabinet), I found half a jar of old-fashioned chunky peanut butter and half a bag of milk chocolate chips. Yes! In the mix they both went, scattered irregularly on top of the batter.

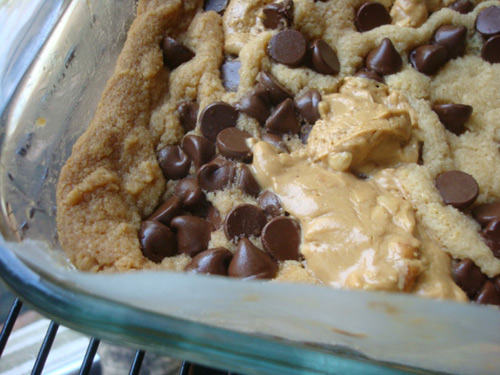
The result? Something lovely and amazing. Moist blondie-esque cookie bars with pockets of gooey-crunchy peanut butter and smooth, delicious chocolate. Something you won't...be...able...to...stop...eating. And if you don't like them? No problem, I'll finish the tray for you.

Peanut Butter and Chocolate Chip-Topped Bar Cookies

adapted from Betty Crocker's Cooky Book

Ingredients

  • 1/2 cup butter
  • 1/2 cup brown sugar, packed
  • 1 cup flour
  • 1/2 jar (about a cup) peanut butter (I used chunky)
  • 1/2 bag (about a cup) milk chocolate chips

Procedure

  1. Heat oven to 350 F.
  2. Mix the butter and sugar thoroughly. Stir in flour. Press and flatten with hand to cover the bottom of a parchment-lined oblong pan, 13x9-ish. 
  3. Bake 10 minutes, then spread with the topping (irregularly spooned globs of peanut butter and a sprinkling of chocolate chips).
  4. Return to the oven and bake for 25 minutes more, or until golden brown. Cool slightly, then cut into bars. Makes about 20.

Brownie Heaven: The Baked Brownie

Now, I don't like to talk in absolutes, but...

...without a doubt, there's definitely something wrong with you if you don't think that the Baked Brownie is the finest brownie of all.

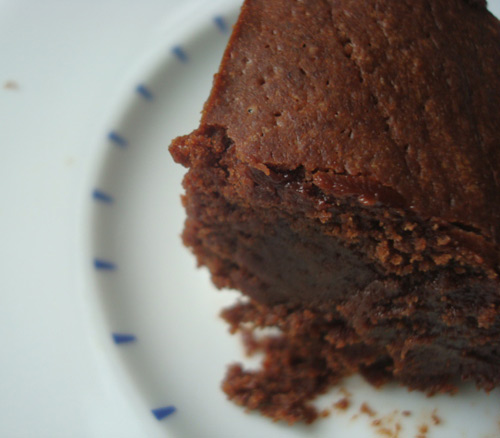
I recently used it as the base for Mimosa Brownies, which were most excellent--but really, this is a brownie that doesn't need anything added--and for that reason, I'd like to take a few moments to celebrate the beauty that is the Baked brownie in its purest form.

This is a brownie which is fudgy and chewy but not too extreme in either direction. Each bite is redolent of chocolate, and every bite is indulgently delicious. They're perfect (but it's ok if you don't like the espresso--while I don't necessarily understand what your problem is, they still taste great without).

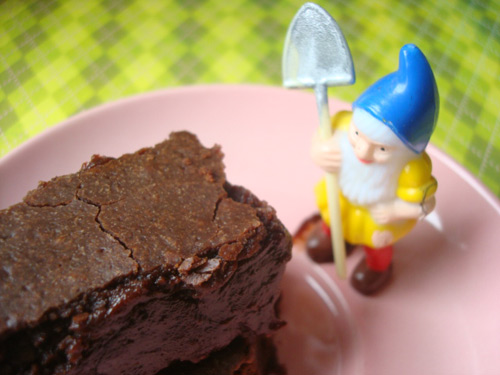
Here's the recipe. As you can see from the top photo, it's not only CakeSpy-beloved, but gnome-approved.

The Baked Brownie

As seen in Baked: New Frontiers in Baking  

Ingredients

  • 1 1/4 cups flour
  • 1 teaspoon salt
  • 2 Tablespoons dark cocoa powder
  • 11 ounces quality dark chocolate (60-72%), chopped coarsely
  • 8 ounces butter (2 sticks), cut into 1 inch cubes
  • 1 tsp instant espresso powder
  • 1 ½ cups sugar
  • ½ cup light brown sugar
  • 5 large eggs, room temperature
  • 2 teaspoons vanilla extract

Procedure

  1. Preheat oven to 350 degrees.
  2. Butter the sides and bottom of a glass or light colored metal pan 9x13x2 pan (I like to lay down a bit of parchment too, for easy removal from the pan).
  3. In a medium bowl, whisk together the flour, the salt, and cocoa powder.
  4. Configure a large sized double boiler. Place the chocolate, the butter, and the instant espresso powder in the bowl of the double boiler and stir occasionally until the chocolate and butter are completely melted and combined. Turn off the heat, but keep the bowl over the water of the double boiler and add both sugars. Whisk the sugars until completely combined and remove the bowl from the pan. Mixture should be room temperature.
  5. Add three eggs to the chocolate/butter mixture and whisk until just combined. Add the remaining eggs and whisk until just combined. Add the vanilla and stir until combined. Do not over beat the batter at this stage or your brownies will be cakey.
  6. Sprinkle the flour/cocoa/salt mix over the chocolate. Using a spatula (DO NOT USE A WHISK) fold the dry into the wet until there is just a trace amount of the flour/cocoa mix visible.
  7. Pour the mixture into the pan and smooth the top with your spatula. Bake the brownies for 30 minutes (rotate the pan half-way through baking) and check to make sure the brownies are completely done by sticking a toothpick into the center of the pan. The brownies are done when the toothpick comes out with a few moist crumbs.
  8. Cool the brownies completely before cutting and serving.


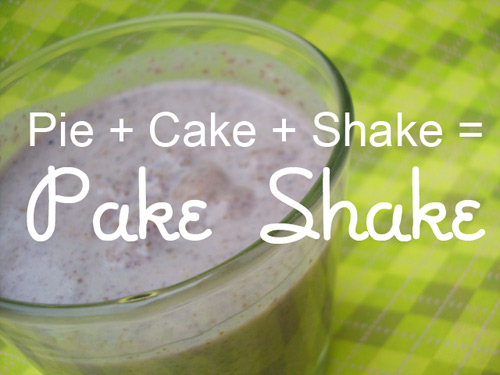
Pie + Cake + Shake = Pake Shake

This is a personal note to everyone who came to Monday's Cake Vs. Pie Party. This crust-against-crumb was a star-studded event, and you have my greatest thanks (along with co-hosts Jenise and Edible Seattle) for coming. True, a PIE was declared best in show--but it was a rather fine specimen, so I can live with this.

But today I'm here to talk about the darker side of sampling 10 pies and 10 cakes in one evening: the massive pie-and-cake sugar hangover you're bound to have the next morning. How to deal with this unique sort of sugar shock to the system?

Hair of the dog that bit you, that's how. And my suggested medicine? The Pake Shake.

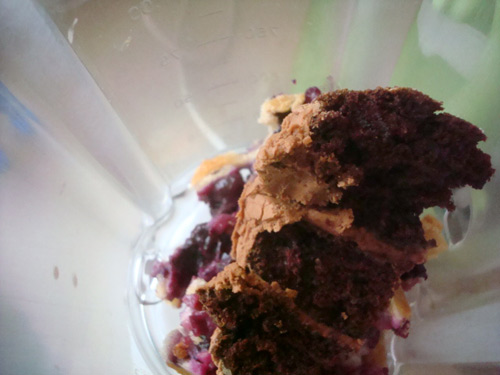
Equal parts pie, cake, and shake, this beauty is inspired by both the pake and the excess of Monday's indulgent evening of tasting pie and cakes. True, it may not be the most beautiful concoction, but it's good for what ails you, a sort of bloody mary equivalent for a sugar hangover.  Keep this idea on file for the next time you find yourself sampling 10 pies and 10 cakes in one night (it might be sooner than you think).

Pake Shake (Pie-and-Cake Shake)

Ingredients

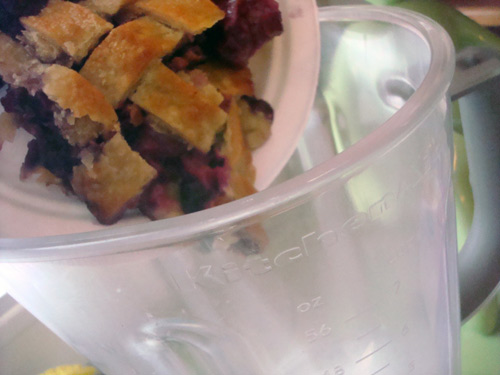
  • 1 slice pie (I used the "Rhueberry", a lattice-topped rhubarb-blueberry pie made by Wendy Sykes)
  • 1 slice cake (I used a slice of mocha cake with chocolate buttercream made by Nazla Merce)
  • 2 large scoops vanilla ice cream
  • Cream or milk, to taste

Procedure 

  1. Combine all of the above ingredients in a blender. Blend until smooth, adding more milk or cream until it has reached your desired consistency.
  2. Pour into a glass, reflect on last night's revelry, and enjoy.


Reading Is Totally Sweet: Honey-Yogurt Panna Cotta with Berries Recipe from Author Jenny Nelson

Eating is awesome, but what to do during those in-between meal times when you're not hungry? Work up an appetite by reading food-themed literature, that's what. Or at least that's what I do (when I'm not painting anthropomorphic pastries, of course).

So I was delighted to receive a review copy of Georgia's Kitchen, a novel wherein the namesake character is a New York chef who goes to Italy to find herself, both in a culinary and existential sense. The book is full of sensual descriptions of delicious food (hooray!). While there isn't a heavy dessert presence, happily I was able to catch up with author Jenny Nelson, who was able to answer the question: what type of dessert keeps authors inspired? Here's what she had to say about one of her favorite recipes, for Honey-Yogurt Panna Cotta:

Panna cotta, a deceptively simple Italian dessert that means, literally, cooked cream, is one of my favorite desserts to make, serve and – most important – eat! I serve it all the time -- at dinner parties, holidays and even as a weekday treat for my kids. It’s elegant, delicious and so, so easy to prepare. While tasty panna cotta recipes abound, this is one of my all-time favorites. You can make it even richer using all cream, but I opt for a more healthful 1 cup half and half, 1 cup whole milk. Either way, it’s delicious.

Honey-Yogurt Panna Cotta with Berries

Serves 8

  • 2 cups heavy cream (or 1 cup half and half, 1 cup whole milk; or 2 cups whole milk)
  • 1/4 cup sugar
  • 1/2 teaspoon vanilla extract
  • 1 envelope (1/4 ounce) unflavored gelatin
  • 1 cup plain low-fat yogurt
  • 1/2 cup honey, plus more for serving
  • 1/8 teaspoon salt
  • 2 cups mixed berries (blueberries, blackberries and raspberries are my favorites)

Procedure

  1. Place cream and sugar in a medium saucepan. Bring cream to a boil, stirring to dissolve sugar. Cover pan, remove from heat, and set aside steep, at least 10 minutes.
  2. Place 1/2 cup cold water in a small bowl, and sprinkle gelatin over water; set aside to soften, at least 5 minutes.
  3. In a large bowl, whisk yogurt, honey, vanilla and salt until combined; set aside.
  4. Return cream to a boil. Remove from heat, and immediately stir in softened gelatin until dissolved.
  5. Pour mixture through a fine-mesh sieve into yogurt-honey mixture; mix until combined.
  6. Divide mixture among eight 4- to 6-ounce ramekins. Chill until firm, at least 4 hours and up to 2 days.
  7. Wash berries and, if necessary, cut into bite-size pieces. Mix together and set aside 

Pie in the Sky: Blueberry Pie Recipe from Macrina Bakery

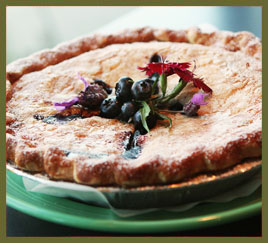
What with Monday's Pie Vs. Cake Showdown coming up, I was pretty excited to discover that this month's newsletter from Macrina Bakery included a blueberry pie recipe! Yielding a not-too-sweet filling with a very buttery crust, this one might just be prize material!

As they put it in the newsletter, "Few things in life are as wonderful as homemade blueberry pie. It is heaven on earth! I recommend using slightly tart organic blueberries whenever possible."

Photo credit: Macrina Bakery

Classic Blueberry Pie

Makes one double-crust 9-inch pie

Ingredients

  • 7 cups (3-1/2 pints) organic blueberries
  • 3/4 cup granulated sugar
  • 1/4 cup light brown sugar
  • 2 teaspoons freshly grated lemon zest
  • 1 teaspoon cinnamon
  • 1 teaspoon pure vanilla extract
  • 3 tablespoons unbleached all-purpose flour
  • 1/2 recipe Flaky Pie Dough (see recipe), chilled
  • 1 tablespoon unsalted butter, cut into small pieces
  • Egg wash made with 1 egg and 1 teaspoon water
  • Coarse raw sugar
  • Vanilla ice cream, for serving

Procedure

  1. Sort through the blueberries, removing any stems and leaves. Gently rinse the berries and lay them out on paper towels to air dry.
  2. Combine 3-1/2 cups of the blueberries, granulated sugar, brown sugar, lemon zest, cinnamon, vanilla extract and flour in a medium saucepan. Mix with a spoon. Cook over medium heat until the fruit juices have been released and the mixture has thickened, 5 to 8 minutes, stirring frequently to keep the mixture from burning. Pour the cooked fruit into a large stainless steel bowl and add the remaining blueberries. Stir with a spoon and set aside until the fruit has cooled to room temperature.
  3. Divide the chilled pie dough into 2 pieces, making one piece slightly larger than the other. Coat your hands with flour and shape the larger piece of dough into a ball. Working on a floured surface, flatten the ball slightly, then roll it into a 12-inch circle, about 1/8-inch thick. Fit the rolled dough into a 9-inch pie pan. Trim the edges of the dough to leave a 1-inch overhang around the pan. Roll out the remaining piece of dough 1/8-inch thick and trim it into a 10-inch circle. Set aside. This will be the top crust.
  4. Pour the cooled fruit into the pie shell and dot with butter. Brush the top side of the overhanging dough with a little egg wash. Lift the top crust onto the pie, folding it in half to make it easier to accurately position. Lift the overhanging dough onto the top crust and crimp with your fingers. Mark the crimped edges with a fork, then brush all of the crust with egg wash. Sprinkle with coarse raw sugar and chill in the refrigerator for at least 30 minutes.
  5. Preheat oven to 375 degrees F. Line rimmed baking sheet with parchment paper.
  6. Place the pie on the prepared baking sheet. Using a sharp knife cut 4 slits in the center of the crust. Bake pie for 50 to 55 minutes. The crust will be golden brown and the fruit will be bubbling in the center of the pie. Let cool for 30 to 40 minutes. Serve with vanilla ice cream.

Sweet n Sour: Old Fashioned Sour Cream Cookies Recipe

There are many moments in life to enjoy over-the-top desserts (seriously--just read the responses in the "what would your last-meal dessert be?" giveaway).

But sometimes, you just need a good old-fashioned cookie. Or, as Betty Crocker of the 60's would say, a cooky.

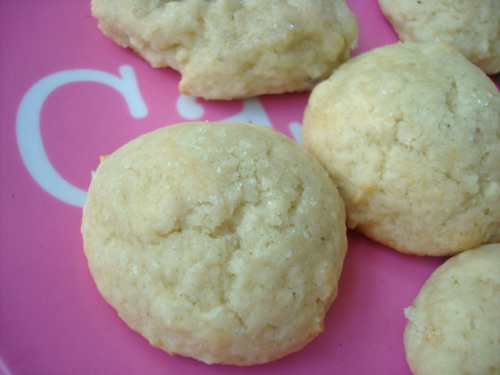
After all, Betty Crocker's Cooky Book is where I found this understated gem of a recipe for Old Fashioned Sour Cream Cookies. It's listed in the "Heritage Cookies" section of the book, which is where you'll find, as I think of them, the frumpy forefathers of today's cookies. I don't mean this as an insult--I simply mean that while they're not the sexiest-looking cookies, they're substantial enough in flavor that it's no secret why these recipes have stuck around through the years.

This particular recipe yields a cookie that is lightly tangy, and yet somehow fluffy without being "light"--they have a compelling flavor which keeps bringing you back for more. And with a sprinkling of sugar on top, they have a satisfying crunch, too.

Old-Fashioned Sour Cream Cookies

Ingredients

  • 1/2 cup butter
  • 1 cup sugar
  • 1 egg
  • 1 teaspoon vanilla
  • 2 2/3 cups flour
  • 1 teaspoon baking powder
  • 1/2 teaspoon baking soda
  • 1/2 teaspoon salt
  • 1/4 teaspoon nutmeg
  • 1/2 cup sour cream

Procedure

  1. Heat oven to 425 F.
  2. Mix butter, sugar, egg, and vanilla thoroughly. 
  3. Sift the dry ingredients together; add to the sugar mixture alternately with the sour cream.
  4. The original recipe suggests rolling the dough out, but I simply pinched off pieces and rolled them into approximately 1 1/2-inch diameter balls and placed them on the baking sheet, about 2 inches apart. 
  5. Place on a greased (or parchment-lined) baking sheet. Sprinkle with sugar.
  6. Bake 8-10 minutes, or until lightly browned on the sides. Makes about 36-48 cookies.

National Brownies at Brunch Month: Mimosa Brownies for Serious Eats

Hold the phone. Hold everything. Did you know that August is National Brownies at Brunch Month?

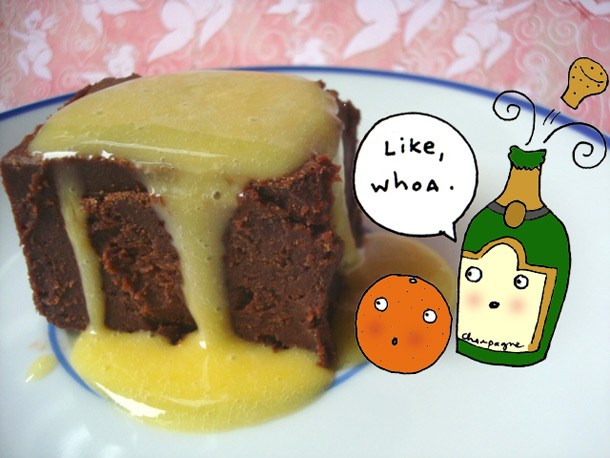
Don't waste time asking follow-up questions like why this month-long holiday exists—instead, bake up a batch of brunch-friendly Mimosa Brownies. Starting with the Oprah-approved brownie recipe from Baked: New Frontiers in Baking, this version gets champagne-and-orange juice makeover for a treat which truly embraces the decadent spirit of both brownies and brunch, all in one delectable unit.

Note: You may notice that the actual amount of champagne (or sparkling wine) is actually quite small, leaving you plenty of bubbly to make actual mimosas to accompany your brownies. As for the use of orange juice concentrate versus orange juice, I found that it offered a bright flavor and better consistency than orange juice.

For the full entry and recipe, visit Serious Eats!

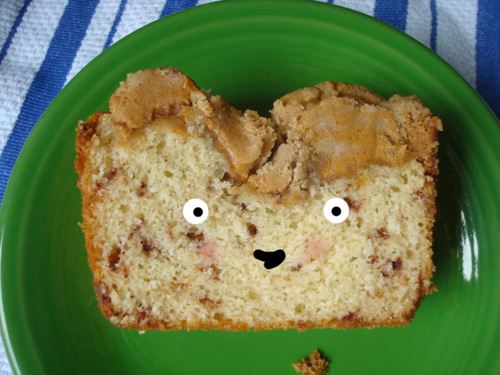
Morning Mix: Peanut Butter Streusel Morning Bread Recipe

Confession: I sometimes, ah, mix it up.

It's true: I'm not adverse to using a mix every now and again. And I kind of have a guilty little spot of love in my heart for Cinnamon Streusel Quick Bread, a recipe made with Betty Crocker's Streusel Muffin Mix. 

It's not that streusel bread would be so hard to make without a mix...but there's something special about this one. What is it that you've hidden in the mix, Betty Crocker?

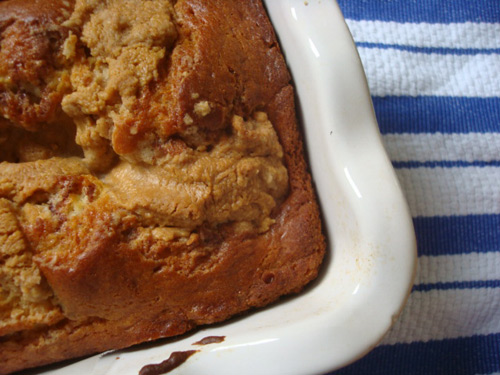
And as I discovered recently, when you add a generous helping of Mighty Maple peanut butter to the streusel topping, its deliciousness factor is increased, like, tenfold.

So here it is: my dirty little secret, my favorite mix for making a sweet breakfast bread.

Peanut Butter Streusel Morning Bread

-makes about 4 servings, in my house-

Adapted from Betty Crocker

Ingredients

  • 1 Box Betty Crocker cinnamon streusel muffin mix
  • 1/3 cup all-purpose flour
  • 1/2 cup water
  • 1/3 cup butter
  • 2 eggs
  • 4-6 tablespoons fairly smooth-textured, full fat peanut butter (I love it with Mighty Maple by Peanut Butter and Co.)

 Procedure

  1. Heat oven to 375ºF. Grease bottom of 9x5-inch loaf pan with shortening, or spray bottom with cooking spray.
  2. In medium bowl, stir Muffin Mix, flour, water, oil and eggs just until blended (batter may be lumpy). Spread batter in pan. 
  3. Melt the peanut butter in the microwave until it is thick but pourable. Mix the streusel topping in, give it a quick stir (it doesn't have to be completely incorporated) and pour it on top of the batter. Don't worry about making your coverage super-even: it's nice to find big chunks of peanut butter here and there.
  4. Bake 38 to 43 minutes or until top is golden brown and springs back when lightly touched. Cool 15 minutes. Run knife around edges of pan before removing; remove from pan. Cool completely before slicing, about 45 minutes.

Short and Sweet: Canestrelli Semolina Shortbread Recipe

In October, a big ol' brick of a book will be hitting the shelves in a bookstore near you: The Essential New York Times Cookbook, Classic Recipes for a New Century. It's an updated version of the classic Craig Claiborne-edited New York Times Cookbook , with plenty of classic recipes as well as a large variety of newer ones. 

Now, there are several reasons why you should be excited about this book: more than a thousand, in fact, which is how many recipes you'll find, culled from the venerable newspaper's archives, each of which has a witty and interesting intro by she's-kind-of-a-big-deal editor Amanda Hesser

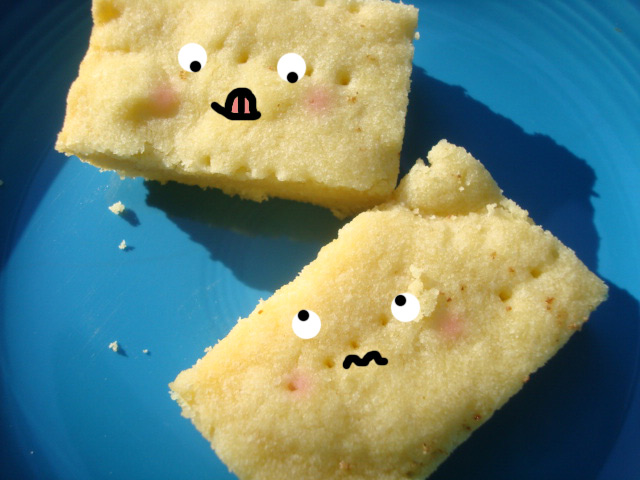
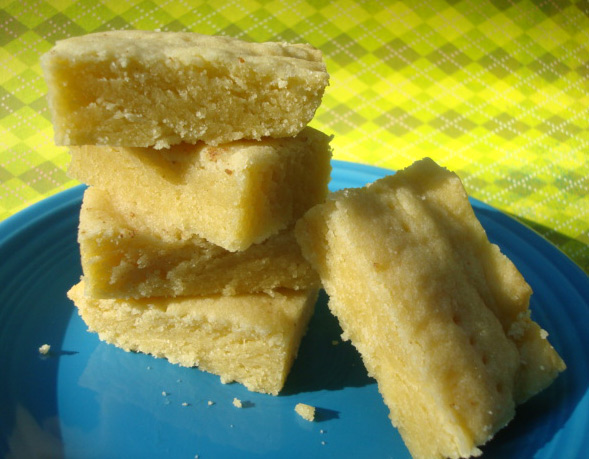
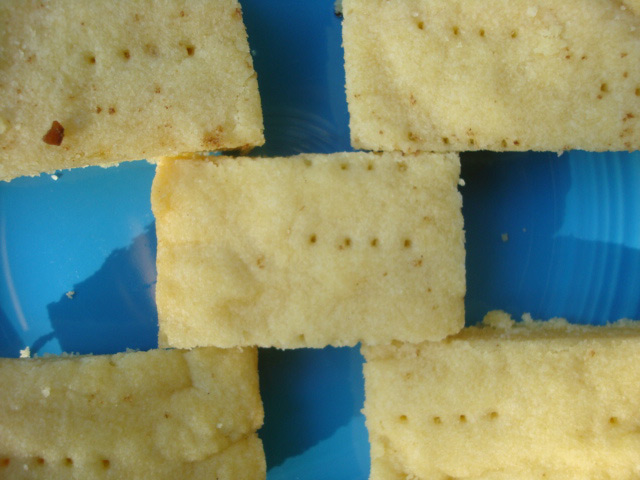
But right now, we're just going to focus on one: the recipe for Canestrelli, a semolina shortbread featured in the book. Lightly nutty and gritty but plenty buttery, these cookies couldn't be simpler to make (I lightly adapted the recipe to make them as bars instead of cookies), and are a perfect light dessert, and made even more delectable with a sprinkling of fancy sea salt.

I served these at a picnic with buddies Tea and Megan, and they went over quite well!

Canestrelli

(Shortbread from Ovada, adapted from Rona Deme's ''Country Host Cookbook'', As seen in the NY Times Cookbook; originally from this article)

Ingredients

  • 1 1/2 cups unbleached, all-purpose flour
  • 1/2 cup semolina
  • 1/2 pound lightly salted butter
  • 1/2 cup sugar

Procedure

  1. Preheat oven to 325 degrees.
  2. In a bowl, sift together the flour and semolina and set aside.
  3. In another large bowl, with the electric mixer on high speed, add the butter in small pieces, beating until it is uniformly softened.
  4. Add the sugar and continue beating until the two are creamed together.
  5. Lower the speed of the mixer and add the flour mixture a cup at a time, continually scraping down the walls of the mixer bowl, and working quickly until the ingredients are just blended. Be careful not to overmix, because the semolina, high in gluten, can toughen the canestrelli. The dough will be somewhat crumbly.
  6. Press the dough together into an 8x8 or 9x9-inch baking pan lined with parchment on the bottom.
  7. Bake for approximately 15 to 20 minutes, or until they begin to blush with color.
  8. Let cool in the pan; when lightly cooled but still warm, score into strips of your desired size. Let cool completely and then remove from pan. They may be stored for two weeks in airtight tins.

Chess Pieces: Yellow Chess Cake Recipe

Is it just me, or does the phrase "light summer dessert" seem like a fancy way of saying "low fat, dull suffering"?

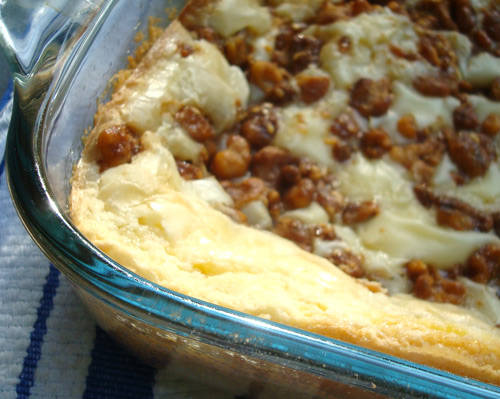
Luckily, there's an antidode: Aimee's Chess Cake, a recipe I found in The Cake Mix Doctor Returns . Similar to that St. Louis specialty called Gooey Butter Cake, this dessert is decadently, deliciously, delightfully, thick as a brick.

The recipe I adapted suggests cutting "into small bars because it's so rich"--but my vote goes for big, fat slices. Topped with candied nuts. Take that, low-fat dessert!

Yellow Chess Cake

Adapted from Aimee's Chess Cake from The Cake Mix Doctor Returns

Ingredients

  • Vegetable oil for the pan
  • Flour, for dusting the pan
  • 1 package plain yellow cake mix
  • 1 stick (8 tablespoons) butter, melted
  • 3 large eggs
  • 4 cups confectioners' sugar, sifted
  • 1 package cream cheese, at room temperature
  • 2 teaspoons vanilla
  • 1 cup candied walnuts (I used these ones ) --these are optional but I like the texture and flavor they add

Procedure

  1. Preheat oven to 350 degrees F. Grease and flour one 9 x 13 inch pan.
  2. In a large bowl mix together cake mix, butter and 1 egg. Pat batter into greased 9x13 inch pan.
  3. In a medium size mixing bowl mix together cream cheese, 2 eggs and sugar. Pour the cream cheese mixture over the cake mix batter. Sprinkle the nuts on top.
  4. Bake for 35 minutes or until golden brown on the edges (the middle will still be soft but will set to a solid but gooey consistency as the cake cools).

CakeSpy Note: Like this cake? You might also enjoy Houdini Bars.

Role Reversal: Reverse Whoopie Pies for Serious Eats

What's a Reverse Whoopie Pie?

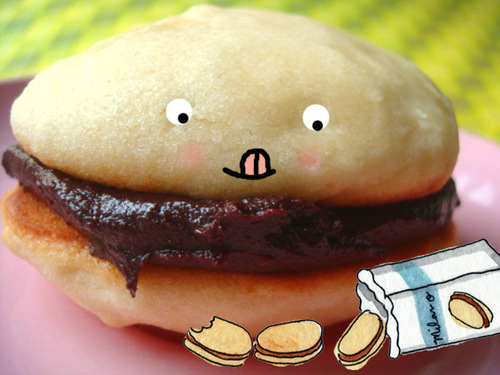
Basically, if you can imagine a Milano cookie going through a Hulk-like transformation into a supersized sweet treat, you've got the right idea.

That's right: these cakey whoopie pies pack all the flavor of the classic chocolate-filled buttery cookie sandwich, but without making any pretense of daintiness. This is treat of such proportion that it requires two hands to hold and all of your stomach to handle. Of course, if you want an even Hulkier variation, add peppermint extract instead of vanilla (and maybe a dash of green food coloring for good measure) for a chocolate-mint variation.

For the full entry and recipe, visit Serious Eats!

Fat Mint: Mint Chocolate Chip Whoopie Pies, and a Whoopie Pie Bake-Off Roundup

OK, so I don't want to make you feel bad if you weren't able to make it to the Whoopie Pie Bake-Off at Oddfellows Cafe this morning.

But.

Dude, if you weren't there, you totally missed out. For so many reasons...but for the sake of brevity, I'll focus on just a handful of reasons why the event was totally sweet (and suggest that you read the CHS roundup too):

John Roderick loves Whoopie Pie: photo c/o Capitol Hill SeattleThe judges, including all-stars from all arenas: Rocker John Roderick, Chamber of Commerce head Michael Wells, ice cream entrepreneur Molly Moon, the Stranger's Christopher Frizzelle and Chelsea Lin of Seattle CitySearch.
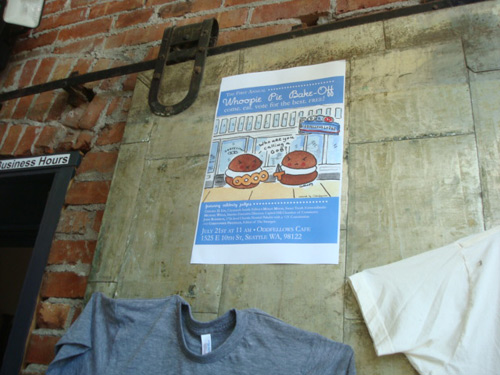
The event was very well-planned: the crew at Oddfellows did a fantastic job of presentation, planning, serving, and sharing the Whoopie Pie love. And the cute posters didn't hurt, either.

The whoopie pies: ranging from classic creations to inventive riffs on the Whoopie Pie, the entries were as varied as the entrants, who ranged from professional bakers (Volunteer Park Cafe, Street Treats, Mini Empire Bakery) to at-home enthusiasts (yours truly included). There was even a gluten-free s'more variety by Jeanne of Four Chickens!

Audrey takes the job of Whoopie Pie tasting very seriously.The prizes: winners made out like bandits, winning awesome prizes donated by both Oddfellows and by yours truly (of course, the humor of fact that young children won this prize isn't lost on me).
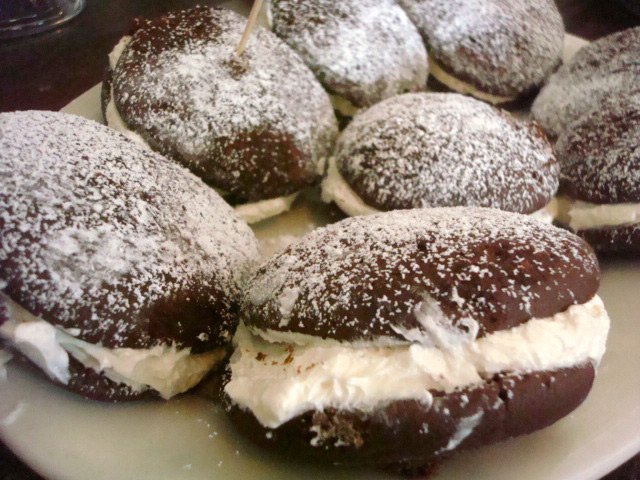
The enthusiastic crowd: well, a picture would show this best. Here's before:
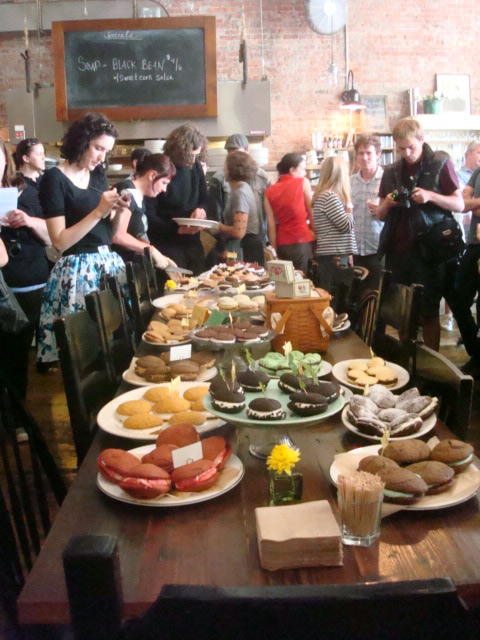
...and here's after:

Yup: people were ready to eat some whoopie pies, all right.

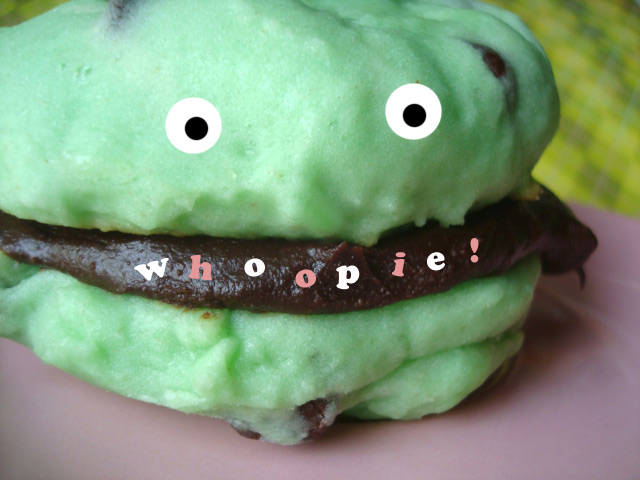
Of course, I'm not going to totally leave you hanging. My entry for Mint Chocolate Chip Whoopie Pies (inspired by my favorite ice cream flavor) went over rather well, if I do say so myself--and I'm willing to share the recipe. So even if you didn't make it, you can make some Whoopie of your own, in the safety of your own home.

Mint Chocolate Chip Whoopie Pies

Adapted from King Arhur Flour's Reverse Whoopie Pies

Makes 12-24 pies, depending on size

For the cookies 

  • 1 cup (2 sticks 8 ounces) unsalted butter
  • 1 1/2 teaspoons salt
  • 2 teaspoons peppermint extract
  • 1 tablespoon baking powder
  • 1 1/2 cups (10 1/2 ounces) sugar
  • 3 large eggs
  • 4 1/2 cups All-Purpose Flour
  • 1 cup (8 ounces) milk
  • 2 cups (12 ounces) chocolate chips
  • green food coloring, to taste (optional, but recommended)

For the filling

  • 4 cups (24 ounces) semisweet chocolate chips
  • 2 tablespoons (3/4 ounce) light corn syrup
  • 4 tablespoons (1/2 stick, 2 ounces) unsalted butter
  • 1 1/2 cups (12 ounces) heavy cream
  • 1/2 teaspoon peppermint extract

Procedure

  1. Preheat the oven to 400°F. Lightly grease (or line with parchment) two baking sheets.
  2. Make the cookies: In a large mixing bowl, cream together the butter, salt, peppermint extract, baking powder, and sugar. Add the eggs one at a time, beating well after each addition. Add the flour to the wet ingredients alternately with the milk, beginning and ending with the flour. Add the green food coloring and mix until incorporated. Do this gently; there’s no need to beat the batter. Stir in the chocolate chips at the end.
  3. Using an ice cream scoop, drop the dough onto the prepared baking sheets. Leave 2 to 2 1/2 inches between each cookie, for expansion.
  4. Bake the cookies for 11 minutes, or until they’re barely set on top; if you see them browning on the bottom, they've baked too long. Cool them on the pan for 5 minutes, then transfer to a rack to cool completely.
  5. To make the filling: Place the chocolate chips, corn syrup, butter, and heavy cream into a large microwave-safe bowl. Heat in the microwave for 2 to 3 minutes, until the mixture is very hot. Stir until the chocolate melts and the mixture is smooth. Add in the peppermint and stir one more time. Chill in the refrigerator, stirring occasionally, till the filling is cool room temperature. Remove from the fridge, and beat at high speed with an electric mixer until it lightens in color and thickens slightly. If the filling doesn’t lighten and thicken after several minutes of beating, chill for another 15 minutes, then beat again. Spread a generous amount of filling on one of the flat sides of the cookies; sandwich another half on top to form your pie. Repeat with the remaining pies. Store in an airtight container--it's better not to freeze these. Because the tops of the whoopie pies can be sticky, I'd suggest individually wrapping in waxed paper rather than plastic wrap.
Scrump and Save: Scrumpy Delight + Simply From Scratch by Alicia Bessette

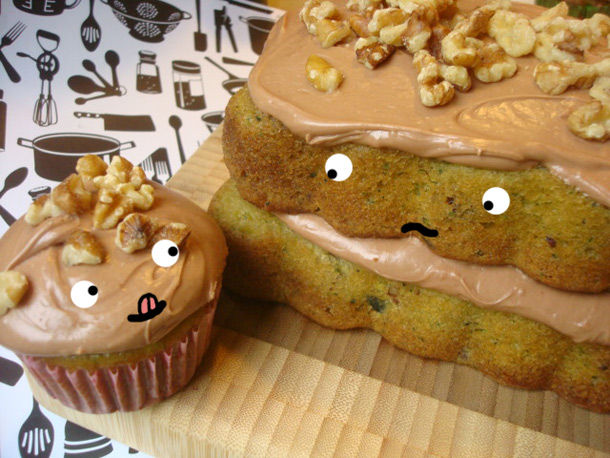
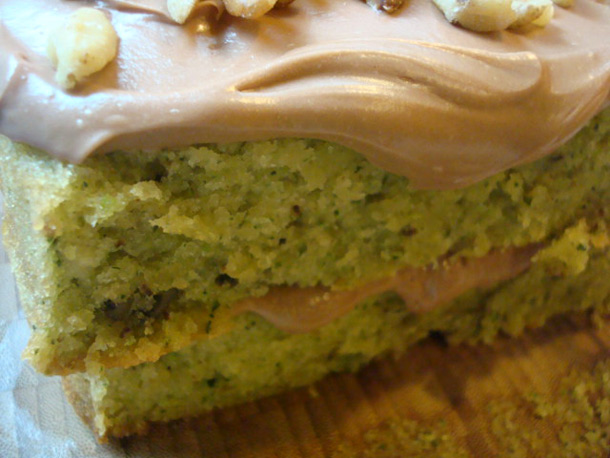
Photos by Dave TavaniScrumpy Delight is, truly, a terrible name for a dessert. It sounds more like Swamp Thing's cute sidekick than a delicious pastry.

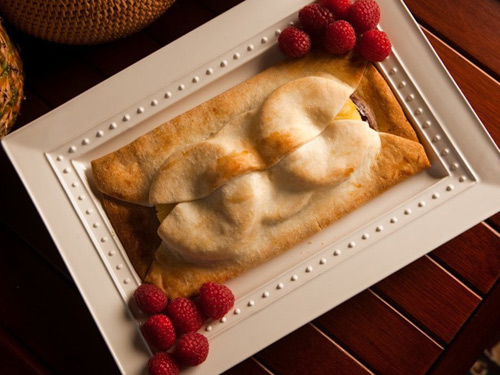
But in the novel Simply from Scratch by Alicia Bessette, which I recently had the opportunity to preview in review copy form (it comes out later on in the summer) it's the unexpectedly delicious dessert--made with an unlikely series of ingredients including pineapple, goat cheese, and chocolate, all baked in a pastry crust-- that represents sweet salvation for a character who is struggling with the tragic death of her husband.

Dave TavaniSo how is the book, anyway? I found it to be a thoroughly engaging novel. While the story can be slightly cliche at times, the main character's charm is undeniable, appealing even as she struggles with tragedy, and ultimately the sweet story did win me over.

Moreover, the book, like the below recipe, goes to show that sometimes, the strangest flavors can come together to create something magical--both in pastry, and in life.

Here's the recipe from the book:

Scrumpy Delight

As seen in Simply from Scratch by Alicia Bessette

- serves 2-4 -

Ingredients

  • 1 heaping cup well chopped pineapple, either grilled (ideally) or at least very well drained
  • 2 ounces spreadable goat cheese, softened slightly in microwave (cream cheese will also do)
  • 1 tablespoon honey
  • 1 teaspoon fresh lime juice
  • 1/2 teaspoon fresh-ground black pepper
  • One pie crust (your favorite recipe, or a pre-made pie crust dough)
  • 1- 1 1/2 ounce dark or milk chocolate bar
  • 2 teaspoons cream or whole milk

For garnish:

  • brown sugar
  • chilled fresh raspberries or blueberries
  • pepper to taste

Procedure


  1. Preheat oven to 425 F. Lightly grease a baking sheet.
  2. Combine pineapple, cheese, honey, lime juice, and pepper in a large mixing bowl.
  3. Carefully lay pie crust flat on your baking sheet. Repair any tears in the dough with moistened fingertips.
  4. Place the chocolate bar in the center of the pie crust.
  5. Pour the pineapple mixture onto the chocolate bar. Using a spatula, spread the mixture out toward the edges of the dough, leaving about a 1-inch edge.
  6. Using fingertips, drag two opposite ends of pie crust to meet in the center, forming a rectangle. Brust the top of the crust with your milk or cream.
  7. Bake for 20-25 minutes or until the crust is golden brown.
  8. Remove from oven. Sprinkle with brown sugar and pepper, if desired. Garnish with berries.
  9. Using a sharp knife, divide into segments. Serve warm.


Pie Meets Cookie: Pookie, a Cookie-Coated Pie

Discovering the Pake (a pie baked into a gigantic cake) was something of an epiphany: talk about a way to make pie even awesomer. But it also prompted a question: what else could be applied to pie for an added dimension of delicious?

The answer was clear, of course: a cookie dough coating.

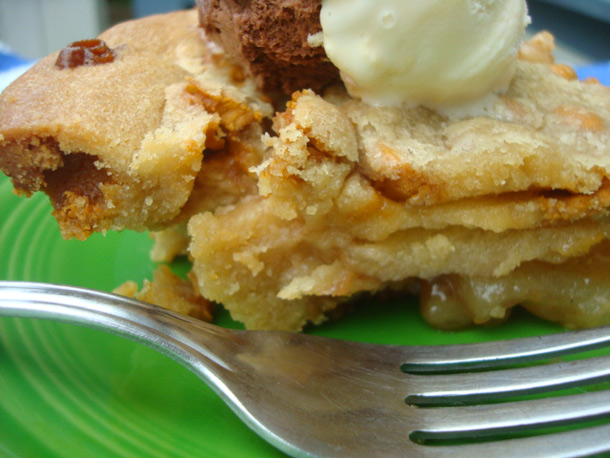
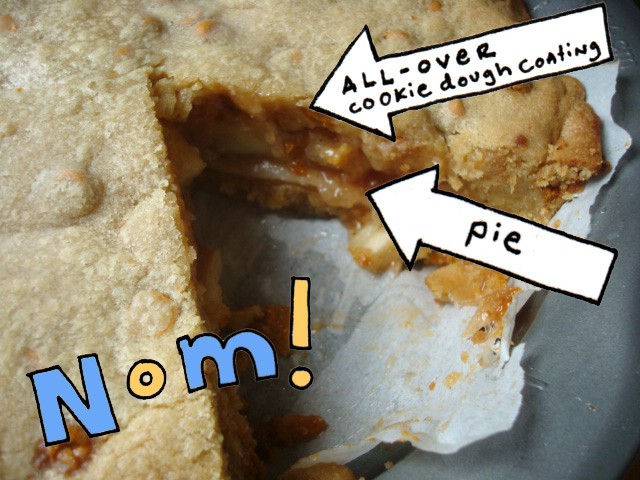
This behemoth starts with an entire 8-inch pie, ideally erring on the slightly under-baked side, which is then covered on all sides in butterscotch chip cookie dough and baked to golden, crispy perfection. Of course, it should go without saying that this buttery, crust-on-crust magic is best served à la mode.

For the full entry and recipe, visit Serious Eats!

Milk Maid: A Fudge Q + A and Recipe from Swiss Maid Fudge

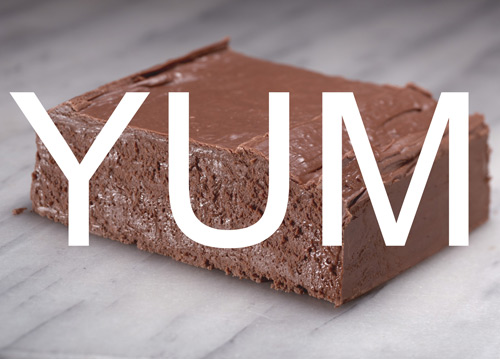
You've never met Jane Heller, but you'll probably like her as soon as I tell you this one thing about her: she has a company, Swiss Maid Fudge, that specializes in making delicious...well, you know. This Wisconsin-based company offers many options beyond the expected vanilla and chocolate, by the way--anyone care for some banana split fudge?

Anyhow. Ready to hear more? Thought so. 

Q: How did you first get involved with making fudge?
A: I began making fudge in high school when I would work summers in the candy store. I would spend my summers doing the same techniques we use today which really sparked my love of the business.  Making fudge has been a large part of my life and I have really grown with this company.

Q: How has Swiss Maid Fudge changed since you first started there?
A: We began with just 3 flavors of fudge – chocolate, vanilla, and maple fudge and have expanded to over 24 flavors!  We have also expanded our homemade products to include several caramel and brittle varieties, salt water taffy, caramel apples and hand-dipped chocolates. We have also expanded nationally through our Web site and started selling all over the country. As a company, we wanted to keep the traditional way of making our homemade fudge, but update our business through our online presence.  
 
Q: What are the top tips you can give someone attempting to make the perfect fudge?
A: The top three tips I can give are:
  • Wash down the sides of your pan with a brush dipped in water to prevent the formation of sugar crystals. 
  • You must use a candy thermometer and cook it to the correct temperature specified in your recipe – a degree here or there will make a big difference in the final outcome. 
  • Let the mixture cool a little before mixing – this will result in a creamier consistency.
 And now that you're armed with that expertise, howsabout a recipe? Jane was kind enough to share one:


Jane’s Chocolate Fudge Cake Recipe
(Video of Jane making this recipe can be found above, or here)
Ingredients:
  • 3/4 Cup Whole Milk
  • 2 Cups Granulated Sugar
  • 1/4 Cup Corn Syrup
  • 6 oz. Unsweetened Chocolate
  • 2 T. Butter
  • 1 tsp. Vanilla
In preparation
  1. Finely chop or grind the unsweetened chocolate.
  2. Prepare your marble slab or countertop by sprinkling with water.
  3. Spray your ring molds with cooking spray. You may select any size mold you prefer. Have a small greased container ready to put the remaining fudge in after you fill the molds.
Procedure
  1. In a saucepan, combine milk, sugar, corn syrup and butter stirring to combine all ingredients well. Wash down the sides of the pan and the stirring spoon with a pastry brush dipped in water. Insert a candy thermometer making sure it doesn't sit on the bottom of the pan. Cook to 238 degrees. Do not overcook.
  2. Promptly remove from heat and slowly pour onto your work surface. Sprinkle the surface of the candy again with water and sprinkle the unsweetened chocolate evenly over the top. Let cool until the cooked mixture holds a slight indentation when your finger is pressed into it-mixture should be warm not hot. This should only take a few minutes.
  3. Using a scraper begin mixing from the outside edges into the middle making sure to get well underneath the candy. Mix swiftly as setting will occur quickly. Once mixed, place the fudge into each mold and the remainder into a pan.
  4. Fudge should immediately be ready to remove from the molds. Sprinkle the tops and sides of each layer with coarse sugar and stack. To make each section stick together melt a little chocolate and put in the middle of each layer before stacking the next.
  5. Package in a cellophane bag and tie with a bow or store in an air tight container. Makes approximately 2 lbs. of fudge.

To learn more, visit the Swiss Maid Fudge website; for a virtual tour of their factory, click here.

O' Delicious: O'Henry Bars Recipe

Dear Oatsies,

I'm sorry to have to say this, but it's over. I've found another oat-based bar cookie to love.

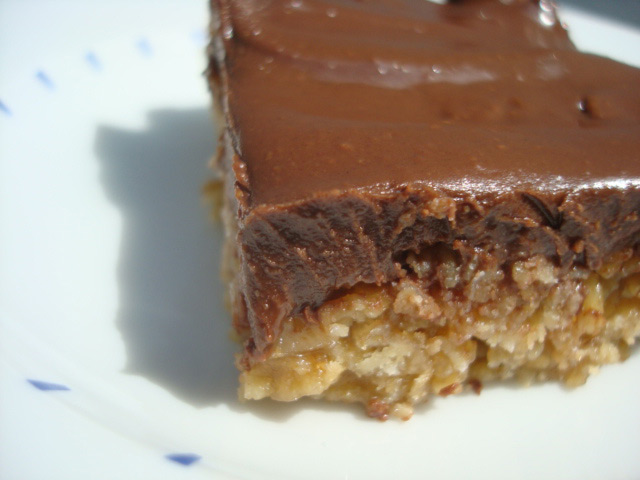
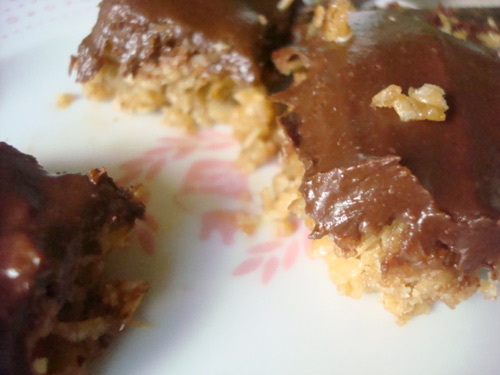
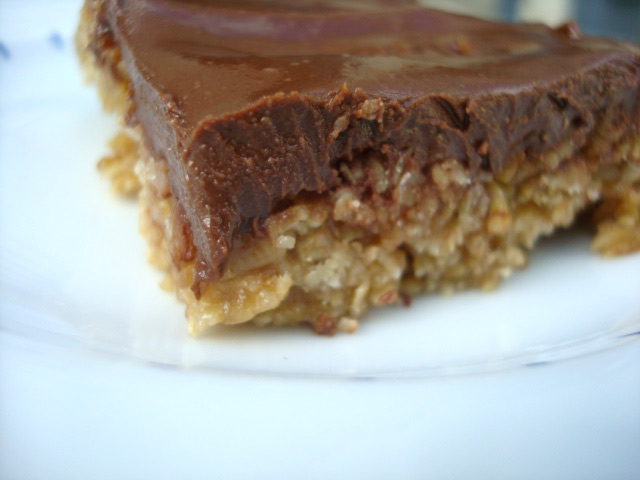
And that other oaty treat? The O'Henry Bar. We met accidentally--when I was chatting with Sabrina, a shopper at the Urban Craft Uprising, she told me about the O'Henry Bar, a treat her mom frequently made for her growing up. At first, this bar sounded kind of like you, Oatsie--an oat, butter, sugar, and corn syrup-based confection which is baked, and then topped...and this is where it changes...with chocolate and peanut butter.

Oh, Oatsie, what was I do do? Your topping of chocolate and chopped nuts is tasty, but who can resist the smooth, salty-sweet deliciousness of peanut butter and chocolate?

Nobody, that's who. And after baking a batch, I can say with no hesitation that it was love at first bite.

It's not me...it's you. I hope you'll be well. Really.

Love,

CakeSpy

P.S. Here's the recipe.

O'Henry Bars

Adapted from Sabrina's mom

Ingredients 

  • 4 cups quick cooking oatmeal
  • 2/3 cup butter
  • 1/2 cup  Karo syrup (light, not dark)
  • 1 cup brown sugar, packed
  • 3 teaspoons vanilla

 For the topping

  • 6 ounces chocolate chips
  • 2/3 cup peanut butter (a more smooth variety)

Procedure

  1. Preheat oven to 350F.
  2. Melt butter, karo syrup, sugar, and vanilla in a medium saucepan over low heat. Add the oats and stir, still over heat, until fully coated and incorporated.
  3. Press firmly into 9"x13" greased pan (I'd recommend putting a piece of wax paper down and roll with rolling pin/can so it doesn't stick) and bake at 350 for 10-12 minutes.
  4. While this cools, make the topping. Melt together 6oz chocolate chips & 2/3 cup of peanut butter (I used Peanut Butter and Co.'s Dark chocolate Dreams for extra chocolaty richness) in either a microwave-safe bowl or over low heat.
  5. Spread over oatmeal bars and let cool. Cut into yummy morsels & enjoy!