Things That Go Wiggle In the Night: Halloween Jell-O Jigglers for Serious Eats

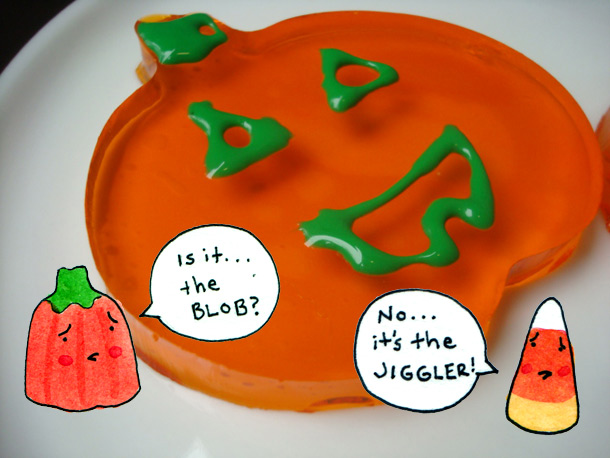
Around Halloween, a lot of attention is given to things that go bump in the night. But for a moment, let's consider things that wobble: the Jell-O Jiggler.

Starting with the classic recipe from the Jell-O website, it's easy to trick out these wiggly, wobbly treats in Halloween shapes for a crowd-pleasing party snack. Of course, I'd advise against handing them out to trick-or-treaters, because there's no bigger bummer than a soggy sack of candy.

For the full entry and tutorial, check out Serious Eats!

Swiss Miss: Deep-Fried Swiss Rolls on a Stick Recipe

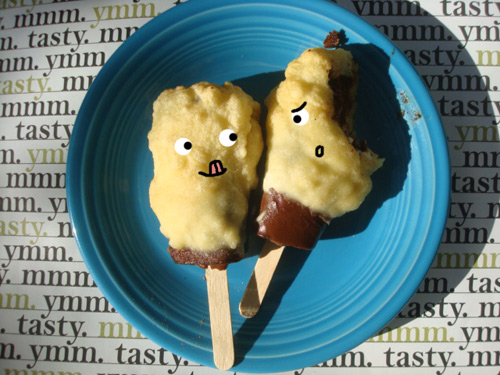
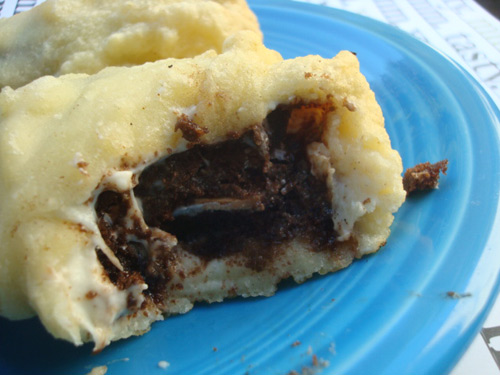
File under "Things you should never do, ever": Deep-frying Swiss Rolls on a Stick.

Oh, who am I kidding--you totally should. Because as I learned when I found myself with a slight excess of fry batter (from when I was deep frying Halloween candy, natch), not only is the deep fried Swiss Roll delicious, and like just about everything, it's even better on a stick.

And now, I'm delighted to share the method by which you can make this magic happen in your very own home.

Oh, and if you enjoy seeing Swiss Rolls being tortured, you might like to revisit the Little Debbie Death Match!

Deep-Fried Swiss Rolls on a Stick

  • 12 Swiss Rolls 
  • 8 cups vegetable oil, for frying
  • 1 1/2 cups flour, divided
  • 1 teaspoon baking soda
  • 1 cup milk
  • 1 tablespoon white vinegar
  • 1 tablespoon vegetable oil

Procedure


  1. Begin by freezing your Swiss rolls: insert the sticks, and place them on a plate or cookie sheet. Freeze them for at least 2 hours, until they are solid and frozen throughout.
  2. When you're nearing the end of the chilling period, start heating the oil for frying. Pour vegetable oil into a large, heavy-bottomed saucepan until it is three inches deep (the amount of oil you use will depend on the size of your saucepan). Turn the heat to medium-high, and insert a candy/deep fry thermometer. Heat until the oil reaches 375°F.
  3. While you're waiting for the oil to heat up, prepare your frying station and batter. Place 1/2 cup of flour in a bowl and set aside. Place the remaining cup of flour in a small bowl and mix with the baking powder and salt; add the milk, vinegar, and oil, and whisking the wet ingredients into the dry until you have a relatively lump-free, smooth, thick batter.
  4. Remove the frozen rolls from the freezer. It's go time.
  5. Dredge each roll in flour, covering it completely. Happily, it's helpful that they're on a stick so you won't get batter all over your fingers.
  6. Quickly place the battered Swiss Roll into the heated oil, holding the end of the stick and being careful not to drop it and cause oil to splash up (you might want to wear gloves for safety, 'cos hot oil can HURT, but I lived dangerously and to tell the tale). It will fry up quickly. 
  7. Once the treat has reached an appealing golden hue, remove from the hot oil and place on a plate covered with a paper towel to absorb excess grease. Repeat the battering and frying process with the remaining Swiss Rolls. While frying, be sure to monitor the temperature of the oil and adjust your heat up or down accordingly, as the candy will melt if it is too hot, and it will take too long to fry and become greasy if the heat is too low.
  8. Let cool slightly, but serve while still warm.


Fry, Baby: Deep-Fried Halloween Candy for Serious Eats

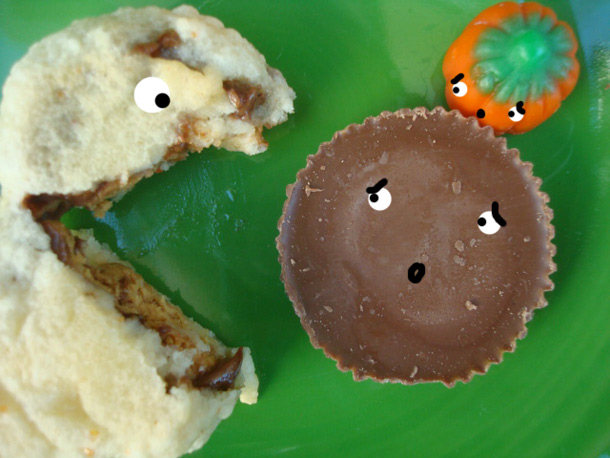
It's a funny thing about Halloween candy: it actually makes you hungrier. At least, that's my theory behind how the same person who can't finish off an entire candy bar can easily put away ten "fun size" candy bars or 30 mellowcreme pumpkins in one sitting.

But there's a way to bring a substantial dimension of deliciousness to your Halloween candy: deep-fry it.

That's right. Batter up your Halloween candy and fry it in hot oil, and you've got yourself little nuggets that are beyond decadent, and bound to satisfy—one or two of these morsels is more than enough.

Note: I tried a variety of Halloween candies in this experiment, including candy corn, mellowcreme pumpkins, Reese's Peanut Butter Cups, Twix, Kit-Kats, and Whoppers. The biggest hit by far was the Peanut butter cups.

For the full entry and recipe, visit Serious Eats!

Guest Post: How To Make Gelatin Bows by Nellie Cakes

CakeSpy Note: This is a guest post from Nellie Cakes, a blog written by Nell, a mom who taught herself how to bake so her daughter could have way cooler cupcakes on her birthday than anyone else in school. 

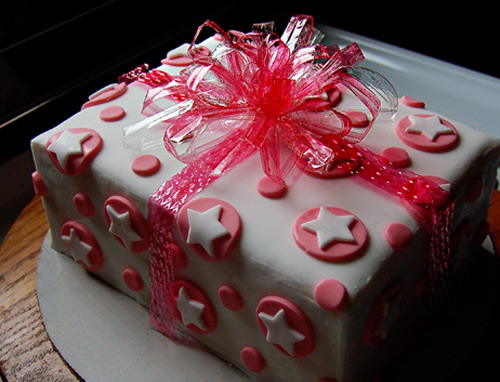
First thing: look at the cake on the top left of the above picture. Now, disregard the cake for a minute, and check out that bow on top! How pretty is that? And guess what! It’s completely edible.  Here’s a closer look at it:
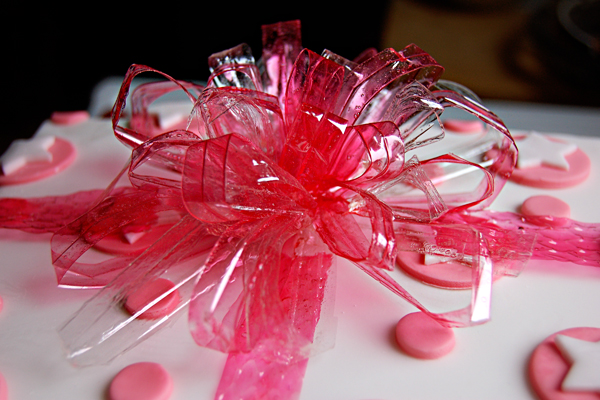
It doesn’t actually taste like much of anything, but it won’t detract from the taste of the cake either, if you decide to slice right on through it. (Which would probably be pretty tough to do.)

Bows aren’t the only thing you can make with this method either! (Flowers and butterflies would look gorgeous too, no?)

There’s another cool thing about it too! You can use the scraps from your project to make your own home-made edible glitter for all your other pretty desserts! To do that, just take the clippings that you’d normally throw away after you finished the project and cut them into tiny pieces. When I held my clippings next to the glitter I bought, I couldn’t tell the difference at all!

You’ll have to plan a little ahead of time if you want it to be ready for that cake you made because it takes about twelve hours for it to completely dry, plus the assembly time.

Ok, here’s what you need:

  • Unflavored gelatin (like Knox)
  • Water
  • Food coloring
  • A clean paint brush
  • A non-stick surface, like a pattern board for fondant. (I used Duff Goldman’s Texture Tiles, which were at Michaels for $5)
  • Scissors

Take one packet of the gelatin (about one tablespoon) and put it in a small bowl with 2 ½ tablespoons of water. Give it enough time to soak up the water completely, about five minutes.

After that’s done, put it in the microwave for about five seconds. Gelatin melts at really low temperatures, so that’s all you’ll need to liquefy it. When you pull it out, it should look like this:
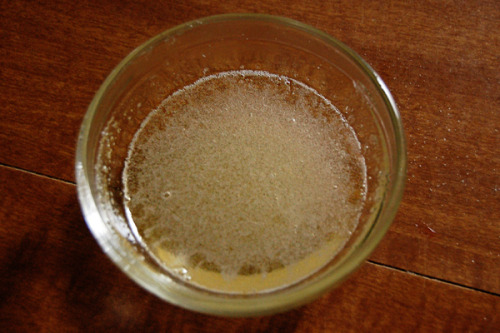
Let it cool for 5 to 10 minutes. When it cools to the right point, a layer of… well, scum, will form on the top. Take a stick of some kind and lift that layer off. If it won’t stay on the stick, let it cool for a few more minutes and try again. It should come off mostly in one piece. Discard that part. Once that’s done, it should look like this:
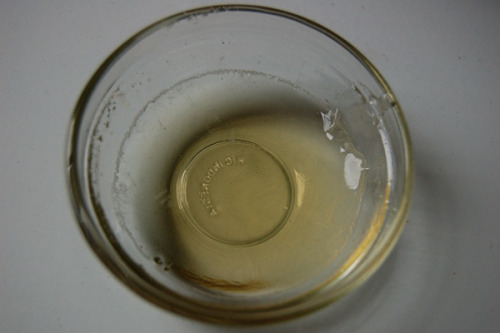
Nice and clear.

By this time, it will probably be too thick to do anything with, so throw it back in the microwave for another five seconds. When it comes out, add the food coloring and mix it around. To make the pink/red in the bow, I only put one drop of regular liquid food coloring in there. If you want it to be more intense, you could always add more. You can also paint the dried gelatin afterward, with a mixture of high proof vodka and food coloring, so if it dries a lighter color than you anticipated, it’s not a total loss. If you do paint it, the gelatin will warp when it gets wet. Make sure you have two non stick surfaces you can sandwich it between, and put a book or something on top until it dries again.

Once you have it the right color, dip your paint brush in the gelatin and paint it onto the non-stick surface, like this:

I made mine pretty thin, stretching the gelatin to cover two and a half boards, which worked out perfectly for the bow, which measured about five inches across. If you want the bow to be bigger or smaller, you can alter the amount. 

My original surface had a simple pattern on it, so it came off pretty easily. Be careful with patterns that are deeper. They’ll cause the gelatin to pool in certain spots, which will make it pretty difficult to peel off the board without cracking it.

Now you wait. It will begin to harden up pretty quickly, but it takes about 12 hours to fully dry. You’ll know it’s dry because you’ll hear it popping off the board. The first time this happened, I walked all over the house trying to figure out what that crackling noise was. I figured it out about a half an hour into the search. I felt like a moron.

The second time I made this, I made sure to paint it on at night so it would be dry the next morning.

Now that it’s all dry (and weirdly plastic like), slowly pull it off the board. It’s amazingly strong, so you don’t have to worry too much about ripping or cracking it.

Take out a pair of clean scissors (you could even use fancy craft scissors) and clean up the edges so it’s a nice rectangle. Then, cut the rectangles into strips. Mine were about half an inch thick. Like so:
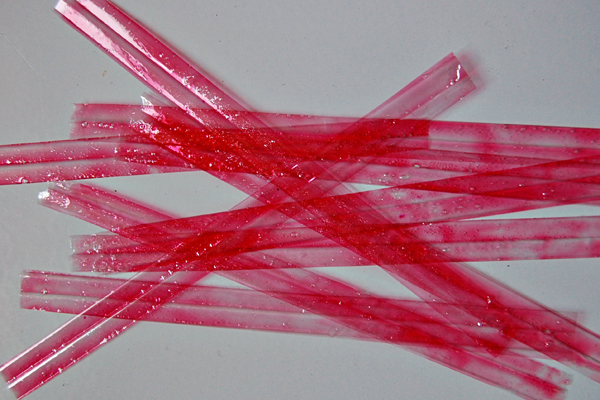
This is where it gets a little trickier. Take the strip and bend it in half, trying not to crease it anywhere. You kind of have to fidget with it to get it right. Once it looks good, warm up some more of the gelatin (if you have some left over. If you don’t, make a tiny bit more) and dip the opposite end of your paint brush in it, and put a dot of the gelatin where you want the edges of the bow to attach. Just pretend it’s Elmer’s glue. You might have to hold it there for a little while until it stays stuck, of you could use paper clips like I did:

 While those are drying, trim a little bit off the ends of the strips you have left, and make smaller loops. And then do it again with even smaller loops. While you wait for those to dry, you can begin assembling the larger ones, if you feel they’re stable enough. Use some of the gelatin to glue the edges together, forming a star with the loops, kind of like this:
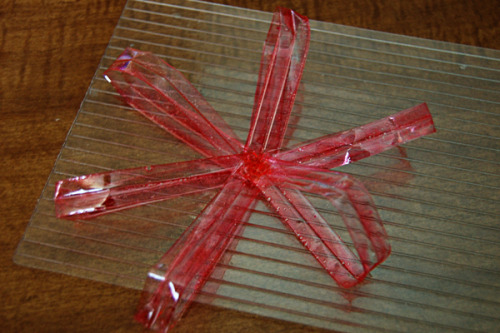
Make sure you glue everything together on top of your non-stick surface, or you’ll end up chiseling gelatin off your table. (Not that I’d know first hand or anything…)

Once that’s stable, add in the smaller ones on top of the first row, but still in between them so it looks well spaced. Repeat. You kind of have to mess around with it to see what looks best. Keep adding the loops until you feel like it’s nice and full. Also, make sure to give yourself time between each major addition, so it doesn’t all fall apart on you.

Let it dry over night.When it’s totally dry, you’d be surprised how durable it is! Now you can put it on top of a cake! I used a couple dabs of corn syrup to make it stick.

Here’s a picture of the finished bow before it went on the cake:
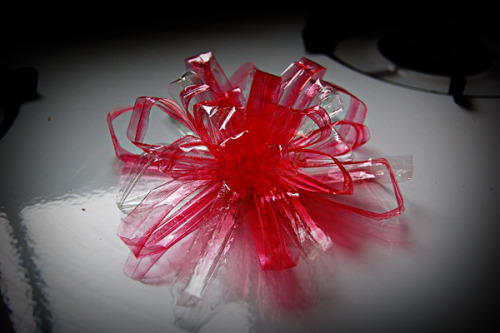
...and here's the cake again.

Hope you enjoyed this tutorial! For more awesome, visit Nellie Cakes!
Better Together: Beer Cupcakes With Chocolate Covered Potato Chips Recipe from Bredenbeck's Bakery, Philadelphia

Sweet or salty? Why decide, when you can have both--and beer, too--in one deliciously decadent cupcake parcel? Yup, that's right: Beer Cupcakes. Topped with Chocolate Covered Potato Chips. It's a recipe kindly donated by Bredenbeck's of Philadelphia. Awful or awesome? Maybe a little of both, in the best way possible. Make it happen at home thusly:

Beer Cupcakes Topped With Chocolate Covered Potato Chips

Ingredients for cupcakes:

  • 1 cup of Guinness® Draught
  • 1 stick plus 1 tablespoon unsalted butter, cut into pieces
  • 3/4 cup unsweetened cocoa powder
  • 2 cups dark brown sugar
  • 3/4 cup sour cream
  • 2 eggs
  • 1 tablespoon vanilla extract
  • 2 cups all-purpose flour
  • 2 1/2 teaspoon baking soda Pinch of cinnamon

Glaze:

  • 8 ounces cream cheese
  • 1 1/4 cup confectioner’s sugar
  • 1/3 cup Guinness® Draught

Chips:

  • 1⁄2 pound high quality milk chocolate, chopped
  • 4 cups ridged potato chips

Procedure

  1. Make the cupcakes. Preheat oven to 350 degrees. In a large sauce pan over low heat, combine Guinness® and butter, stirring until butter melts. Remove pan from heat and whisk in cocoa powder and brown sugar. In a medium bowl, whisk together sour cream, eggs and vanilla. Combine with beer mixture. Sift together flour and baking soda, then fold into batter. Pour into greased muffin tin, filling each cup about 2/3. Bake for 20-25 minutes. Cool in tin for 10 minutes, then remove from tin and place on a wire rack to finish cooling.
  2. Make the glaze. With a mixer, whip cream cheese until smooth. Sift confectioner’s sugar into cream cheese, and beat. Add Guinness®, and beat until smooth. Apply to cupcakes using a flat spatula.
  3. Prepare your garnish. Place 3/4 of the chocolate into a heat safe bowl, and place over the top of a pan of simmering water. Heat, stirring occasionally until the chocolate has melted, then continue to heat the chocolate to 110F degrees, stirring occasionally. As soon as the chocolate reaches this temperature, remove from heat. Stir in remaining chocolate until melted. Using tongs, dip potato chips one at a time into the chocolate. Place on waxed paper to cool. Once cooled, place atop cupcakes. Enjoy!
Of course, if you have no time—or desire—to bake your own Beer Cupcakes, you can stop into Bredenbeck’s Bakery and try their version! They're also busy baking all your favorite fall confections: pumpkin bread, caramel apple cheesecake, pumpkin cheesecake with cinnamon whipped cream, carrot cake, s’mores pie and much, much more.

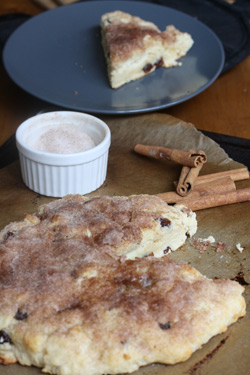
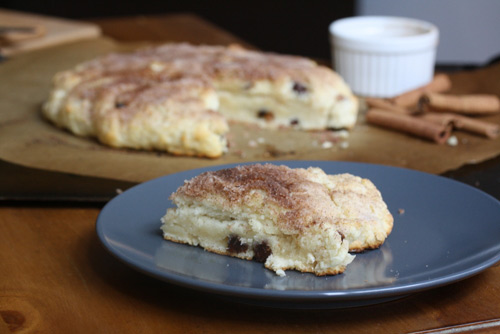
Well-Bread: Hot Raisin Bread Recipe from Big Girls, Small Kitchen

CakeSpy Note: This is a guest entry from Cara, a co-author of Big Girls, Small Kitchen, a blog devoted to "quarter-life" cooking (and the home of the Watermelon Ice Cream Cake). Per the writer, "this article is about the fantastic, nostalgic Hot Raisin Bread that my mom always made me for breakfast when I was growing up. And is it sweet? you may ask. Not only is it sweet, but it's topped with the most delicious crust of butter, sugar, and cinnamon."

My Breakfast of Champions

My mom made us breakfast every single day while we were growing up, before we piled into the car and she dropped us off at school on her way to work. When I say I don't understand people who don't eat breakfast, I say this with the perspective of someone who ate scrambled eggs, pancakes, French toast, corn muffins, and hot raisin bread every morning, not just someone who ate, you know, a bowl of cereal. Later, in middle and high school, we did sometimes eat just cereal or yogurt and fruit, but even then there were occasions when we'd get the full breakfast treatment.

On one of these days late in high school, my mom made hot raisin bread. She took it out of the oven, I cut myself a wedge, and when I drove my fork down through the cinnamon-sugar crust on top into the biscuit-like interior, I remembered why this was always one of my favorites. It's decadent in the way that Frosted Mini Wheats are decadent--a layer of sugar, in this case cinnamon-sugar and butter, bursts in your mouth, distinguishing the relative plainness of the inside. I was a junior or senior, and we had a field hockey game that afternoon against one of our rivals. The tradition was to dress up in funny outfits on game days, and I can only imagine what Phoebe and I and the rest of our teammates were wearing. Whether it was my breakfast or my outfit, I played one of my best games ever as forward, scoring a hat trick. Three goals. These days, that kind of athleticism feels like it belonged to another person completely.

Anyway, some other parent came up to my mom and was like, "What do you feed her for breakfast?!"

And my mom, I think, answered truthfully, "Well, it's this dish called Hot Raisin Bread..."

I wasn't eating my Wheaties. I was eating my mom's home-cooked food and apparently it did me better than any cereal.

When I baked this recently, I ate it as an afternoon snack. The cinnamon-y scent filled my apartment. I cut a wedge, poured some some tea, and waited for something to happen. Sure I wasn't playing hockey, but wouldn't mom's magic breakfast work in my Brooklyn apartment too? I did some work on the book, researched my summer vacation, and kept on waiting. And waiting. I haven't found out yet if the Hat Trick Raisin Bread does anything for no-longer athletic adults, but it definitely still tastes really good.

Hot Raisin Bread
Makes 1 bread, serves 6-8
from Quick Breads by Beatrice Ojakangas

Ingredients
  • 2 cups flour
  • 2 teaspoons baking powder
  • 1/4 teaspoon salt
  • 1/4 cup vegetable oil
  • 3/4 cup milk
  • 1/3 cup raisins
  • 2 tablespoons sugar
  • 2 tablespoons butter, melted or soft
  • 1/4 cup cinnamon sugar (1/4 cup sugar plus 1/2 teaspoon cinnamon)
Procedure
  1. Preheat the oven to 450°F. Line a baking sheet with parchment.
  2. Combine the flour, powder, salt, raisins, and sugar in a medium bowl. Add the oil and milk and mix into a soft dough.
  3. Spread with the butter and sprinkle with the cinnamon sugar.
  4. Bake for 10-12 minutes, until just golden. Cut into squares and serve hot--this doesn't really weather well, so make it when you plan to eat.
  5. Transfer it to the baking sheet and pat the dough into a rough 8-inch square, about 1/2-inch thick.

Keep up with Cara's baking adventures on Big Girls, Small Kitchen!

Hummingbird Chronicles: Lemon Cupcakes Recipe from Hummingbird Bakery

English cupcakes come stateside!CakeSpy Note: This is an ongoing series of entries about (and recipes from!) London's Hummingbird Bakery by Cake Gumshoe Alexandra Levert, who is an assistant director for a French television network in Toronto, Ontario, Canada. She loves cooking and baking because she finds it comforting and yet challenging at the same time. She tries to combine her love of food and her love of travel as much as life will let her.

 One Sunday afternoon, my boyfriend, who has never been into cupcakes, decided to finally take a look at my Hummingbird Bakery Cookbook. He started flipping the pages and landed on the lemon cupcakes page. He suddenly got all excited and said he wanted to make them. And right now. I was surprised, yet I wasn’t: he can never say no to a dessert with lemon. Suddenly, I was the one who wasn’t too excited about the idea of making them. Don’t get me wrong, I love lemon, but I always prefer chocolate to fruit in a dessert. This time though, I let him convince me and we went to the grocery store. 

Hummingbird Bakery Lemon Cupcakes

Recipe by Tarek Malouf, from Hummingbird Bakery Cookbook 

For the base:


  • 120g of plain flour
  • 150g of caster sugar
  • 1½  teaspoons of baking powder
  • 2 tablespoons of grated lemon zest, plus extra to decorate
  • 40g of unsalted butter (at room temperature)
  • 120 ml of whole milk
  • 1 egg 


For the lemon frosting:


  • 250g of icing sugar (sifted) 
  • 80g of unsalted butter (at room temperature)
  • 2 tablespoons of grated lemon zest
  • A few drops of yellow food colouring (optional but pretty!)
  • 25 ml of whole milk 


For the cooking process:


  • A 12-hole cupcake tray lined with paper cases 


So here is what I did:


  1. First, I preheated the oven to 325°F or 170°C. 
  2. Second, I sifted the flour and put it in a large bowl with the sugar, baking powder, lemon zest and butter. Then I used a handheld electric whisk, although you can also use a freestanding electric mixer with a paddle attachment, to beat the first batch of ingredients together. I beat them on slow speed until I was certain all the components were combined. I gradually poured the milk in and continued beating so that everything was mixed in well. I added the egg to the first mixture and beat it in with the rest for a few minutes until it formed a nice, smooth blend. Now the next part tested my cupcake skills for the first time: spooning the mixture into the paper cases. To do so, I took two spoons: one to pick up a bit of the blend and the other to push it out of the first spoon and into the mold. I repeated that same action until all 12 paper cases were about 2/3 full. The tricky part was to try and keep the tray as clean as possible, by not letting any of the mixture fall anywhere but in the cases. It was harder than it looked, but I did it. One cupcake point for me! 
  3. I put the tray in the oven for 22 minutes, since the recipe said to leave it in for 20 to 25 minutes. What I did was I set my timer for 20 minutes, and then when it rang, I took a fork and inserted it gently into one of the cakes. When I took the fork out, there was a slight trace of cake on it, so I knew I had to leave them in for a few more minutes. So I waited a little bit, checked again and they were fine. I took them out of the oven and let them cool down completely. 
  4. After about 30 minutes, it was time for me to make the icing. First I beat the icing sugar, butter, lemon zest and food colouring with the same handheld electric whisk, but this time on medium-slow speed until the ingredients were well combined. Then I turned the whisk down to a slower speed while I poured the milk. After that, I turned it to high speed and beat the mix for about 5 minutes, until the frosting became fluffy enough. As Tarek Malouf said in his book: “The longer the frosting is beaten, the fluffier and lighter it becomes.” 
  5. Then my now-favourite, yet the riskiest part of the whole process finally arrived: it was time to put the frosting on the cakes. The thing about cupcakes is that they are supposed to look pretty and appetizing, and this was my first time trying to do so. The best advice I can give you is just dig in but do it gently. Take a good amount of the frosting with a spoon, a knife or a small spatula and spread it evenly while rotating the cupcake. This will give you more control over what the end result will be like. And voilà! Your first cupcakes. MY first cupcakes! 


So what do they taste like, you ask? Well, the thing about Hummingbird cupcakes is that they are never too sugary, which is good for people who don’t have a sweet tooth. I found the lemon ones very flavorsome, yet quite subtle in taste. Lemon is not something you need a lot of in order to get the full taste experience. And it was the case with these cupcakes. 

Final words: In order to make the recipes with as much precision as possible, I would recommend using a weighing scale in order to measure some of the ingredients. I didn’t have one when I made this recipe, and I found it really affected the texture and consistency of the frosting. It was a bit too liquid, not overly but just enough for it not to stick to the base properly. Remember: You need good tools to make great cupcakes!

Trick or Sweet: Candy Corn Kaleidoscope Cookies for Serious Eats

It's October, and you know what that means: it's officially candy corn season.

But if you appreciate the iconic look more than the mellowcreme taste of the stuff, here's a solution: a reconfiguration of the Kaleidoscope Cooky (yes, cooky) from the Betty Crocker's Cooky Book, made to resemble the tricolor confection. Lightly crumbly, very buttery, and extremely crowd-pleasing, these cookies are a totally sweet tricked-out treat.

Note: This recipe is designed to feed a crowd; I have in the past halved it with fine results. Also, if shaping the dough into the candy corn shape seems too fussy, they're just as festive as Halloween-hued rounds.

For the full entry and recipe, visit Serious Eats!

Get Figgy: Fig-Panettone Bread Pudding Recipe

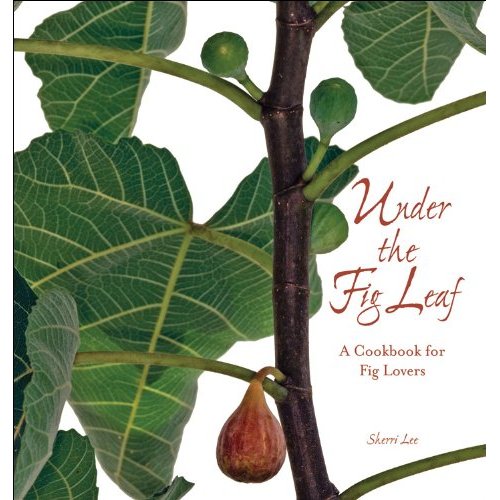
Bring us some figgy pudding, and make it tasty! Here's an intriguing recipe for bread pudding with figs and brandy--delicious for the shorter and cooler days that lie ahead. It's a sweet guest contribution from self-proclaimed "fig enthusiast" (no, really) Sherri Lee, from her cookbook Under the Fig Leaf, a culmination taking "her passion for figs and 10 years of cooking experiments into a fig cookbook featuring over 130 recipes from appetizers, beverages and salads to main courses and desserts." Here's the recipe:

Chef Joseph’s Fig-Panettone Bread Pudding

 Ingredients


  • 2 cups dried figs, chopped, stems removed
  • ¼ cup brandy
  • 2 Tablespoons butter for greasing baking dish
  • 12 cups Panettone Italian Bread, torn into pieces
  • 3 whole eggs
  • 3 egg yolks, reserve whites
  • 1 teaspoon vanilla extract
  • ½ teaspoon ground cinnamon
  • 1 ½ cups heavy cream
  • 1 ½ cups whole milk
  • 1 cup sugar
  • 3 egg whites
  • Pinch of salt

Procedure

  1. Preheat the oven to 325 degrees.
  2. Soak the chopped figs in the brandy and set aside.
  3. Butter a 9x13 glass baking dish
  4. Place the pieces of panettone in the baking dish and toss them evenly with the figs and brandy.
  5. In a large mixing bowl combine the whole eggs with the egg yolks.
  6. Stir in the vanilla extract, cinnamon, cream, milk and sugar.  Beat well.
  7. In a separate bowl, beat the egg whites with the salt until they form soft peaks.
  8. Fold the whites into the egg yolk mixture and pour over the panettone and figs.  Let stand at room temperature for 10 to 15 minutes.
  9. Bake uncovered for 1 hour.  Serve warm with a splash of heavy cream.


Bonbon Jovi Truffles: A Sweet Treat for Serious Eats

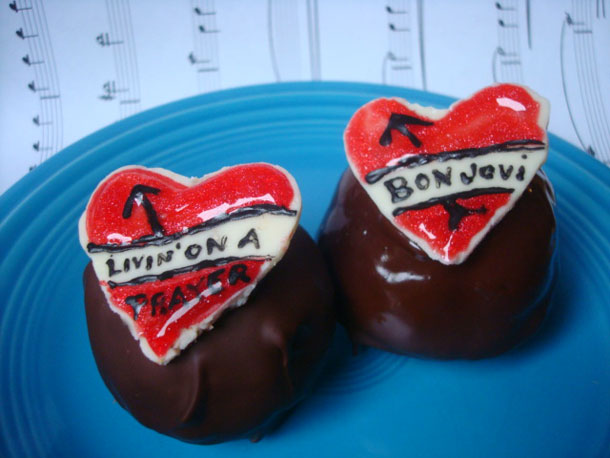
Bonbon Jovi Truffles: they may be slippery when wet, but they don't give love a bad name.

Starting with a can't-go-wrong combination of smooth peanut butter and chocolate, these truffles get a snappy "pop" from Rice Krispies. Simple and delicious, these truffles are as addictive of a guilty pleasure as a hit single. They'll make your mouth as happy as singing Living on a Prayer at the top of your lungs with the windows down.

Note: I made my toppers using a 1-inch heart-shaped cookie cutter to mimic a Bon Jovi band logo, which is an ornate bleeding heart. If you break some hearts while removing them, don't sweat it—just use some confectioners' sugar and water like "glue" to put them back together. Decorate with writing markers or gel icing with the titles of your favorite Bon Jovi hits.

For the full tutorial and post, visit Serious Eats!

Life's a Witch: Fat Witch Brownies Cookbook, and a Recipe

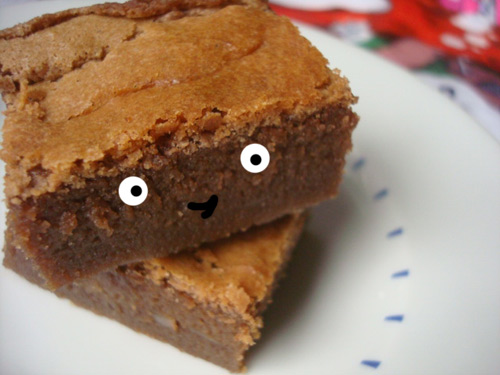
Fat Witch Brownies is, with capital letters, a Happy Place. My first experience with them was at my first post-college job in NYC, where we purchased these sweet little morsels from their Chelsea Market retail location as client holiday gifts. Well, and a few extras for ourselves, which is how I got hooked on these fudgy, dense little treats. While my true affinity was always for their blondies, when I recently received their cookbook, Fat Witch Brownies: Brownies, Blondies, and Bars from New York's Legendary Fat Witch Bakery in the mail, I knew it was the classic brownie that I had to try first. While my brownies came out slightly chewier than the ones I had remembered, they were still plenty dense and delightfully the opposite of virtuous, and when I put them out at my store, they disappeared in record time.

Of course, I can't wait to try some of the other recipes in the book, including the one for my beloved blondies, as well as some new classics--the butterscotch flip (a fancier version of the blondie-brownie), Lemon cheesecake brownies, and cranberry blondes.

Fat Witch Brownies

Ingredients

  • 14 Tablespoons (1 3/4 sticks) unsalted butter
  • 1/2 cup plus 2 tablespoons bittersweet chocolate chips
  • 1 1/4 cups granulated sugar
  • 4 large eggs
  • 1 teaspoon pure vanilla extract
  • 1/2 cup plus 2 tablespoons ubleached flour
  • pinch of salt

Procedure

  1. Grease a 9-inch baking pan with butter. Dust with flour and tap out the excess. Preheat the oven to 350 F.
  2. Melt the butter and chocolate in a small saucepan over low heat, stirring frequently. Set aside to cool while you prepare the next step.
  3. Cream the sugar, eggs, and vanilla together. Add the cooled chocolate mixture and mix until well blended.
  4. Measure the flour and salt and then sift together directly into the chocolate mixture. Mix the batter gently until well combined and no trace of the dry ingredients remains.
  5. If you wanna, stir in nuts or any extras at this point.
  6. Spread the batter evenly in the prepared baking pan and bake 33 minutes or until a toothpick inserted comes out clean or with crumbs but not batter.
  7. Remove from the oven and let cool on rack for 1 hour. Cut just before serving. Makes 12-16 brownies.

Pound It: Pound Cake Recipe, Circa 1824

So, here's the deal. Anyone who has ever had the slightest bit of curiousity about why Pound Cake is referred to as such is probably aware that it is derived from the French "Quatre Quarts"--meaning, literally, four quarts--which refers to the equal weight of the four ingredients (eggs, butter, sugar, flour) which went into early versions of the cake. Apparently, this easy ratio was necessary because"  In the days when many people couldn't read, this simple convention made it simple to remember recipes." (What's cooking America".

But what this brief historical lesson does not tell you, however, is how these early versions tasted.

And so, dear friends, I bravely stocked up my reusable grocery tote (I am in Seattle, after all) with a whole lot of eggs, butter, sugar, and flour, and tried it out for you.

Of course, my first inclination was to try this recipe, found on The Food Timeline:

[1817] A Pound cake, plain.
Beat a pound of butter in an earthen pan till it is like a thick cream, then beat in nine whole eggs till it is quite light. Put in a glass of brandy, a little lemon-peel shred fine; then pork in a pound and a quarter of flour. Put it into your hoop or pan, and bake it for one hour."
---The Female Instructor or Young Woman's Guide to Domestic Happiness, [Thomas Kelly:London] 1817 (p. 462)

But as tempting as it was to figure out how to "pork in" a pound and a quarter of flour, something seemed missing from this recipe: namely, sugar. So instead I opted for a variation on the recipe (also from the Food Timeline):

[1824] Pound cake.
Wash the salt from a pound of butter and rub it till it is soft as cream, have ready a pound of flour sifted, one pound of powdered sugar, and twelve eggs well beaten; put alternately into the butter, sugar, flour, and the froth from the eggs; continuing to beat them together till all the ingredients are in, and the cake quite light; add some grated lemon peel, a nutmeg, and a gill of brandy; butter the pans and bake them. This cake makes an excellent pudding if baked in a large mould, and eaten with sugar and wine. It is also excellent when boiled, and served up with melted butter, sugar, and wine."
---The Virginia Housewife, Mary Randolph, with historical notes and commentaries by Karen Hess [University of South Carolina Press:Columbia] 1984 (p. 161)

In this version, the proportions were pretty much a pound each, but in the effort to produce the most pure final product, I did not add the peel, nutmeg, or brandy.

So, here's how it all went down.


  • First, creaming the butter til it was "like cream"--basically, I beat it (in my very not 1824-esque Kitchen Aid) until it was softer than butter itself, and became an aromatic, beautiful sort of thing that begged to be slathered on bread.
  • In my second stand mixer (because yes, I have two...jealous?), I separately mixed the eggs. What did "well-beaten" mean? I took it to mean "beat into complete submission", so I let them thoroughly froth up by mixing them on medium for about 5 minutes (but to be 100% honest, I didn't really look at the clock).
  • Then, I started to add the rest of the ingredients, bit by bit, to the extremely creamy, dreamy butter.
  • This makes a pretty significant bit of batter, so I divided among a few pans. I baked each cake in a moderate (350-degree) oven until lightly golden on top--about 30-45 minutes depending on the pan size.  


But what of the cake that came out of the oven? Amazingly, this cake was far lighter than I would have expected. The crumb was surprisingly delicate, and the texture almost feathery--and yet, and yet, the indescribeably buttery and rich taste allows you to make no mistake, this is a serious cake through and through.

Would I suggest moving back to our pound cake roots? Probably not, because ultimately (for better or worse) I think I do prefer the hefty, dense, sliced loaves of pound cake that are more common these days. But it did make for a sweet experiment, and an even sweeter taste of history.

Want more? You can find a plethora of historic poundcake recipes (and info) on Food Timeline.


Stuff It: Cupcake-Stuffed Cupcakes for Serious Eats

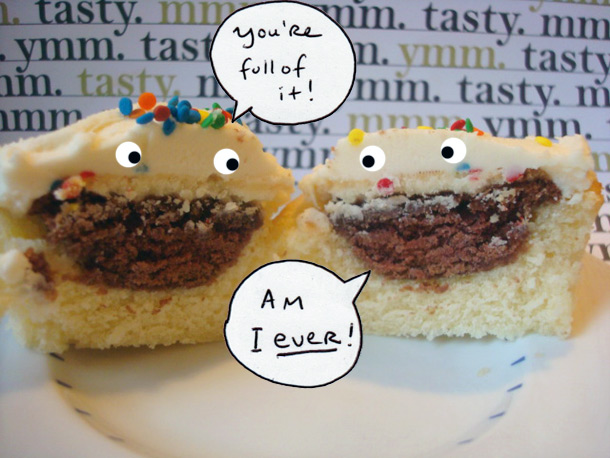
I hold this truth to be self-evident: Cupcakes are better when filled. This, of course, is a lesson learned from Bake It In A Cake, which proves that there's no lack of material with which to fill them, ranging from cookie dough to dollhouse-sized pies to baklava.

But the ultimate cupcake-stuffer? Cupcakes themselves. By embedding miniature cupcakes—frosting and all—inside batter-filled standard-sized cups, you get a surprisingly delightful treat: The baby-cakes, sealed by the moisture of the cake batter, don't dry out, whereas the baked bit of frosting lightly spreads, browns, and adds a rich crunch, making for an overall taste and visual contrast which can't be beat.

Note: If you don't cover the mini cupcakes batter, the frosting will spread a bit and you might want to keep a cookie sheet under the muffin tin in case of drippage. Alternately, save a little batter and cover them completely before baking.

For the full entry and recipe, visit Serious Eats!

Totally Sweet: Roly Poly Recipe from Macrina Bakery

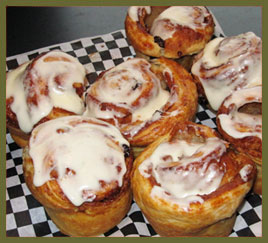
Image Credit: Macrina BakeryLet's see. Things that are delicious: Croissants. Cinnamon Rolls. Things that are even more delicious: the Roly Poly, a beautiful marriage of carbohydratey treat which brings together the best parts of both and also adds coconut and raisins. This is the version from the lovely and amazing Macrina Bakery, featured as their Recipe of the Month. Yes!

Their intro to the recipe:

My Grandmother Bakke made the most incredible cinnamon rolls I've ever tasted. One day, always open to improving on a good thing, she decided to add two of her favorite ingredients - coconut and walnuts. The results were spectacular. I recommend forming these pastries the night before you want to serve them.

Roly Poly

Ingredients 

  • 1 recipe Croissant Dough (see recipe)
  • 1/2 cup seedless raisins
  • 1 cup walnut halves
  • 1/2 cup granulated sugar
  • 1/2 cup light brown sugar
  • 1 tsp pure vanilla extract
  • 2 tsp cinnamon
  • 1/2 cup shredded, unsweetened coconut
  • Spray bottle of water

Procedure 

  1. Complete the Croissant Dough recipe as instructed and chill in the refrigerator for 30 minutes.
  2. Place raisins in a small bowl and cover with hot tap water. Let soak for 10 minutes, then drain and squeeze with your hands to remove excess liquid. Set aside.
  3. Preheat oven to 350 degrees F. Place walnuts on a rimmed baking sheet and toast for 15 minutes or until golden brown. Let cool 10 minutes. Chop coarsely and set aside.
  4. In a medium bowl, combine sugars, vanilla extract and cinnamon. Mix well with a wooden spoon and set aside.
  5. Take Croissant Dough from refrigerator and remove plastic. Cut dough in half and place 1 piece on a lightly floured work surface. (Cover remaining dough with plastic wrap and return to the refrigerator.) Roll dough into 12" x 20" rectangle and lightly mist dough with spray bottle of water. Spread half of the cinnamon-sugar mixture over entire surface. Sprinkle half of the raisins, half of the walnuts and half of the shredded coconut on top. Starting with one of the long sides, roll dough away from you into a log. The finished log should be about 3 inches in diameter. Repeat process with second piece of dough.
  6. Using a sharp chef's knife cut each log into 6 equal rolls. Tuck the loose end of each roll underneath. Place the rolls tuck side down into oiled muffin tins and cover with plastic wrap. Let proof in warm room (about 70 degrees F) for 1-1/2 hours. Rolls will rise slightly. Transfer to refrigerator for at least 8 hours or overnight. The dough will continue to ferment while it's in the refrigerator, developing a slightly sour flavor that contrasts perfectly with the sweetness of the filling.
  7. The next morning, remove the cinnamon rolls from the refrigerator and let sit, still covered, at room temperature for 1 hour.
  8. Preheat oven to 385 degrees F.
  9. Remove plastic and bake for 40-45 minutes. Finished rolls will be a deep golden brown. Let cool for about 5 minutes, then turn pan over and gently remove the rolls. Don't let them cool for too long in the pan or the sugars will harden and the rolls will stick.


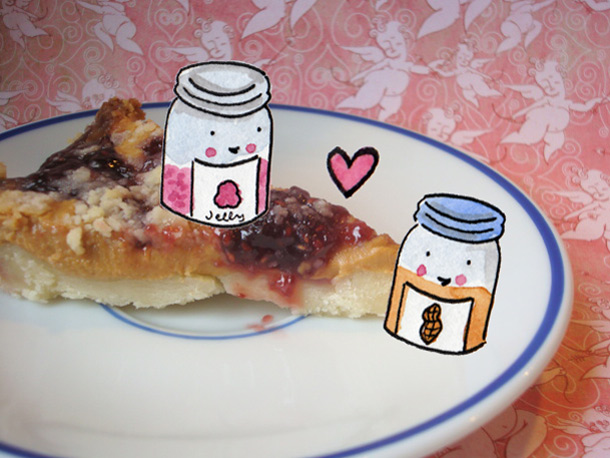
Are You Ready for this Jelly? Peanut Butter and Jelly Tart Recipe for Serious Eats

The problem with the Peanut Butter and Jelly Sandwich? Like most childhood treats, it's rarely as delicious as you remember. However, there's a way to update this classic in a totally sweet way: turn it into a tart. Anchored by a substantial buttery shortbread crust, this peanut butter and jelly pie is sophisticated enough to satisfy adult palates—after all, it's an adaptation of the Rosemary-Scented Date-Nut Bars from The Perfect Finish by Bill Yosses and Melissa Clark—but simple and tasty enough to please eaters of all ages.

For the full entry and recipe, visit Serious Eats!

Rhue the Day: Rhueberry Pie Recipe from Wendy Sykes

So, when we had a Cake Vs. Pie party at CakeSpy Shop, the winner of the evening was pie. It's ok. Really. While on the one hand I'm still a little bitter (team cake!), I must admit that the pies were some fine ones indeed.

Happily, one of the standouts (and 2nd Prize winner!) can now be made in your very household, because the baker, Wendy Sykes (who just debuted a totally sweet website, Four and 20 Blackbirds!) has kindly offered up her recipe for the unlikely, but totally delicious, combination of rhubarb-blueberry which makes up her Rhueberry Pie. In a nutshell? If you don't make this, you'll rhue the day. Oh, yes I did just say that.

Rhuberry Pie
Source: Wendy Sykes

Note: Use a fairly deep pie dish for this recipe!

Prepared pie dough for 9” covered pie

  • 3 eggs
  • 1 1/2 C sugar
  • 4 T cornstarch
  • 3/4 t salt
  • 1 t vanilla
  • 2 T butter, cut into small pieces
  • 2 C rhubarb, chopped into small pieces
  • 2 C blueberries, picked over

Procedure

  1. Beat 3 eggs until light and frothy.  Stir in sugar, cornstarch, salt, vanilla, and pieces of butter.
  2. Gently mix in rhubarb and blueberries.
  3. Pour berry/custard filling carefully into pie shell, making sure fruit is evenly distributed. Cover with vented crust, or lattice top.  Brush top with egg wash and sprinkle with sugar.
  4. Bake at 400 for 20 minutes or until crust just begins to turn golden brown. Turn oven down to 350 and bake for about 40 minutes until filling is really bubbling and crust is a nice golden brown.
  5. Let cool and chow down!


Curiosity Killed the Cookie: Another Experiment in How Not To Make Chocolate Chip Cookies

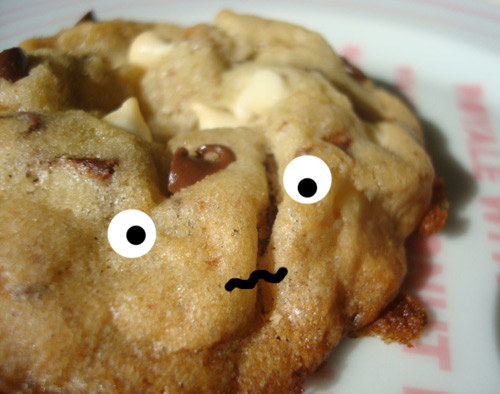
Not sure about whether or not curiosity killed the cat, but it sure did compromise these cookies. 

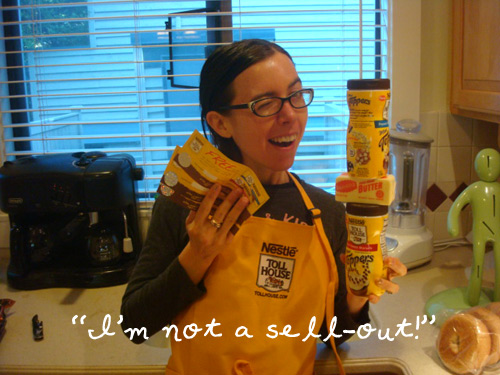
That's right: I've been messing with chocolate chip cookies again. It all started about a week ago, after a lifetime of conscientiously creaming the butter and sugar at the beginning of making chocolate chip cookies. I had received a big ol' parcel of freebies from Nestle Toll House (giveaway coming in a few days!) and had cookies on the mind.

A question occurred: "what would happen if I swapped the order in which the flour and sugar are added?".

Well, needless to say I was gonna find out.

And so, instead of creaming the butter and sugar, I "creamed" the butter and flour, and then added the sugar in, bit by bit, later on in the recipe, at the time when I would normally be adding the flour. I didn't mess with the actual measurements of the ingredients, though.

So what happened?

Well, the fact that these were going to come together differently was evident right away. The flour clumped up with the butter like...well, pie crust. (this makes sense, right?)

And then, adding in the eggs and other ingredients, things seemed to start looking like normal cookie batter.

Adding in the sugar, bit by bit, the dough looked, smelled, and felt pretty normal. I added in the vanilla and chocolate chips.

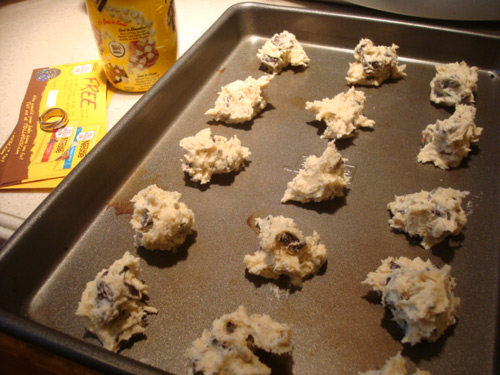
I let it chill for a while. Normal-looking. I spooned it on to the baking sheet, finishing off some of the cookies with these cute Nestle chocolate and white chocolate chip mini morsel toppers.

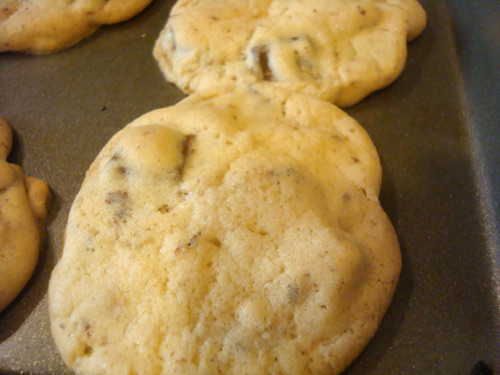
When the cookies came out of the oven, they looked completely perfect: lightly browned on the edges and bottom, soft in the middle.

But then something strange happened. As the cookies cooled...they turned into cookie crackers!

They looked right. They smelled right. They even tasted pretty right. But the texture was...well, disappointing. Crackery. Weird.

As I found out on Baking911.com, I had basically skipped an important step by making this switcheroo: "Creaming incorporates the maximum amount of air bubbles so a recipe will rise in the oven and be light in texture." So while I can't get technical about the chemistry of why this crackery texture was the result, I can say that while I was happy to have seen for myself what happens when you skip this step, I'm not likely to do it again.

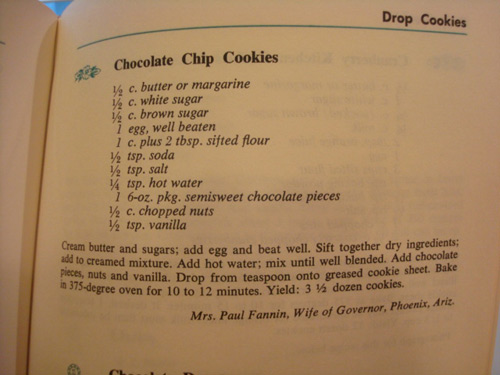
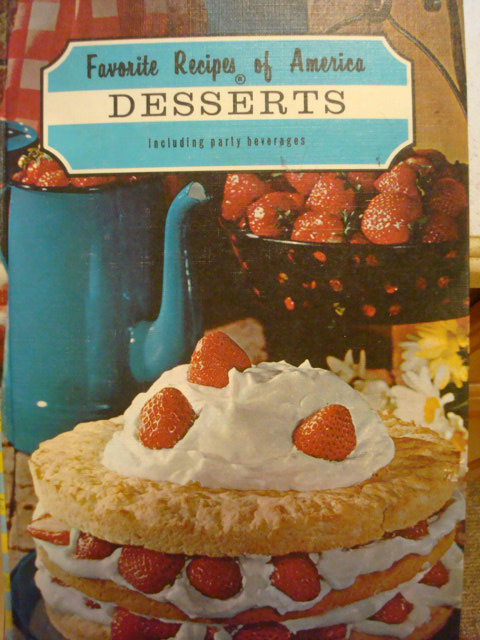
Here's the recipe I used--feel free to try my experiment for yourself, or honor the good Mrs. Paul Franklin, Wife of Governor, from Phoenix, AZ, and follow the directions correctly (listed correctly below). By the way, this is the book the recipe is from--isn't the cover just too much?

Chocolate Chip Cookies

From Favorite recipes of America desserts Including Party Beverages, Vol 1  

Ingredients

  • 1/2 cup butter
  • 1/2 cup white sugar
  • 1/2 cup brown sugar, packed
  • 1 egg, well beaten
  • 1 cup, plus 2 tablespoons, sifted flour
  • 1/2 teaspoon baking soda
  • 1/2 teaspoon salt
  • 1/4 teaspoon hot water
  • 1 6-ounce package semisweet chocolate morsels or pieces
  • 1/2 cup chopped nuts (optional)
  • 1/2 teaspoon vanilla

Procedure

Cream butter and sugars; add egg and beat well. Sift together dry ingredients (except for chocolate); add to creamed mixture. Add hot water; mix until well blended. Add chocolate pieces, nuts, and vanilla, and blend just until incorporated. Drop from teaspoon onto greased cookie sheet. Bake in a 375-degree oven for 10-12 minutes. Makes 3 1/2 dozen small cookies.

Hot Dog! Chilly Willy Ice Cream Sandwiches on Hot Dog Buns Recipe for Serious Eats

CakeSpy Note: I created these for a Labor Day entry on Serious Eats. Even though Labor Day is over, they're a great way to use leftover hot dog buns!

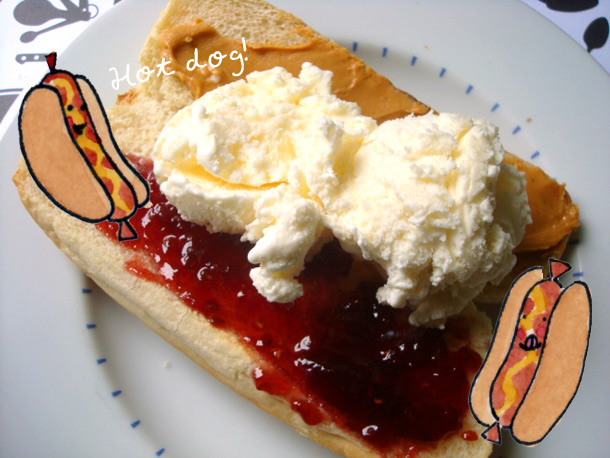
When it comes to Labor Day food, the general rule is "it's more fun on a bun." Happily, dessert can be part of the party when you combine ice cream and hot dog buns to make Chilly Dogs.

I was delighted when I first came across this confection at Snacks!, a bodega in Seattle's Ballard neighborhood. Unlikely as it may seem, the combination of toasted hot dog bun lined with peanut butter and jelly, then topped with ice cream is actually quite delicious—the light sweetness of the bun works nicely with the ice cream, with just enough sponginess to absorb the flavor of the ice cream, but sturdy enough that it will keep it contained for a sweet hand-held treat. Of course, it might get a bit messy toward the end, but isn't that part of the fun of outdoor eating?

For the full post and recipe, check out Serious Eats!

Totally Stuffed: Cupcake-Filled Croissants Recipe

The list of foods that are made more awesome by being stuffed in croissants is pretty immense and far-reaching, from the sweet (chocolate, almonds, cream cheese) to the savory (ham, cheese, hot dogs).

So I was pretty sure that a buttery blanket of croissant dough would have the same awesomeness-enhancing effect on leftover birthday cake (or, in this case, a leftover birthday season cupcake, from the delectable Jubilee Cupcakes).

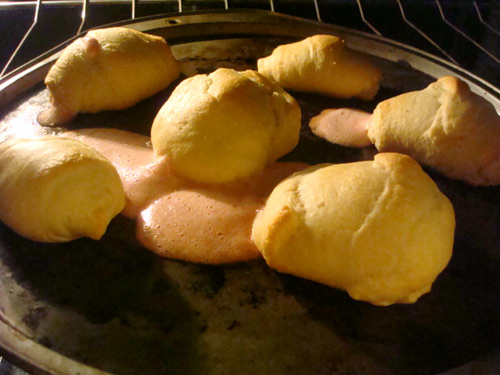
And guess what? It turned out pretty good. While the frosting can melt out a bit and get messy, it does lends an extra-buttery richness (and a nice color contrast, as mine had pink frosting), and the cake crumbs give it an extra-carbohydratey boost, perfect for carbo-loading if you're about to run a marathon (or, you know, just a tasty snack if you're not).

Want to give it a try? Here's how I did it.

Birthday Cake-Filled Croissants

Ingredients

  • 1 leftover cupcake (or, 1 leftover slice birthday cake)
  • 1 package ready-to-bake croissants (you know, the kind in a roll)
  • Extra butter, to brush on top (if you're into that)

Directions

  1. Preheat oven to the temperature directed on the croissant package.
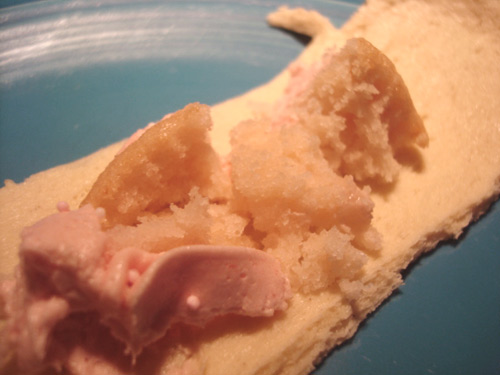
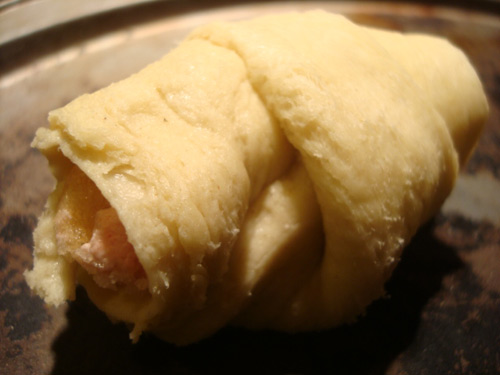
  2. Unroll the croissants. In the center of each, place a chunk of birthday cake, crumbled up (with frosting!). Roll them up, or (as I did with some of them) form the dough into little dumplings around the cake.
  3. Place on a sheet. If desired, brush tops with melted butter (why not?).
  4. Bake for the time specified on your croissant package. When you open the oven, you may discover that the frosting has oozed a bit out of the sides, but don't worry--plenty was probably able to melt into the croissant dough. Plus, once it cools just a bit, you can kind of scrape off the oozed bits and eat them (if, like me, you have no manners, that is).


Joyeux Anniversaire: Birthday Cake French Toast Recipe for Serious Eats

Say hello to your new best friend, Birthday Cake French Toast. This recipe breathes new life into birthday cake that is past its prime, making use of the dry texture to absorb a rich, eggy mixture, which is then pan-fried (frosting and all) to yield a new breed of French toast that's beyond decadent. In the tradition of over-the-top morning foods such as Cadbury Creme Eggs Benedict, this makes for a sugar bomb of a plate, tasting far better than it has any right to, in a so-bad-it's-good sort of way.
Read more