Scouting Sweetness: Homemade Samoas Girl Scout Cookies for Serious Eats

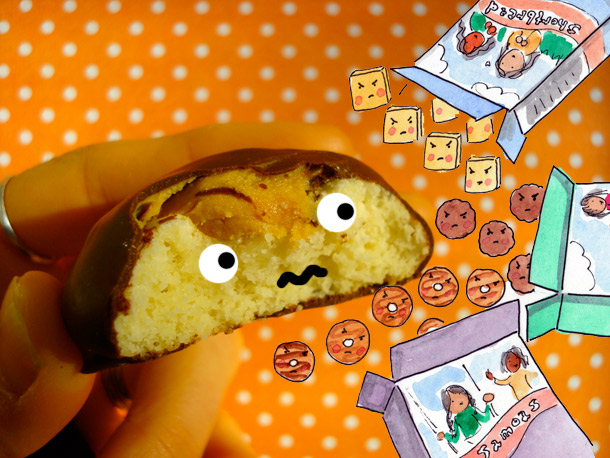
Fact: Samosas and Samoas, while both delicious, are not the same. In a nutshell, the former is a savory snack, often eaten before an Indian meal; the latter is a sweet cookie, sold by Girl Scouts, enjoyed basically any time.

Of course, there's no need to power through this homonym haze in some areas of the country, where these chocolate-coconut-shortbread-caramel confections are known as "Caramel deLites."

But regardless of geography and nomenclature, one thing is for sure: these cookies are tasty little morsels. And when you've reached the end of the box you purchased from your local Scouts, there's a surefire solution for sweet gratification: make your own batch (my recipe is adapted from recipes onBaking Bites and Batter Licker), and call them whatever you want.

Check out the full entry and recipe on Serious Eats!

Gee Whiz: Cinnamon Toast With Cheez Whiz Recipe

If you've ever been plagued by the question "what are they eating for breakfast in North Dakota right now?" I have an answer for you: if it's a special day, probably cinnamon toast with Cheez Whiz. No, I am not kidding. I have it on good authority from locals that this is something that they actually do, without a trace of irony. Curious, I gave it a try, and have to assign it this verdict: it's terrible. It's awful. I couldn't stop eating it.

This recipe is easily doubled, tripled, or quadrupled.

Cinnamon Toast With Cheez Whiz

1 serving

  • 2 slices cinnamon swirl bread (with or without raisins)
  • 2 tablespoons Cheez Whiz

Procedure

Toast the cinnamon swirl bread. Smear each slice with a tablespoon of Cheez Whiz. Enjoy.

Vegans Are Totally Sweet: A Vegan Bake Sale Roundup and Vegan Pie Recipe from Cake Gumshoe Shavon

You know what was awesome? The Vegan Bake Sale that we had at CakeSpy Shop last weekend. In fact, it was such a success that monthly bake sales are in the works! Future events with Bake It In A Cake and The Piecycle coming up in March and April, respectively!

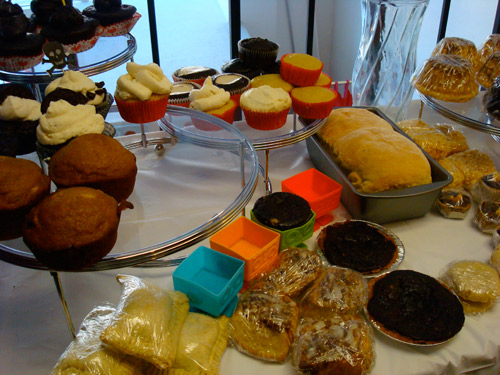
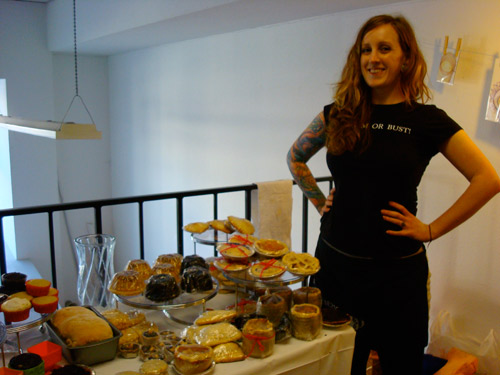
But back to this first lovely one with the talented Shavon Hutchinson, who was raising money with her delicious baked goods to go to Bikram Yoga teacher school. I know, I know. Sounds healthy. But trust me, the baked goods, while vegan, were totally decadent and delicious. Here's just a preview of a few items on offer:

...and they were baked by this adorable girl:

And happily, Shavon has offered up a favorite recipe for your viewing (and baking) pleasure, for some pocket pies!

Shavon's Pocket Pies

PIE DOUGH:
2 1/2c all purp flour 
1 tea sug
1 tea salt

1/2 c organic vegan palm oil shortening
1/2 c vegan "butter" ie earth balance

mix all dry ingredients and put in freezer along with your shortening and butter. it is mui importante to keep all ingredients as cold as possible when making pie dough.

put dry ingredients in food processor and slowly add your butter/short mix til resembles fine bread crumbs. then slowly add 1/4 c ice water. add more ice water 1 T at a time until dough comes together. turn out onto a lightly floured surface and need until all smooth texture. divide into 2 discs, cover in plastic and chill in fridge for at least an hour. 

now you can mix your pie guts. 


BASIC PIE GUT MIX:
2 C prepared fruit (peeled cored sliced) or berries, you can even use frozen fruit here, its ok dont be ashamed...
2 T sugar (i like a mixture or brown and regular)
2 T flour (a little less if using apples or other dryer fruit)
pinch salt
cinn, nutmeg, cloves (if your taste buds so fancy)

mix all together until well combined and let it sit out and get nice and juicey. if using berries i like to mash up a few of em to really get the juices out. and walla...pie guts...

ASSEMBLY:
take your 2 discs of die dough and let em thaw a little so they are more manageable after chilling time. over-worked pie dough is not very fun. use whatever shape cookie cutter or glass top you want to cut out bottom layers and tops. now make an assembly line and fill em up. i use about 1 T filling per pocket. you want to make sure and have enough room to make a seal. once youre ready to top em off then brush the rims with soymilk or water or butter, i like the butter option the best. pich together and make pretty with a fork edge or whatever. place on a parchment lined cookie sheet, sometimes they leak yum!, brush with melted butter, sprinkle with sugar and bake at 375 for about 20min or until golden brown. enjoy!

When Life Gives You Lemons: Very Lemon Drop Cookies Recipe

Some sweet recipes dumb down lemon flavor, overcompensating with sugar to make up for the tartness of the lemon. Not these cookies. Sure, they're plenty sweet, but by using lemon juice, rind, liqueur, candies, and even lemon curd to top them, they've got so much lemon that non-lemon lovers need not apply. But if you do love lemon, then pucker up and get ready to chow down on these sweet-tart treats. Get bonus sweet-sour points by garnishing with pixie stix powder, but it's not necessary; pearl sugar is pretty too.

Lemon Drop Cookies

20 to 24 cookies, depending on size

  • 2 cups flour, sifted
  • 3 teaspoons baking powder
  • 3/4 teaspoons salt
  • 1 tablespoon grated lemon rind
  • 1/2 cup (1 stick) butter, softened
  • 1 cup sugar
  • 1 egg
  • 1/4 cup lemon juice
  • 2 tablespoons lemon liqueur
  • 2 tablespoons water
  • 3/4 cup tart lemon candies
  • Optional: lemon curd, pixie stix, or pearl sugar for topping

Procedure

  1. Preheat oven to 375. Line two baking sheets with parchment paper.
  2. In a medium bowl, sift together the flour, baking powder, and salt.
  3. In the bowl of a stand mixer fitted with the paddle attachment, mix the lemon rind, butter, and sugar, beating until light and fluffy.
  4. Add the egg and mix until incorporated.
  5. Add the lemon juice, lemon liqueur, and water; beat well.
  6. Add the dry ingredients, and beat until incorporated, using a rubber spatula to scrape down the sides of the bowl. Gently fold in the lemon candies.
  7. Using a tablespoon or ice cream scoop, drop mounds of dough onto parchment-lined cookie sheets. Be sure to leave 2 inches around each cookie, for spreading.
  8. Bake for 10-15 minutes, or until just golden on the edges. Let cool, and if desired, top each cookie with about 1 teaspoon of lemon curd. 


Baked, Not Stirred: Fresa Breeze Margarita Cupcakes Recipe from Robicelli's

Who knew? February 22 is National Margarita Day. But how to celebrate? Well, naturally, you should indulge in a margarita or seven. But you'll need something to soak up all of that blissful booze, so may I suggest a Margarita Cupcake? Here's a recipe sent on care of Partida Tequila, developed specially for them by Robicelli's (who you know I have a cake crush on!).

Margarita Cupcakes

Cake
3/4 stick butter, melted & cooled
3 eggs
1/4 heavy cream
1/4 cup Partida Blanco tequila
1 cup flour
3/4 cup sugar
1 teaspoon baking powder
1/2 tsp salt
Zests of 2 limes

Cream cheese frosting
1 tsp Partida Blanco Tequila
1/2 stick butter, softened
1 package cream cheese, softened
3 cups powdered sugar

Strawberry salsa
1 large container strawberries, stems removed and chopped 
1/4 cup seedless cucumber, peeled, seeded and diced
1/3 cup sugar
2 Tbsp Partida Tequila
One Lime, juiced
1/2 teaspoon Sea Salt

Strawberry Salsa:
1.  Combine all ingredients in a bowl and cover with plastic wrap.  Refrigerate for at least 30 minutes.

For Cake:
1. Preheat oven to 350.
2. Beat eggs until well mixed, then add butter, cream, tequila & salt.  Mix until combined.
3. Sift together flour, sugar and baking powder.  Add to wet mixture and stir until smooth.
4. Divide amongst 12 cupcake tins and bake for 16-18 minutes, or until the tops just spring back when touched.

Cream Cheese Frosting:
1.  Beat together tequila, softened butter and cream cheese on high speed until light and fluffy.
2.  Add powdered sugar 1/2 a cup at a time, beating well after each addition.
3.  Once all sugar is added, beat for an additional 3 minutes to incorporate air.

To assemble:
1.  Strain salsa, reserving liquid.  Using a pastry brush, brush the top of each cupcake with the liquid.
2.  Frost cupcakes with the cream cheese & tequila icing.  Using a teaspoon, scoop out an indentation in the middle of each cupcake.
3. Place a heaping spoonful of the strawberry salsa in each indentation.
4.  Garnish with a sliver or lime.

Scouting Sweetness: Homemade Tagalong Girl Scout Cookies for Serious Eats

Once upon a time, Girl Scout Cookies were made by hand, by actual Girl Scouts. They were then sold door to door to teach the girls lessons about marketing and goal-setting.

These days, while the aim is still true—the proceeds go to a good cause—the Tagalongs*, Thin Mints, and Samoas are made commercially, making for confections that arguably fall into "don't confuse the experience with the product" territory.

The solution? Do buy cookies from those earnest young Scouts. But also make a batch of your own for a delicious home-baked treat. Start with these Tagalongs: slightly fatter and more substantial than the Scout version, you'll enjoy each chocolatey, peanut buttery, shortbready bite.

Not into Tagalongs? More of a Thin Mints fan? Make Thin Mints instead »

* In some regions, Tagalongs are packaged under the name "Peanut Butter Patty." Different licensed bakeries that supply the Girl Scouts call the same cookies different names. Wiki up on it here.

For more lore, and the recipe, visit Serious Eats!

Eat Dessert First: Chronicling Breakssert, the Beyond-Cereal Breakfast

CakeSpy Note: This is a sweet dispatch from Cake Gumshoe Shannon Connell, a food and travel writer based in Chapel Hill, NC. Visit her website here.

They say that breakfast is the most important meal of the day. There’s nothing wrong with an old-fashioned plate of bacon and eggs or even a bowl of granola. But, I dare to dream a little bigger, and definitely a lot sweeter — allow me to introduce breakssert.

Breakssert is a collision of savory and sweet, an impatient ode to what traditionally comes as the first and last flavors of the day. It’s starting the morning off on a sweet foot. Breakssert is the reason that saving the best for last is, simply put, a mistake.

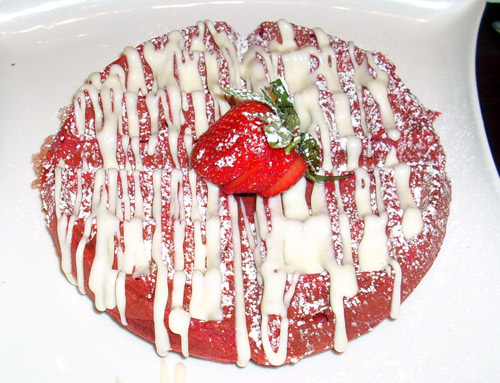
At Terrace Café in Charlotte, North Carolina, they’re getting breakssert right. Their Red Velvet Waffles (pictured top) and S’mores French Toast are enough to make even the most reluctant morning person get out of bed dancing (I know because I am that person).

The Red Velvet Waffle is a crimson grid of sweetness that’s just a tad crispy on the outside but warm and chewy on the inside. If your sweet tooth isn’t quelled by the waffle itself, the cream cheese icing, powdered sugar and a strawberry will seal the deal.

The S’mores French Toast makes any ordinary s’more look plain puny. Chocolate-dipped Texas toast is coated in graham cracker crumbs in a sandwich of chocolate and marshmallowy goodness.

But if you're not in Charlotte, how can you add more breakssert to your life, and fast? Here are some tips. Try your local diner, the non-health conscious, long-time purveyor of sweets and grease. For instance, DeLuca's Restaurant, a famous diner in Pittsburgh, Pennsylvania that has been featured on the Travel Channel’s ever-popular Man v. Food, isn’t shy about serving up gargantuan-sized Heavenly Hotcakes and Waffle Sundaes.
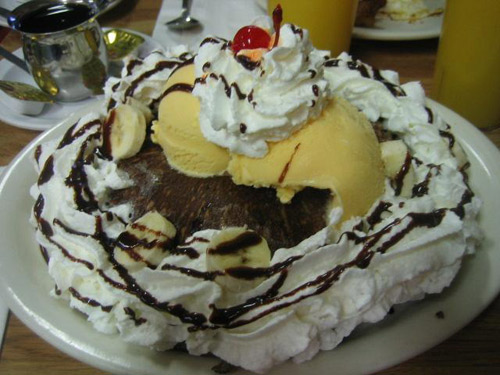
Image: RoadFood.comSo what could be better than a pancake topped with ice cream? Two pancakes filled with blueberries and bananas topped with ice cream, whipped cream, strawberries, honey-roasted pecans and chocolate and caramel sauce. That’s the ingredient line-up for their Banana Split Heavenly Hotcakes. Their other seven variations include the Almond Joy, Reese’s Cup and Funky Monkey – a winning combination of double chocolate banana pancakes, French vanilla ice cream, bananas, chocolate and caramel topping.

You can also bring the concept of breakssert home by incorporating sweetness and innovation into your morning meal. A personal favorite is Crème Brulee French Toast, a simple blend of bread, eggs, sugar and butter. A dash of vanilla and Grand Marnier go a long way to bring a lot of flavor to this dessert-inspired dish from Allrecipes.com.Image: Allrecipes.com

Crème Brulee French Toast

  • 1/2 cup unsalted butter
  • 1 cup packed brown sugar
  • 2 tablespoons corn syrup
  • 6 French bread slices
  • 5 eggs
  • 1 1/2 cups half-and-half cream
  • 1 teaspoon vanilla extract
  • 1 teaspoon brandy-based orange liqueur (such as Grand Marnier®)
  • 1/4 teaspoon salt

Directions

  1. Melt butter in a small saucepan over medium heat. Mix in brown sugar and corn syrup, stirring until sugar is dissolved. Pour into a 9x13 inch baking dish.
  2. Remove crusts from bread, and arrange in the baking dish in a single layer. In a small bowl, whisk together eggs, half and half, vanilla extract, orange brandy, and salt. Pour over the bread. Cover, and chill at least 8 hours, or overnight.
  3. Preheat oven to 350 degrees F. Remove the dish from the refrigerator, and bring to room temperature.
  4. Bake uncovered 35 to 40 minutes in the preheated oven, until puffed and lightly browned. 

Be forewarned! Coffee is a recommended accompaniment to all of the dishes above if you don’t want to enter a post-breakfast food coma. But if you’re looking for a good start to a lazy Sunday morning, breakssert may just be a perfect ingredient.

Dark But Sweet: Bittersweet Chocolate Gateau Recipe from Macrina Bakery, Seattle

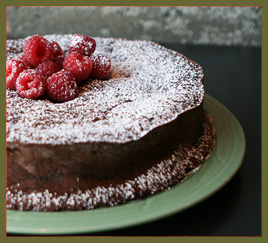
Image: Macrina BakeryTopping the list of things that make you go NOM? Howsabout a big slice of Bittersweet Chocolate Gateau? It's the recipe of the month from Seattle's famous Macrina Bakery, and I don't know about you, but I think it would be a perfect cake to enjoy for breakfast, lunch, dinner, or all of the above.

Bittersweet Chocolate Gateau

  • 10 ounces bittersweet chocolate
  • 9 eggs
  • 12 tablespoons (1-1/2 sticks)
  • unsalted butter, at room temperature
  • 3/4 cup granulated sugar
  • 1/4 cup dark cocoa powder, sifted
  • 2 cups (1 pint) fresh raspberries
  • Lightly Sweetened Whipped Cream (recipe follows)
  • Powdered sugar


Procedure

  1. Preheat oven to 350°F. Oil a 9 x 13-inch springform pan. Set aside.
  2. Chop chocolate into small pieces and place in a small stainless steel bowl. Place bowl on top of a saucepan filled with 2 inches of simmering water, making sure that the bottom of the bowl does not come in contact with the water. It’s important that the water be just simmering; if it’s too hot it will scorch the chocolate. Stir chocolate with a rubber spatula until all of the pieces have melted and reached a smooth consistency. Remove the bowl from the heat and set it on the stovetop to keep it slightly warm.
  3. Separate eggs, placing yolks in a small bowl and whites in a medium bowl. Set bowls aside.
  4. Combine butter and sugar in the bowl of a stand mixer and using the paddle attachment, mix on low speed for 1 to 2 minutes. Increase speed to medium and mix for about 5 minutes more to cream the butter. The mixture will become smooth and pale in color. Start adding the egg yolks, 2 at a time, taking care to mix each addition fully before adding more yolks. Scrape down the sides of the bowl with a rubber spatula as needed. After all of the yolks are incorporated, add the sifted cocoa powder and continue mixing until combined.
  5. Remove the bowl from the stand mixer and fold in the melted chocolate with a rubber spatula. The batter will thicken. Using a whisk or hand-held mixer, whip egg whites until medium-stiff peaks form. Gently fold the whipped egg whites into the batter, one third at a time. Continue folding the batter until there are no visible white streaks; it is important that the whites be fully incorporated into the batter. The final mixture should have a sponge-like texture. Pour the batter into the prepared springform pan and scatter half of the raspberries over the top. Poke the berries down with your fingers until they are just below the surface.
  6. Place pan on center rack of oven and bake for 45 to 50 minutes, or until the center is set. Let cool on a wire rack for 30 minutes. Release the sides of the pan and lift, leaving the cake on the pan bottom. Dust the top of the cake with powdered sugar and garnish with the remaining raspberries. Serve with Lightly Sweetened Whipped Cream. It’s best to enjoy this cake the day it’s baked, but it can be stored at room temperature for up to one day. It will become very dense and fudge-like if kept in the refrigerator.
  7. It's also most excellent with freshly whipped cream!

Power Moves: The Power Cookie by Capers

I feel like we need to talk for a minute about one of my favorite "feels like health food" cookies: The Power Cookie. This beauty is the invention of Capers Markets (a Whole Foods partner in Canada), but luckily, here in Seattle we are close enough that they are readily available in Whole Foods stores. 

You may be tempted, upon looking at it, to think that this oaty, nutty, seedy, granola-y looking vegan (yes, vegan!) lump is kind of healthy. But you'd be wrong. It's delightfully full-of-fat, sweet but not overly so, and feels very indulgent. 

As BFF blog Everybody Likes Sandwiches says, 

The cookies are filling and with all of that good stuff crammed in, I certainly wouldn’t be adverse to calling these a breakfast cookie! While the ingredient list is long, these are simple to put together and they bake up really well too. If you don’t have applesauce on hand, but you do have an apple, just make your own sauce. One large apple should do it.

and -- even MORE awesome -- la belle Sandwich lady has come up with a "Bakery Hack" and made up her own version of the Power Cookie recipe! Since I've had the good fortune of trying her delicious baking, I would say that you could take this one on with confidence.

To find a Power Cookie, visit Whole Foods locations in Seattle or Vancouver (probably in-between, too); to try the recipe, visit Everybody Likes Sandwiches.

Triple Chocolate Nanaimo Bars: A Delicious Valentine's Day Recipe for Serious Eats

Why are forks more popular in February? Because they have Valen-tines!

And happily, there's still time to make up something tasty for those tines: Triple Chocolate Nanaimo Bars. Now, in case you're not familiar with Nanaimo bars, they're a fairly perfect food to begin with: a decadent three-part confection made up of a chocolate graham cracker crust, a (vanilla) custardy middle section, and chocolate topping.

Of course, like so many things, they're even better with more chocolate—and this version, with a rich dark chocolate center and a high quality bittersweet chocolate topping, might just make you fall in love, à la black widow spider, with the whole tray. Hey, nobody says you have to share.

For the full entry and recipe, visit Serious Eats!

Coconut Dream: Coconut Cream Bread Pudding with Chocolate Velvet Sauce

There are some coconut haters out there.

But that's just fine, because that means there's more of this exceedingly decadent coconut cream bread pudding for the lovers to share. 

This delicious dessert comes by way of Paula Deen's The Deen Family Cookbook. As the grande dame of get-fat-quick desserts herself says, "the rich coconut pudding with a nice pool of chocolate sauce all around brings me back to the days when me and Bubba would count out all our change to buy mounds bars on the way home from school". Like a Mounds bar all grown up and decked out in its after-dinner best, this dessert is bound to make you both very fat and very happy.

Coconut Cream Bread Pudding with Chocolate Velvet Sauce

Serves 6

  • One large loaf (16-20 inches) French Bread, cut into one inch cubes
  • 4 egg yolks
  • 2 whole eggs
  • Two 13.5 ounce cans unsweetened coconut milk
  • One 15-ounce can of cream of coconut
  • 1/4 teaspoon salt
  • 1/4 teaspoon nutmeg
  • 2 cups sweetened flaked coconut
  • Chocolate sauce
  • 1 cup semisweet chocolate chips
  • 1/2 cup heavy cream

 Procedure

  1. Lightly grease the bottom of a 9-inch square flameproof baking dish. Arrange the bread cubes evenly. In a large bowl, whisk together the yolks and eggs, coconut milk, cream of coconut, salt, and nutmeg. Stir in 1 1/2 cups of the coconut flakes. Pour the custard over the bread cubes. Press the cubes gently to soak up the custard. Let the mixture stand for about an hour in the fridge (covered).
  2. Preheat the oven to 325 F. Sprinkle the top of the pudding with the remaining 1/2 cup coconut flakes. Cover the dish with foil, poking a few holes so that steam can vent. Place a roasting pan on the oven rack and put the baking dish in it. Pour hot water into the roasting pan to come halfway up the sides of the baking dish. Bake until the pudding is firm to the touch, about 1 hour and 15 minutes. Remove the foil and bake for 15 minutes more. Remove the baking dish from the water bath (carefully!) and run it under the broiler, at least 4 inches from the heat, until golden (1-2 minutes). Let the pudding cool completely.
  3. Make the chocolate sauce directly before serving. Place the chocolate chips in a medium saucepan, and melt on low heat. Pour the cream over the slightly melted chips and continue stirring on low heat until you have a smooth, creamy mixture. Add more cream if desired until it has reached your desired consistency. Drizzle over each serving. 


Better Together: Peanut Butter Cup Pocket Pies

True or False: 

  1. Everything's cuter in miniature form.
  2. Pie is so hot right now.
  3. Peanut butter cups are delicious.

Well, I think we all know the answer to all three, and it's certainly not "false". But when these three truths come together in one adorable pocket pie form, they go beyond TRUE to TRUE LOVE.

That's right: Peanut Butter Cup Pocket Pies!

These sweet morsels are the perfect two-bite treat, and tasty as can be with the can't-lose combo of peanut butter and chocolate, all blanketed between two discs of rich, buttery pie crust. 

They'd be cute as pops too, but I think I actually prefer the stick-less version, because they're easier to "pop" in your mouth. 

Here's how you make them.

Peanut Butter Cup Pocket Pies

Makes 12 2-inch pocket pies


  • 1 9-inch pie crust, unbaked
  • 12 teaspoons (approx.) creamy peanut butter
  • about 36-40 chocolate chips (milk, semisweet or dark chocolate, your choice)
  • 1 egg, beaten (for egg wash)

You also need: a 2-inch (or so) round cookie cutter, small pastry brush

  1. Prepare a baking sheet by lining it with parchment; set to the side. Preheat oven to 400 degrees F.
  2. Roll out your pie crust on a flat, floured surface.
  3. Using a 2-inch (or so) round cookie cutter, cut out as many rounds as you can. It's fine to use other shaped cookie cutters too, but keep it fairly simple (hearts, squares, flower shapes, etc) so that you'll be able to easily seal the pies later. Clump the remaining dough, re-roll, and try to get some more cutouts. If they're kind of ugly, it's ok--use these for the bottom layer of your pocket pies.
  4. Lay out half of the pies on your prepared baking sheet. Place a teaspoon of peanut butter in the center of each, leaving room on the perimeter so you can seal the second half of pie crust on top. Add 3-4 chocolate chips to each, pressing into the peanut butter. 
  5. Using a small pastry brush, brush a small amount of egg wash along the perimeter of each of the peanut butter-filled pie bottoms.
  6. Place the top cutouts on top of each of the peanut buttered and egg washed bottom pieces. Press gently down, and use the tines of a fork to "seal" the pies. I did not vent these on the top. If you want, egg wash the top of the pies too (I didn't, because I forgot. I will be honest.)
  7. Place in the preheated oven; bake for 8-12 minutes, or until golden. 

Gimme S'more: Brownie S'more Pie in a Graham Cracker Crust Recipe

Problem: you're looking a little thin these days.

Delicious solution: Brownie S'more Pie in a Graham Cracker Crust. Yeah, you heard me.

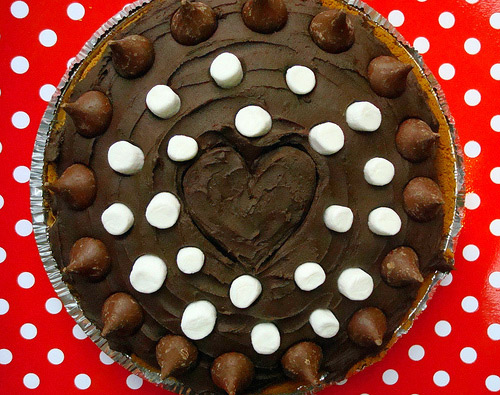
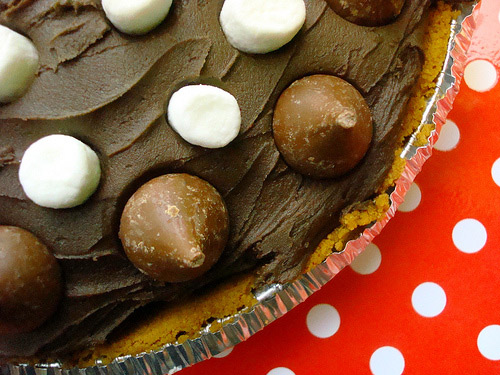
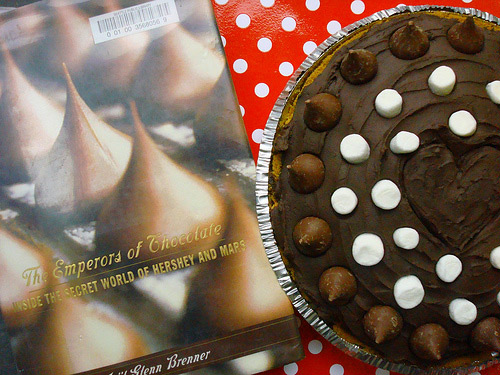
This baby has the better part of a batch of brownie batter baked inside of a buttery graham cracker crust, and is crowned with a big, fat swirl of deep, dark, rich cocoa buttercream and topped with yet more chocolate and more marshmallows for good measure. It weighs many pounds, and each one is a pound of awesome.

While topping it with Hershey's Kisses (inspired by my current reading material, The Emperors of Chocolate: Inside the Secret World of Hershey and Mars) and a heart design is timely, what with it getting dangerously close to Valentine's Day, it's a pretty sure thing that this is what love tastes like all year round.

Brownie S'more Pie in a Graham Cracker Crust

Ingredients

  • 1 9-inch graham cracker crust 
  • 1 batch your favorite brownie recipe
  • 1/2 cup mini marshmallows
  • Hershey's Kisses plus more mini marshmallows, to garnish

For the cocoa buttercream

  • 1 cup (2 sticks) butter, softened
  • 1/4 cup unsweetened cocoa powder
  • 3 tablespoons milk 
  • 1 teaspoon vanilla extract
  • 4 to 5 cups confectioners' sugar, sifted

Procedure

  1. Have your graham cracker crust ready: if you are making your own from scratch, no need to pre-bake. If you're using a store bought variety, just leave it off to the side for the moment.
  2. Prepare your brownie batter per the instructions in your favorite recipe, with one change: fold in the marshmallows once the batter is otherwise ready and mixed.
  3. Pour the batter into the prepared pie shell, filling it about 2/3 of the way full. You may have extra brownie batter; bake it up in cupcake cups, or, you know, lick the bowl clean.
  4. Place the pie plate on top of a cookie sheet (just because brownie recipes can vary, and I don't want it to drip over the pie plate into your oven!).
  5. Bake according to the brownie recipe instructions. Keep an eye on the bake time and check the pie about 5 minutes before the brownie bake time specifies, since you might be using slightly less batter. 
  6. The brownies are done when a toothpick comes out mostly clean -- I would always err on under, rather than over-baking them.
  7. Remove from the oven and let cool completely.
  8. While it is cooling, prepare the cocoa buttercream: in a stand mixer fitted with a paddle attachment, cream the butter. With the machine set at its lowest speed, add the cocoa powder and mix well. Add the milk and vanilla and mix until incorporated. Slowly beat in the confectioners' sugar, starting with 4 cups and adding more until it has reached your desired spreading consistency. Spread the frosting on top of the brownie pie, leaving a little bit of the brownie showing along the edges (pretty!). Top with your extra chocolate and marshmallows.

Note: Do make sure that the frosting is of an easily spreadable consistency. Because brownies have a flaky texture on top, you want to be sure that the frosting spreads with ease and won't bring up too many of the crumbs (that just looks messy!).

Sweet Nothings: Conversation Heart Cream Pie for Serious Eats

I'm pretty sure that I can count on on hand the number of people who genuinely love the taste of Conversation Hearts. And that's when I think really hard.

Conversation Heart Cream Pie, however, is a different story.

Believe it or not, letting those sugary-chalky lumps steep in milk before making a cream pie custard filling actually does yield a surprisingly toothsome (if slightly tooth-decaying) pastry product. No, it's not fine dining—it's best described as vanilla cream pudding pie punctuated with melty, pastel sugar cubes—but it goes down much easier than you'd think, especially when crowned with a cloud of freshly whipped cream.

For the full entry, recipe, and more pictures, visit Serious Eats!

Whole Hog: Groundhog Day Cake for Serious Eats

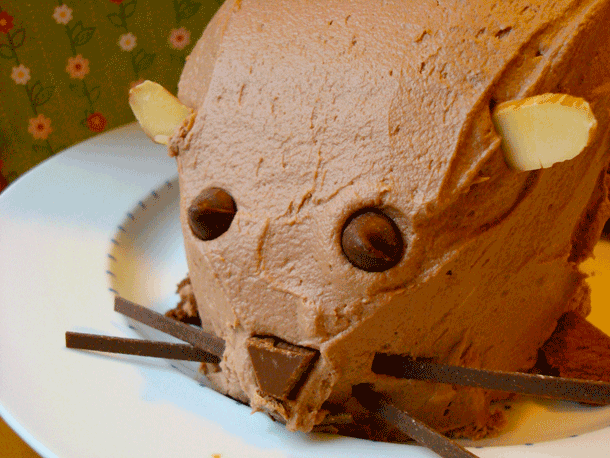
My family has an unusual tradition: we celebrate Groundhog Day. In a completely non-ironic way. And to herald the occasion, there is always a cake-homage to the skittish little critter.

Why? Well, my dad is a surfer, and he carefully follows Punxsutawney Phil's yearly emergence. If he does not see his shadow, it means spring is coming, and thus surf season will come sooner. And also because, well, cake is very delicious.

Of course, no matter whether you're in a rush for spring to come, it's a pretty sure thing that this Groundhog-themed cake will brighten your day—and the remaining crumbs will cast minimal shadows.

For the full entry and recipe, visit Serious Eats!

Have Some Funfetti: Funfetti Pancakes for Serious Eats

Fact: half of the word "pancake" is comprised of the word "cake". Actually, if you want to get really technical, it's slightly more than half.

And in celebration of bringing more cake to the pan, I'd like to present my newest invention: Funfetti Pancakes.

By lightly modifying a typical cake mix, you can make your own DIY pancake mix; the resulting pancakes are light and fluffy, but sweeter (and in this case, more colorful) than the typical griddle fare. Top them with jam, syrup, or even cake frosting for a morning treat that tastes like sweet fun.

For the full entry (and recipe!) visit Serious Eats!

Crispy, Creamy, Gooey: Caramel Pudding Pie in a Rice Krispie Treat Crust

Guess what? Today is National Pie Day. Why today? I don't have a good answer for that, but when I have given you a perfectly good reason to eat pie, your follow-up question shouldn't be "why", but "why not?" and the only thing you should really be concerned with is how you'll celebrate.

Happily, in Seattle, there's an annual Pie Day Party in the Ballard neighborhood; however, even if you're nowhere near Seattle, you can still enjoy this extremely easy and incredibly delicious recipe for Pudding Pie in a Rice Krispie Treat Crust (which, incidentally, is what I will be bringing to the party). Though I used caramel pudding, you could use any flavor you like (vanilla, chocolate, butterscotch, or even pistachio sound good to me) -- either way, the resulting treat, which has a satisfying mix of crunchy, gooey, and creamy textures and flavors, is good to the last bite.

Pudding Pie in a Rice Krispie Treat Crust

Serves about 8

 Ingredients

  • 1 batch Rice Krispie Treat Batter
  • 1 batch instant pudding (3.3 ounce size box)
  • optional: mix-ins for your pudding (chocolate chips, caramel sauce, coconut flakes, etc)

 Procedure

  1. Prepare your pie plate by buttering it generously (the slices can be hard to remove if you don't).
  2. Make Rice Krispie treats as you usually would, in the microwave or on the stovetop; however, instead of pressing the mixture into a square pan as usual, press it into your pie plate, pressing the mixture down on the bottom and up the sides, holding a piece of waxed paper to press so the mixture doesn't stick to your hands. You might not use all of the treat batter; if not, press the remaining mixture into small ramekins or form into Krispie balls to enjoy later.
  3. Let the crust cool completely.
  4. Prepare your instant pudding (typically by whisking the pudding and 2 cups cold milk together until it starts to thicken); if desired, add a handful of chocolate chips, a swirl of caramel, or whatever mix-ins you'd like. Spoon the pudding into your pie crust and keep refrigerated until you're ready to serve it. Ideally, let the pie set for about an hour before serving so the pudding can completely thicken.
  5. Use a very sharp knife to slice, to ensure that you cut through the krispie treat crust; serve using a cake server.


Feather in Your Cappuccino: Cappuccino Tapioca Pudding with Cardamom Brulee Recipe

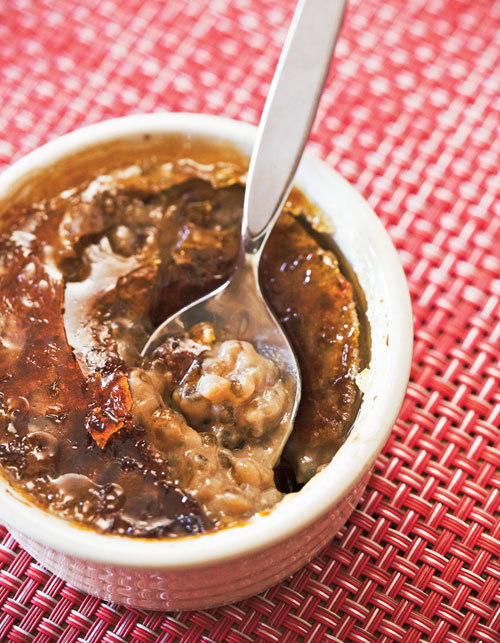
FACT: Pudding is delicious. So why is it that so many home bakers, undaunted by baking cakes, cookies, or even pie crust, are scared to make it?

Could it be they're scared of the dreaded scrambled eggs effect of adding eggs to the hot liquid? Or is it just that it's so much easier to add cold milk, mix, chill, and serve? (Bless you, instant pudding!)

Well, in the new book Serve Yourself: Nightly Adventures in Cooking for One by Joe Yonan, one of the goals is to stress that pudding is something you can (and should) do at home. Don't believe me? Here's a recipe that the publisher was kind enough to share! Sounds good to me!

Cappuccino Tapioca Pudding with Cardamom Brulee
Makes 6 (1/2-cup) servings
  • 3 cups milk, preferably low-fat
  • 1/3 cup small pearl tapioca
  • 1 tablespoon instant espresso powder
  • 2 egg yolks, whisked to combine
  • 1/4 teaspoon fine sea salt
  • 1/3 cup plus 2 tablespoons sugar
  • 1/2 teaspoon ground cardamom
  1. Pour 1 cup of the milk into a heavy saucepan. Add the tapioca and let soak for at least 30 minutes.
  2. Pour the remaining 2 cups of milk into a mixing bowl or glass measuring cup, sprinkle the espresso powder over, let it sit for a minute or two, and then stir to dissolve.
  3. Whisk the espresso-milk mixture into the tapioca mixture, along with the egg yolks, salt, and 1/3 cup of the sugar. Over medium heat, slowly bring the mixture just barely to a boil, stirring constantly; it will take 10 to 15 minutes. Reduce the heat until the mixture is barely simmering, and continue cooking the tapioca, stirring occasionally, until the beads swell up and become almost translucent and the custard thickens, another 15 to 20 minutes.
  4. Remove from the heat and let it cool. Spoon the pudding into 6 individual 1/2- cup ramekins and wrap each in plastic wrap, pressing the plastic directly onto the surface of the pudding to prevent a skin from forming. Refrigerate until chilled. It will keep it the refrigerator for several days or in the freezer for up to 2 months.
  5. When you are ready to eat, unwrap one of the ramekins of pudding (thaw it first if frozen), and sprinkle the top with 1 teaspoon of the remaining sugar and a pinch of cardamom. Use a small culinary blowtorch to caramelize the sugar on top, keeping the torch moving so you deeply brown but don’t blacken the sugar, then eat.

Reprinted with permission from Serve Yourself: Nightly Adventures in Cooking for One by Joe Yonan copyright © 2011. Published by Ten Speed Press, a division of Random House, Inc.

Photo credit: Ed Anderson © 2011

Let it Snow, Man: Snowman Cupcakes from Bredenbeck's Bakery, Chestnut Hill, PA

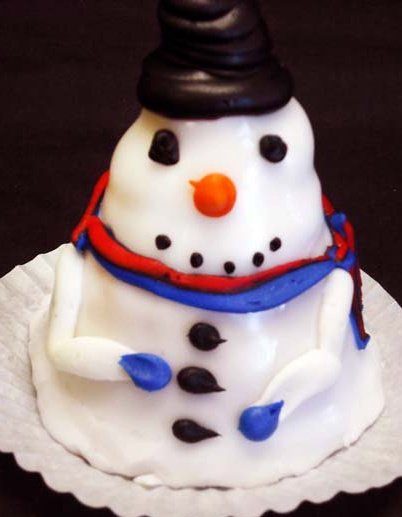
Winter got you down? Well, here's a way to add some sugar to the cold, dark days: Snowman Cupcakes!

Snowman-ify the cupcakes of your choice with this super-easy tutorial from Philadelphia's Bredenbeck's Bakery--not only is it easy, but it's fun and delicious when you're snowed in.

Here's how you do it.

You’ll need:
  • A dozen of your favorite cupcakes
  • 16 oz. vanilla icing
  • 22 oz. (two packages) white chocolate chips
  • Red shoestring licorice, black gel icing, candies for decorating
  1. Start with your favorite cupcake recipe and bake according to instructions
  2. Flip your cooled cupcakes upside down, and spoon a dollop of icing on top to add height
  3. Place the iced cupcakes in the freezer until icing is firm
  4. Melt white chocolate in a double boiler
  5. Place frozen iced cupcakes on a wire rack
  6. Spoon melted white chocolate over top of iced cupcakes, allowing excess to drizzle through wire rack
  7. Wrap a few pieces of shoestring licorice around for a scarf, create a face, nose and buttons using the black gel icing and candies.

Of course, if you make them, share your pictures with them on the Bredenbeck's Facebook Page for sweet snow day fun!


Mix it Up: Funfetti Cakelets in the Toaster Oven

Picture this: you've just filled up a cake tin's worth of cupcakes, and you have a dollop of batter left. What to do?

Now, you may think that the possibilities stop at A) Swipe it with your finger (or a spatula) and eat it...or B) Put it in a cupcake liner and bake it all by its lonesome.

Now, these are respectable options, for sure. But I'd like to present another option: bake it in the toaster oven.

I did this recently, and while I wouldn't call it an amazing success, it was thoroughly eatable, and a great sweet fix in a pinch (or late at night, when these things seem like a great idea). And it sure was fun to do.

Here's how I did it.

Toaster Oven Cakelets

 Ingredients

  • 1 dollop leftover Funfetti batter, prepared per box instructions
  • a piece of aluminum foil to bundle it in

Procedure

  1. Place your dollop of cake batter on the center of the aluminum foil. Bunch the sides up around it, to form walls so that the batter won't seep through.
  2. Place the wad in the toaster oven and toast (you heard me, toast) it on medium heat (350 if you have such settings) until it is browned on top, about 15 minutes. Lightly peel away the foil from the side to see if it is baked through. If so, remove from toaster oven, cool, and top with frosting, a dab of ice cream, etc, and enjoy.