Good Fish: Goldfish Bowl Cookies Tutorial

So, recently I received a review copy of a book called Good Fish: Sustainable Seafood Recipes from the Pacific Coast by Becky Selengut.

Now, I know why I received a review copy. It is because it was put out by the same publisher of my soon-to-be-released book, entitled CakeSpy Presents Sweet Treats for a Sugar-Filled Life, which I might add is available for pre-order (nice plug!). It is also because I am a fan of Becky, who is not only a razor-sharp wit, but a heck of a cook, and a valued customer of mine (she used my cards for her wedding thank you cards, so she is guilty of very good taste).

But here's the thing. There's not one dessert recipe in the entire book. There are quinoa cakes, but of the savory persuasion. But everyone knows that savory cakes are just a good way to warm up your belly for sweet cakes.
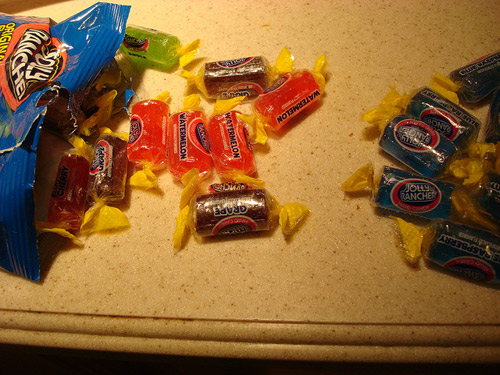
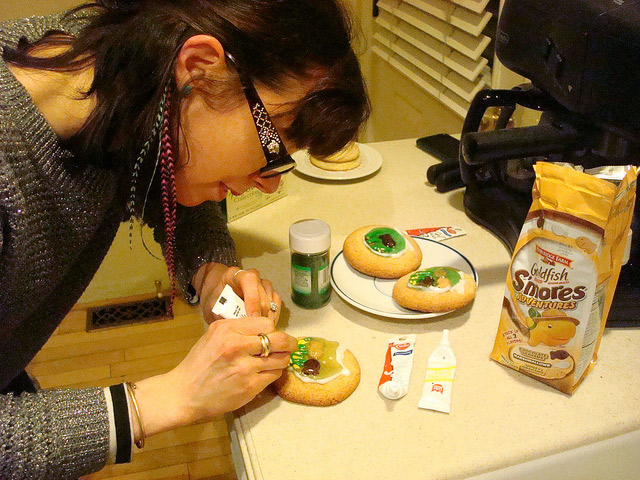
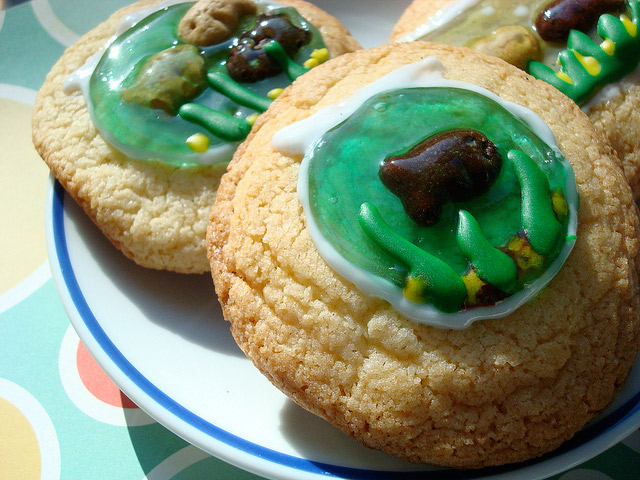
So, in Becky's honor, I have created these goldfish-bowl cookies. Employing melted jolly ranchers form a translucent "bowl" over the goldfish crackers which are then finished off with writing icing, these cookies may look fishy, but taste anything but. While I would be lying if I said the jolly rancher taste was totally harmonious with the sugar cookie, it does make them awfully cute, and you can pull off the decoration before eating if desired.
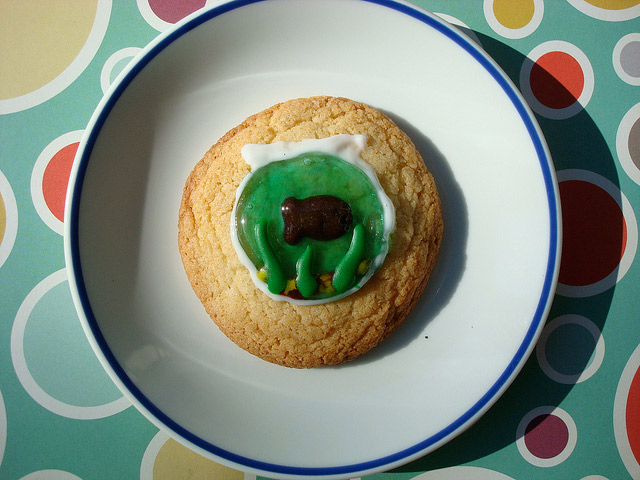
Goldfish Bowl Cookies

 You need:

  • 12 jumbo sugar cookies, about 3 inches in diameter
  • Blue Jolly ranchers or translucent blue or clear candies (about 2 per cookie)
  • Goldfish Crackers (I used the S'more variety)
  • writing icing in various colors, for decoration

 Procedure:

  1. Lay your cookies in a row, and position the goldfish on each cookie in advance.
  2. Get out a small dish. Put about 4 of your candies in it at a time (you can do about 2 cookies' worth at a time; do more and it will get hard too fast). Microwave at medium heat until melted (for me, about 20 seconds). Holding the bowl carefully (you might want a mitt or something to protect you, because it will be hot), pour the candy directly on top of the positioned goldfish, using a spoon to smooth the candy into a circle. Work quickly because the candy will harden rapidly.
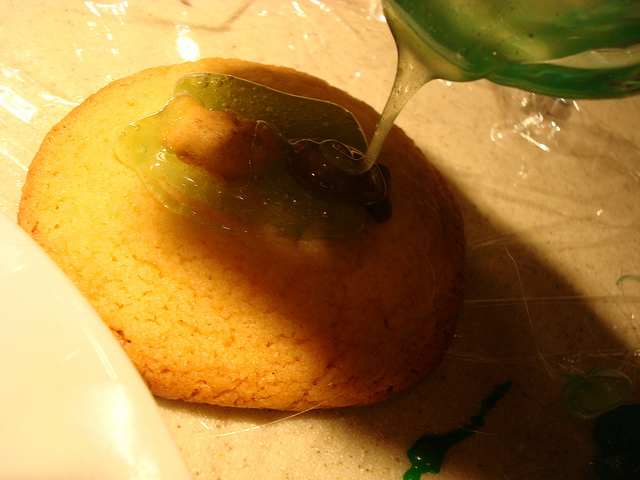
  3. Repeat, melting candy in small batches, until all of the cookies are done.
  4. Once the candy is hardened, use writing icing to form the bowl shape more clearly, and to add little fronds or pebbles in the "bowls".Decorating is more fun when you have feathers in your hair.
  5. Serve to your delighted friends after dinner, preferably something like this "heart-stoppingly delicious" dungeness crab mac and cheese from Becky's book, which can be purchased here.

Sweet Honey: Homemade Honeycomb Recipe from Cake Gumshoe Victoria

CakeSpy Note: This is a totally sweet guest post from Singapore-based Cake Gumshoe Victoria, who blogs here.

Honeycomb; noun: A wax structure made by bees featuring hexagonal cells where they store eggs and honey.
Sounds a little... gross.

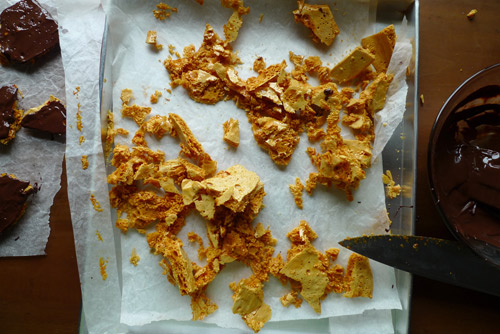
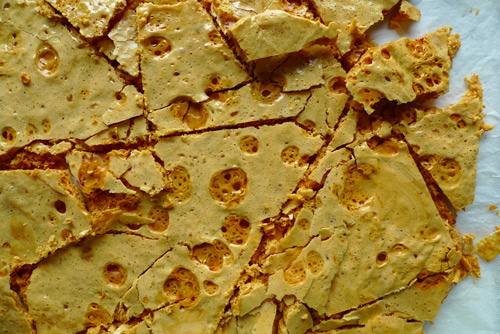
Honeycomb; delicious: An amalgamation of honey, sugar and glucose lifted to bubbly heights with the addition of baking soda. Promises to melt into almost nothing when you crunch into it. Much better and made even better when coated in dark chocolate. It’s like a whole fleet of honeycomb pieces entering a diving competition.
 
My first encounter with the confection was when my sister introduced me to Violent Crumble; similar to Crunchie. It was strange, like cotton candy, it looked so large yet dwindled into sugar sweet nothing in your mouth with only an aftertaste of honey lingering. I’m not even sure it was real honey now that I think of it. Their ‘pores’ were uniform, definitely not hexagonal and much smaller than the ones found in homemade honeycomb. I wonder how they did it.
 
So today I decided I’d try my hand at making my own. It’s simple enough, starring only a few main characters; sugar, honey, glucose and baking soda. It starts with a big pot, a minor effort of stirring and a huge uproar of sugar-ness rising once the baking soda comes into contact with the hot caramel-like liquid. It’s pretty fun to watch, like a school volcano project, only this time, completely edible.
 
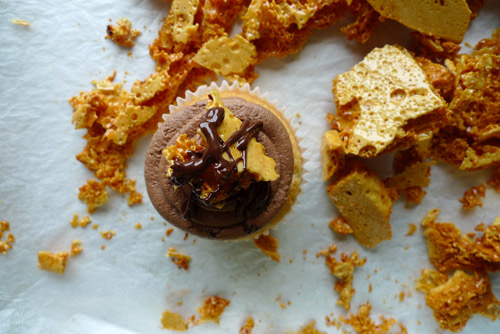
They’re great covered in dark chocolate, or if you’re feeling quite hardworking, bake a batch of cupcakes and use these babies as their crowning glory.

Honeycomb
(from Home Cooking by Rachel Allen)
  • 1 tsp sunflower oil
  • 325g caster sugar
  • 50g honey
  • 125g glucose
  • 1 tbsp baking soda
  1. Line a large baking tray with parchment paper and grease lightly with the oil.
  2. Place the sugar, honey and glucose in a large pot. Add 4 tablespoons of water and bring to a boil over high heat. Stir until the sugar dissolves and stay away once it does; just let it boil in peace. Simmer, without stirring, for 5-10 minutes or until it reaches 149°C (300°F).
  3. Immediately remove from heat and quickly whisk in the baking soda. The mixture will grow very quickly. Pour into the prepared baking tray, swirling to spread the mixture evenly. Leave to cool completely before breaking into chunks and shards. Store in an airtight container.
For chocolate coated honeycomb chunks, melt 150g of chocolate in the microwave and then after it’s cooled down, spread it evenly with a spatula over the honeycomb pieces or just let them plunge into chocolate heaven. Leave to set completely on baking paper.
 
For more great recipes, visit Victoria's blog!

Sweet Innovation: Cupcake-Stuffed Strawberries by 1 Fine Cookie

Photo: 1finecookieSo. It's been proven that cupcakes are better when stuffed with things. Truffles, mini pies, even cupcakes!

But what about when you stuff cupcakes in other stuff? 

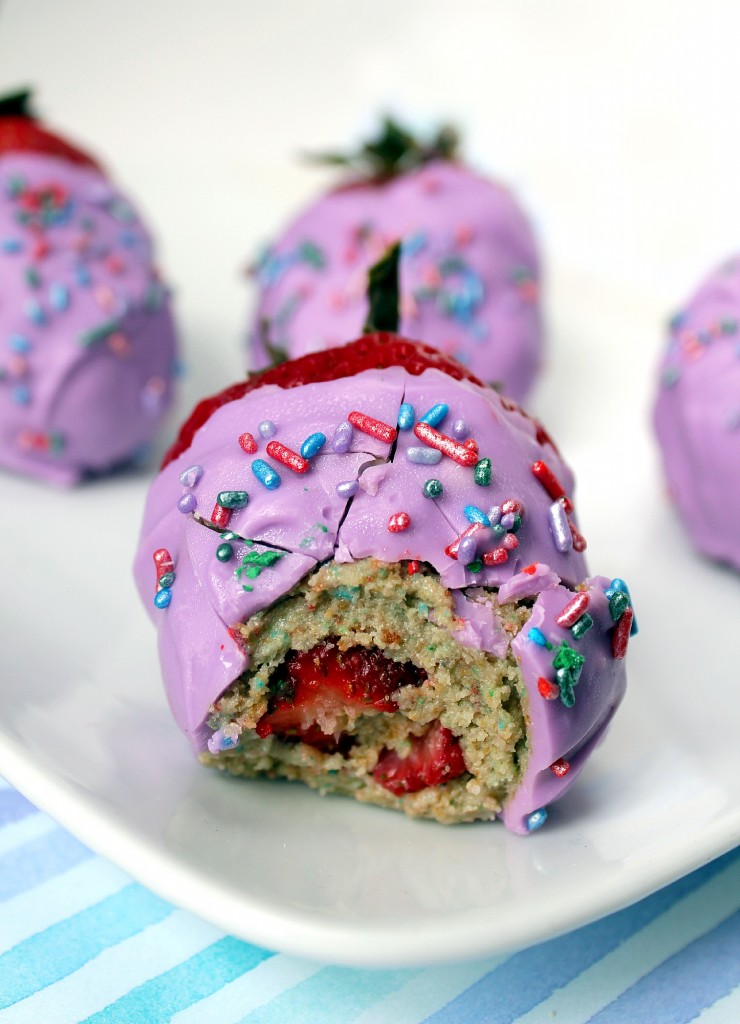
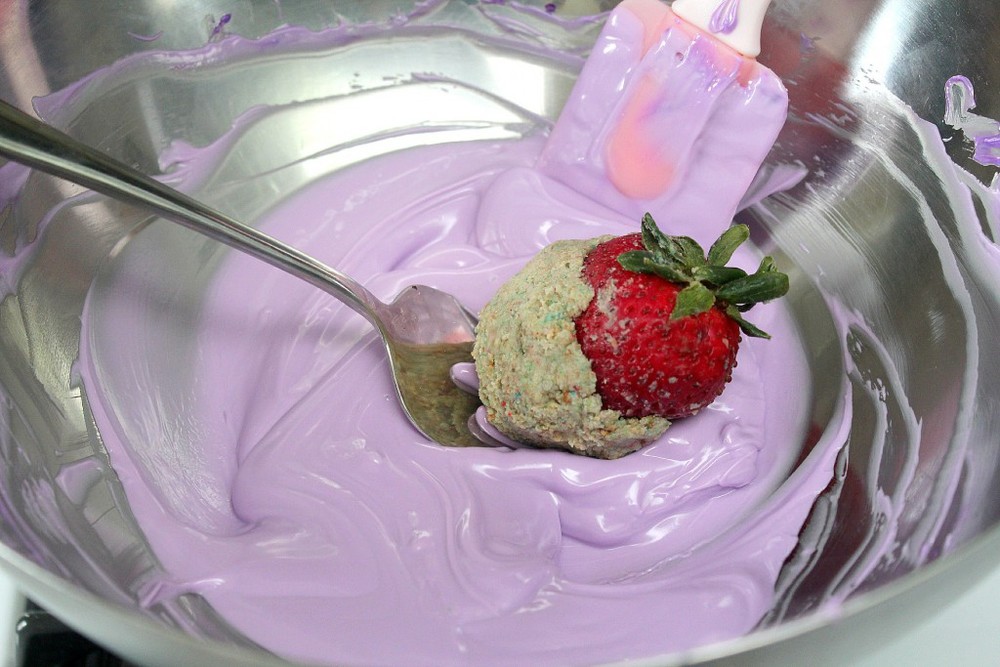
Photo: 1finecookieTime to meet the greatest cake innovation that has ever met health food: cupcake-stuffed strawberries, dreamed up by my new favorite website, 1 Fine Cookie. A clever riff on cake truffles, these babies start with strawberries which are cut at the bottom to let the delicious cupcake-and-frosting slurry in, and then coated in chocolate or candy wafer coating; the result is extreme deliciousness and decadently addictive, not to mention clever as all get-out.

For the full tutorial and recipe, visit 1finecookie.com.

Magic in the Middle: Truffle-Stuffed Cupcakes Recipe for Serious Eats

Chocolate cupcakes are pretty great. But there's a way to make them even better: stuff 'em with truffles. We originally got the idea from Reddit.

It's an easy and quick addition: simply drop a chocolate truffle in each treat before baking. The rewards are many. The gooey little chocolate center not only adds a decadent richness to the cake, but also keeps it deliciously moist.

Note: What kind of truffles? I used Godiva Gems; while I haven't tried this recipe with other truffles, I feel as if it would work well with most truffles containing a more solid filling such as ganache, coconut, or caramel (avoid liqueurs and soft or oozing fillings).

Note: With half of the batch, I took care to ensure each truffle was fully covered with batter; with the other half, I simply dropped the truffles in the center of the cup before baking. The outcome was the same with all of the cakes: the truffles would sink to the lower center of the cupcake either way.

For the full entry and recipe, visit Serious Eats!

Saltwater Sweetness: Saltwater Taffy Cream Pie Recipe

Now, you may not know this, but I hail from a magical land called New Jersey. And in that magical land, there is a magical snack that gives residents along the shore their secret, magical New Jersey powers. That snack is called Saltwater Taffy (and at this point, no, you are not invited to ask any follow up questions).

Now, the name may be misleading. This taffy doesn't actually contain saltwater, but instead is called such because it was popularized by the shore in Atlantic city in the late 1800s-early 1900s, and has been associated to a close proximity to the sea ever since. Dig?

But what is true is that it is a singular sensation of a confection: mellower and creamier than hard candies, with a texture that begs you to slowly savor rather than suck and bite. 

I don't know about you, but that's all I needed to decide it would make a great addition to a cream pie.

So here it is for you, friends: a modern marvel that I'm calling Saltwater Taffy Cream Pie. YES!

Saltwater Taffy Cream Pie

  • 1 9-inch pie crust (unbaked) - I tried out the Grand Central U-bake Crust, which I recently received a sample of, and it worked great!
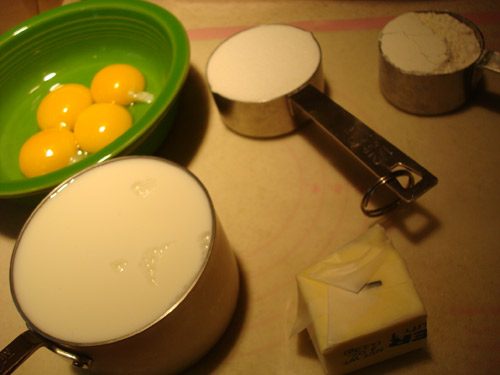
  • 1/2 cup plus 4 tablespoons sugar, divided
  • 1/3 cup all purpose flour
  • 1 1/2 cups milk
  • 4 large eggs, separated
  • 1/4 cup (1/2 stick) butter
  • 2 teaspoons vanilla, divided
  • 30 or so taffy candies (about 15 for the filling and as many as you'd like to garnish)
  • 1/4 teaspoon cream of tartar
  • 1/8 teaspoon salt

Procedure

  1. Preheat the oven to 400. Bake the pie crust 8-12 minutes (using pie weights), or until lightly brown. Set to the side to cool.
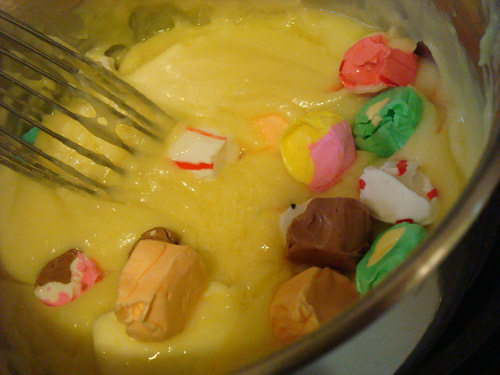
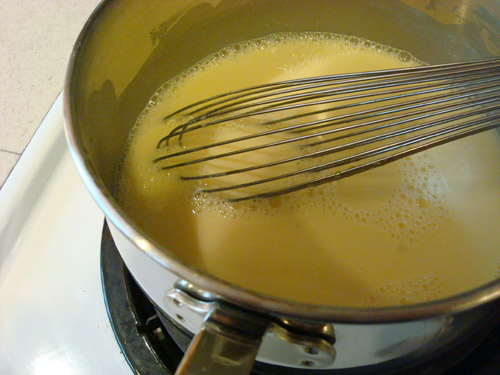
  2. In a medium saucepan, mix 1/2 cup sugar and the flour. Add the milk and stir until dissolved. Add the egg yolks and mix very well. Cook over low heat, stirring constantly, until thickened--this was about 15 minutes in total for me. Remove from heat and stir in the butter, 1 teaspoon of vanilla, and 15 or so of your taffy candies (um, unwrapped please). They may make bright swirls in the filling, which is...not necessarily pretty or appetizing. Power through it. Cool the mixture, and pour into the prepared pie crust.
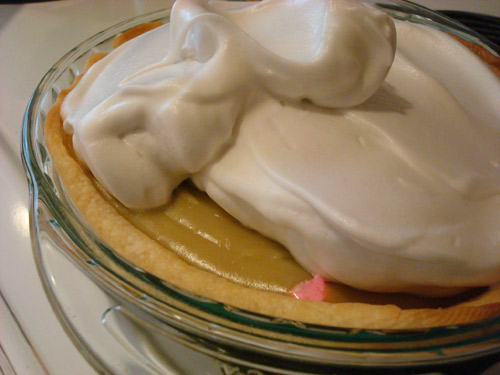
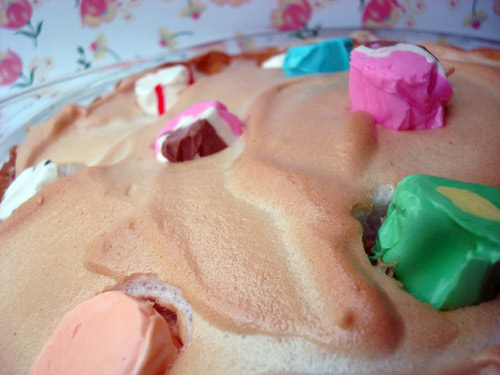
  3. In a large bowl, beat the egg whites on high speed with an electric mixer, til stiff but not yet glossy. Sprinkle the cream of tartar and salt on top, and beat lightly. Slowly add the remaining sugar and 1 teaspoon vanilla, beating constantly until the meringue forms soft peaks and a nice glossy sheen, kind of like the consistency of shaving cream. Spread over the pie. Reduce oven heat to 325. Bake 8-12 minutes, or until lightly browned. I found that to brown evenly, it helped to shift the plate halfway through baking. Remove from the oven and let cool on a wire rack. Once cool, dot the top with extra taffy, if desired. Refrigerate leftovers.

Getting Loopy: Froot Loop Whoopie Pies Recipe from Munchin With Munchkin

Photo: Muchin With MunchkinCakeSpy Note: This is a guest post from Cake Gumshoe Christine, who blogs at Munchin With Munchkin. Let the NOM begin:

The first time I had a whoopie pie was 15 years ago and completely by accident. I had found a sandwich cookie recipe in one of my mother’s cook books and begged her to make it with me. I remember the chocolate cookies being moist like cake and the icing tasted like no other. We only made them once as the cookbook was lent to a friend and never seen again.

I would dream about those cookies and subconsciously was on the hunt for another fresh batch. Every recipe I tried after that became a horrid mess of typical vanilla icing and cookies that in no way resembled cake. Years later the whoopie pie trend emerged and I finally re-discovered that magical cookie of my childhood.

One evening, after being horribly nostalgic, I picked up a box of fruit loops as a late night snack. The first bite yielded memories of elementary school and early morning chaos. By the second bite I had a revelation! The mysterious taste of fruit loops was no longer a mystery!

I ran to my spice cabinet and searched through the endless glass bottles until I found one in particular; cardamon. The spice that only  saw the light of day during a curry cook-off was the secret ingredient in my childhood cereal!

Upon this discovery I began to imagine all the new baking possibilities. Cardamon rice pudding, cardamon lime pie, cardamon cake, and that’s when it hit me; Fruit Loop inspired whoopie pies. Combining cardamon cookies with a light and fluffy fruit flavoured icing would make everything wrong in the world right. So today I say farewell to my diet (at least for now) and hello to orange and green coloured carbs.

Froot Loop Whoopie Pies

Cookies

  • 1 cup granulated sugar
  • ½ cup vegetable shortening
  • 2 eggs
  • 2 cups all purpose flour
  • 1 ½ Tsp. baking soda
  • ½ Tsp. salt
  • 1 cup buttermilk
  • 1 Tsp. vanilla extract
  • 1 Tbsp. ground cardamom

Lime Filling

  • ½ cup vegetable shortening
  • ¾ cup powdered sugar
  • ½ cup marshmallow cream
  • ½ Tsp Vanilla
  • 1 Tsp. Lime zest
  • 1 Tbsp. fresh lime juice

Mandarin Filling

  • ½ cup vegetable shortening
  • ¾ cup powdered sugar
  • ½ cup marshmallow cream
  • ½ Tsp Vanilla
  • 1 Tsp. Mandarin zest
  • 1 Tbsp. fresh mandarin juice

Procedure 

  1. Preheat Oven to 350.
  2. Line a baking sheet with parchment paper and spray with cooking oil; set aside. (Or alternately use a whoopie pie pan)
  3. In a large bowl cream together the sugar with ½ cup shortening using an electric mixer. Add eggs and continue to mix until well combined.
  4. Add flour, baking soda, salt, buttermilk, vanilla and cardamon and blend on low speed for one minute. Increase speed to medium and continue to mix for an additional two minutes ensuring to scrape down the sides.
  5. Scoop one tablespoon of batter onto the prepared pan about an inch apart. Bake in the oven for 8-10 minutes until no indentation appears when the top is lightly touched.
  6. Let cool on cookie sheet or in whoopie pie pan for two minutes and then transfer to a cooling rack until cooled.
  7. While cookies are cooling prepare the filling. Combine all ingredients in a medium bowl. Using an electric mixer beat on low for one minute.
  8. Add desired amount of food colouring, increase speed to high and continue to beat for an additional two minutes. Refrigerate until ready to use.
  9. To assemble cookies place a dollop of icing on the centre of the flat side of one cookie. Top with another cookie and press gently together to evenly spread the icing. Repeat for all cookies.


Makes about 20 sandwich cookies

Cinco de Sweet Mayo: Cinnamon Sugar Dessert Chips With Fruit Salsa Recipe

Everyone knows that chips and salsa are an ideal accompaniment to margaritas and a delicious precursor to a Cinco de Mayo meal.

But what about giving them a sweet makeover to continue the party post-dinner?

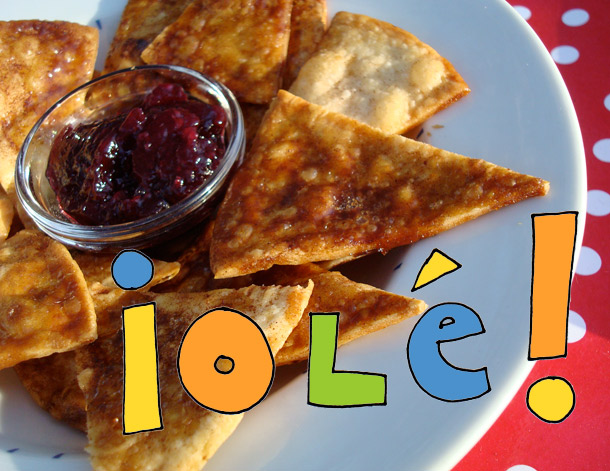
Say hello to Cinnamon Sugar Dessert Chips with Fruit Salsa, a dish wherein plain flour tortillas are brushed with a decadent cinnamon-flecked brown sugar and butter mixture and baked until crispy, then served with fruit preserves. Like its cousin Pie Fries, this dish is a snap to prepare and makes for some sweetly addictive eating.

For the full entry and recipe, visit Serious Eats!

Pie Slam Profiles: Pake Recipe and Story by Alexander

CakeSpy Note: This is part of a series of Pie Slam Profiles, featuring the recipes and stories of each of the 9 entrants in last week's Pi(e) Day Pie Slam! This entry came from Alexander, who made the ultimate dessert: a Pake (a pie baked into a cake!). Here's his story:

 Though we all know of Thomas Cake, know the holiday and have seen the statues of him, most do not know his humble beginnings.

As a young cupcake Thomas attended a mostly pie school. The tartlets would all surround him, throw pits at him, mock his egg content, pull at his ruffled cupcake clothes and call him nothing without frosting.

Thomas hoped to find a friend in the also maligned Concord grape tartlet but Concord’s cruelty ran deepest of them all. He’d shove Thomas into the wet dirt, calling him a mud pie.

The adult pies would look the other way, saying things like “Tartlets will be tartlets,” and “that little cupcake just needs a thicker crust.”

As Thomas grew older, almost a full sized cake, he began stuffing himself with cherries to try and fit in with the pies. But his cake brethren despised those of their kind who filled themselves with fruit, for nothing was more reviled than a fruit cake. Once, his father caught him hiding cherries and shouted, “You are not my son! I didn’t raise a black forest cake! I raised a good, simple chocolate cake!”

 But the political winds were changing: At a national level, the cakes formed an alliance with the also oppressed crumbles, a sizable minority that usually sided with the pies, but were sick of playing second fiddle to them. In a violent coup, cakes and crumbles overthrew the ruling pie majority and secured power through brute force. The now ruling Cake Party banned pies from appearing at Thanksgiving and the pumpkin pies wept.

At first, Thomas reveled in the power of his new social status. He need only threaten to report his pie classmates to the ruling party and he would get whatever he wanted.

But one day, Thomas saw Concord pie by a big mud puddle. As Thomas lifted Concord by the scruff of his tin, intending to make Concord eat humble pie, the Apple pies guffawed in anticipation, their cruel laughter reminding Thomas of his position only weeks before. Instead he gently lowered Concord to dry land and asked, “Can’t we all just get along?”

From then on, Thomas became an advocate for downtrodden desserts. Pie, cake, brownies, cookies clafouti and even donuts soon marched to his rallying cry of dessert equality. Even the soufflés rose to the occasion.

 The King Cake feared Thomas’ 350 degree rhetoric. One day, Thomas simply disappeared, never to be seen again. Rumor had it, the King Cake had personally stabbed Thomas in the back with a cake server, but most believe he was simply dumped in a compost pile and left to rot.

But, Thomas’s ideas live on! The next time you think of ordering a cake for a birthday or consider entering a pie into a fair, remember Thomas’s teachings! Consider instead, a panna cotta or maybe even a Pavlova. Don’t be slave to your sweet preconceptions! Remember, our enemies are not the pies or the cakes but the soups, the salads, the main course, the Atkin’s Diet! Sweet solidarity!

Chocolate and Cherry Pake

Crust:
  • Make a "sturdy" pie crust. I usually follow Ken Haedrich's food processor recipe from his book "Pie."
  • 2 3/4 cups all purpose, 1 tablespoon sugar, 1 teaspoon salt, 2 sticks cold butter, 1/2 cup cold water. Follow standard crust directions, but mix two egg yolks into the cold water to make the crust sturdier.
Pie Filling:
  • 1-1/2 lb. Bing cherries, pitted (4-1/2 cups)
  • 1 cup  sugar
  • 1/4 cup MINUTE Tapioca
  • 1 Tbsp.  lemon juice
  • 1/4 tsp. almond extract
  1. Mix fillings and let sit for 15 minutes, Fill crusts and bake at 400 for 45-50 minutes.

Cake Batter:


  1. Make a basic chocolate cake batter. I usually use something similar to this (a decently sturdy cake, not the total fall apart cake on the back of Hershey's Cocoa Powder box (a surprisingly good recipe):
  2. Prepare two cake pans. Pour just enough batter to cover the bottom of one pan, then place the cherry pie into it. Drop the pan on the counter to remove air bubbles and to settle the pie in the batter. Just barely cover the exposed top of the pie with batter. Pour the remaining batter into the other pan.
  3. Bake. The cake pan with the pie will take much longer as the pie is absorbing most of the heat (especially if the pie has already cooled.) Remove the normal pan when it's done, remove the pie/cake pan when it's slightly underdone. Let both cool, then cut the normal cake layer into two or three layers (depending on the thickness.)


Frosting:


  • Make a buttercream  (1/2 cup butter, 3 1/2 confectioner's, 1 pinch salt, 1 teaspoon coffee or espresso.)


To assemble:


  1. Place the cake enclosed pie as the bottom layer. Frost with butter cream. Place a normal cake layer on top of it. Frost and sprinkle with cherries and cherry kirschwasser. Do the same for the remaining layers, but do not frost and cherry the final layer.
  2. Cover the entire pake with stabilized whipped cream and decorate with chocolate shavings. Refrigerate so the whipped cream doesn't go bad.


Let's Jam: Jamprint Cookies Recipe from Oddfellows Cafe, Seattle

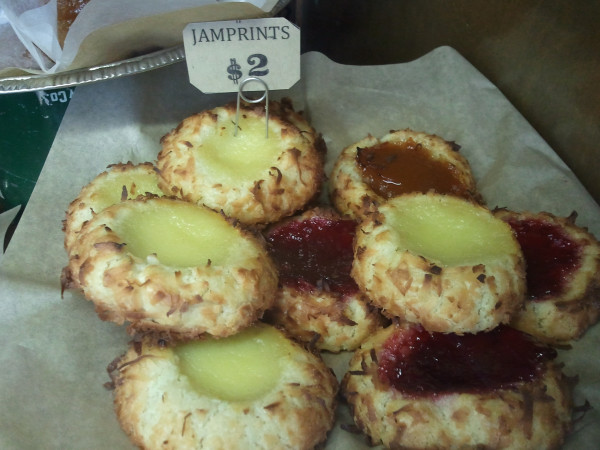
Anyone who has ever visited Seattle's Oddfellows Cafe knows what a beautiful and special things its bakery case contains. From biscuits to blondies to bundts (and even homemade Ho-hos!), they've got something for every sweet tooth. And now, here's one of their secrets: a recipe for their Jamprint Cookies (a sort of thumbprint-meets-macaroon cookie). They urge you to post pictures on their Facebook page if you try the recipe out!

Here's how to make this magic happen at home:

Jamprint Cookies

 Ingredients

  • .75 lbs butter
  • 1 cup sugar
  • 3.5 cups flour
  • .5 teaspoon salt
  • flaked coconut, for edges
  • jam (of your choosing), about 1 teaspoon per cookie

Procedure 

  1. Preheat oven to 350
  2. Cream butter + sugar in mixer w/ paddle attachment, add vanilla + salt
  3. Sift in the flour, mix until dough comes together
  4. Wrap in plastic, chill for 1 hr
  5. Roll it into 1 ounce balls, dip balls in egg wash + roll in flaked coconut
  6. Put ball on a baking sheet + indent the top, fill with jam.
  7. Bake for 20 to 25 minutes, until coconut is toasted and jam thickens.


Peeping Yum: Leftover Peeps S'more Pie Recipe for Serious Eats

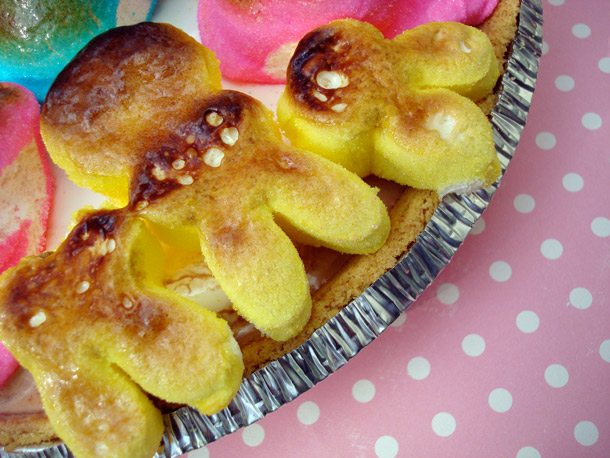
Easter is over, which means that all of the Easter candy is available at extreme discount (so glad!). And here's a perfect way to use those surplus sugarcoated marshmallow creatures: Peeps S'more Ice Cream Pie.

Made by filling a buttery graham cracker crust with rocky road ice cream, this frozen delight gets a sweet finish with broiled Peeps nesting on top, making for a treat that is as much eye candy as it is sweet to eat.

For the full entry and recipe, visit Serious Eats!

Hoppy Easter: A Batch of Sweet Recipes, Love CakeSpy

Oh, hi sweeties. I just wanted to take a moment to wish you a very Hoppy--er, Happy--Easter! It is my sincere wish that it be full of treats, such as:

Cadbury Creme Eggs Benedict

Carrot Cake Truffles

Peeps S'mores

Peeps Pizza (Peepza)

Peeps Fluffernutter

Easter Candy Taco Plate

Cadbury Creme Deviled Eggs

Homemade Easter Corn

Leftover Easter Candy Cookies

Springtime Cutout Cookie Sandwiches

...or any of these Peeps ideas.

...or at least some Peeps-inspired art like this. 

...but then again, if you want to get to know your Easter Candy a little better, you can always check out this interview with a Cadbury Creme Egg. (more Creme Egg sweetness here)

Hoppy Easter, sweeties!

Sweetness in the Morning: Coffee Spanish Torrijas Recipe

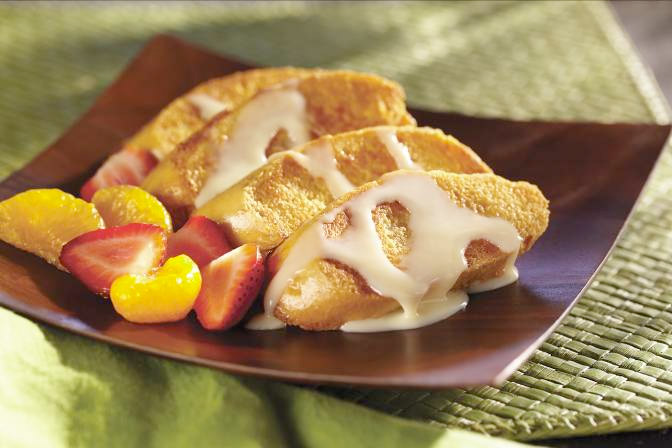
Nomsies! A big thank you to Eagle Brand Condensed Milk and to Ingrid Hoffman, who were kind enough to share this recipe for Coffee Spanish Torrijas (described to me as "like Spanish French Toast").

Coffee Spanish Torrijas

Yield: 6-8 servings / Prep Time: 10 Minutes / Cook Time: 5 Minutes

Ingredients:

  • 1 (14 oz.) can Sweetened Condensed Milk, divided
  • 1/3 cup strong brewed coffee, plus 4 tsp., divided
  • 3/4 teaspoon vanilla extract
  • 1 large egg
  • 2 to 3 tablespoons butter
  • 1 (6 oz.) loaf French bread, cut into 16 (1/2-inch) slices
  • Ground cinnamon 

Instructions:

  1. HEAT oven to 250°F. Place small baking sheet in oven.
  2. WHISK together 2/3 cup sweetened condensed milk, 1/3 cup coffee and vanilla in large bowl. Whisk egg in medium shallow bowl until blended.
  3. HEAT 1 tablespoon oil in large skillet over medium heat. Dip one bread slice at a time in milk mixture, then in beaten egg, turning to coat both sides. Place 5 to 6 slices in heated skillet. Cook until browned, about 1 to 2 minutes per side. Place on baking sheet in oven to keep warm. Repeat with remaining slices adding more oil as needed.
  4. COMBINE remaining sweetened condensed milk and 4 teaspoons coffee in small bowl to make topping. Drizzle topping over warm bread slices just before serving. Sprinkle with cinnamon.
  5. For a citrus topping, stir 1 teaspoon lime juice and 1/4 teaspoon grated lime peel into topping.

Hoppy Easter: Carrot Cake Truffles Recipe for Serious Eats

How do you capture the Easter Bunny?

Not with carrots, that's for sure: way too healthy, and if there's one life lesson that holds true, it's that you catch more flies with honey.

That is to say, try your luck with these little nuggets of delight known as Carrot Cake Truffles, inspired by the basic cake pop recipe from my bloggy BFF Bakerella. Comprised of dense carrot cake mixed with cream cheese to form a decadent filling, a coating of high-quality white chocolate adds a sweet finish, making for a hoppy, er, happy eating experience. Even if you don't capture the Easter Bunny, your happiness is pretty much guaranteed.

For the full entry and recipe, visit Serious Eats!

So Corny: Easter Candy Corn Recipe for Serious Eats

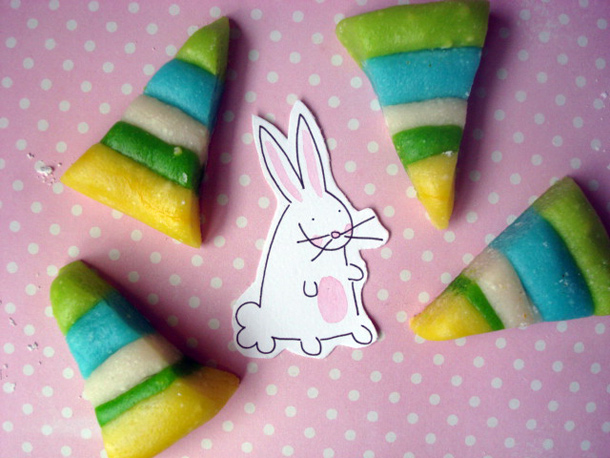
It's time to let you in on a little secret: Easter Corn is the same thing as Candy Corn, but colored differently. And like Candy Corn, it tastes better when made at home.

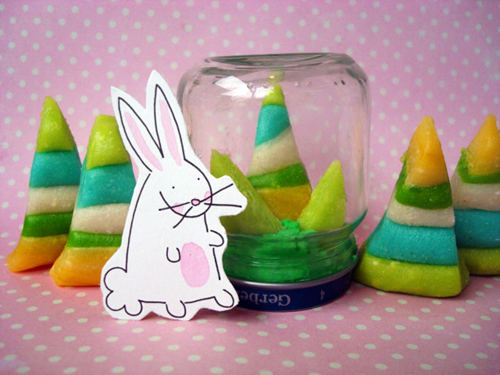
Of course, you can make the most of this festive treat by coloring it creatively. Instead of tricolors, why not go for five stripes of pastel sweetness? And, going even further, why not serve it in overturned baby-food jars to form the cutest enchanted forest-style terrarium treats you've ever seen? With all that magic, you might just give the Easter Bunny a run for its money.

For the full entry and recipe, visit Serious Eats!

Get Dirty: Dirt Cake Recipe from Cake Gumshoe Sabrina

Have you ever heard of "Dirt Cake"? Well, neither had I, sweet friends, but Cake Gumshoe Sabrina was kind enough to share after I had what can only be described as a "Facebook freakout" after seeing her post pictures of this masterpiece online.

Here's the 411, from Sabrina:

According to your comment, I'm assuming you have never had the yumminess that is 'DIRT CAKE!' It is quite simple to make and makes for a happy tummy.

Dirt Cake


  • 1 regular-sized package of Oreos (or store brand)
  • 1 box of instant chocolate Jello pudding mix (the no-cook version)
  • 3 cups of milk
  • 1/2 or 1 tub of whipped topping 
  • 1 package of gummi worms

Procedure

  1. Step 1: Crush your Oreos! I place cookies in a large ziploc bag, gently use a rubber mallet to break them down to smaller pieces/crumbs. HINT: You could also use a blender if you've got one handy, it's a lot faster. If you use one, break up the cookies a little bit beforehand to help w/ the process.
  2. Step 2: Make some mud. Prepare the package of pudding mix by combining 3 cups of milk and blending thoroughly. Add 1/2 to a full tub of thawed whipped topping (as found in the freezer section) and mix well.
  3. Step 3: Build! In a deep bowl, clear flower pot or several individual bowls, add a layer of crushed Oreos (aka dirt) then spoon a layer of your mud pudding, follow with another layer of dirt and repeat until you're out of both. I usually end up with 3 layers of cookie crumbs and 2 layers of pudding.  HINT: As you build your layers, feel free to drop a few gummi worms in!
  4. Step 4: Garish. Add gummi worms to the top of the 'cake' and refrigerate for several hours.  HINT: If you happen to have a sprig of fake flowers laying around, clean the plastic stem and stick it into the dirt cake. Sometimes the flowers can be too heavy or lopsided so this won't always work...but it definitely adds to the effect! 
Enjoy!


Sweet Fusion: Easter Candy Choco Taco Plate Recipe for Serious Eats

It's true, I am a genius.What happens when you combine Easter Candy with a Choco Taco?

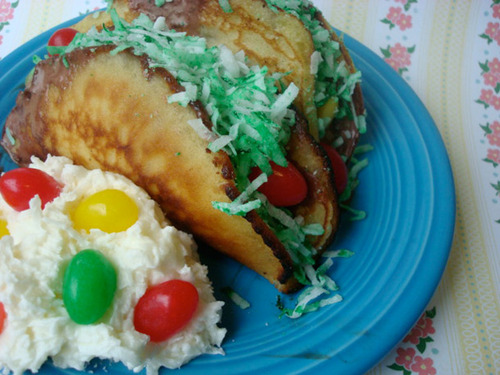
Nothing good, that's what. Instead, you have something great. This Easter-themed "taco plate" is fusion at its best, with sweet "tacos" filled with ice cream and all manner of pastel sweets, topped with green-tinted shredded coconut which simultaneously mimics Easter basket grass and shredded lettuce. Bonus points if you serve it up with a side of "rice and beans"—rice pudding studded with jelly beans, of course.

For the full entry and recipe, visit Serious Eats!

Sweet Spot: Oatmeal Raisinet Cookies Recipe by Cake Gumshoe Christine

CakeSpy Note: This is a guest post from Cake Gumshoe Christine Mullen, a photographer and food blogger from Ottawa, Ontario. She enjoys experimenting in the kitchen and photographing the results but ultimately hates doing the dishes. She blogs at Munchin With Munchkin.

I have the biggest weak spot for chocolate covered raisins. Every time I bite into one it brings me back to my earliest childhood memory.

I remember the specific moment I was hooked for life. It was December of 1989. My mother was on Christmas holidays and she decided to take me to see my first movie. We drove to Britannia which had both an indoor theatre and a drive in.

When we entered the theatre I was mesmerized by the speckled carpet, the sparkling ceiling and the overwhelming smell of popcorn. As we stood in line my eyes focused on a glass display case at the front
counter filled with colourful boxes of candy.

When we finally got to the front of the line my mother purchased our tickets and asked me if I wanted a treat. In my 3 years of life I rarely had candy so I knew this was a special occasion. As I peered through the glass my options were overwhelming. Without the ability to read my decision was determined solely by the colour of the box. I came to the conclusion that the purple box would contain the best treat and mother happily agreed.

With large purple box in hand we walked to our theatre and chose seats
close to the front. My memories of the movie are vague but I remember
sharing that box of raisinets and thinking my mother was the coolest
person in the whole world.

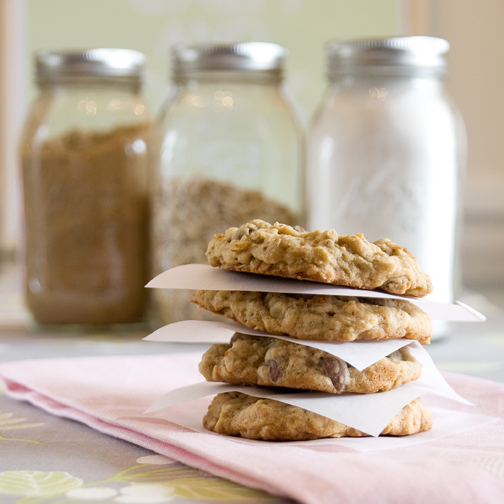
My mother is coming to visit me this week so in preparation I made these oatmeal raisinet cookies to share with her. They are incredibly soft and chewy and the chocolate covered raisins add that taste of childhood every great cookie should have.

Oatmeal Raisinet Cookies

Makes about two dozen cookies


  • 1 cup butter, at room temperature
  • 1 cup light brown sugar
  • ½ cup granulated sugar
  • 2 eggs
  • 2 Tsp. vanilla extract
  • 1 ½ cups all purpose flour
  • 1 Tsp. baking soda
  • ½  Tsp. salt
  • 3 cups old fashioned oats
  • 1 ½ cups chocolate covered raisins

Procedure

  1. Preheat oven to 350
  2. In a large bowl cream the butter and sugars.
  3. Add the eggs and vanilla and mix until fully combined.
  4. Stir in the baking soda, salt, and flour and mix until just combined, being careful not to over mix. Briefly mix in the oats. Add the chocolate covered raisins and stir until just combined.
  5. Scoop 1 tablespoon of cookie dough onto un-greased cookie sheets about half an inch apart.
  6. Bake for 10 – 12 minutes until the cookies are golden brown along the edges.


Feeling Toasty: Coconut French Toast With Bananas Foster Recipe from Joe Yonan

What happens when coconut, French Toast, and Bananas Foster make sweet love?

Well, find out for yourself (pervert!)--check out Serve Yourself: Nightly Adventures in Cooking for One by Joe Yonan. He was kind enough to share the following recipe from the new release:

Coconut French Toast with Bananas Foster

  • 3 tablespoons pecan halves
  • 1 egg
  • 1/4 cup coconut milk
  • 1/4 teaspoon vanilla extract
  • 1 thick (3/4- to 1-inch) slice rich white bread, such as brioche or challah, trimmed neatly into a round or square (crusts removed)
  • 1/4 cup Japanese-style panko
  • 2 tablespoons dried unsweetened coconut flakes (medium shred)
  • 1 teaspoon granulated sugar
  • 1 tablespoon plus 1 teaspoon unsalted butter
  • 1 teaspoon dark brown sugar
  • 1 banana, peeled and diagonally sliced 1/2 inch thick
  • 2 tablespoons dark rum
Procedure
  1. Toast the pecans in a small, dry skillet over medium-high heat, shaking the pan frequently, until they start to turn dark brown and smell very fragrant, 2 to 3 minutes. Immediately transfer them to a plate to cool.
  2. Whisk the egg, coconut milk, and vanilla extract together in a shallow bowl. Add the bread; let it stand for about 10 minutes, turning it over about halfway through, until it has absorbed most of the liquid.
  3. Combine the panko crumbs, coconut, and granulated sugar on a plate. Use a spatula to transfer the soaked bread to the crumb mixture, and turn to coat both sides evenly. Pat as much of the mixture as you can onto the bread.
  4. Melt 1 tablespoon of the butter over medium-low heat in a small skillet. Add the bread and cook until it is golden brown and crusted, 3 to 4 minutes. Turn it over and cook another few minutes, until it is golden brown on the second side. (Reduce the temperature as needed to keep the bread from getting too dark.) Transfer to a plate. The inside of the French toast will be fairly spongy.
  5. Add the remaining 1 teaspoon of butter to the pan and let it melt. Add the brown sugar and stir until it melts, 1 to 2 minutes. Add the banana slices and stir until they are warmed through and coated with the butter in the pan, 1 minute. Add the pecans and rum, and stir to combine.
  6. Spoon the warmed banana mixture over the French toast, and eat.

Note: Some brands of coconut milk, such as Chaokoh from Thailand, are available in 5.6-ounce cans rather than the standard 13.5 to 14 ounces. Store coconut milk in the refrigerator for up to 1 week, or freeze in ice-cube trays and then store the cubes in freezer-safe heavy-duty plastic bags for several months.

Reprinted with permission from Serve Yourself: Nightly Adventures in Cooking for One by Joe Yonan copyright © 2011. Published by Ten Speed Press, a division of Random House, Inc.

Oh Fudge: Chocolate Covered Cherry Fudge by Fields of Cake

Images: Fields of CakeCheck it. So, a week or two ago, I went to Vermont for the Maple Open House weekend. Which was awesome. You'll totally hear more about it soon. But.

Right now, I want to address a beautiful diversion from said Vermont Maple Weekend. 

So, I have been bloggy BFF's for, like, ever with Fields of Cake. Carrie Fields, the talented proprietress of this blog and Portland, Maine-area home-based baking business, has not only been a customer of mine for years, but has wowed me with her baking prowess on many occasions.

So when she sent me a message that basically amounted to "You're this close, come to Maine!"...I listened.

And I went to Maine, where I was treated to sea, sunshine...and the most delicious fudge I have ever, in my life, tasted.

And I have tried my share of fudge varieties, let me tell you.

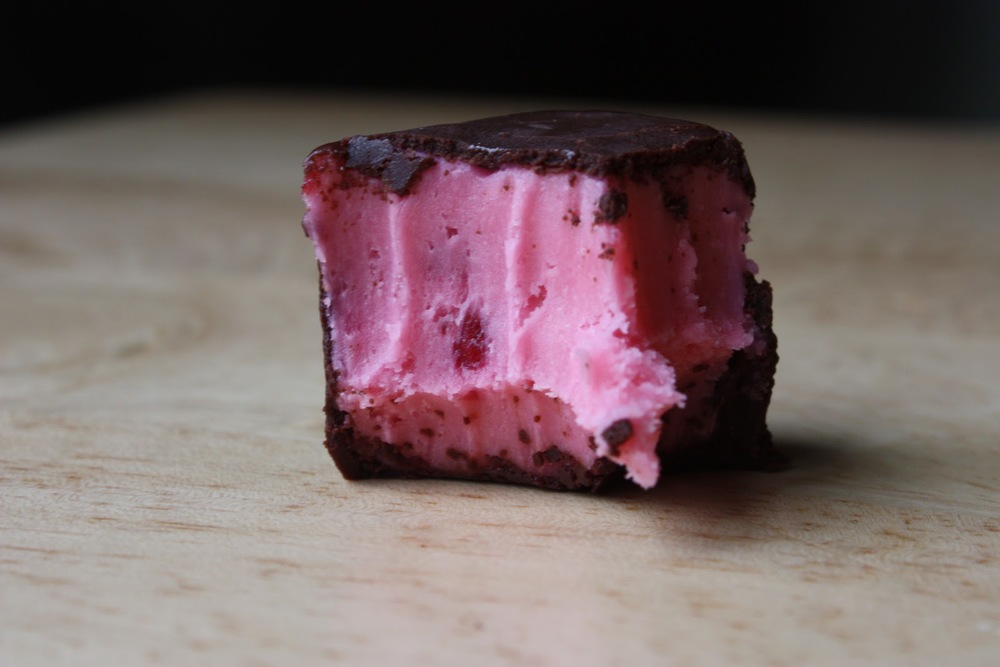
This chocolate-covered cherry fudge is extremely sweet in the up-front, assertive way that only fudge can get away with. But Carrie's was a gorgeous variety: completely smooth, none of that "chocolate sand" gritty texture business, and in spite of the sweetness you could still taste the flavor of real cherry shining through.

Basically, this was the type of fudge that could make you swear off chocolate covered cherries forever.

Find the recipe here.

Maple Madness: Vermont Maple Cookies with Maple Buttercream and Canadian Bacon Recipe

Fact: Vermont Maple cookies are pretty awesome.

But, you know, that's not to say that they can't be made better with the addition of two things that make pretty much everything better: frosting and bacon. When paired with the fact that this enables you to eat two cookies, at once, with frosting and bacon, pretty much puts us all at the point of awesome overload. Here's how you do it.

Vermont Maple Cookies with Maple Buttercream and Canadian Bacon

For the cookies

For the frosting and garnish (frosting adapted from this recipe)

  • 3 large egg yolks
  • 1 cup pure maple syrup, best quality
  • 2 sticks (1 cup) unsalted butter, cold, cut into small pieces
  • To garnish: 3-4 slices Canadian bacon, glazed with 1 tablespoon of maple syrup and baked until very crispy, and crumbled

Procedure

  1. Bake cookies and let cool.
  2. In the bowl of an electric mixer fitted with the whisk attachment, beat the egg yolkson high speed until light and fluffy, about 5 minutes; set aside. In a small saucepan set over medium-high heat, bring the maple syrup to a boil, and cook until it registers 240 on a candy thermometer, about 15 minutes. Remove from heat.With the mixer running, slowly pour syrup down the side of the bowl in a slow, steady stream, until completely incorporated, about 1 minute.
  3. Continue beating until bowl is just slightly warm to the touch, 4 to 5 minutes. Add butter, one piece at a time, until thoroughly incorporated and the frosting is fluffy, about 4 minutes more.
  4. Turn over one of your cookies and place a healthy dollop on the bottom. Sandwich a second cookie, bottom-side down, on top. Sprinkle the exposed frosting sides with crumbled bacon. Enjoy.