Fromage et Chocolat: Chocolate-Covered Cheetos Recipe for Serious Eats

Believe it or not, this was not my idea.

This nugget of sugar-coated tastiness came from Becky Selengut, author of Good Fish (and arguably Bad Seed, or at least enabler of Bad Ideas), who made a compelling suggestion to the world via Twitter: "Chocolate covered fritos. Go. Make. Sell. Widely."

Well, naturally I knew this confection was my destiny, but I took it one step further, testing out the idea on several chips, including two types of Doritos, Fritos, Lay's Potato Chips, and Cheetos.

To be honest, the original chips were probably the biggest crowd-pleaser, but theCheetos were certainly the most compelling—vaguely shrimplike in shape, these nubbly, crunchy, chocolate-and-cheese snacks were oddly addictive in a sweet-and-salty, lowbrow sort of way; if you enjoyed Velveeta Fudge, you might want to give this one a try.

For the full entry and recipe, visit Serious Eats!

Street Eats: Chocolate Pudding and Cookies Recipe from Food Trucks by Heather Shouse

Image credit: sugarcave.com

Street food is one of the most exciting emerging sectors of the foodie landscape, creating impromptu dining experiences made possible by following trucks on Twitter or Facebook to find out where they are, and then lining up on the street to get some of the (often unique) food being served up.

It was only a matter of time before a book came out dedicated to the subject, and Food Trucks: Dispatches and Recipes from the Best Kitchens on Wheels is a fun and timely ode to The New Street Food. It is full of stories and recipes, mostly savory, but a small handful of sweet ones.

The one that I zeroed in on, though? Yellow Submarine in Miami, Florida--because they had the most compelling dessert recipe, for Chocolate Pudding and Cookies. It's sort of like my favorite Banana Nilla Wafer pudding, but with chocolate pudding and no bananas.

Angela's Chocolate Pudding and Cookies

8-12 servings

  • 2 boxes (3.5 oz) chocolate pudding (cook and serve)
  • 4 cups cold milk
  • 1 can Nestle table cream
  • 1 can condensed milk
  • 2 (3.15 oz) packages Goya Maria cookies (mexican butter cookies) 
  1. Make the pudding according the package instructions. Let the pudding rest for 2-3 minutes, then add the table cream and condensed milk, mixing very well.
  2. Into a large, round glass bowl, pour enough of the chocolate mixture to cover the bottom of the container. Add a layer of the Maria cookies, then top with a layer of the pudding; repeat until the cookies and chocolate mixture are used up. Let the treat rest in the fridge for 2 hours, then spoon out on to plates and serve.


Pass the Torchetti: Torchetti Cookies from Cle Elum Bakery, WA

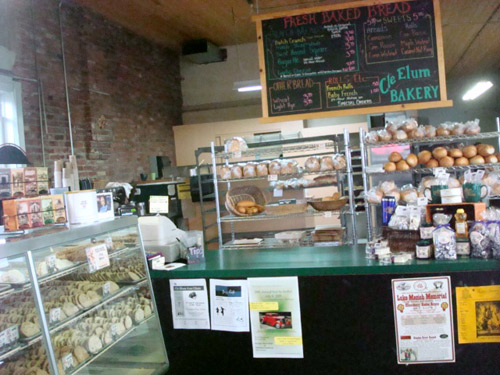
The other day, I found myself in a magical land called Cle Elum.

Now, don't ask me how to pronounce the name of the town--but do ask me what I ate there, because I did find a magical place called Cle Elum Bakery.

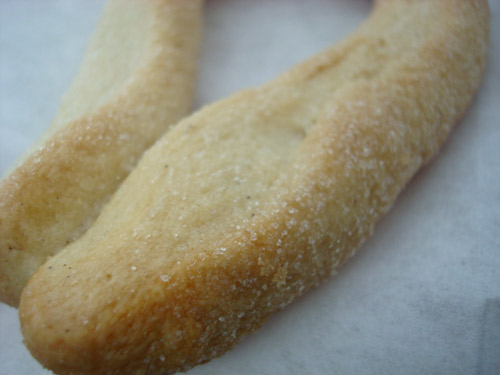
I ate something called Torchetti, that's what. This is a traditional Italian cookie which I learned more frequently goes by Torcetti, which means "little twist"--which, you know, describes them pretty well. Physically they resemble Berlinerkranser or Calabrian Love Knots, but texture and taste-wise they are different; where aforementioned cookies are crumbly and buttery, these biscuits are more hearty and sturdier in texture with the addition of yeast, more like lightly sweet biscuits than butter cookies.

As I learned from this segment,

The recipe itself is very old, indicated by the use of yeast, not baking powder, for leavening.  These cookies are from the Piedmont region of northern Italy.  Turin, Piedmont's capital, was also Italy's first capital.  The city preserves remarkable architectural and cultural treasures.

They're a very nice snacking cookie, no matter what you want to call them or how you want to spell it.

Of course, if you can't make it up (or over?) to Cle Elum, you can try this recipe (adapted from Taste of Home):

Torchetti (or Torcetti)

  • 5 cups all-purpose flour
  • 1 cup cold butter, cubed
  • 1 cup shortening
  • 1 package (1/4 ounce) active dry yeast
  • 1/2 cup warm milk (110° to 115°)
  • 2 eggs
  • 1 tablespoon sugar
  • 1-1/2 teaspoons vanilla extract
  • 2 cups confectioners' sugar
  • Additional confectioners' sugar

Procedure

  1. Place flour in a large bowl; cut in butter and shortening until mixture resembles coarse crumbs. Set aside. In a large bowl, dissolve yeast in warm milk. Add the eggs, sugar, vanilla and 2 cups of the crumb mixture; beat until well blended. Gradually beat in remaining crumb mixture.
  2. Turn onto a floured surface; knead for 3-4 minutes. Place in a greased bowl, turning once to grease top. Cover and let rise in a warm place until doubled, about 1 hour.
  3. Punch dough down; divide into six portions. Shape each portion into twelve 6-in. ropes, about 1/4-in. thick; roll in confectioners' sugar. Shape each rope into a loop. Holding both ends of loop, twist together three times.
  4. Place 2 in. apart on greased baking sheets. Bake at 375° for 12-14 minutes or until golden brown. Roll warm cookies in additional confectioners' sugar. Cool on wire racks. 


Maine Event: Maine Wild Blueberry Muffins Recipe

 When it comes to Maine Blueberries, technically Pie takes the cake--Wild Blueberry Pie is the official state dessert. 

But the fact is, when you go to gift shops, you'll find postcards touting this recipe for Wild Blueberry Muffins, so I vote that they are worth your time, too.

Maine Wild Blueberry Muffins Recipe

  • 1 egg
  • 1/2 cup milk
  • 1/4 cup vegetable oil
  • 1 1/2 cups flour
  • 1/2 cup sugar
  • 2 tsp baking powder
  • 1/2 teaspoon salt
  • 2 cups Maine wild blueberries

Procedure

  1. Preheat oven to 400 degrees. Grease a muffin pan.
  2. Beat egg slightly; stir in milk and oil. Mix in the dry ingredients until the flour is moistened. Batter should be lumpy--don't overmix. Add the blueberries. 
  3. Fill the muffin cups and bake for 20-25 minutes, or until golden brown. Yield: 12 muffins.


Stuff It: Sugar Cookies Stuffed With Chocolate Chip Cookie Dough Recipe for Serious Eats

Nomsies!Here's the thing. Chocolate chip cookie dough makes delicious things even more delicious. Including other cookies.

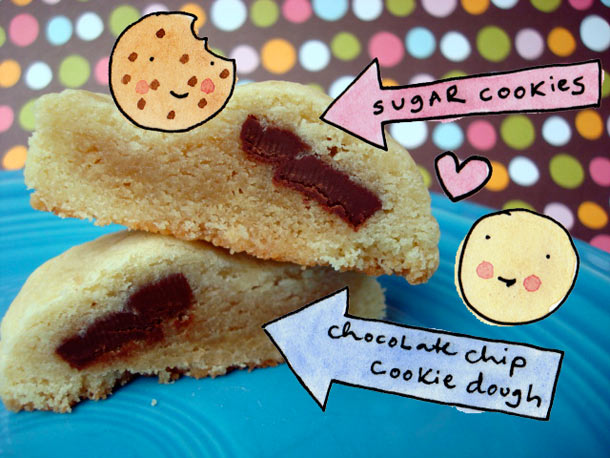
Case in point: sugar cookies stuffed with chocolate chip cookie dough. This baking experiment proves that yes, stacking two cutout cookies sandwiched with a dollop of chocolate chip cookie dough bakes up something delicious, and, in case you didn't notice, it's basically like eating three cookies at once. Triple threat of sweet deliciousness.

Note: You can either make these cookies as cutout cookies, or make more free-form rounds with your sugar cookie dough. The free-form method will result in fatter cookies (pictured at top); the cutout method will result in slightly slimmer cookies with a bulging mound of dough in the middle.

For the full entry and recipe, visit Serious Eats!

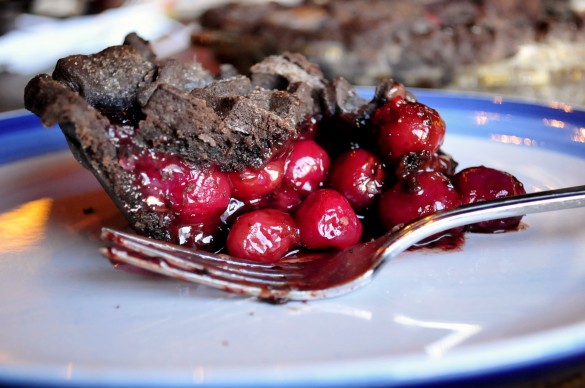
Totally Sweet: Cherry Pie in a Chocolate Pie Crust Recipe from Domestic Fits

Photos: Domesticfits.comCakeSpy Note: This is a guest post from Cake Gumshoe Jackie, a Los Angeles resident (but we won't hold that against her) who cooks and bakes from a small kitchen surrounded by a husband, bulldog, 1 year old daughter and lots of sunshine. She is committed to cooking and baking with the abundance of local produce that her area offers, strawberries and avocados better watch out!

CHOCOLATE PIE CRUST! It’s pretty clear by my excessive use of capitalization what my favorite part of this pie is. I woke up in the middle of the night (I know, overly dramatic for a food blog post) with the idea of a chocolate pie dough crust. After a quick google search I wasn’t able to find a recipe for inspiration, leading my to wonder if my midnight dessert vision wasn’t even possible. By only modifying my go-to pie dough crust, It turns out that it is VERY possible, and super tasty.

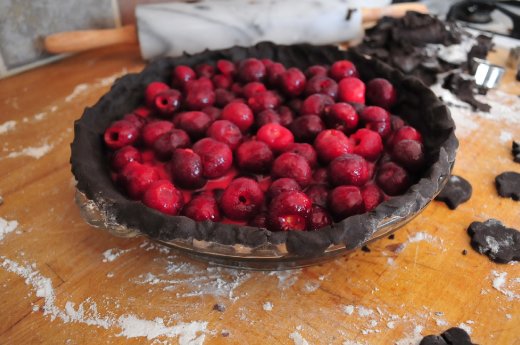
Here are a few process shots and the recipe, which can also be found on Jackie's blog, Domestic Fits.

Cherry Pie in a Chocolate Pie Crust

 Ingredients

  • 1/3 cup unsweetened cocoa
  • 2 2/3 cup of all purpose flour
  • 1/2 tsp salt
  • 3 tbs sugar
  • 12 tbs butter, cut into cubes
  • 1/2 cup shortning
  • 1/4 cup vodka
  • 1/4 cup cold water

Pie Filling ingredients:

  • 1 1/4 cup sugar
  • 3 tbs cornstarch
  • 5 cups of fresh bing cherries
  • 3 tbs lemon juice from a real life lemon, none of that squeeze bottle crap (about 1 large lemon’s worth)
  • 1/2 tsp vanilla extract
  • 1 cup chocolate, broken up into chunks (I used 56%)
  • 3 tbs butter
  • 1 tbs light corn syrup
  • 2 tbs butter (for crust assembly)
  • plus 2 tbs white sugar to sprinkle on top before cooking 

 Procedure

  1. I did some pretty extensive research on pie dough over the past few years and I’ve learned a few things that I’ll pass on to you all. First, food processors are great at getting the job done as quickly as possible, and we all know that the more you mess with dough the tougher it becomes. So break out that food processor and add the cocoa, 2 cups of the flour, salt and sugar and give it a quick pulse until it’s combined.
  2. Add the cubes of butter and the shortening and pulse until combined, about 1 1/2 minutes. A mix of shortening and butter gives a good flavor and texture.
  3. Now, if you have a larger food processor that mine, then add the remaining flour and pulse until it gathers around the blade. MINE is tiny and I need a new one. So if you are in the same boat as I am, just transfer it to a bowl and add the remaining flour by hand. (if you have a nice big guy food processor, transfer to a bowl after you add the remaining flour)
  4. Then add the water and the vodka and squish it into the dough until its all combined. Vodka is another tip I picked up during my dough research. It cooks off completely (unlike water) creating a super flakey crust. Your dough will be very moist, but you can add a bit of flour if it is too moist to hold together. Then split into two evenly sized disks and wrap in plastic wrap, and chill for AT LEAST AN HOUR, super important, don’t skip this step.
  5. You can chill it for a few days if you need to, in that case, put the wrapped circles in a zip lock bag.
  6. Before you get to the cherries, combine the sugar, cornstarch, salt, lemon juice and vanilla in a large bowl and set aside.
  7. Now, get out those beautiful cherries. You’ll have to pit them, so I hope you have a pitter. You can buy them for about $8 and its totally worth it.
  8. To pit 5 cups, it should only take about 10 minutes. Unless, your daughter needs a nap and she won’t sleep and you can hear her jumping in her crib throwing bedtime bunny, sleepy time bug, and her sippy cup across the room and you have to go in and lay her down and tell her that she is a tired lady and she needs to go nigh night….in that case, it may take longer.
  9. Add the pitted cherries to the sugar mixture bowl and stir until the cherries are well coated. Allow to rest for about 30 minutes.
  10. Get your cold dough out of the fridge and place it on a well floured surface. I’m not gonna lie to you, this is not the easiest dough to work with. It’ll need a lot of flour on both sides, flour the top to make sure it doesn’t stick to your rolling pin. roll out into a circle large enough to fit into your pie pan with only a little over hang. If it breaks apart, just smoosh it back together with your fingers. Transfer to your pie pan, if it breaks, again, just push the cracks back together.
  11. in a microwave safe bowl, add your chocolate chunks, butter and corn syrup.
  12. Microwave for 20 seconds, stir and repeat until all melty. Pour the chocolate into the crust and smooth out to make an even layer. Then add your beautiful cherries. 
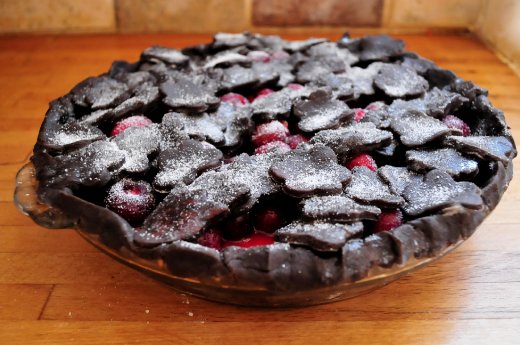
  13. OK, so by this point I was a little fed up with my crust, so the double crust plan was altered a bit. If you want to roll out circle #2 and make it a double crust, be my guest. I decided to roll out #2 and cut him up with two mini cookie cutters. You can also cut strips to do a lattice top.
  14. I then layered them on the top to create parallel lines, brushing each cutout with melted butter to help them adhere to each other. I then filed in a bit of the blank spaces with randomly placed cutouts and sprinkled the top with sugar.
  15. By this point you may be thinking, “Why didn’t she ask me to preheat the oven? Did she forget? should I just set it to my go-to 350?” Nope. This is one of those pearls of pie dough wisdom that I am passing on. Ice cold dough cooks better than room temp dough. SInce we have worked this pie dough over pretty good, it needs to rest and chill before going into the oven. SO now, turn the oven on and set it to 475 and place your pie in the fridge to chill. Wait about 20 minutes and then bake your pie at 475 for about 15 minutes. Then, turn your oven down to 375 and finish baking for about 45 minutes or until the filling is thick and bubbly. If your crust looks like it is browning too much, cover it in foil.


Sweet and Salty: Cashew Bacon Brittle Recipe by Seattle Pastry Girl

Photo: Seattle Pastry GirlCakeSpy's got a sweet crush on Seattle Pastry Girl.

Now, it's true that her sweet blog is full of sweet and buttery recipes, and we seem to be sympatico in many of our cookbook and baking loves.

But the biggest reason at the moment for my crush is your delicious, sweet-and-salty-and-so-decadently-indulgent Bacon Brittle.

After picking up a sack of this sweet n' salty stuff at the Bakesale for the South at CakeSpy Shop, it was basically love at first bite. More substantial than typical nut brittles, the caramelly sweetness was gorgeously paired by the salty bacon, which also kept the treat from being achingly sweet (a problem with so many brittles!).

Now, Seattle Pastry Girl doesn't sell this sweet treat around town in general, but its sweet and salty deliciousness can be attained at home--I found the recipe on her website.

That's right: make your own Cashew Bacon Brittle at home. Here's the recipe.

Pop! Brownie Pops Recipe For Serious Eats

Dilemma: it's Memorial Day and you need a sweet treat by this afternoon—ideally something simple to prepare and easy to eat outdoors.

Never fear: you've still got time to make Brownie Pops!

This is a sweet idea I got from Dawn, who writes the blog Not Just A Mommy. Using brownies is a little lower-maintenance than using cake to make these cute pops. The natural density of brownies means you don't have to mix with frosting to attain a fudgy consistency; simply bake up (or buy) a batch of fudgy brownies, shape into balls, chill, dip in candy coating, and let set while you get your grill on; by the time the burgers and hot dogs have been devoured, these bite-sized delights will be ready to serve.

For the full entry and recipe, visit Serious Eats!

Get Shorty: Lavender Shortbread Recipe from Tania of Love Big Bake Often

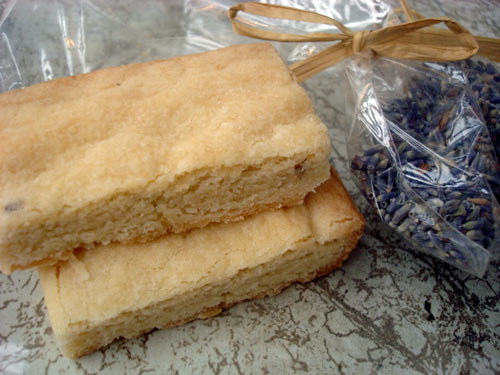
What's better than shortbread? Not much. But this simple sweet takes beautifully to added flavors, including herbs--as evidenced by this delicious recipe for Lavender Shortbread. I first sampled this when Cake Gumshoe Tania (look at her blog here) brought some to an event at the store, and -- joy!--she was also kind enough to offer the recipe. The only warning? This buttery stuff is addictive!

Lavender Shortbread

 Ingredients

  • 1 cup butter, softened
  • 1/2 cup sugar
  • zest from 1/2 a lemon
  • 1 teaspoon dried lavender
  • 2 1/4 cups flour

 Procedure

  1. Preheat oven to 325 F. Butter an 8x8-inch pan.
  2. Cream butter and sugar together until fluffy. Add zest and lavender; mix well.
  3. Add flour and mix til fully incorporated.
  4. Press dough into your prepared pan.
  5. Bake for 30 minutes, or until golden around the edges and with a dull finish on top.
  6. Let cool for 10 minutes, then cut into pieces, still in pan; let cool completely before removing.
  7. Enjoy, ideally with a cuppa'.


Peachy Keen: Peach Cobbler Milkshake Recipe by Munchin With Munchkin

Photo: Munchin with MunchkinCakeSpy Note: This is a guest post from Cake Gumshoe Christine, who blogs at Munchin With Munchkin. Let the NOM begin:

I am not a vegan. I’m actually not even a vegetarian but I love a challenge.

So many desserts are off limits for those trying to avoid animal products or even attempting to live a healthy lifestyle. It truly doesn’t have to be this way as making a vegan dessert is just as simple as making one full of fat, sugar and dairy. All you need is a blender and a few simple ingredients such as fruit, coconut milk, and some common spices.

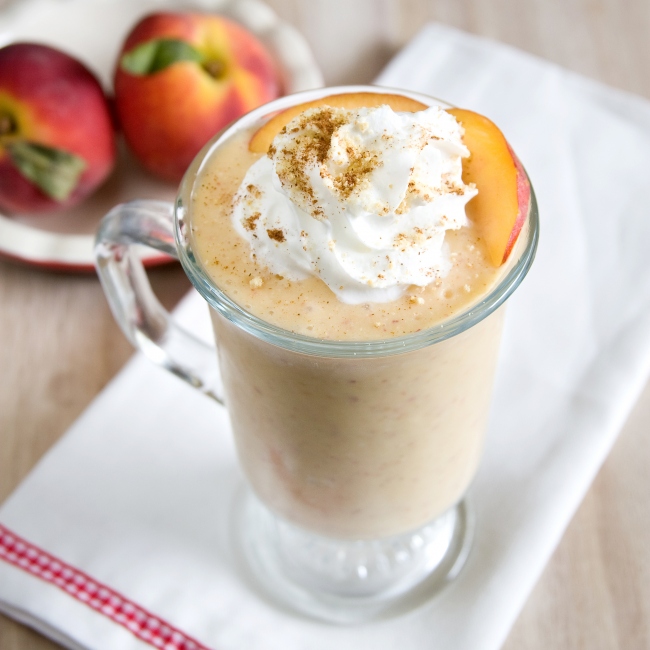
Peach cobbler is one of my favourite desserts and with fresh peaches popping up at my local farmers market I couldn’t resist the challenge of another classic dessert-inspired milkshake. When choosing peaches for this purpose, ensure they are quite ripe as they no longer ripen after they are picked. If you can find a few ripe peaches there is no need to add additional sweetener such as maple syrup as these juicy fruits are full of natural sugars.

You can also opt to make this recipe raw by omitting the peach preserves and substituting almond butter and a few pecans for the graham cracker crumbs and oats. Now go make your sweet tooth happy and enjoy some peach cobbler for breakfast! Happy Friday!

Peach Cobbler Milkshake

Ingredients

  • 4 ripe peaches, sliced
  • 1 Tbsp. lemon juice
  • 2 Tbsp. Peach preserves, preferably natural, no sugar added
  • 1 Tbsp. coconut oil
  • 1 cup light coconut milk
  • 1 ripe frozen banana
  • 1 Tsp. pure vanilla extract
  • ½ Tsp. cinnamon
  • dash nutmeg
  • 2 Tbsp. graham cracker crumbs (check label to ensure it is vegan)
  • 1 Tbsp. old fashioned oats
  • 2-3 pecans (optional)
  • maple syrup, sweeten to taste (optional)
  • ice cubes

Procedure

  1. Combine all ingredients in a blender and pulse until smooth
  2. Top with soy based whip cream, sprinkle with additional graham crackers and cinnamon. Garnish with a peach slice.

Serves 3-4

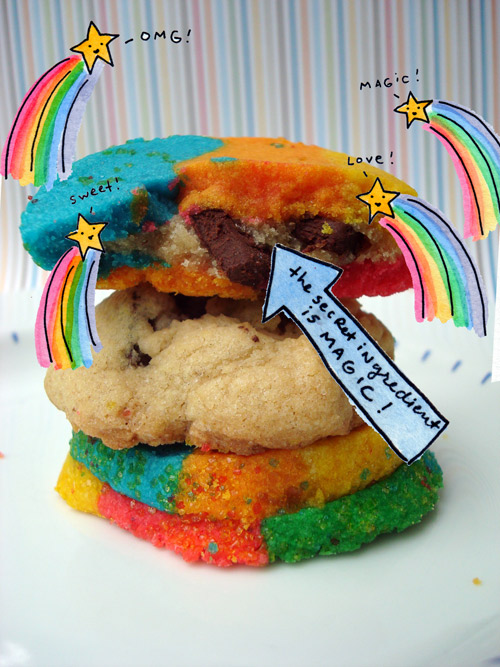
Taste The Magic: Rainbow Cookies Stuffed With Chocolate Chip Cookie Dough Recipe

Recently, I received this cry for help via email from reader Anne:

Dear CakeSpy,

I have a big problem.  Sunday is my 30th birthday and as is tradition, we will have a Bake-Off! Birthday Bake-Off is pretty much the greatest idea I have ever had: maximum dessert variety and no having to awkwardly stare off into space while people sing happy birthday and all I'm thinking is how we are wasting precious seconds that could be used for eating frosting.  But, the dilemma.  I have no idea what to make this year.  Now that there are internets, there are just TOO MANY awesome recipes and I can't decide on one.  You are the connoisseur of carbs - what would YOU make??


-Clueless in Cleveland

Now, Clueless in Cleveland, I will tell you, I thought about this for a long time. I went outside and took a walk, knowing that the answer would come to me. And then it did:As a majestic unicorn whizzed by, I thought to myself: "It must involve rainbows, and magic."

And from then on, the answer was easy:

1. Take the most colorful recipe I could think of, which is definitely Rainbow Cookies (now, to get the recipe I'm going to have to urge you to buy my book, because that's where the recipe is, but I'll tell you now that it's not so very different from these cookies).

2. Add magic. And how better and more reliably can one add magic than by adding cookie dough to the mix?

And so, with that sweet epiphany in mind, allow me to present the new Best Thing Ever:

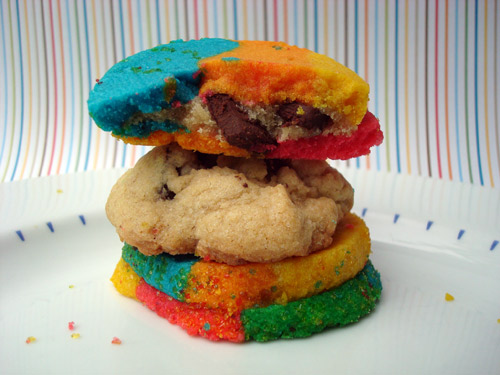
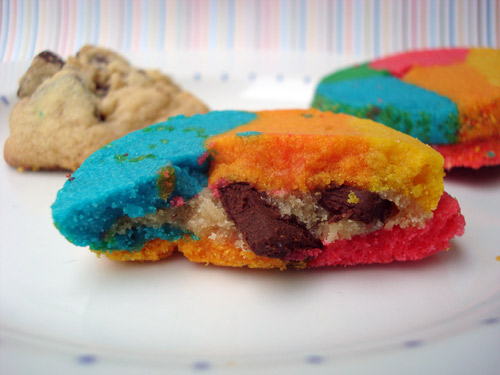
Rainbow Cookies Stuffed With Chocolate Chip Cookie Dough. 

Here's how you do it.

You'll need:

  • 1 batch rainbow cookie dough (similar enough to this recipe that you could make it work by tinting the dough many colors)
  • 1/2 batch chocolate chip cookie dough (bake the rest normally, or use it to stuff cupcakes, you follow your bliss)

Note: if you are uneasy about the cookie dough not baking fully and the whole egg thing, use a chocolate chip cookie dough that does not use eggs, or that uses egg replacer.

  1. Preheat your oven to 375 degrees. Line a baking sheet with parchment paper.
  2. So, you've got your rainbow cookie dough all ready to go. Now, slice it into fairly thin coins--like, 1/8 inch thick. Lay them on your prepared baking sheet with about 1 inch in between rounds (they won't spread too much).
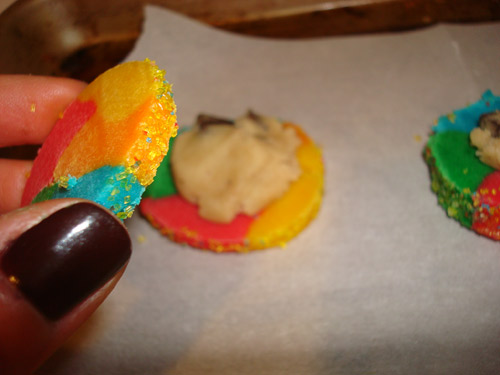
  3. On the center of each round, place a small dollop of chocolate chip cookie dough.
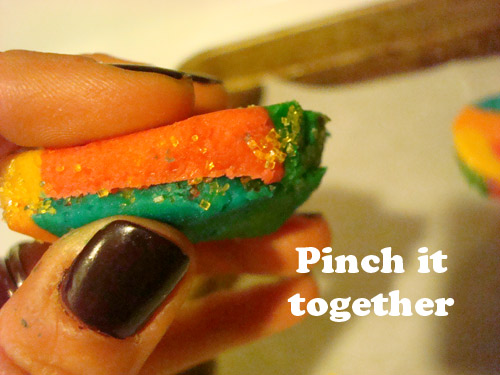
  4. Place a second coin of rainbow cookie dough on top. If it cracks between color segments, use your fingers to smooth it back into place. Gently press the sides down so your chocolate chip cookie dough doesn't ooze out.
  5. Bake for 9-10 minutes, or until rainbow cookies have a dull finish on top. 
  6. Let cool for 5 minutes on the sheet before transferring to a wire rack to cool completely.

Berry Delicious: Triple Strawberry Cheesecake Recipe from The Rice Kernel

CakeSpy Note: This is a guest post from The Rice Kernel. Named for a little boy who came along and transformed one family's kitchen experiences, Rice Kernel features wholesome, homemade recipes to help you achieve a "rainbow a day" of colorful and nutritious foods.  For the sweets lover, Rice Kernel's "rainbow" includes plenty of indulgences, often made over with healthful ingredients.  This triple strawberry cheesecake is the perfect collaboration of creamy, decadent cheese and fresh, tart summer berries. The recipe originally appeared as part of this post.

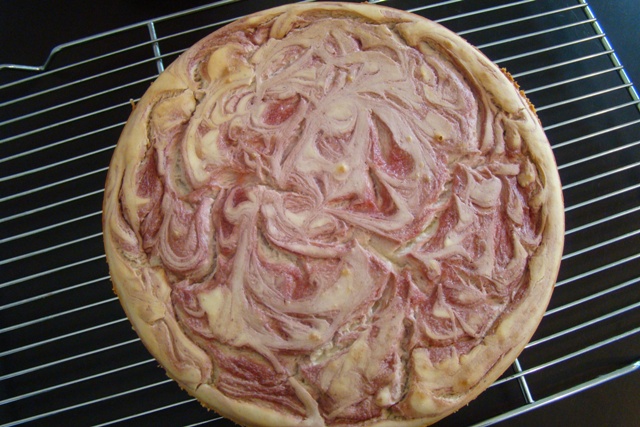
This is a strawberry cheesecake.  Not a plain cheesecake topped with strawberries.  And not a plain cheesecake with a swirl of strawberry puree.  Fresh strawberries are infused throughout this cheesecake – in the base, with an extra swirl of fresh puree, and with sliced fruit perched atop the lovely pink cake.  (For serious strawberry afficionados, consider making extra puree or strawberry coulis to drizzle atop the cheesecake.)  I’m crazy about this cake.  So crazy Rice Kernel and I had to eat some warm from the oven.  (In case you’re curious, it’s warm and mousse-like.)  Tall, light, creamy, and full of freshness, it will make any strawberry lover swoon. 

Strawberry Cheesecake, adapted from Dorie Greenspan’s Tall and Creamy Cheesecake from Baking: From my Home to Yours (via The Way the Cookie Crumbles)

Crust
1½ cups graham crackers
2 tablespoons sugar
pinch of salt
3 tablespoons unsalted butter or Earth Balance, melted

Cheesecake
4 (8-ounce) packages reduced fat cream cheese or Neufchatel, at room temperature
1⅓ cups sugar
½ teaspoon salt
2 teaspoons pure vanilla extract
4 large eggs, at room temperature
1 cup strawberry puree, divided

Directions

  1. Place washed and hulled strawberries in a blender (about 1½ cups whole) and puree until smooth.  Place through a fine sieve to remove seeds.
  2. For the crust:  Spray the bottom of a springform pan with nonstick spray.  Either grind the graham crackers with a food processor or place them in a ziptop bag and crush with a rolling pin.  Add sugar, salt, and butter to the crumbs and stir until evenly mixed.  Press the crumbs into an even layer covering the bottom of the prepared pan.  Put the pan in the freezer for 30 minutes.
  3. Meanwhile, heat the oven to 350 degrees F. Bake the crust for 7-10 minutes, until fragrant.  Let cool on a wire rack, then wrap the bottom of the pan in foil.  Reduce the oven temperature to 325 degrees F.  Bring a pot of water to a boil.
  4. For the cheesecake:  With a mixer fitted with the paddle attachment (or with a hand mixer), beat the cream cheese at medium-low speed until smooth.  Add the sugar and salt; continue mixing for about 2 minutes, until the mixture is light and creamy. Add the vanilla, then the eggs one a time, mixing just until each one is incorporated. Mix in ½ cup of the strawberry puree.
  5. Pour the batter onto the cooled crust.  Spoon the remaining strawberry puree over the batter and use a butter knife to gently swirl it.  Place the wrapped springform pan into roasting pan; pour the hot water into the roasting pan.
  6. Bake the cheesecake for 1 hour and 30 minutes.  Turn off the oven’s heat and prop the oven door open with a wooden spoon; let the cheesecake set in the water bath for another hour.  Remove the cheesecake from the hot water and let it come to room temperature on a cooling rack.  When the cake is cool, cover the top lightly and chill the cake for at least 4 hours.

Strawberry Coulis

Ingredients

2 cups quartered hulled strawberries (about 12 ounces)
1/4 cup water
3 tbsp sugar
1 tbsp fresh lemon juice

Directions

  1. Combine strawberries, water, sugar and lemon juice in blender. Purée until very smooth. 
  2. Press through a fine mesh strainer to remove the seeds. 
  3. Cover and refrigerate until cold.

Sweet Mystery: Lowry's Fudge Cake Recipe and Story

Recently, I came into contact with a new type of cake: Lowry's Fudge Cake. Or was it Lowery's? I'm not completely sure, because based on anecdotal evidence, I see it both ways.

To the best of my sweet sleuthing, this cake--really more like bar cookies, really--made a name for itself in the kitchen of the Lowry's Motel restaurant in Greenville, IL. I found this small recipe headnote on Recipe Circus:

No Greenville native of a certain age will ever forget the pleasure of biting into a piece of Lowery's Fudge cake. It was sold exclusively at the old Lowery's Motel. We still remember how it was cut into squares and neatly wrapped in wax paper. After the Lowery ladies died and the motel restaurant became but a fond memory, custody of the fudge-cake recipe was passed to another lady of the church. It still arrives for the reception in perfect squares, wrapped in the traditional wax paper, though now the ladies of the Pastoral Care Committee unwarp it and arrange it on a silver tray. It never lasts long.

...and yet when I tried to find "Lowery's Motel" I drew a blank, but I did find evidence of a Lowry's, as noted in the obituary of Mariam T. Lowry (which references a motel in the family), and this vintage postcard:

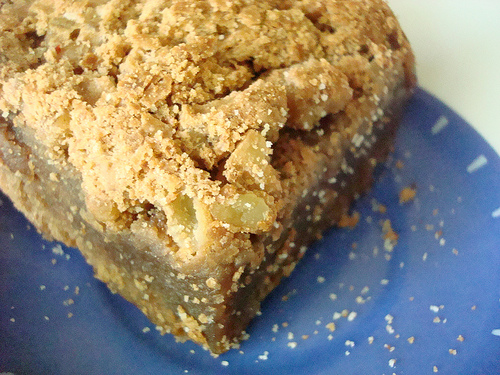
...so sadly, while I was unable to find out much more about who created this recipe, one thing is not shrouded in mystery: the cake's deliciousness. As previously noted, it really is more like a cross between a cake and a bar cookie, kind of like a chocolate gooey butter cake with a crumb topping. Very decadent, very delicious. Happily, I was able to find a recipe--here it is for you. The one I tried (pictured top, not baked by me) also had a brown sugar crumb topping. Feel free to leave any more lore about the cake in the comments section!

Lowry's (or is it Lowery's?) Fudge Cake

  • 2 sticks of butter
  • 4 squares semisweet chocolate
  • 1 3/4 cups sugar
  • 4 eggs
  • 1 cup flour, sifted
  • pinch of salt
  • 1 tsp vanilla
  • 1 cup pecans, chopped

Recipe

  1. Preheat oven to 300F.
  2. Melt the butter and chocolate together. Add the sugar, Stir until melted. Cool slightly. With a wooden spoon, mix in the eggs, one at a time. Fold in flour and salt. Add vanilla and chopped pecans. Some people like alot of vanilla and a lot of nuts. I suggest 1 tsp vanilla and 1 cup chopped nuts. 
  3. Pour the mixture into a buttered 9X11 inch pan. Bake for about 40 minutes. Start testing at 30-35 minutes. To be a purist, your straw for testing should come out clean. Cool on wire rack.


Do the Mashed Potato: Chocolate Covered Potato Kisses Recipe for Serious Eats

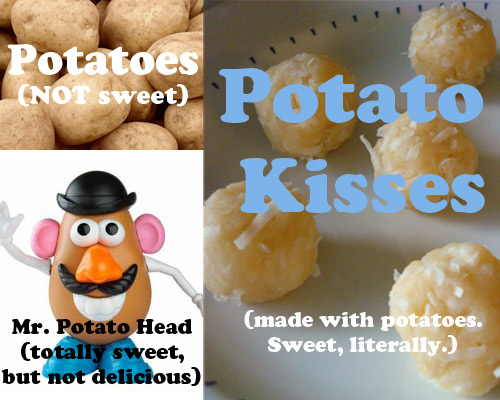
Desperate times called for desperate measures, and in the 1930s, candy was often made using an unlikely ingredient: mashed potatoes. No, really.

Potato fondant, rolled candies filled with peanut butter, and Potato Fudge were among the potato-rich candies referred to as "depression candy."

Of course, even in less depressed modern-day kitchens, these recipes are worth revisiting: turns out, potato is a surprisingly versatile candy filling, working very well with a variety of flavors and textures and making for a texture that is surprisingly creamy. This recipe for Potato Kisses is one of my personal favorites, rich with sweetened coconut. And of course, like so many things, it tastes even better with a rich coating of dark chocolate.

For the full entry, more cute pictures, and the recipe, visit Serious Eats!

Cookie Time: Butterscotch Pecan Cookies Recipe by Big Girls, Small Kitchen

CakeSpy Note: I am so glad you have plenty of money, because there's another book you should buy this year in addition to my CakeSpy oeuvre. It's called In the Small Kitchen: 100 Recipes from Our Year of Cooking in the Real World and it's by Cara and Phoebe of Big Girls Small Kitchen. Here's a guest post from these talented sweeties:

There are about a million reasons to bake, most of which are enumerated right here on CakeSpy. Sweets bring such pleasure, and they’re the easiest treats to share.

But sometimes a batch of baked goods is not just about the chocolate (or the butter or the sugar or the maple syrup).  We send off treats when we want to express an emotion or make a gesture that we’re just not eloquent enough to put into words. We bake, box, and deliver, and poof!—we’ve conveyed how we feel. 

So whether it’s guilt, atonement, or pity you need to demonstrate, we’ve got the sweet for you in our book,  In the Small Kitchenwhich comes out on Tuesday, May 24th! A whole section, called “Tins of Treats” is organized by emotion and the treat that goes with it. (In case you can’t wait, the answer is: brownies assuage guilt, “lotus” blondies are for atonement, and classic chocolate chip cookies are best for ameliorating a pitiable situation.)

For now, something simple: cookies for gratitude. It’s possible this is what cookies were invented for.

These Butterscotch Pecan Cookies are something special, as is fitting when you’re thankful. Their toothsome texture makes each bite melt in your mouth, and the sweet taste of butterscotch is balanced every so slightly by espresso. But the best part is the sweet-and-savory coating: these babies get a roll in a sugar-salt mix before going into the oven to caramelize and bake. Gratitude, indeed!

--Cara and Phoebe, bloggers at Big Girls, Small Kitchen and authors of In the Small Kitchen.

Butterscotch Pecan Cookies

Makes 24-30 cookies

If you can’t find butterscotch extract, use 3/4 cup butterscotch chips and decrease the pecans to 1 ¼ cups.

  • 2 cups (8-ounces) raw pecans
  • 2 cups plus 2 tablespoons all-purpose flour
  • 1 teaspoon baking soda
  • 1/2 teaspoon salt
  • 1 cup (2 sticks) unsalted butter
  • 2/3 cup granulated sugar
  • 2/3 cup packed light brown sugar
  • 1 egg
  • 3/4 teaspoon butterscotch extract (see note)
  • 2 teaspoons vanilla extract
  • 1/8 teaspoon espresso powder (optional)

 for coating the cookies:

  • 1/3 cup granulated sugar
  • 1 1/4 teaspoons salt

Procedure

1. Preheat the oven to 375°F.  Line 2-3 baking sheets with parchment (or just bake in batches).

2. Spread the pecan halves on a baking sheet and toast for about 10 minutes, checking every minute or so after 5 minutes have passed. You want the nuts to be fragrant and sweet but not burnt. Set aside to cool. (You can do this step a while in advance.)

3. Put 3/4 cup cooled pecans in a food processor. Pulse on and off until the pecans are just ground--you don't want to turn them into a paste.

4. On a cutting board, chop the remaining 1 ¼ cups pecans into small pieces. Put the ground and chopped nuts in a small bowl and add the flour, baking soda, and teaspoon salt. Stir to combine and set aside.

5. In a large mixing bowl with a handheld mixture, cream the butter with the sugars until light and fluffy.

6. Add the egg, beat until combined, then mix in the extracts and espresso powder.

7. Pour the dry ingredients into the butter mixture and mix just until the flour is incorporated.

8. Prepare the coating: mix together the additional sugar and salt on a shallow plate. Form the dough into 2-inch balls, and roll the balls in the sugar-salt mixture until coated. Place the balls on a baking sheet 3 inches apart.

9. Bake the cookies for 8-10 minutes, until the bottoms are golden and the tops are just barely firm. Remove and let cool on the baking sheet for 10 minutes before gently removing to racks or plates to cool completely.

Sealed with a Kiss: Potato Kisses Recipe

You may not know this, but during the Great Depression, when many ingredients were scarce, an unexpected ingredient had a bit of a heyday in the world of confectionery: the Potato! 

And I don't mean lumpy but delicious baked goods or candy bars named after their resemblance to the potato. I mean treats made with actual potatoes--usually mashed, and added (I imagine) as a sort of flour substitute / body-builder, and as an absorber of other flavors around it.

While the potato's period of vogue as a component of confectionery seems to have faded, it was fun to make this recipe for Potato Kisses; this is the traditional recipe, but for next week's Serious Eats post, I am going to do a modern-day (and in my opinion, more delicious!) version.

I found this recipe in Who Wants Candy? by Jane Sharrock, where she says "once quite popular as an after-dinner treat with our grandparents and great-grandparents, potato candies are now ssomewhat of a novelty, with only a handful of lucky people knowing how delicious they can be." The book also includes recipes for Wacky Potato Fudge and Potato fondant.

Potato Kisses

  • 1/2 cup unseasoned hot mashed potatoes
  • 1 teaspoon butter
  • 1 pound confectioners' sugar, sifted
  • 1/2 teaspoon almond extract
  • 3 1/2 ounces sweetened flaked coconut

Procedure

  1. Cover a countertop area or large baking sheet with waxed or parchment paper.
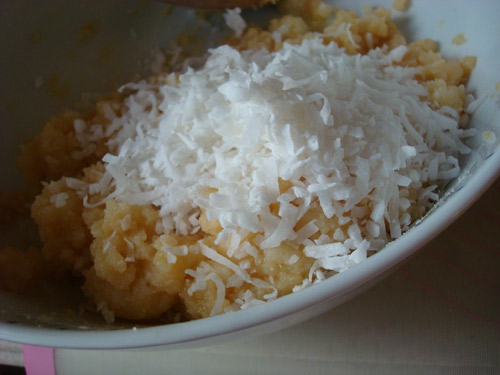
  2. In a medium mixing bowl, combine the mashed potatoes and butter, mixing well. Gradually add the sugar, blending until smooth. Stir in the almond extract and coconut; drop by spoonfuls on to the paper. Store in an airtight container.

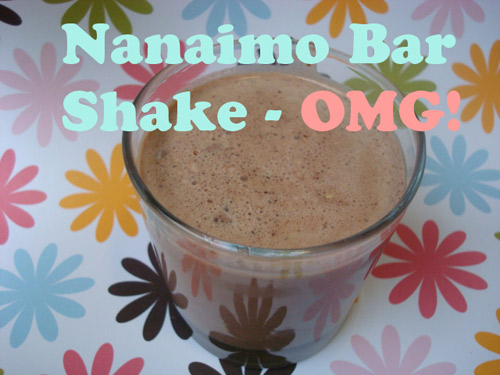
Make it in a Shake: Nanaimo Bar Milkshake Recipe

File under "Unholy, but Wholly Delicious": The Nanaimo Bar Shake.

That's right.

When I recently found myself with an excess of Nanaimo Bars--to the point where they were just on the verge of getting stale--I thought to myself, "how can I revive these sweet treats for an extra-awesome treat?". The answer was swift and obvious: make it in a shake!

The result when you give the richest, most decadently addictive bar cookie on earth gets a butterfat upgrade? You have yourself a frosty froth of fantastic, that's what you've got. 

Here's how to make this magic happen at home. 

You're welcome.


Nanaimo Bar Shake

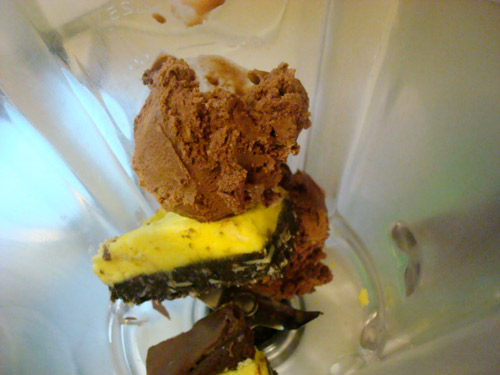
  • 1 Nanaimo Bar
  • 2 scoops ice cream, vanilla or chocolate, or one of each
  • milk or cream, to thin (up to 1/4 cup)

 Procedure

But in a blender. Blend. Add more milk/cream if you want it more sippable. Enjoy.

Sweet Honey: Honey-Almond Cantuccini from Ancient Grains

I always love meeting a new cookie. So I was delighted to make the acquaintance of Cantuccini in the newly-released book Ancient Grains for Modern Meals: Mediterranean Whole Grain Recipes for Barley, Farro, Kamut, Polenta, Wheat Berries & More by Maria Speck, in which they are introduced thusly:

"Small almond biscotti are called cantuccini, or "little nooks" in the Tuscany region of Italy. These are honey-sweetened and delicately flavored with almonds in two forms--a finely ground meal and whole toasted nuts. Watch these twice-baked cookies closely, as you don't want them to brown too much and lose their fine fragrance. You will need extra almond meal for the work surface."

Honey-Almond Cantuccini

 Ingredients

  • 1 3/4 cups whole wheat pastry flour
  • 1 cup lightly packed almond meal (3.5 ounces)
  • 1/2 teaspoon sea salt
  • 1/2 cup coarsely chopped toasted skin-on whole almonds
  • 1/2 cup extra-virgin olive oil
  • 1/2 cup honey
  • 2 1/2 teaspoons vanilla extract
  • 2 teaspoons finely grated lemon zest

 Procedure

  1. Whisk together the pastry flour, almond meal, and salt in a large bowl, and then stir in the almonds. Make a well in the center. In a medium bowl, using a large whisk, thoroughly blend the olive oil, honey, vanilla, and lemon zest until thick and syrupy, about one minute. Add to the center of the dry ingredients and combine, using a rubber spatula or wooden spoon, just until a soft dough forms. Do not overmix. Cover the bowl with a plate and let sit at room temperature for 30 minutes.
  2. Meanwhile, position a rack in the center of your oven and preheat to 300 degrees F.
  3. Line a large rimless sheet with parchment paper.
  4. Lightly sprinkle your work surface with almond meal. Cut the dough inside the bowl into four equal pieces. It will be soft and sticky. Briefly knead each piece a few times to smooth and form into a log, about 7 inches long and 1.5 inches wide. If almond pieces protrude, gently press them in while working the dough. Add more almond meal to your work surface if needed. Repeat with the remaining dough. Place logs on the prepared baking sheet, leaving about 2 inches in between.
  5. Bake the logs until the tops show small cracks, firm up, and just start to brown--32 to 35 minutes. Remove from oven, and carefully slide the parchment paper with the logs onto a wire rack to cool for about 15 minutes. Leave the oven on.
  6. Transfer logs to a cutting board. Using a large, sharp serrated knife, cut each log diagonally into 1/2 inch thick slice. Return the parchment paper to the baking sheet; place the slices upright (not cut-side up) on the baking sheet.
  7. Bake until the cantuccini feel dry to the touch at the cut sides (not on the top) and just start to brown at the edges, 15-17 minutes. Transfer the cookies to a wire rack to cool completely before storing. They freeze well for up to 1 month.


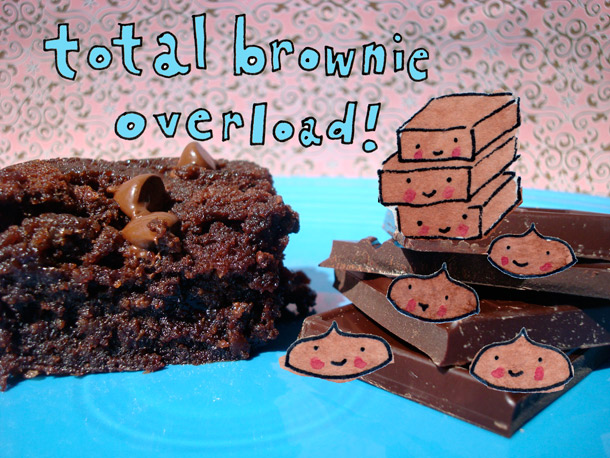
Total Brownie Overload: Brownie Upside-Down Brownie Recipe for Serious Eats

Om nom nomWhat on earth is a Brownie Upside-Down Brownie?

First, think to yourself: "Pineapple Upside-Down Cake". Now, replace "pineapple" with "brownie" and "cake" with "brownie." Now you are getting the idea. This brilliant notion came to me by way of Vickie, the designer behind A Mano Jewelry and, apparently, a whiz in the kitchen.
Starting with a buttery, brown sugar base, a layer of bite-sized brownies is then coated with decadent brownie batter, baked and then flipped for the most decadently, buttery, chocolatey treat you could possibly imagine. Advice: eat now, and diet another day.

Note: Use either pre-packaged brownie bites, such as these, or homemade (almost erring on under-baked) brownies for the topping part; they will simply melt into the brownie batter in the most deliciously chocolaty fashion.

For the full entry and recipe, visit Serious Eats!