Sweet Leftovers: Birthday Cake Bread Pudding Recipe for Serious Eats

When you have over 30 birthday cakes, you've got to do something with the leftovers. And you can only eat so much Birthday Cake French Toast.

Having found myself in such a situation following my recent 30th birthday party, I decided to get creative with the leftovers. Naturally, on the list was employing a trusted bread pudding recipe, but swapping leftover birthday cake for the called-for carbohydrate.

This makes for a deliciously buttery, buttercream-studded variety of bread pudding, soft and sweet in the middle, and punctuated by sweet, crunchy bits of frosting on top, which reached a semi-caramelized state during the baking process. Happy post-birthday, indeed.

For the full entry and recipe, visit Serious Eats!

Sweet Imprints: Peanut Butter and Jelly Chocolate Thumbprint Cookies Recipe

Pop quiz! What's delicious?

A. Thumbprint cookies.
B. Chocolate
C. Peanut Butter and Jelly
D. All of the above

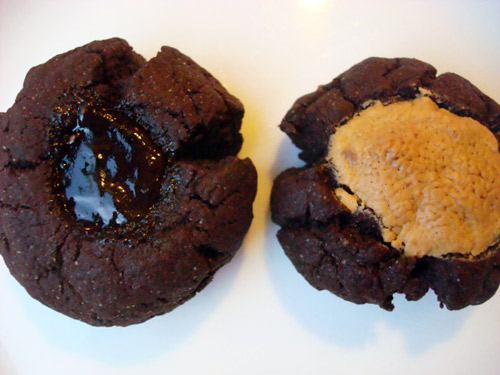
The answer is D, and even further, they're better when all put together, at once. Case in point: buttery chocolate thumbprint cookies filled with peanut butter and jelly! A twist on several classics, I recently made these and based on how quickly they got eaten, I'd say that they were a big (sweet) success.

Peanut Butter and Jelly Chocolate Thumbprint Cookies

Ingredients

  • 3/4 cup all purpose flour
  • 1/3 cup unsweetened cocoa powder
  • 1/4 teaspoon salt
  • 1/4 cup unsalted butter
  • 1/4 cup sugar
  • 1/2 teaspoon vanilla extract
  • 2 tablespoons light cream

Procedure

  1. Preheat your oven to 400°F.
  2. Mix the flour, cocoa, and salt in a large bowl. Set to the side.
  3. In the bowl of an electric mixer fitted with the paddle attachment, cream the butter until it is light and fluffy.
  4. Stir in the sugar and vanilla until incorporated.
  5. Add the cream, mixing until it forms a stiff dough.
  6. Break off a piece of dough and roll into a ball about 1 to 1 1/2 inches in diameter. Using your hand, gently flatten (it's ok if they crack lightly on the sides) and using your thumb, press an indent in the center. Repeat with the remaining dough. Place the cookies on two parchment-lined baking sheets, leaving about 1 1/2 inches between each cookie. In the center of each cookie, put either a small dollop of peanut butter or jelly. I alternated both, and even put both peanut butter and jelly in a few.
  7. Bake until lightly browned (since the dough is fairly dark, look for a dull finish on top) and firm to the touch, 18-24 minutes. Transfer to wire racks to cool.

Frozen Hot Chocolate Recipe for Serious Eats

If you've ever visited Serendipity 3 in New York City, you are probably aware of—and hopefully have sampled—their signature dessert, the Frrrozen Hot Chocolate.

If you've never sampled this sweet treat, it's sort of like the richest, most decadent, most tricked-out-with-chocolate Frappuccino-type drink (sans coffee, of course) that you've ever tasted. With the sheer amount of chocolate in this drinkable dessert, it gets into every sip, slurp, or bite (because the consistency is such that it works with a straw or a spoon).

This adaptation, believe it or not, is even more decadent than Serendipity 3's, employing cream instead of milk and even more chocolate than the original--but if you're feeling guilty, simply split it into smaller servings. They won't be huge, but I promise, they will be mighty.

For the full entry and recipe, visit Serious Eats!

Microwave Chocolate Peanut Butter Chip Fudge Recipe

There was a time, in my childhood, during which my parents chose to go without a microwave. I know--hippies!

As a result, I became exceedingly adept at cooking everything with the toaster--for instance, putting foil on top of the toaster oven and heating up microwave pizza using the heat rising from inside of the toaster. Totally not a fire hazard at all. 

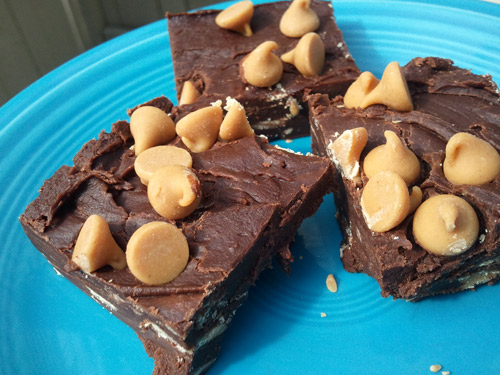
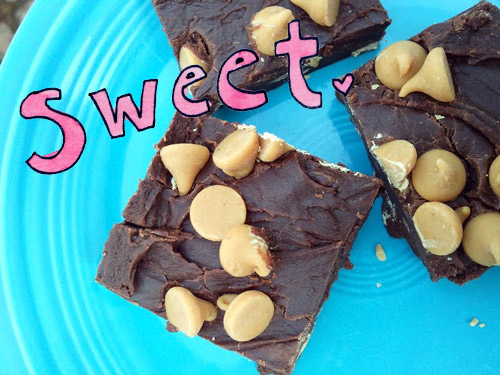
These days, now that I have a microwave of my very own, I really want you to know that I appreciate its presence very much and strive to honor it whenever possible. And what bigger tribute to la belle microwave than making delicious microwave fudge? This is a riff on a recipe I found on Allrecipes.com, but I made the executive decision to use half and half instead of milk (good idea) and to add a healthy dose of peanut butter chips for added rich deliciousness. Here's how you make some microwave magic at home:

Microwave Chocolate Peanut Butter Chip Fudge

  • 4 cups confectioners' sugar, sifted
  • 1/2 cup unsweetened cocoa powder, sifted
  • 1/2 cup half and half, divided
  • 1/2 cup unsalted butter, cut into 1/2 inch cubes
  • 1 teaspoon vanilla extract
  • 3/4 cup peanut butter chip morsels, divided into 1/2 and 1/4 cup


Procedure

  1. Line an 8x8-inch or 9x9-inch pyrex pan with parchment paper or waxed paper.
  2. In a large microwave safe bowl, stir together the confectioners' sugar and cocoa. Pour 1/4 cup of the half and half over the mixture and place butter in bowl. Do not mix (it will be too thick to mix, anyway). Microwave on high until butter is melted, about 2 minutes. Stir in the vanilla and 1/2 cup of the peanut butter morsels. Stir vigorously until smooth. You can also put the mixture into a stand mixer if that sounds exhausting. If your mixture is too dry, add up to 1/4 cup more half and half, a little at a time, until the mixture comes together in a fudge-like consistency.
  3. Spoon the mixture into your prepared pan and using a rubber spatula, spread the mixture so that it is evenly distributed. If desired, sprinkle the top with the remaining peanut butter morsel chips.
  4. Chill in the refrigerator for an hour, or the freezer for half an hour, before serving. Makes about 16 squares.

Gad-Zukes: Zucchini White Chocolate Chip Cookies Recipe for Serious Eats

August is prime time for zucchini. And such proliferation means that means that after you're done making healthy summer pastas, salads, grilled vegetables and wholesome stir-fry dishes, you'll still have plenty left over to make dessert.

You could make zucchini bread, or even better, zucchini cake—but for a lighter bite with a zingy citrus burst, why not try White Chocolate Chip Zucchini Cookies? These drop cookies are simple to make, and offer a sweet summery variation on the usual chocolate chip cookie. Many zucchini-based sweets call for shredded zucchini, but for this recipe, I prefer to dice and lightly sauté it in brown sugar and butter. The zucchini absorbs the sweet, rich flavor of the sugar and butter, adding moist, chewy flavor bursts throughout the cookie, which are gorgeously complemented by sweet white chocolate.

For the full entry and recipe, visit Serious Eats!

Pineapple Upside-Down Cupcakes Recipe

Mini Pineapple Upside Down Cakes

You may spin me "right round baby right round", but I'd rather eat a pound (and a half) of these Pineapple "Upside Down" Cupcakes. Nom!

Pineapple "Upside-Down" Cupcakes Recipe

Adapted fromKatie and the Cupcake Cure (Cupcake Diaries)

For the cakes

  • 1 box of yellow cake mix
  • 1 cup sour cream (full fat, yo)
  • 1/2 cup pineapple juice (can use juice from can of pineapple slices; see topping ingredients)
  • 1/2 cup vegetable oil
  • 4 large eggs
  • 1 teaspoon vanilla extract

Topping

  • 8 tablespoons unsalted butter, melted
  • 3/4 cup firmly packed light brown sugar
  • 1 can (20 ounces) crushed pineapple, drained (set aside 1/2 cup juice for the batter; see above)
  • maraschino cherries

 Procedure

  1. Center baking rack in oven; preheat to 350F. Line a muffin tin with baking cups.
  2. In a large mixing bowl, combine all of the batter ingredients. With an electric mixer on medium speed, mix the ingredients together until no lumps remain. Spoon the batter into the cupcake tins so that each cup is 1/2 full.
  3. Make the topping. Mix the melted butter and brown sugar together with a spoon. Sprinkle about a teaspoon of the mixture on top of the cupcake batter in the tins. Now add a layer of about a tablespoon of the pineapple. If you'd like (do it) add a cherry on top, pressing into the pineapple layer so it's level.
  4. Bak the cupcakes 18-20 minutes, or until a toothpick inserted into the center of a cupcake comes out clean. Remove from oven and place on a wire rack to cool. Let the cupcakes cool at least 20 minutes before eating.

Sweetness Overload: Banana Split S'more Whoopie Pies Recipe for Serious Eats

In case you didn't already know it, August 10th is both National S'more Day andNational Banana Split Day.

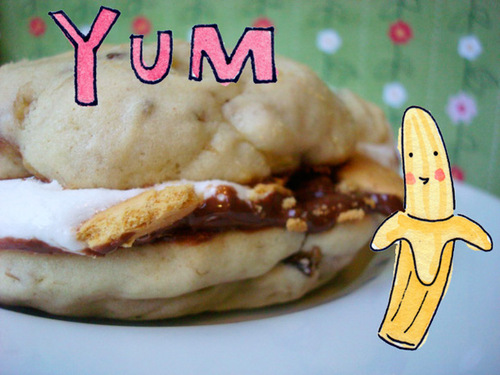
And in celebration of this momentous day, here's a dessert mash-up which allows you to go above and beyond your civic pastry eating duty: the Banana Split S'more Whoopie Pie. It combines all of the key flavor points of both the banana split and s'mores, but the delivery is a bit of a curveball: cakey banana-marshmallow cookies are lined with chocolate before sandwiching ice cream flecked with graham cracker bits.

Just more proof that if some is good, s'more is better.

Note: Don't like the idea of cold cookies? For an easy variation, sandwich toasted marshmallows or marshmallow fluff between the sandwiches instead of ice cream for a treat that doesn't have to be chilled.

For the full entry and recipe, visit Serious Eats!

Sweet Reading: Cookies and Cream Scones Recipe and a Giveaway for The Secret Ingredient by Laura Schaefer

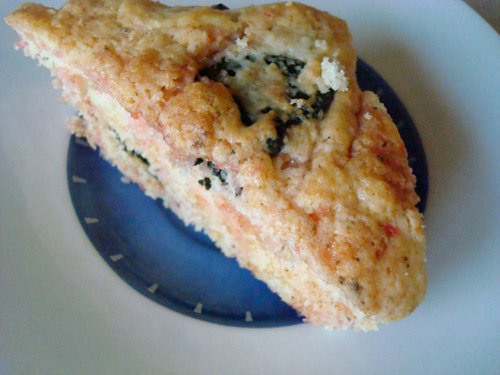
Reading is totally sweet. We all know that. But novels are even sweeter when they involve baking recipes! A few years ago, I was charmed by Laura Shaefer's young adult novel The Teashop Girls, about three friends who are trying to save the main character's grandmother's tea shop in Madison, WI; now, there's a follow-up novel entitled The Secret Ingredient, which is a sweet but not saccharine continuation of the tale of Annie and her friends growing up and learning their place in the world--this time centering around a scone-making blogging competition.

So, they're super cute books for young girls to read, but happily, Paula Wiseman books has offered a copy of The Secret Ingredient for giveaway! Just add a comment to this post (or comment on the CakeSpy facebook page) with your favorite type of scone. 

and--bonus! Here's a recipe for one of the scones from the book.

Cookies and Cream Scones

Adapted from The Secret Ingredient

Ingredients

  • 2 cups all purpose flour
  • 1 tablespoon baking powder
  • 3/4 cup sugar
  • 1/2 teaspoon salt
  • 3 tablespoons butter
  • 1 egg, beaten
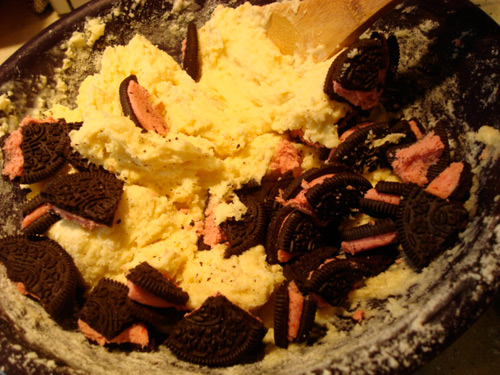
  • 1 cup chopped sandwich cookies (I used about 8 coarsely chopped berry oreos, because they were pink in the middle)
  • 1/2 cup buttermilk
  • 1/4 cup milk

Procedure

  1. Preheat the oven to 400 F.
  2. Mix the dry ingredients together first; cut in the butter. Stir in the beaten egg and the cookie pieces. 
  3. Slowly add the buttermilk to form a thick dough. Knead the dough on a board, roll to a 1-inch thickness, and cut the dough into 2-inch rounds or triangles.
  4. Place each piece on a greased cookie sheet and brush the tops with the milk. Bake for 12-15 minutes, or until golden brown.

Gimme S'more: S'more Pop-Tart S'mores Recipe

I'm just going to come out and say it: I am no stranger to S'more brilliance. After all, I am the inventor of the mystical and magical S'moreo (S'mores made using oreos).

And I do own this t-shirt (thanks Nicole):

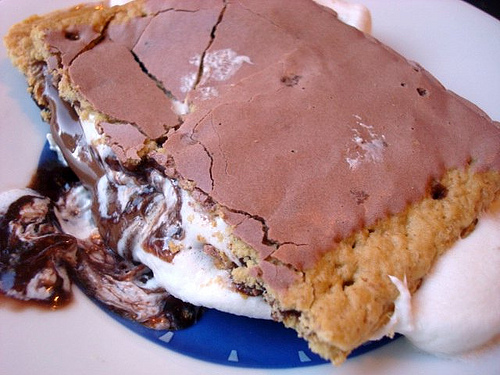
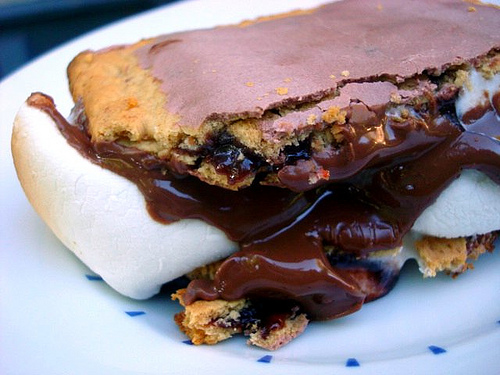
But if you're seeking extreme S'more Flavor Overload, have I ever got a new sweet treat for you: S'more Pop-Tart S'mores. If you suspect that this masterpiece is comprised of s'mores made using S'more Pop-Tarts instead of graham crackers, you suspect correctly.

If your impulse is to protest "too much!", I must gently correct you: "just enough". The usual S'more is bookended by even more S'more, in this case deliciously gooey Pop-Tart form. Really, what you've got is cold, hard (or is that soft, gooey?) proof that if some is good, s'more is better.

S'more Pop-Tart S'mores

Makes one (easily duplicated)


  • 1 S'mores Pop-Tart, lightly toasted (not all the way toasted; it will finish toasting with the rest of the ingredients) and sliced in half
  • 1 or 2 jumbo marshmallows
  • 6 squares from a Hershey's Chocolate bar
  • 1 square, about 4 by 4 inches, of aluminum foil 

Procedure 

  1. Place one side of the pop-tart, frosted side down, on the foil. 
  2. Lay the chocolate squares on top, and then the marshmallows (or single marshmallow, torn in half) on top of the chocolate. Add the second half of the Pop-Tart on top, frosted side up.
  3. Place in the toaster oven over medium heat for 1-3 minutes, until the edges of the pop-tart and marshmallows are are browned and the chocolate is looking melty on the sides. Remove carefully.

This can also be done in the microwave (don't use the foil!); place the ingredients on a microwave-safe plate and microwave on high for 15 seconds.


Good Eatin': Eton Mess Recipe for Serious Eats

Eton Mess. Its name suggests disarray, but rest assured, the delicious factor with this chilled dessert is in very good order.

Sort of like the love child of Pavlova and Trifle, this confection, consisting of crushed meringue cookies, freshly whipped cream and sugar-coated berries (usually strawberries) takes its name from the venerable Eton College, where it is traditionally served at the school's annual cricket game against Winchester College.

It's wonderfully easy to prepare, and is very open to improvisation: not mad for meringues? Try it with ladyfingers or crushed Nilla wafers instead. Not starry-eyed for strawberries? Substitute blackberries, blueberries, or a mix of your favorite fruits in equal quantities.

Note: I got the charming idea of serving this sweet treat in half-pint mason jars from a restaurant in Seattle called Smith, where chef Chris Howell serves Eton Mess in this method, using a rotating roster of fresh berries.

For the full entry and recipe, visit Serious Eats!

Biscuit Time: Biscuit Cinnamon Rolls Recipe for Serious Eats

What happens when you combine biscuits with cinnamon rolls?

A few things, as I discovered when I recently came across something called the Biscuit Cinnamon Roll at the Denver Biscuit Company. On a technical level, the combination yields a biscuity, dense and substantial roll with a deliciously crisped edge and gooey, sweet interior. But if you want to get poetic about it (and you just might), by melding these two twin titans of carbohydrate awesomeness, you've got a decadently delicious and addictive tour de force that just might change the way you look at morning sweets forever.

Here's my homemade re-creation of this Denver delicacy.

Note: The biscuit portion of the recipe is adapted from The New York Times.

Find the full entry and recipe on Serious Eats!

Fortune Teller: Homemade Fortune Cookies Recipe for Serious Eats

Fortune cookies are so bossy, always telling you what the future holds, often in a weird and enigmatic way. But with National Fortune Cookie Day being July 20 (sorry I'm late), there's a sweeter option. Choose your own destiny by baking your own fortune cookies: this way, you can stuff them with any kind of fortunes you want. And as a bonus, they're surprisingly easy and quick to bake, and the lightly sweet, vanilla-scented homemade version tastes vastly superior to commercial varieties.

For the full entry and recipe, visit Serious Eats!

Sweet and Fiery: Ancho Pine Nut Brownies Recipe

It's time to spice up your life.

And I'm not talking about watching the Spice Girls movie on continuous loop, although I would certainly not judge you if you decided to do this. It's a great movie.

No, I'm talking about Ancho Pine Nut Brownies, which are basically my new favorite thing. I became obsessed with them after discovering them on this blog; I sought out the book they came from, entitled Nuevo Tex-Mex: Festive New Recipes from Just North of the Border; and tried a batch myself (I lightly adapted the recipe, which was developed by baker Rebecca Rather).

Incredibly dense (yes!), the chocolate is off-set by a chile bite and a mellow background of pine nuts, and chocolate morsels added to the mix make for a minefield of mingling flavors that work in a surprisingly harmonious manner. Don't like sweet and spicy? Skip the Ancho if you must, but rest assured I will be judging you for that.

Ancho Pine Nut Brownies

  • 1 pound semisweet chocolate, coarsely chopped
  • 1 pound unsalted butter, cut into small pieces
  • 7 eggs (the original recipe calls for 8!)
  • 3 cups granulated sugar
  • 2 cups all-purpose flour
  • 1 1/2 tablespoons ancho chile powder (see note)
  • 1/2 cup semisweet chocolate morsels
  • 1 1/2 cup toasted pine nuts or Pinon nuts.

 Procedure

  1. Preheat oven to 325 degrees F. Butter a 13 x 9-inch baking pan.
  2. In the top pan of a double boiler, combine the chocolate and butter. Place over barely simmering water in the bottom pan and heat, stirring occasionally, until the chocolate and butter have melted and are combined.
  3. Remove from heat. In a bowl, whisk together the eggs and sugar until thick and smooth. Slowly pour into the chocolate mixture, stirring constantly.
  4. Stir in the flour, ancho chile powder, chocolate morsels and pine nuts.
  5. Pour evenly into the prepared baking pan. Place in the oven and bake for 20 to 25 minutes, or until a knife inserted in the center comes out mostly clean.
  6. Remove from the oven and let cool completely. Cut into squares to serve. If desired (do it!) serve with ice cream.

Sweet Sandwich: Fried Peanut Butter and Jelly Poundcake Sandwich Recipe

I'm going to tell you something now, and I want you to not freak out too much. You know that childhood staple known as the Peanut Butter and Jelly Sandwich? Well, the first time I tried it was when I was 18 years old.

It's true. Due to a jam aversion on SpyMom's part (I know, odd but true) I never had the classic sandwich combo, instead growing up eating crunchy Skippy peanut butter, no jelly, on rye bread (the kind with no caraway seeds). I realize this may sound odd, but I didn't know there could be another way.

But then, in college, upon learning that I'd never sampled the classic combo, some friends whipped me up a peanut butter and jelly sandwich on wonder bread. And to me, it tasted...sweet. But it wasn't quite right: it was almost-dessert, but masquerading as a sandwich. Honestly, I didn't care for it.

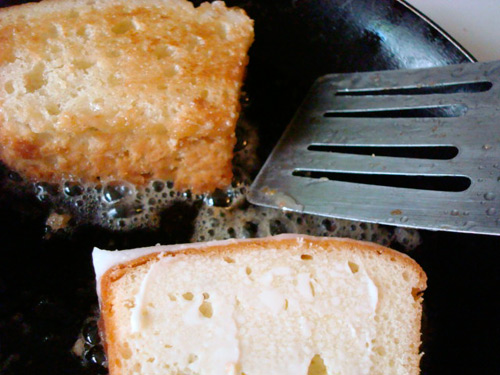
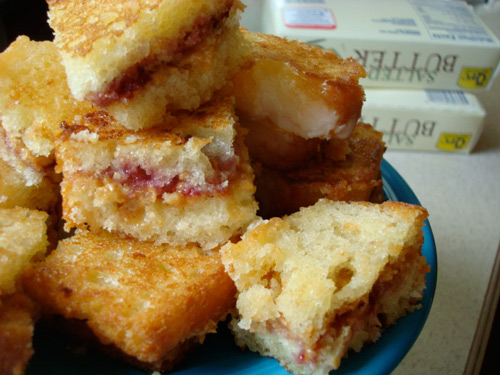
However, what I discovered is that when you embrace that sweetness and take it to the next level--namely, by using pound cake instead of bread, and then pan-frying the whole thing, you get a sweet sandwich that is comfortable being served a la mode, and deliciously decadent and indulgent. 

Here's how you can make it happen at home.

Fried Peanut Butter and Jelly Poundcake Sandwiches

Makes about 6 sandwiches (can be cut into fourths for more delicate appetites)

  • 1 pound cake loaf (I used an iced lemon pound cake from Metropolitan Market)
  • 1 stick of butter
  • 12 tablespoons peanut butter (2 per sandwich); I used Peanut Butter and Co.'s The Bee's Knees
  • 6 tablespoons jam or preserves of your choice (1 tablespoon per sandwich)

Procedure

  1. Prepare your sandwiches. Cut the loaf into 12 slices (can do more or less depending on how thick you'd like the sandwiches).
  2. Pair two slices together; apply one tablespoon of peanut butter to each side. Add jam to one side, and then sandwich them together, so that the filling is contained in the sandwich. Repeat with the remaining slices of pound cake until you have 6 sandwiches. Put the plate of prepared sandwiches in the refrigerator while you prepare the next step.
  3. In a medium frying pan, melt 2-3 tablespoons of butter over medium heat. Once bubbling, remove your sandwiches from the fridge. Apply a smear of butter to the top side, and place the sandwich in the frying pan, non-buttered side down. After about 1-2 minutes, or when the bottom has turned golden, flip the sandwich using a metal spatula (silicone ones don't work as well, as the sandwiches can get a little sticky and want to adhere themselves to the bottom of the pan) and fry the second side (the second side will take slightly less time). If you have room, you can do two sandwiches at one time in the pan.
  4. Remove from the frying pan and set on paper towels to blot the excess butter. Repeat with the remaining sandwiches, adding more butter to the pan as needed.
  5. Serve immediately; if desired, with a scoop of ice cream on the side.

Hop to It: Grasshopper Pie in a Brownie Crust Recipe for Serious Eats

Comprised of a boozy, creamy mint filling in a chocolate cookie pie crust, Grasshopper Pie is a deliciously refreshing summertime dessert.

But when you swap out the chocolate cookie crust for a crumbled brownie crust, you've got something even more amazing. When you pour the hot filling onto the rich brownie crust, they meld together beautifully when chilled. If you serve it with a big scoop of ice cream on top (not excessive at all) it verges into brownie sundae territory, in the best way possible.

For the full writeup and recipe, visit Serious Eats!

Sweet Summer: Apple and Bing Cherry Galette Recipe from Macrina Bakery

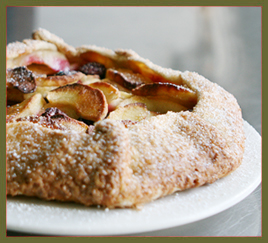
Image: Macrina BakeryHappy July, indeed: it's time for Macrina's recipe of the month! This time, it's for something that sounds delectable even to those (like me) who are wary of fruit-based desserts: Apple and Bing Cherry Galette. Sweet with a bit of sour? Sounds pretty summery, and perfect to be paired with ice cream. Here's the recipe introduction:

I have fond memories of the first time we made this dessert. My friend Kay Simon, wine maker and co-owner of Washington's Chinook Winery, had stopped by the café with some bottles of Merlot that we'd ordered. She also brought along a surprise gift - five pounds of sweet, sun-ripened cherries from her neighbor's farm in Prosser, Washington. We popped a few into our mouths and started daydreaming of all the wonderful pastries we could make with the fruit. The end result was one of my favorite desserts.

Apple and Bing Cherry Galette Recipe

Serves 8 to 10

  • 6 Granny Smith apples 
  • 1/2 tablespoon freshly squeezed lemon juice
  • 3/4 cup granulated sugar
  • 3 tablespoons unbleached all-purpose flour 
  • 1/2 tablespoon cinnamon
  • 2 tablespoons unsalted butter, cut into small pieces
  • 2 cups fresh Bing cherries, stemmed and pitted
  • 1 tablespoon pure vanilla extract 
  • 1/2 recipe Flaky Pie Dough, chilled (recipe follows)
  • Egg wash made with 1 egg and
  • 1 teaspoon water
  • 2 tablespoons coarse raw sugar
  • Vanilla ice cream, for serving


Preheat the oven to 375°F. Peel and core apples and cut into 1/2-inch slices (approximately 12 slices per apple).

Place apple slices and lemon juice in a large bowl. Add sugar, flour and cinnamon and toss until slices are evenly coated. Spread apples into a single layer on a rimmed baking sheet and dot with pieces of butter. Roast on center rack of oven for 15 minutes to release some of the juices and intensify the flavors. Set aside to cool.

Increase oven temperature to 385°F. In a large bowl, combine cooled apples, cherries and vanilla extract. Mix gently with a wooden spoon and set aside.

Coat your hands with flour and shape the chilled piece of dough into a ball. Working on a floured surface, flatten the ball slightly and roll it into a 14-inch circle, about 1/8 inch thick. Gently transfer rolled dough onto a parchment-lined, rimmed baking sheet.

Pile fruit onto center of the dough, leaving excess liquid in the bowl, and spread to cover about 8 inches, leaving a 3-inch border of dough around the filling. Lift border on top of the filling, tucking and folding the dough to create a gathered or pleated finish. Lift each of the folds up and brush underneath with egg wash to seal the crust. Brush all exposed dough with egg wash and sprinkle with coarse raw sugar.

Chill in the freezer for at least 30 minutes.

Place tart on center rack of oven and bake for 15 minutes. Reduce heat to 375°F and bake for 40 minutes more or until crust is golden brown. If the apples start to burn before the crust is ready, cover them with a small piece of aluminum foil. Let cool on the baking sheet for 20 to 30 minutes. Serve warm with vanilla ice cream.

Flakey Pie Dough
Makes enough dough for 2 double-crusted (9-inch) pies, or 2 (10-inch) rustic galettes or tarts.


  • 5 1/4 cups unbleached all-purpose flour
  • 1 tablespoon kosher salt
  • 12 tablespoons (1 1/2 sticks) unsalted butter, chilled and cut into 1/4 - inch pieces
  • 1 3/4 cups solid vegetable shortening, chilled
  • 1 cup ice water


Combine flour and salt in a large bowl and toss together.  Add butter and cut it into the flour until the texture is coarse and crumbly.  You can use a pastry cutter or your fingers, but I like to use 2 forks.  Break up the shortening and add it in small pieces.  Cut in the shortening until the dough is crumbly again.  Add ice water and mix just until the water is incorporated and the dough sticks together when pinched.  This dough will be quite sticky, so dust your hands with flour before handling it.  Pull dough from bowl onto a lightly floured work surface (chilled marble is ideal) and pat it into a block.  Wrap the dough tightly in plastic wrap and chill in the refrigerator for at least 1 hour before using.  Since this recipe makes enough dough for 2 pies or tarts, I recommend cutting it in half before chilling.

Flakey Pie Dough will last for up to 4 days in the refrigerator and for up to 1 month in the freezer.  If you freeze half or all of the dough, it’s a good idea to double wrap it.  Frozen dough needs to be fully defrosted before it’s used, and my preferred method is to transfer the dough to the refrigerator 1 day before I plan on baking with it.  The dough can also be defrosted at room temperature, but it needs to be re-chilled in the refrigerator for 1 hour prior to using.

Sweet Chill: Cannoli Ice Cream Recipe for Serious Eats

Everybody knows that the best part of the cannoli is the cream. But what happens when you take that delicious filling and combine it with ice cream?

What you've got on your hands is an ice dream, that's what. This is an adaptation of a recipe from the brilliant book All American Desserts by Judith Fertig, wherein high-quality vanilla ice cream is doctored up with the makings of cannoli cream. The result is a memorable frozen treat: rich with ricotta, spices, and flecked with bits of candied fruit and chocolate chips. It's the best of two creamy worlds.

For the full entry and recipe, visit Serious Eats!

Sweet and Salty: Peanut Butter Potato Chip Cookies Recipe for Peanut Butter and Co.

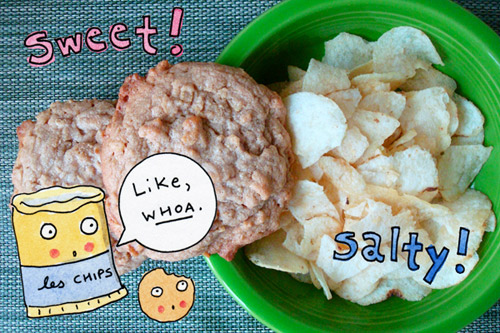
Looking for cookies to serve during your July 4 festivities? Bake this cookie that creates an explosion of flavors in your mouth, of the sweet-savory kind.  The sweet drop cookies are nicely contrasted by the saltiness of the chips, but get a fascinating flavor dimension from the nutty Smooth Operator peanut butter. One bite and even doubters will be singing a new story.

Note: I found that you can also get extra flavor-points by using The Bee’s Knees peanut butter, which adds pleasing mellow end-note from the honey mingling with the brown sugar.

For the full entry and recipe, visit Peanut Butter & Co's website!

Ooey Gooey: Chocolate Gooey Butter Cake Recipe for Serious Eats

Gooey Butter Cake: there is no part of these three beautiful words that is wrong. This cake, which is actually more like a two-part bar cookie, is the pride of St. Louis, MO, a cake steeped in legend and even a little controversy.

It is also unique in that recipes almost always call for a cake mix, and many will argue that this is the "traditional" method of preparation—and yields the best end result.

This version twists the tradition slightly, using a chocolate cake mix instead of the usual yellow, and employs cocoa in the filling. The result is an addictively sweet variation on this rich regional treasure.

For the recipe, visit Serious Eats!

Matcha Point: Matcha Tiramisu With Adzuki Red Bean and Mascarpone Recipe

CakeSpy Note: This is a guest post from The Rice Kernel. Named for a little boy who came along and transformed one family's kitchen experiences, Rice Kernel features wholesome, homemade recipes to help you achieve a "rainbow a day" of colorful and nutritious foods.  For the sweets lover, Rice Kernel's "rainbow" includes plenty of indulgences, often made over with healthful ingredients.  This triple strawberry cheesecake is the perfect collaboration of creamy, decadent cheese and fresh, tart summer berries. The recipe originally appeared as part of this post.

Growing up in the 1980s, tiramisu was ubiquitous at dinner parties and on restaurant menus.  And I consumed my share of them.  (With a Shirley Temple in my other hand, of course.  I wanted a “drink” like the adults.)  But in the intervening decades, my parents rarely ordered or prepared the Italian dessert – they were turned on to (and, hence, turned off by) the raw eggs and copious of heavy cream and mascarpone.  These days, I don’t come upon tiramisu often but when I do, I can’t deny a few bites of the Italian-American favorite.   

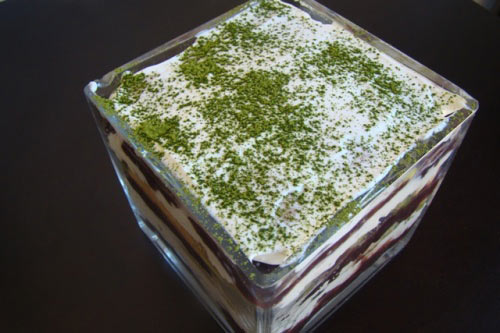
I can’t recall with certainty how or when I dreamt up this recipe.  I was thinking about tiramisu - and thinking that my husband doesn’t share my affinity for coffee and liquer-infused desserts.  Feeling (momentarily) indifferent about typical American dessert flavors, this idea was conceived.  Here, the ladyfingers are soaked in sweetened green tea and sandwiched between rich mascarpone cheese and nutty, sweet red bean paste.  Matcha powder is sifted between layers and atop the dessert as both a bitter counterpoint to the sweetened layers and as a garnish. 

How was it, you ask?  The texture of the dessert is much like a traditional tiramisu – creamy with a softened, moist cake layer.  There is a richness and creaminess from the mascarpone, a nutty sweetness from the adzuki bean paste, and a slightly bitter (but refreshing) contrast from the green tea.  Frankly, if you enjoy the flavors of green tea and red bean you’ll find this delightful – and addictive.  If the flavors aren’t your cup of tea, may I suggest lemonstrawberryvanilla, or chocolate for your sweet tooth? 

Matcha Tiramisu with Adzuki Red Bean and Mascarpone

Ingredients

1 cup boiling water + 1 tbsp macha powder + sugar (to taste).
16 Savoiardi biscuits (ladyfingers)
Matcha powder for dusting
1 cup (1/2 pound) mascarpone cheese (or cream cheese, or vegan cream cheese)
1/4 cup heavy cream
2 tbsp powdered sugar 
2 tbsp matcha powder for dusting
1/2 cup adzuki bean paste (thinned with a few tablespoons of water)

Procedure

  1. Beat cream and powdered sugar in a large bowl with an electric mixer until soft peaks form.  Fold in mascarpone.
  2. Pour 1 tbsp matcha and water mixture in a shallow bowl.  
  3. Dip both sides of half of the ladyfingers in the espresso and use them to line the bottom of a glass or ceramic baking dish.  Dust the ladyfingers with matcha powder.
  4. Spoon a third of the adzuki bean pasta atop the ladyfingers and spread in a smooth, even layer.  Follow with the mascarpone mixture.  Repeat with ladyfingers, adzuki, and mascarpone.  (End with the mascarpone.)
  5. Cover and refrigerate the tiramisu for at least 4 hours or overnight.
  6. Just before serving, sift the matcha powder over the top of the tiramisu.

Note:  Tiramisu can be refrigerated up to 2 days.