Cupcake Cream Pie Recipe for Serious Eats

When it comes to cream pies, you probably think along the lines of banana, coconut, or chocolate. But why limit yourself? Why not let your imagination fly high and fill your pie with delicious cupcakes?

I recently gave this pie in the sky idea a try by lining the bottom of a baked pie crust with alternating slices of cut-up vanilla and chocolate frosted cupcakes, over which I poured a rich, homemade custard filling. So what happens? As the custard sets, it absorbs some of the rich butteriness of the frosting, infusing the entire pie. As a result, the taste is kind of like cream pie meets birthday cake, in a decidedly delicious way. While some might argue that it's gilding the lily, it might interest you to know that this pie also tastes fantastic when paired with ice cream.

For the full entry and recipe, visit Serious Eats!

Blueberry Pie Recipe from SpyMom

SpyMom Made a Pie

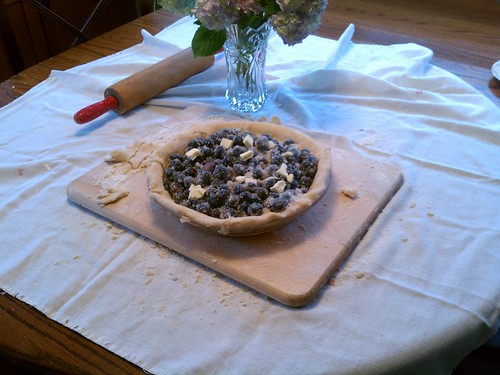
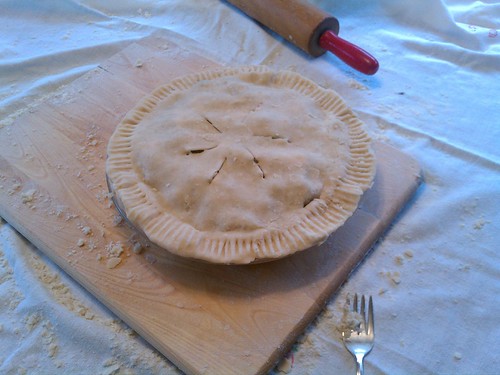
Guess what? SpyMom (that would be MY mom) made a pie. A glorious pie. One so simple and sweet, delightful to eat. SpyMom dubbed it "perfectly imperfect" in its final look, but judging by the little heart-shaped dollop of blueberry juice on top (do you see it?), I'd simply call it "perfectly lovable".

SpyMom made a pie

Happily, she was willing to share the recipe, which she has adapted from a version (I'm not sure which) of the Boston Cooking-School Cookbook.

Oh, and as an aside about the final result: it's the type of pie that is perfect with ice cream, but it also makes for fantastic breakfast-eating, too.

Of course, as SpyMom cautions, this pie was made with fresh New Jersey blueberries, and that's really what makes the pie. Since it's so simple, use the best blueberries you can--you won't regret it! 

Blueberry Pie by SpyMom

Blueberry Pie

  • 1 double-crust pie dough, unbaked. 
  • 4 cups fresh blueberries, washed
  • 3 tablespoons flour
  • 1 cup sugar
  • 1/8 teaspoon salt
  • 1 tablespoon lemon juice
  • 1 tablespoon butter 

Preheat oven to 425 degrees f. 

Line the pie pan with half of the dough (for a bottom crust).

Mix the flour, sugar, and salt in a large bowl. Add the blueberries and lemon juice and toss well.

Pile the mixture into your prepared bottom crust, and dot the top with cut-up pieces of butter.

Roll out the top crust and drape it over the pie. Crimp or flute the edges to form a seal. Make several vents on top to let the steam out while baking.

Bake for 10 minutes at 425 degrees, and then reduce the heat to 350 degrees F. Bake for 30-40 more minutes, or until the top is browned.

Hot Dog Cookies Recipe for Serious Eats

In a culinary sense, the typical cookout menu focuses more on savory than sweet. But that doesn't mean that cookies can't come to your outdoor barbecue: it just means they should get festive.

Hot dog look aside, taste-wise, these treats are totally sweet. Starting with a simple and lightly sweet butter cookie dough, you simply tint a portion, shape appropriately, and add a squiggle of decorating icing to attain an adorable dessert trompe l'oeil morsel. Though the dough requires a chilling period, don't panic: it's only an hour, so go ahead, socialize, eat another (savory) hot dog, and then bake these babies off for a sweet ending to your meal.

Find the full writeup and recipe here!

Leftover Pie Parfait for Serious Eats

Leftover pie. It's not a common occurrence—who leaves pie uneaten, after all? But it has happened, maybe even in your own fridge: that one final slice, left to linger, and maybe getting a little dry around the edges.

But what to do? Do you just choke down the past-its-prime slice? Do you douse it in whipped cream, hoping to make it taste better?

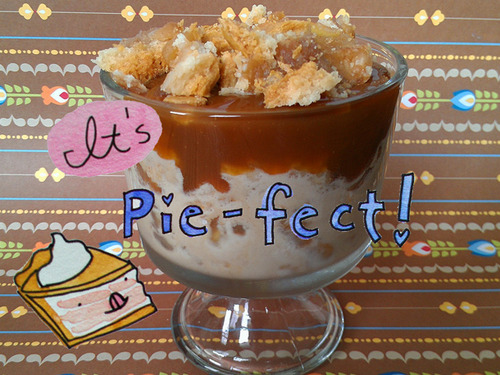
No. What you do is salvage that slice by making it a pretty Pie Parfait. By choosing an assortment of ice cream and toppings which complement your pie, you can bring new life to a dying dessert. In fact, slightly stale pie will work best as its texture will hold up better against the ice cream, and it will better absorb the flavors of the additions.

The composition of your parfait is your own adventure. The basic rule is that you want to choose an ice cream, a topping, and a sauce which act either in harmony or in unison with your pie flavor. For instance, you could compose a harmonious concoction by pairing a slightly tart apple pie with cinnamon ice cream, graham cracker crumbles, and caramel sauce; or, you could go matchy-matchy and pair a slice of grasshopper pie with mint chocolate chip ice cream, thin mints, and chocolate sauce.

Plus, it's fun. Who wouldn't like to trick out their pie and eat it in a pretty cup? It's the perfect way to eat your leftover dessert.

For the full scoop, visit Serious Eats!

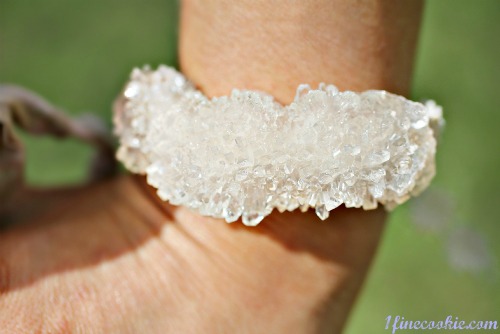
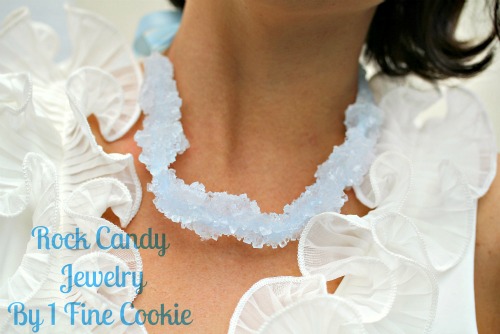
How To Make Edible Rock Candy Jewelry

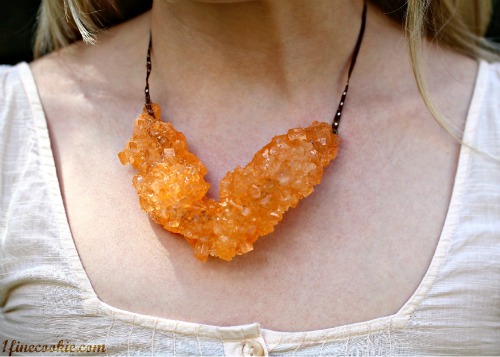
This necklace is not only delightful, it is delicious.CakeSpy Note: This tutorial is provided courtesy Cake Gumshoe Jasmin, a suspected sweet genius who, among other things, has invented cupcake-stuffed strawberries. Check out her work at 1 Fine Cookie!

It’s fashionable, pretty, tastes good, affordable and easy to make. What’s not to like about 1 Fine Cookie’s rock candy jewelry?

These precious “stones” are made with unique flavors, such as marshmallow, peanut butter and more. The flavor is up to your preference!

Make these for ladies’ night, showers, bachelorette weekends, birthday parties, with the kids, or for Mother’s or Valentine’s day. The possibilities are endless!

The bare-bones basics are listed below; for a more detailed tutorial, visit 1 Fine Cookie.

Ingredients and Tools:

  • clothes pin
  • large glass container
  • ribbon
  • sugar
  • optional but recommended: Torani syrups.
  • optional: food coloring

 Process shot!

How to make it happen

  1. Cook about one part water to three parts sugar. One necklace will be about 1 cup water, as a reference point.

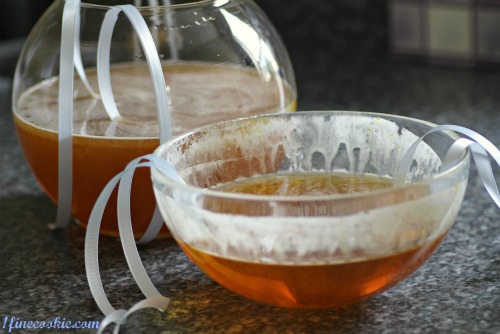
  2. Once the sugar has completely dissolved and simmered, turn off heat and cool. Mix in any food coloring, and a few drizzles of your choice Torani syrup for flavor. 

  3. Soak middle of ribbon (about 2 feet or more) in the sugar water mixture, then coat in sugar overnight until dry.

  4. Place middle of ribbon inside of sugar water, which has been poured into a large glass container. Use clothespins to clip the ribbons and prevent from falling in.

Allow to grow! Move necklaces around a little every day to prevent it from sticking to the sides. While factors will play into how long this will take, including the size of your piece, the humidity, et cetera, you're basically looking at 1-4 weeks.

Cakespy has written permission to feature the recipe, writing and photos of 1 Fine Cookie. Be polite: if you would like to share as well, please visit the website for policies first.


Cream of the Crop: Coconut Cream Whoopie Pies Recipe for Serious Eats

Guess what? Tomorrow (May 8) is National Coconut Cream Pie Day.

Clearly, this is an appropriate occasion to eat your weight in coconut cream pie. But why stop there? Why can't whoopie pies come to the party, too?

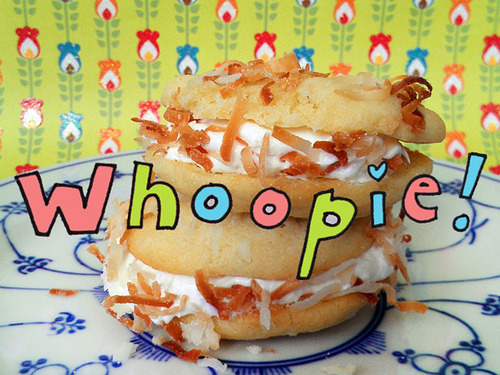
True: traditional whoopie pies are not pie at all—rather, they are cake-like cookies with frosting sandwiched in between. But in the case of the Coconut Cream Whoopie Pie, you can have your cake and eat your pie, too. The rich filling is sort of like a mix between coconut frosting and cream pie filling.

Moreover, these sweet sandwiches are like eating the delicious intersection between sugar cookies, coconut cake, and coconut cream pie in one delectable form—that is to say, an absolutely appropriate food to celebrate this red-letter calendar day.

For the full entry and recipe, visit Serious Eats!

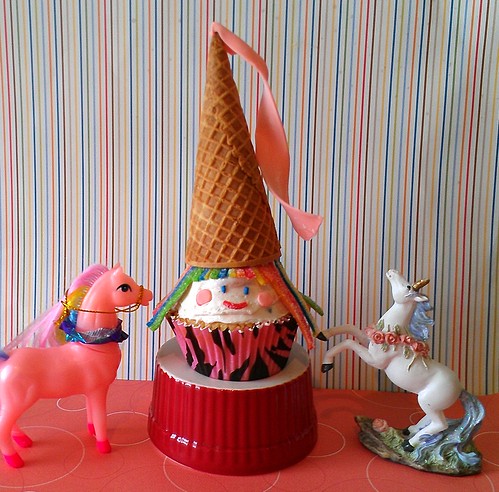
Sweet Fancy: Magical Princess Cupcakes inspired by Amy Atlas

Please just buy Amy Atlas's new book already. Entitled Sweet Designs: Bake It, Craft It, Style It, this sweet book is chock-full of amazing party ideas and as packed as a cup of brown sugar is for a cookie recipe, with delicious recipes and adorable tutorials.

Princess cakes

But don't just take my word for it: check out this cute tutorial.

In the book, there's a recipe and tutorial for "Wicked Pumpkin Cupcakes" which employ overturned ice cream cones for witch hats and candy corn for noses. How cute!

Of course, since it's months from Halloween, I figured it would be pretty adorable to adapt this into a "Pretty Princess Cupcake". Yup, still adorable. And proof that you can use this book as a template to come up with your own party ideas too! Choose your own adventure, yo.

Pretty Princess Cupcakes

adapted from Wicked Pumpkin Cupcakes from Sweet Designs: Bake It, Craft It, Style It.

Makes 12

Assemble your cupcakes. Frost each, spreading until smooth on the cupcakes.

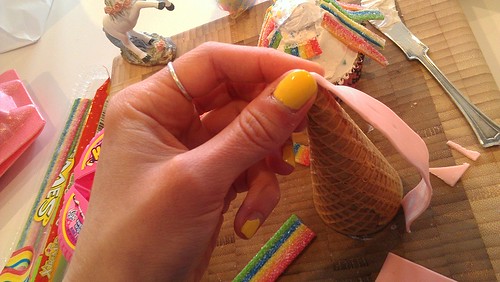
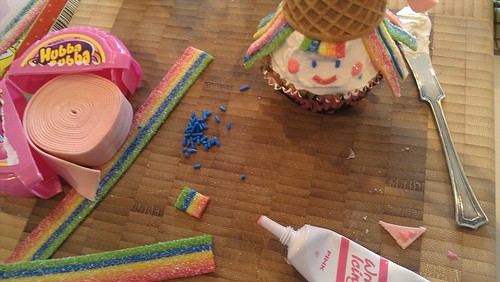
Adhere an approximately 4-inch piece of bubble tape to the top of your ice cream cone, to form a little veil at the top of the hat. You know, how princesses like to do. I adhered it by putting a tiny dab of frosting but then really just gently pressing the gum around the top of the cone; they stayed in place long enough to serve and be devoured. Repeat with remaining cones. If desired, add a little "twist" to the veil.

Making the hat

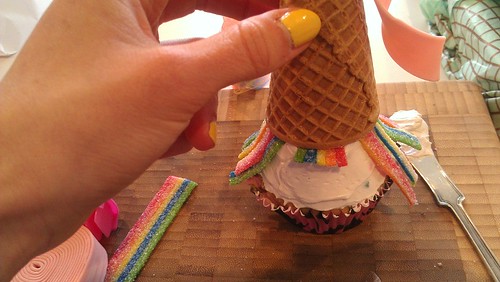
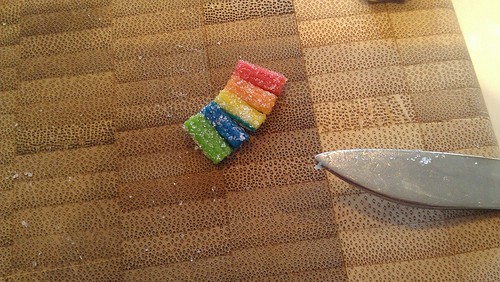
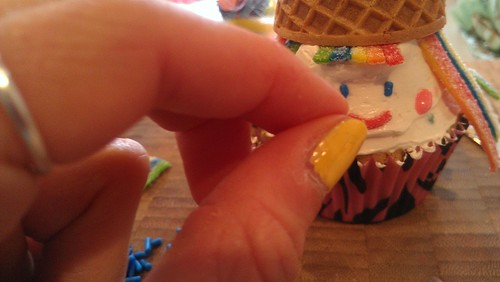
Place an ice cream cone "hat" onto each cupcake, making sure to leave enough frosting showing for the face. Place the longer licorice strands around the sides, for hair; use the shorter stands in front, for "bangs". I even cut along the color divisions for a nice little fringe on the bangs. 

Put on the hat

Fringe

Note: you can also do the hair first and then stick the "hat" on, but sometimes it doesn't stick as well (the cone won't stick as well to the frosting when the candy is already on it!).

How I did this thing

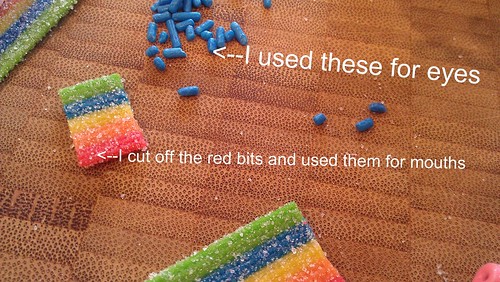
Create faces using your candy--you can use m&m's for the eyes, but I actually found that using small bits of sprinkles was decidedly adorable too. Using small bits of the leftover Taffy candy, I cut out 1/2 inch segments of the red section and used it as smiling faces, and formed tiny pieces of bubblegum from the bubble tape into tiny pink cheeks.

Sweet  

How I did it

Tunnel of Penuche Cake Recipe for Serious Eats

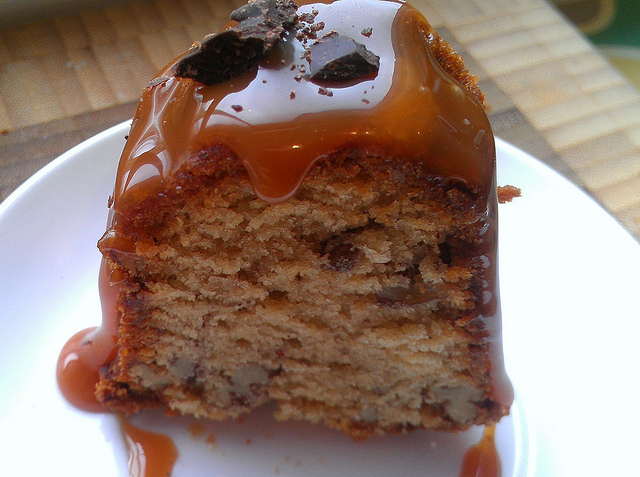
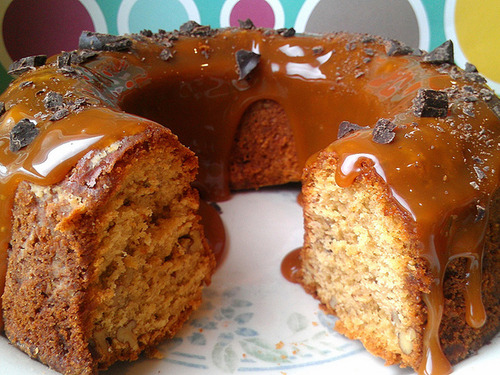
Perhaps you've heard of Tunnel of Fudge Cake. In spite of its titter-worthy name, this rich, nutty fudge cake with a gooey center and chocolate glaze is a modern classic. It was entered into the 1966 Pillsbury Bake-Off, and it's largely accepted as the recipe that made bundt pans a must-have item, and a predecessor of the chocolate lava cake trend.

But for those of you who aren't into the chocolate overload of the famous Tunnel of Fudge Cake, I have configured a sweet counterpart: the Tunnel of Penuche Cake.

If fudge is the inspiration for the original, penuche (a "blonde" fudge made with brown sugar, butter, milk, and vanilla) is the muse for this honey-hued variation. The dense cake is somewhat blondie-like, redolent of brown sugar and butter and studded with bits of pecan. Although the gooey center effect is far more subtle in this version than the original— it's more like a slightly softer and richer cake in the center, giving way to a lightly crispy edge— it's still extremely pleasant to eat. Ungarnished, this would make a fantastic breakfast cake; when topped with a generous coating of butterscotch sauce or dulce de leche, it is suitable for eating any time of day.

For the full entry and recipe, visit Serious Eats!

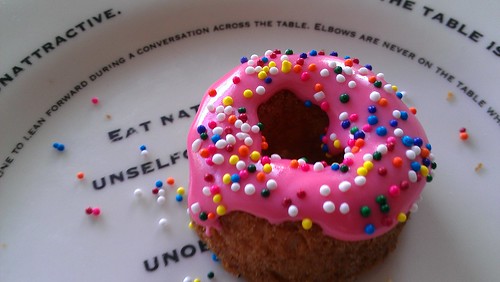
Sweet Dough: Sugar Cookies that Look Like Doughnuts

Doughnut Cookie

So, you're making sugar cookies. Awesome. Good for you.

You've got the batter all mixed. At this point, you pretty much have two choices. You either roll out the dough and cut out some cute shapes, or you're going to drop them on the sheet and bake them. Right? WRONG.

Sour Cream Sugar Cookies

Put away your rolling pin, because I've got an easy way to make your sugar cookies cuter: bake them in a mini doughnut pan .

If you own a mini doughnut pan, like I do (jealous? I got it at the Wilton tent sale when I visited their headquarters), you simply must employ it to make your sugar cookies more adorable.

Honestly, it couldn't be easier to do (provided you have a mini doughnut pan). Here's how I did it.

First, prepare a batch of sugar cookie dough. I am not going to be bossy about what recipe, but I will tell you that I used the one on page 13 of this e-book. Once mixed, set aside for a little bit.

Preheat your oven to the temperature your recipe says it ought to be.

Next, lightly butter your mini doughnut pan. Or spray it with non-stick spray. Whatever you want. 

After it's greased, stuff the dough in the mini doughnut wells. Fill them til they're mostly full. If you think your cookies are going to spread, put less dough in (or put a cookie sheet under the mini doughnut pan while you bake them).

Bake the cookies, but check them about 5 minutes before your recipe would call for, because they're baking in a different vessel.

Donut cookies

Once golden brown, remove from the oven. Let them cool for a while (maybe 20 minutes) in the doughnut pan. Then, gently remove. I found that after loosening one edge with a sharp knife, they basically just popped out. 

Let the cookies cool, and then apply a dab of pink icing (pink is really best) and be sure to put sprinkles on them too.

Enjoy! They're adorable and sweet. But they're not doughnuts, they just look like them.

Doughnut Cookie

Salted Caramel Tart Recipe from the Edible Seattle Cookbook

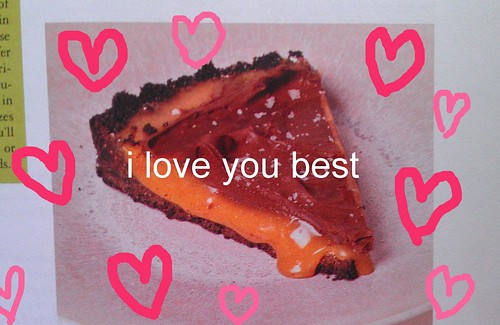
Salted caramel tart

I don't know if we have actively discussed how awesome Jill Lightner is. So awesome that I'm not even going to pause and correct the fact that I ended a sentence with "is". Make that two sentences. Hey, it's my website, I do what I wanna!

But back to Jill. She's the editor of the incredible publication Edible Seattle, and she has an encyclopedic knowledge of all things foodie in the greater Seattle area. And even better, her sweet tooth just about matches mine. She was one of the first in line to get a copy of CakeSpy Presents Sweet Treats for a Sugar-Filled Life signed at my book launch party. Yes, I like Jill very much.

Buy this thing

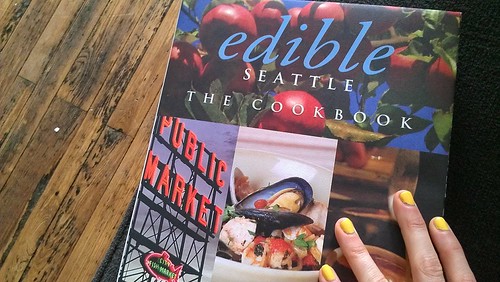
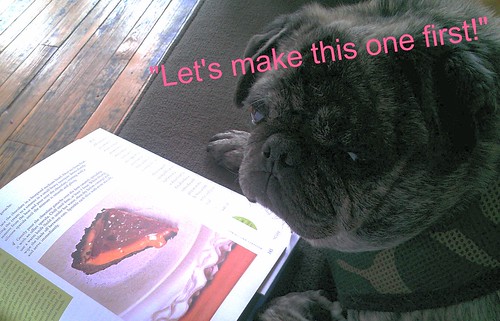
And now she has her own book out: Edible Seattle: The Cookbook . This gorgeous volume includes recipes for Pacific northwest specialties by Seattle area cooks and pastry chefs, as well as profiles on the local providers, ingredients, and inventors of these lovely recipes. It's a vital volume for anyone living in the greater Seattle area, but a great buy for non-Seattleites too. And the dessert chapter is very, very nice, including sables, pies, homemade ice creams, and--my favorite--a salted caramel tart.

Salted caramel tart

The recipe comes from the Volunteer Park Cafe, and yields a crack-like addictive result. The caramel recipe will yield double what you need for two tarts, but it keeps well in the fridge, so save it for a second tart, or just eat it by the spoonful til it's gone.

Here's the recipe for that tart to get your motor running--for more, buy the book.

Salted Caramel Tart

For the crust

  • 1 box (9 ounces) Nabisco famous chocolate wafers
  • 1 stick unsalted butter, melted

For the caramel

  • 2 cups sugar
  • 1 cup filtered water
  • 1 cup heavy cream
  • 1 stick (8oz) chilled unsalted butter, cut into small pieces
  • 1 teaspoon pink Hawaiian Alaea sea salt, smoked gray salt, or fleur de sel

For the chocolate ganache

  • 8 ounces fine quality bittersweet chocolate, chopped (chocolate chips ok)
  • 1 cup heavy cream

Procedure

  1. Preheat the oven to 325 F. Grind the cookies in a food processor or crush by hand until they are fine crumbs. Drizzle the melted butter over the ground cookies, and either pulse in processor or mix by hand until combined. Press into a 9-inch fluted tart pan. Bake 10-15 minutes, until it is fragrant (light browning will be hard to detect on the dark chocolate wafers). Cool to room temperature.
  2. In a heavy medium saucepan, bring the sugar and water to a boil over medium-high heat. Do not stir. Brush down the sides of the pan every 5 minutes with a pastry brush dipped in water to keep crystals from forming. Continue cooking until the caramel is a deep golden brown, keeping a watchful eye on the pot so it doesn't burn. Remove the pan from heat and slowly pour in the heavy cream, whisking constantly. The hot caramel will bubble, so be careful--if it hits your hand, it WILL hurt. Whisk in the chilled butter pieces. Add the sea salt, whisking to comine. Pour half of the caramel into the cooled chocolate crust. Chill until firm in the refrigerator, at least one hour.
  3. Near the end of your cooling period, prepare the ganache. Place the chocolate in a heatproof medium bowl. Over medium heat, bring the cream to a simmer in a small heavy saucepan. Immediately remove from heat and pour over the chocolate, stirring with a rubber spatula until the mixture is smooth and glossy.
  4. Gently pour the ganache over the firm caramel, spreading with an offset spatula. Chill until firm, at least one hour. When slicing, use a warm knife (hold under hot water and dry before using)and wipe off the blade between cuts. Sprinkle each slice with more salt, and serve immediately.

Buy the book: Edible Seattle: The Cookbook.

Morning Sweets: Mini Banana-Maple Pancake Muffins Recipe

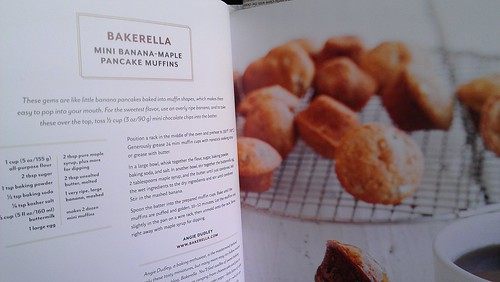
Mini Banana-Maple Pancake Muffins Recipe

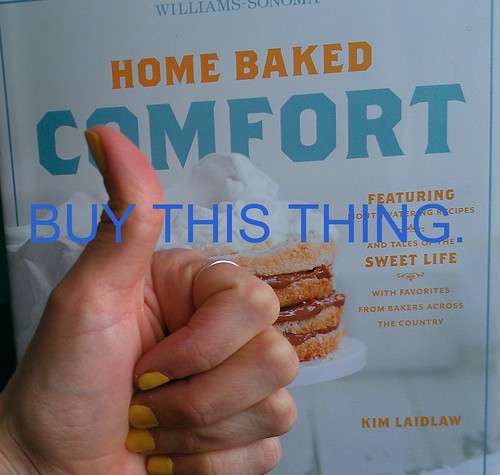
Um. Did I tell you that my bloggy BFF Bakerella (I love alliteration, what can I say?) contributed a recipe to the fantastic new book Home Baked Comfort, released by Williams-Sonoma and including fantastic recipes from bakers across the country?

Thumbs up

Well. Miss Bakerella's contribution is rather delicious: Mini Banana-Maple Pancake Muffins. Really, just uttering the title of the recipe ought to have you running to Williams-Sonoma to purchase the book...but in case it doesn't, here's the actual recipe.

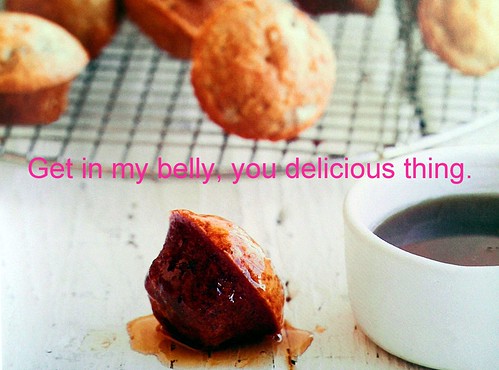
Like little pancakes in muffin form, these are a snap to make and unbelievably easy to eat. How did you just eat ten? Huh?

Yes!

The book is full of plenty of other awesome stuff. Go buy it.

Mini Banana-Maple Pancake Muffins

Makes 2 dozen

  • 1 cup all-purpose flour
  • 2 tablespoons sugar
  • 1 teaspoon baking powder
  • 1/2 teaspoon baking soda
  • 1/4 teaspoon salt
  • 2/3 cup buttermilk
  • 1 large egg
  • 2 tablespoons pure maple syrup, plus more for dipping
  • 2 tablespoons unsalted butter, melted
  • 1 very ripe large banana, mashed

Procedure

  1. Position a rack in the middle of your oven. Preheat to 350 degrees F. Generously grease 24 mini muffin cups with nonstick cooking spray or butter it up.
  2. In a large bowl, whisk together the flour, sugar, baking soda and powder, and salt. In another bowl, stir together the buttermilk, egg, 2 tablespoons of maple syrup, and butter until just combined. Add the wet to the dry ingredients and stir until combined. Stir in the mashed banana until evenly distributed.
  3. Spoon the batter into the prepared muffin cups. Bake until puffed and golden, 10-12 minutes. Let hte muffins cool slightly in the pan on a wire rack, then unmold onto the rack. Serve while still warm with extra syrup for dipping.

Sweet Schooling: Wellesley Fudge Cake Recipe

Wellesley Fudge Cake

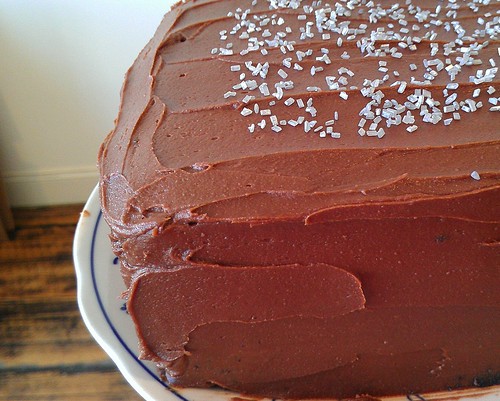
Wellesley Fudge cake--a deeply decadent chocolate cake topped with a slab of fudge frosting--seems an unlikely sweet to associate with the prim-and-proper ladies of Wellesley (the college featured in the classic feat of cinema Mona Lisa Smile). 

Clearly by the popularity of this recipe, it seems that those young ladies had as voracious an appetite for the sweet stuff as they did for knowledge. But to really look at the origins of this cake, we’ve got to rewind a little bit, to the invention of fudge itself.
Wellesley Fudge Cake


Fudge, that semi-soft candy made from butter, sugar, and various flavorings (very commonly chocolate) is an american-ized version of french bonbons and creams, and it became popular in the US in the early 1900s. The Oxford English Dictionary suggests that the name is perhaps derived from the word “fadge”, which is an old-timey term for “to fit pieces together”. Of course, not to confuse you, but an Irish dish called “Fadge” does exist, but it is actually an apple potato cake, traditionally served at Halloween.

As an interesting side note, the word “fudge” referring to a cheat or hoax dates to the 1830s, before the candy was popular--but this may explain how the name was assigned to the candy, too.

You see, those young college ladies would use the sweet stuff as their excuse to stay up late: candy-making was an acceptable activity, and they would use it as an excuse to stay up late, ostensibly to talk about boys and other forbidden subjects. “Nearly every night at college,” said the Vassar girl, “some girl may be found somewhere who is making ‘fudges’ or giving a fudge party.” The timing seems to work out: the word “fudge” for a confection showed up as early as the 1890s, and by 1908 the term was commonly used in association with women’s colleges.
 

IMAG0570

A 1909 cookbook produced by Walter Baker & Co. (producer of Baker’s chocolates) includes three different recipes for fudge, each just slightly different and named, respectively, after Vassar, Smith, and Wellesley colleges.

In fact, there is a letter in the Vassar archives which says,

“Fudge, as I first knew it, was first made in Baltimore by a cousin of a schoolmate of mine. It was sold in 1886 in a grocery store...I secured a recipe and in my first year at Vassar, I made it there--and in 1888 I made 30 pounds for the Senior auction, its real introduction to the college, I think.”

So why would it proliferate, and be adapted to an even richer and more over the top treat, the decadent Wellesley Fudge Cake, at this particular school? Perhaps because it was such a forbidden pleasure there. An 1876 circular to parents states that the college refuses to accept students who are broken down in health, maintaining that a proper diet is key for proper learning, and that “we have therefore decided not to receive any one who will not come with the resolution to obey cheerfully all our rules in this respect, and pledged in honor neither to buy nor receive in any manner whatsoever any confectionery or eatables of any kind not provided for them by the College.” Further, the founder of Wellesley College held that, “pies, lies, and doughnuts should never have a place in Wellesley College”. Well, naturally it would take off here: it tasted positively sacre-licious!

By 1913, fudge and fudge cakes were was common on the tea-room menus surrounding the college.I will help
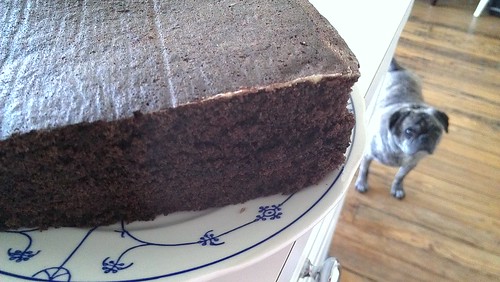
Every few decades the cake enjoys a renaissance; a little fussy to make in that it requires a bit of candy-making prowess, it is astoundingly easy to eat. The confection was bound for success too: soon, it was even featured prominently as

Some versions call for an unfrosted cake; others, which I favor, feature a double dose of chocolate, the base of which is brownie-like, coated with a more fudge-like frosting.IMAG0574
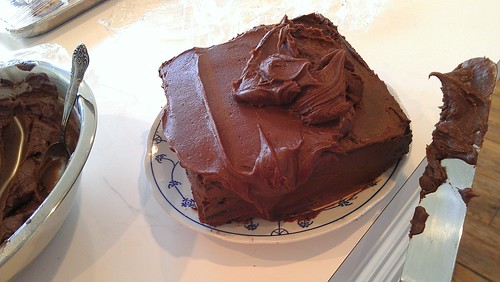
Note: Traditional recipes called for “thick sour milk”; I'm not quite sure what that even is, so this recipe employs buttermilk. After testing another traditional recipe with some help by Java Cupcake, I find this a superior cake. 

The recipe that finally ended up tasting best? This one, lightly adapted from the geniuses at Cook's Country Magazine. Their original version appears in the book Cook's Country Blue Ribbon Desserts.

Wellesley Fudge Cake
Adapted from Cook's Country Blue Ribbon Desserts

Cake

  • 2 1/2 cups all-purpose flour
  • 2 t. baking soda
  • 1 t. baking powder
  • 1/2 t. salt
  • 3/4 c. hot water
  • 1/2 c/ Dutch-processed cocoa powder (I used Hershey's Special Dark which also works fine)
  • 16 T. (2 sticks) unsalted butter, cut into 16 pieces and softened
  • 2 c. granulated sugar
  • 2 large eggs
  • 1 c. buttermilk, room temperature
  • 2 t. vanilla extract

Frosting

  • 1 1/2 c. packed light brown sugar
  • 1 c. evaporated milk
  • 8 T. (1 stick) unsalted butter, cut into 8 pieces and softened
  • 1/2 t. salt
  • 8 oz. bittersweet chocolate, chopped
  • 1 t. vanilla extract
  • 3 c. confectioners’ sugar, sifted

To make the cake:

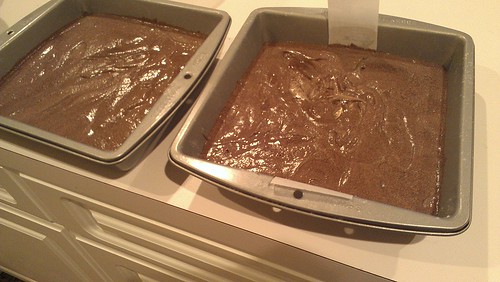
  1. Adjust an oven rack to the middle position and heat the oven to 350 degrees. Grease and flour two 8-inch square baking pans, then line the bottoms with parchment paper. Combine the flour, baking soda, baking powder and salt in a bowl. Set aside.
  2. In a small bowl, whisk the hot water and cocoa together until smooth and set aside. In a large bowl, beat the butter and granulated sugar together with an electric mixer on medium-high speed until light and fluffy, 3-6 minutes. Beat in the eggs, one at a time, until incorporated. Mix in one-third of the flour mixture, followed by 1/2 cup of the buttermilk. Repeat with half of the remaining flour mixture and the remaining 1/2 cup buttermilk. Add the remaining flour mixture and mix until combined. Reduce the mixer speed to low and slowly add the cocoa mixture until incorporated.
  3. Give the batter a final stir with a rubber spatula to make sure it is thoroughly combined. Scrape the batter into the prepared pans, smooth the tops, and gently tap the pans on the work surface to settle the batter. Bake the cakes until a toothpick inserted in the center comes out with a few crumbs attached, 25-30 minutes, rotating the pans halfway through baking. Let the cakes cool in the pans for 15 minutes. Run a small knife around the edges of the cakes, then flip them out onto a wire rack. Peel off the parchment paper, flip the cakes right side up, and let cool completely before frosting, about 2 hours. (The cakes can be wrapped tightly in plastic wrap and stored at room temperature for up to 2 days.)
  4. To make the frosting: Stir together the brown sugar, 1/2 cup of the evaporated milk, 4 tablespoons of the butter, and salt in a large saucepan and cook over medium heat until small bubbles appear around the edge of the pan, 4-8 minutes. Reduce the heat to low and simmer, stirring occasionally, until large bubbles form and the mixture has thickened and turned deep golden brown, about 6 minutes. Transfer to a large bowl. Stir in the remaining 1/2 cup evaporated milk and remaining 4 tablespoons butter until the mixture has cooled slightly. Add the chocolate and vanilla and stir until smooth. Whisk in the confectioners’ sugar until incorporated. Let the frosting cool to room temperature, stirring occasionally, about 1 hour.
  5. Line the edges of a cake platter with strips of parchment paper to keep the platter clean while you assemble the cake. Place one of the cake layers on the platter. Spread 1 cup of the frosting over the cake, right to the edges. Place the second cake layer on top, press lightly to adhere, and spread the remaining frosting evenly over the top and sides of the cake. Refrigerate the cake until the frosting is set, about 1 hour. Remove the parchment strips from the platter before serving.


Cinco de Mayo Sweet: Tortilla Torte Recipe for Serious Eats

Have you ever found yourself wondering why, in the field of desserts inspired by Mexican food, the choco taco must always reign supreme? I mean, there is so much possibility in the genre. I know that personally, I'd be mega-thrilled about a chocolate-peanut butter quesadilla or some Cadbury Creme huevos rancheros.

But for a sweet south of the border-inspired treat that really takes the cake, why not try out a Tortilla Torte? This recipe is lightly adapted from a family cookbook recipe shared with me by Kerry Haygood of cake pop bakery Lollicakes.

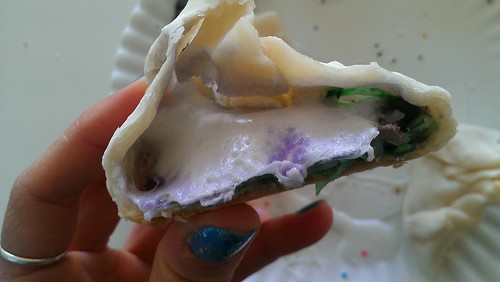
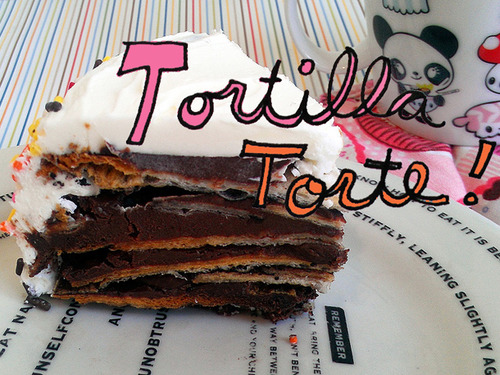
Composed of tortillas stacked over chocolate cream filling and topped with a billow of fluffy white frosting, this torte visually resembles fancy stacked sponge cakes, but ultimately makes for a very different dessert experience. The tortillas take a bit of getting used to—they will remain lightly chewy even when the chocolate has had a chance to set— but the taste sensation is unlike any other dessert I've ever tried. The floury taste of the tortillas mixes quite pleasantly with the rich chocolate-sour cream filling (which is also great by the spoonful) and the complementary tangy sweetness of the sour cream frosting.

That's to say: it's nacho typical dessert.

For the full entry and recipe, visit Serious Eats!

Sweet Chips: Choco Nachos Recipe

Choco Nachos

Desserts inspired by Mexican food: there's just so much untapped potential. I mean, who wouldn't love a delicious choco-burrito (why must it just be choco tacos?) or a blueberry-cornmeal sope with sweetened sour cream on the side? Or tamales with a sweet, instead of savory, filling? Really, the possibilities are staggering (and very delicious-sounding).

Choco nachos

But for now, I'll keep it simple with a brilliant new invention of mine: Choco Nachos.

This dish could not be easier to make, and the rewards are many to your taste buds. They're sweet! They're crunchy! They're carbohydratey! They're buttery! They have chocolate! You can dip them in ice cream, rice pudding, or more chocolate! 

Choco nachos

Seriously, I don't know why you're even still reading this (are you?). You should get yourself to the grocery store for the ingredients. Or maybe you don't even need to: they are prepared using fairly common pantry ingredients. All you have to do is cut tortillas into chip shapes, brush with butter-sugar-cocoa mixture, and bake until they've reached your desired level of crispiness. Here's how you make it happen.

Choco nachos

Choco Nachos

Ingredients

  •  Tortillas (I used 4 10-inch tortillas)
  • 2 teaspoons cocoa (I used Hershey's special dark)
  • 1 tablespoon sugar
  • dash of cinnamon
  • 1 stick of butter
  • Ice cream, rice pudding, or whatever sweet and creamy accompaniment you'd like to serve on the side

Procedure

  1. Preheat your oven to 375 degrees F. Butter the bottom of a large jelly roll pan (don't use a cookie sheet becase it will drip!). If no jelly roll pan, a large pyrex pan will work - you will just do it in a few batches.
  2. Trim the tortillas into chip shapes. As small or as big as you want them.
  3. Stir the cocoa, sugar, and cinnamon together in a small bowl.
  4. Melt the butter in a saucepan or in the microwave. Stir in the sugar mixture until it's well distributed.
  5. Place chips on the buttered pan. Brush the tops with the sugar-butter mixture. Place in the oven for 6-10 minutes or until crispy. Flip halfway through the process. If you have more chips than fit on the sheet, do this in several batches.
  6. Serve while still slightly warm, with whatever dipping sauce you'd like.

Sweet Story: Katharine Hepburn Brownies

Katharine Hepburn Brownies

Here is a fantastic and true story about Katharine Hepburn. In the early 1980s, a Bryn Mawr student was considering dropping out to go to Scotland and write screenplays. While home for the holidays in her native NYC, her frantic father wrote a letter to Katharine Hepburn, who had also attended Bryn Mawr, imploring “She's a great admirer of yours, and perhaps she'll listen to you”.

Wait, what? Well, it turns out, this wasn't such a crazy thing to do. Turns out, this distraught father was a neighbor of Miss Hepburn's, and would occasionally exchange pleasantries: not good friends, for sure, but a friendly acquaintance.

Upon receiving this cry for help, the imperious Hepburn didn’t waste any time. She phoned at 7:30 the next morning, demanding to speak with the would-be dropout (who was sleeping at the time of the call but certainly awoke rapidly) admonishing “what a damn stupid thing to do!” , and proceeding to deliver a stern lecture, after which she demanded father and daughter at tea at her home.

On the date of the tea, upon arriving at Hepburn’s Turtle Bay townhome, Hepburn greeted them with “casual hauteur, she provided us with tea and some of her famous brownies”.

While there’s no transcript of the tea party, let’s just say the student remained at Bryn Mawr.

Katharine Hepburn Brownies

 Were the brownies responsible? Perhaps. Because as a woman of principle, Hepburn’s were:


1. Never Quit

2. Be Yourself

3. Don’t put too much flour in your brownies.

As Liz Smith says in “Dishing,” “I suppose you realize already those rules to live by were handed down by Katharine Hepburn.” They first appeared in Ladies home journal in 1975 accompanying an interview with Kate, who called them “the best brownies ever!”. Where Kate got the recipe has always been vague, but the popularity of them has not been vague at all. The recipe was released to the public in that article. Since then, it has taken on a life of its own, proliferating in books, magazines, and with the advent of the internet, it became a much-storied recipe on blogs and food websites.

And there’s a reason why the legend endures. If there are three schools of brownie (cakey, chewy, and fudge-like) these are firmly chewy affairs: thick and slightly gooey while still warm, in that sort of "stick-to-your-front-teeth" sort of way (that is a compliment). They're incredibly easy: a dude friend who made this recipe said it should be rated as "guy-friendly" and "totally easy". So there you go. 

Brownies

Katharine Hepburn Brownies

Makes one tray, you decide how many brownies to slice it into.

Ingredients

  • 2 (one-ounce) squares unsweetened baker's chocolate

  • 1 stick unsalted butter

  • 1 cup sugar

  • 2 eggs

  • 1/2 tsp. vanilla

  • 1/4 cup flour

  • 1/4 tsp. salt

  • 1 cup chopped walnuts


Directions
Melt chocolate and butter in a heavy saucepan over low heat. Remove from heat and stir in sugar. Add eggs and vanilla and beat well. Stir in flour, salt and walnuts. Mix well. Pour into a buttered 8-inch-square baking pan. Bake at 325° for 40 minutes. Cool and cut into squares. 

Butter Me Up: Philadelphia Butter Cake Recipe for Serious Eats

Philadelphia Butter Cake. If you've never heard of it, are you ever in for a treat.

Philadelphia Butter Cake is a rich, buttery cake with a gooey center that's served in bar form. Judging by the picture and the name, you might be tempted to think that Philadelphia Butter Cake is similar to Gooey Butter Cake, a St. Louis specialty. But you're not quite right: while they have some similar characteristics, I'd call them more "cousins" than "twins". The Philadelphia version has two distinct differences from Gooey Butter Cake: first, the topping does not include cream cheese, and second, the base contains yeast.

If light-as-air-cakes are what you crave, then don't bother with this one. Though the flavor and appearance are in some ways quite simple, it's still definitely an indulgence. Philadelphia Butter Cake is almost indescribably rich: if you can imagine Gooey Butter cake without the cream cheese, and with a base that is somewhat like a crushed, compressed danish, then you're getting the right idea. It's like an opportunity to savor the very soul of butter in a compact, sweet square of pleasure.

For the full entry and recipe, visit Serious Eats!

Chocolate Souffle Cakes with Taito Truffle

Healthy Dessert from Los Angeles

Do not panic...but this dessert is somewhat healthy.

I recently received a press release touting the immunity-boosting benefits of this sweet treat, created by Master Chef Helene An, of Crustacean Restaurant Beverly Hills.

Chef An is pretty interesting: she studied Eastern Medicine in her native Vietnam and has incorporated its principles in her cuisine.  All of her dishes feature herbs specific to health concerns along with strengthening the immune system.

The dish was created for Valentine's Day, when An decided "she decided to feature her favorite herb, Tiato, in creating her Chocolate Souffle Cake.  The Tiato herb (a Vietnamese mint) increases circulation and facilitates digestion and adds a unique mint flavor to the cake.  Here is the recipe that I hope will spark your interest. "

Well, I will tell you, even though the romance of the big heart day is over, the recipe has continued to intrigue me. Here it is:

Chocolate Souffle Cakes with Taito truffle

Tiato truffles
4 ounces (120 grams) white chocolate, roughly chopped
2 tablespoons unsalted butter
3 tablespoons heavy whipping cream
1/8 teaspoon salt
1/4 c dehydrated tiato leaves (grounded)
1/3 c brandy

Chocolate Cake

5 tablespoons (77 grams) unsalted butter
1 tablespoon all-purpose flour, for flouring ramekins
5 ounces (165 grams) bittersweet chocolate, chopped
4 large eggs at room temperature
p teaspoon salt
3 tablespoons sugar
2 teaspoons cornstarch

Direction

1. To make the truffles: combine the white chocolate, butter, cream, and salt in a double boiler or in a heatproof bowl set over a saucepan of gently simmering water and heat, stirring occasionally, until the chocolate and butter are completely melted and smooth. Whisk in tiato powder and brandy.  Transfer the ganache to a shallow dish and refrigerate, uncovered, until firm.

2. When the ganache is almost set, make the chocolate cakes: Preheat the oven to 425 degrees F. Generously butter and flour eight 4- ounce ramekins and set aside.

3. Melt the butter and chocolate in a double boiler or in a heat proof bowl set over a saucepan of gently simmering water, stirring occasionally, until completely melted and smooth. Remove from the heat.

4. Put the yolks, salt, and half the sugar in a large mixing bowl and whisk just until blended. Add the melted chocolate mixture, whish well, and set aside.

5.       Put the egg whites in the bowl of an electric mixer fitted with the whisk attachment and whisk at medium-high speed until frothy. With the machine running, slowly add the remaining sugar and continue whisking until medium peaks form.

6.       Whisk half the whites into the yolk mixture until fully incorporated, and then gently fold in the remaining whites. Divide the batter evenly among the ramekins.

7.       Use a 1-inch diameter ice cream scoop or a measuring spoon to scoop the white chocolate mixture into eight 1-inch balls. Press a ball into the center of each ramekin and use the back of a spoon to a smooth the batter over the truffle until it is covered.

8.       Bake until the cakes are a dark chocolaty brown and dry to touch, about 7 minutes; they should have risen about ? an inch above the rim of the ramekins. Cool for 1 minute in the ramekins, then invert onto serving plates and serve.

Sweet Tarts: Leftover Jelly Bean Pop Tarts for Serious Eats

Leftover Jelly Bean Pop-Tarts: the perfect way to add some magic to your morning by making colorful use of your leftover Easter candy.

Preparing a homemade version of the popular store-bought pastries is extremely easy, and placing rows of jelly beans in the middle is a vibrant way to make use of any straggler candy. The jelly beans become soft and slightly gooey while the tarts are still warm; they form into flattened but soft little sugar lumps when cooled. Unlike fruit fillings which are somewhat able to masquerade as healthy, the sweetness of the candy takes these treats into firm dessert territory (or at least extreme morning indulgence). They're a fun treat to make with kids, and are bound to delight eaters as they discover the rainbow of color contained within.

For the full entry and recipe, visit Serious Eats!

Sweet Treats: Peeps Dumplings

IMAG0297

Today, I found myself with a few little ingredient odds and ends at hand.

Included: Peeps, pie crust, tinted coconut.

And so I thought...why not engage in a little Peeps Torture? After all, this a documented fun activity. Who hasn't enjoyed a little Easter-time Peeps torture? 

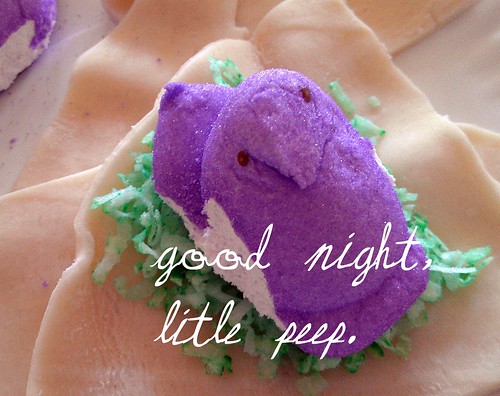
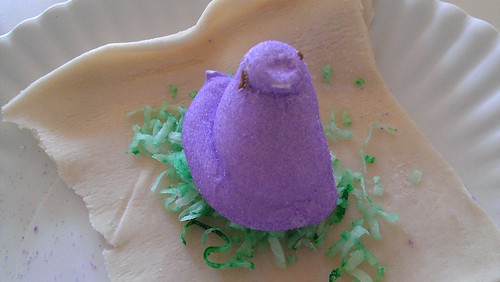
And so, I cut out scraps of pie crust in a size about 5 inches by 5 inches.

On top of it, I laid a little bed of tinted coconut.

IMAG0302

And then I put a Peep on top of that...like putting it on a little nest. 

IMAG0299

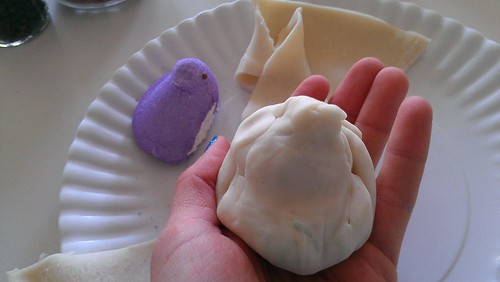
And then I gathered the crust and sort of "tented" it around the peep. Like a little bed!

IMAG0301

Is it just me, or does Peep #2 look a little concerned?

Well, he had good reason for concern. He was next to be put into a bed. A forever bed.

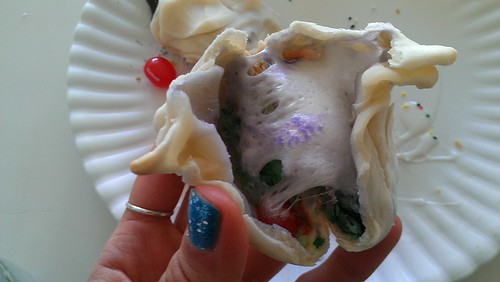
and then...I put these little dumplings in the oven. And then...

IMAG0319

Aaaaaah!

Here's how to make this magic happen at home.

IMAG0320

Peeps Dumplings

Ingredients

  • Pie crust scraps (enough to roll back out to about 5x5 inches)
  • As many Peeps as you have pie scrap pieces
  • shredded coconut 
  • Chocolate chips or chocolate pieces (I didn't to this but think it would taste good so I am suggesting it here)

Procedure

  1. Place one Peep and whichever fillings you'd like on the center of each piece of pie crust.
  2. Form a little "tent" around the peep, making sure to seal the top off to prevent oozing.
  3. Bake at 400 degrees for 7-10 minutes, or until it starts to brown.
  4. Let cool, but serve still slightly warm.

Cadbury Creme Scrambled Eggs for Serious Eats

It's a simple enough question: What would happen if you scrambled Cadbury Creme Eggs as if they were regular eggs?

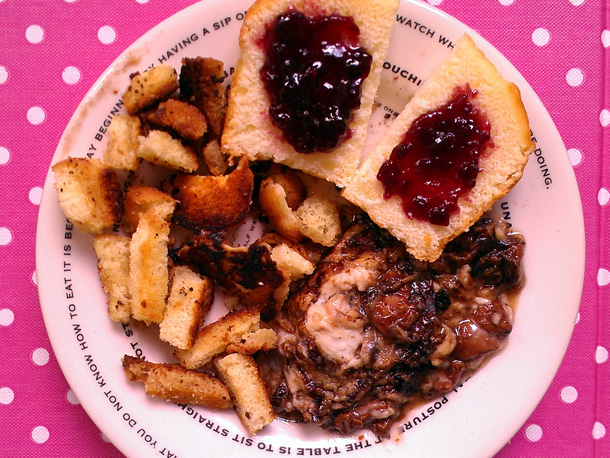
Well, I recently found out the answer by testing it in my own kitchen. Now, the results may not be surprising: what you get is a big, buttery glob of chocolaty goo. I experimented a little bit more, by adding some heavy cream and whisking vigorously before scrambling, and while I wasn't able to avoid the ugly factor, at least this version had a little more substance and shape. The taste of the eggs is not exceptional on its own (it tastes like a Creme Egg melted in butter and cream), but it's rather good when put on top of "potatoes" made from diced day-old doughnuts that have been fried in butter and "toast with jam" made from pound cake.

Conclusion? In the future I may stick to regular eggs for scrambling—but it was a valuable lesson to learn that melted Cadbury Creme Eggs taste delicious on top of pound cake!
For the full entry and recipe, visit Serious Eats!