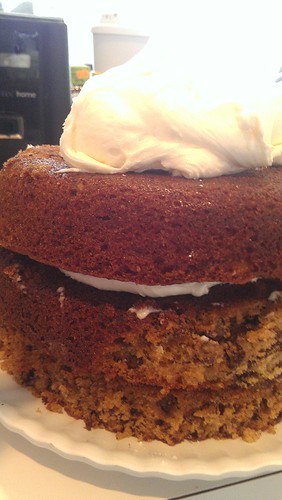
Sweet Potato Pecan Pound Cake With Maple Buttercream

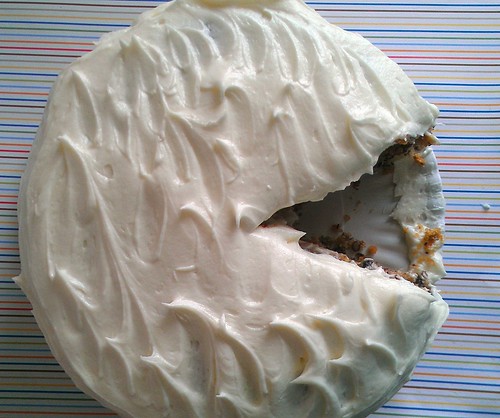
Sweet potato pecan cake

I have a problem.

The problem is that this cake is so delicious that I want to die. And I want the cause of my death to be "eating 200 pounds of this cake". It is seriously that good.

Of course, if you don't like sweet potato or maple (or joy) you should probably not bother with this cake. But if you do like these things, then you're in for a treat. A rich, buttery, spicy pound cake, decadently moist from the sweet potato and lightly crunchy from the addition of toasted pecans would probably be just fine all on its own or with a dusting of confectioners' sugar, but let's be honest: it's even better with buttercream. This simple maple buttercream is a joy to eat, subtle and mellowly sweet. Add a few more toasted pecans on top and you'll be joining me in "want to die a sweet autumn binge eating death" territory.

Here are a few process shots, and then the recipe. Enjoy.

Sweet potato pecan cake

Here is the batter being made. Um, the recipe doesn't require that many eggs. I was doing other stuff too.

Sweet potato pecan cake

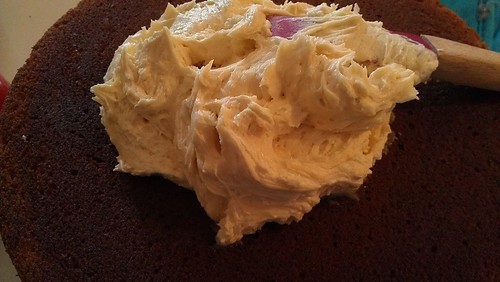
Here's the first delicious slather of buttercream meeting cake.

Sweet potato pecan cake

Here's the batter in the pan.

Here's the recipe.

Sweet Potato Pecan Pound Cake with Maple Buttercream

Makes 2 8-inch cakes, 24 cupcakes, or one 2-layer cake

  • 3 cups all-purpose flour
  • 1 teaspoon baking powder
  • 1/2 teaspoon baking soda
  • 1/2 teaspoon salt
  • 3 teaspoons ground cinnamon
  • 1 teaspoon ground nutmeg
  • 1 cup unsalted butter, softened
  • 1 cup granulated sugar
  • 1 cup light brown sugar, packed
  • 4 large eggs
  • 2 cups canned sweet potato pie filling
  • 1/3 cup milk
  • 1 cup toasted pecans, coarsely chopped

Frosting

  • 2 sticks (1 cup) butter, softened
  • 4 cups confectioners’ sugar
  • 2 tablespoons pure maple syrup
  • 1 teaspoon vanilla
  • more toasted pecans, for garnish

Procedure


  1. Heat oven to 350°. Line two 8-inch cake pans with parchment paper, and grease generously. You can also bake these as cupcakes, but you'll reduce the baking time later.
  2. In a medium bowl, combine the flour, baking powder, soda, salt, and spices; set aside.
  3. Cream the butter with sugars until light and fluffy, 3 to 5 minutes. Beat in eggs, one at a time, scraping down the sides of the bowl with a rubber spatula with each addition and mixing well. Beat in the vanilla and sweet potato until blended.
  4. Stir the dry ingredients into the batter in 2-3 increments,  alternating with the milk, until blended. Fold in the nuts.
  5. Spoon the batter into the prepared cake pans.
  6. Bake for 40-50 minutes, or until a cake tester or toothpick inserted in the center comes out clean. 
  7. Cool in the pan for about 15 minutes before turning the cakes out on to wire racks to cool completely before frosting.
  8. Time to make the frosting. In a stand mixer fitted with the paddle attachment, cream the butter and maple syrup for 3 to 5 minutes, until smooth. Stir in the vanilla. Add the confectioners’ sugar, cup by cup, until your desired spreading consistency has been reached. Scrape down the sides of the bowl as needed with a rubber spatula. If the frosting becomes too stiff, stir in a small quantity of milk to thin. 
  9. Frost the cakes generously, and garnish with more toasted pecans and cinnamon and nutmeg.


Trick or Sweet: Candy Corn Upside Down Cake

Recently, I asked my favorite Pineapple Upside-Down Cake recipe a serious question: "What would you like to be for Halloween this year?".

After considering various options, such as Doughnut Upside-Down Cake, Tarte Tatin, and various other options for the inverted dessert, we decided to go with something festive: Candy Corn Upside-Down Cake.

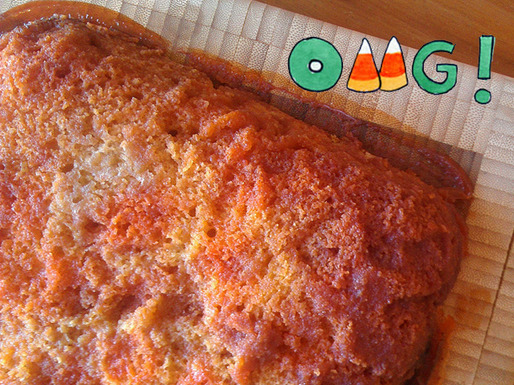
It was simple enough to do: just substitute candy corn for the pineapple requested in the original recipe. But what happened when I baked it up was a surprise: the brown sugar and butter topping fused with the melted candy corn to form some sort of unholy, monstrous Halloween caramel-sugar topping, which dripped back into the cake when inverted. The result? The entire buttery cake tasted like it had been basted in candy corn. And if you're a candy corn lover, that might just be a beautiful thing.
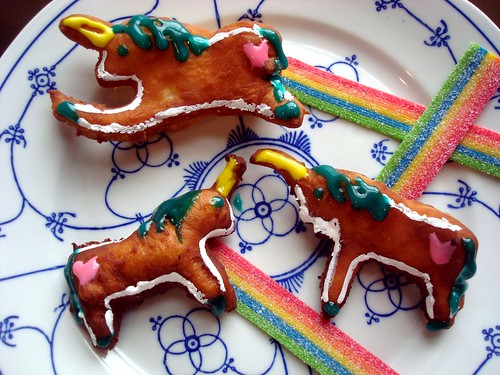
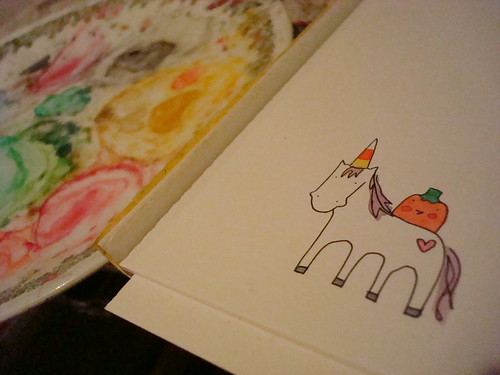
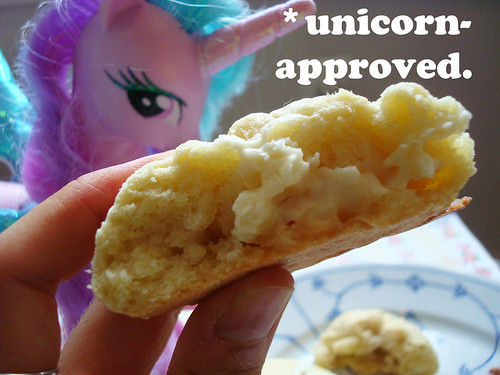
Even Unicorn agrees!

Candy Corn Upside Down Cake

9 servings

  • 1/3 cup (about 5 tablespoons) butter, plus 1/2 cup (1 stick) butter, softened and divided
  • 2/3 cup (about 6 ounces) packed light brown sugar
  • 1 1/2 cups candy corn
  • 1 1/2 cups (7 1/2 ounces) all purpose flour
  • 1 teaspoon baking powder
  • 1/2 teaspoon salt
  • 1 cup (about 7 ounces) granulated sugar
  • 2 large eggs
  • 3/4 cup milk (whole or 2 percent)

Procedure

  1. Preheat the oven to 350°F. Place the butter in a 9-inch square baking pan, and set it in the oven until melted (it is fine to do this as the oven preheats). Remove the pan from the oven and gently tilt so that the butter coats the entire bottom of the pan. Sprinkle brown sugar evenly over the butter. Sprinkle candy corn evenly on top.
  2. In a medium bowl, sift together the flour, baking powder, and salt.  
  3. In the bowl of a stand mixer fitted with the paddle attachment, cream the butter and granulated sugar on medium speed until light and fluffy, 3 to 5 minutes. Add the eggs, mixing until incorporated. Add the flour mixture alternately with the milk, in 2 to 3 additions, pausing to scrape down the sides of the bowl with each addition. Beat on low speed until fully incorporated. Pour the batter into the pan, taking care not to dislodge the carefully planted candy corn.  
  4. Set a cookie tray under the cake in the oven, in case the candy bubbles or drips. Bake until a toothpick inserted in the center comes out mostly clean, 45 to 50 minutes.  
  5. Immediately place a heatproof serving plate upside down over the pan; in one swift, sure motion, flip the plate and pan over so that the cake is now on the plate. Leave the pan in place for several minutes so the gooey mixture can drip down over the cake. After the dripping is done, lift off the pan. Serve still slightly warm. Store, loosely covered, at room temperature.

Unicorn Doughnuts

Unicorn doughnuts

This morning, I awoke knowing exactly what I needed, above and beyond any other thing on earth.

Unicorn Doughnuts.

Good rainbow-colored gravy, how could I make this miracle happen, I wondered?

Well, I guess it could start with making doughnuts. I made up a batch of dough. You can find the recipe below. Technically, it is for "regular" doughnuts. That means you could make round doughnuts. Unicorn doughnuts

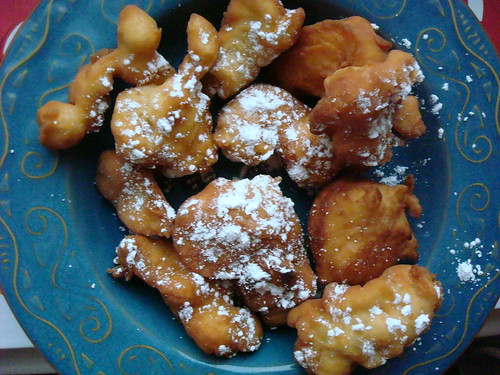
Or you could even free-form and drop dollops of dough into the oil to make a homemade funnel cake! Funnel cake

But right now, we are talking about unicorn doughnuts.

Now, I have learned through trial and error that this dough is much easier to work with if you let it chill for a good long while. So I let it chill for about 3 hours total. 

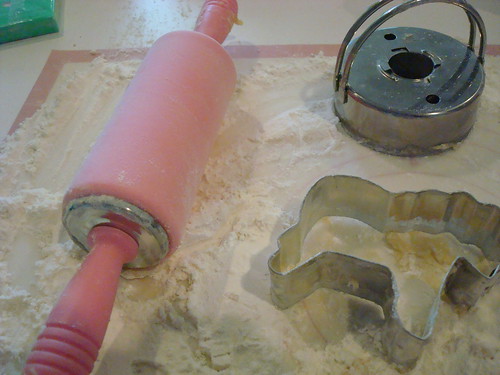
And when it came time to roll out the dough, I brought out my secret weapon: the unicorn cookie cutter. It made fast friends with doughnut cutter.

Unicorn Doughnuts

Now, after my first try cutting out a unicorn, I can see why unicorn doughnuts are not in regular rotation. It's very hard to get a clean cut and then transfer it to the frying oil. They come out mangled. Booooo. 

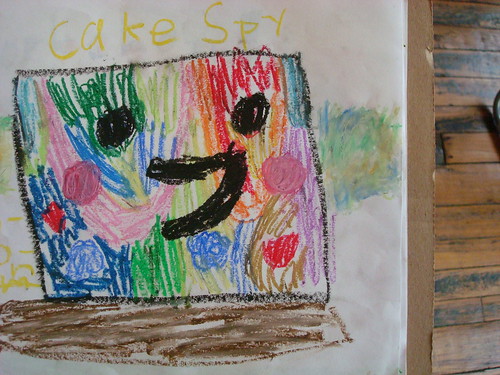
But I didn't get discouraged. For inspiration I looked at this drawing done by a 6-year old friend, which reminded me that my website is capable of magic!

Magical

And so I got back to work. And here's what ultimately worked best. 

I got a small piece of parchment paper, and sprinkled flour on it.

I rolled out a tiny piece of dough to about 1/4 inch thick on top of it. Rolling out tiny dough is cuter with a tiny rolling pin, btw.

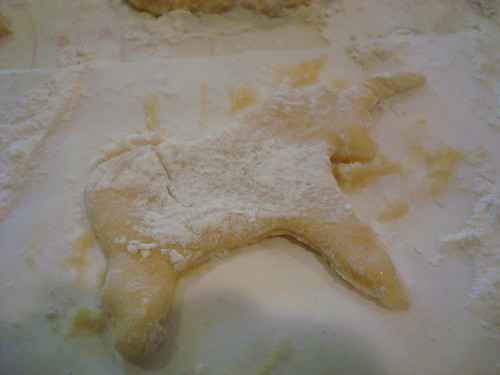
I then floured the cookie cutter and imprinted the dough. I delicately removed the dough on the sides of it before lifting the cutter.

I then put this sheet with the unicorn in the freezer. Not for long, just for maybe 15 minutes. While the oil heated.

Unicorn Doughnut cutout

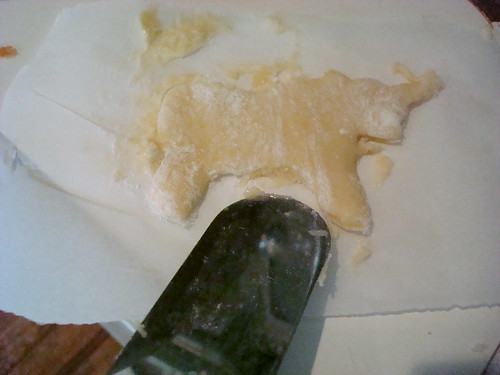
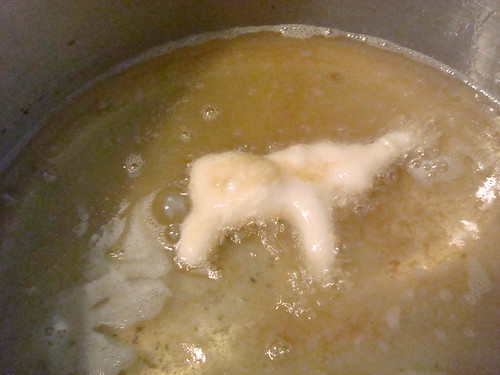
When the oil was ready, I removed the unicorns from the freezer, and delicately extracted them from the parchment using an offset frosting spatula. I dropped them into the oil.

Unicorn Doughnuts

And...it worked!

Fry, unicorn doughnut!

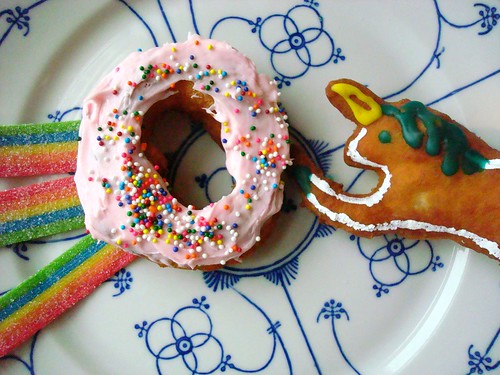
Some of them get a little mangly but it's ok. Because once you decorate them, what looks like a weirdly long leg...becomes a prancy leg! 

Unicorn Doughnuts Unicorn doughnuts

Decorating them like I did is not strictly necessary, but I thought it was fun. I used some writing icing, and applied the white part using a small brush (I won't be using that one to paint again!). 

Homemade Doughnuts

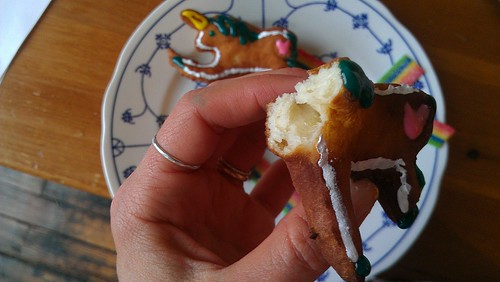
Unicorn doughnuts

Yum.

Unicorn doughnuts

Here's the recipe.

Unicorn Doughnuts

Makes about 20 

Ingredients

  • 3 3/4 cups flour
  • 2 teaspoons baking powder
  • 1/4 teaspoon salt
  • 2/3 cup sour cream
  • 1/3 cup buttermilk
  • 3/4 cup sugar
  • 3 large eggs
  • 1 teaspoon vanilla extract
  • 6 to 8 cups vegetable/canola oil, for deep frying
  • various frosting, writing icing, or just confectioners' sugar, for finishing off
  • Unicorn Cookie Cutter (like this one)

Procedure

  1. In a large bowl, sift together the flour, baking powder, and salt. Set aside.
  2. In another large bowl, whisk the sour cream, buttermilk, and sugar, until smooth and combined.
  3. Beat in the eggs and vanilla until just combined. If needed, scrape the sides of the bowl with a rubber spatula.
  4. In 2-3 increments, add the flour mixture to this wet mixture, stirring with a wooden spoon until just combined. The dough will be quite sticky. Refrigerate it for about 2 hours, or until completely chilled.
  5. Turn the dough on to a very generously floured surface. Knead for 2 minutes, or until the dough is smooth and elastic. Return the dough to the fridge for another hour. This will make certain that the dough does what you want later.
  6. Assemble several sheets of parchment paper (one or two unicorns per sheet for easy handling). Roll out to a 1/2 inch thickness on top of the floured parchment paper. Using a floured cutter, imprint the dough and remove excess dough around it (this helps keep the perfect unicorn shape). Remove the cutter and clean up dough as needed. Put the dough, right on the parchment paper, in the freezer. Repeat with the remaining dough.
  7. In a heavy medium pot or a deep-fat fryer, put enough oil to achieve a depth of about 4 inches; heat it to 375 degrees F. Gently transfer the unicorns from the parchment paper to the oil, removing from the paper using a spatula. Fry the unicorns, 2-3 at a time, until golden brown on each side (less than 3 minutes). Remove with a slotted spoon and place on paper towels to blot excess oil. Repeat with remaining doughnuts.
  8. You're going to have to wait til the doughnuts are cool to decorate them like I did, but if you're greedy, just dust them with confectioners' sugar and eat them while warm. Either way, these magical doughnuts are best consumed the same day they're made.

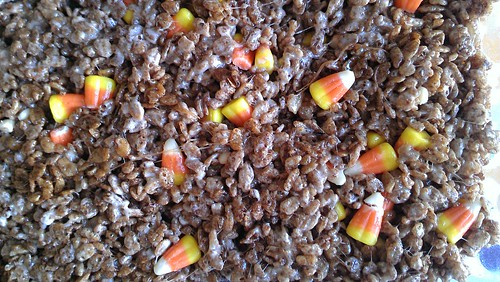
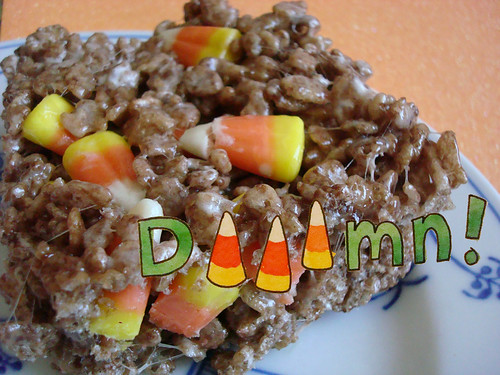
Cocoa Krispies Treats with Candy Corn

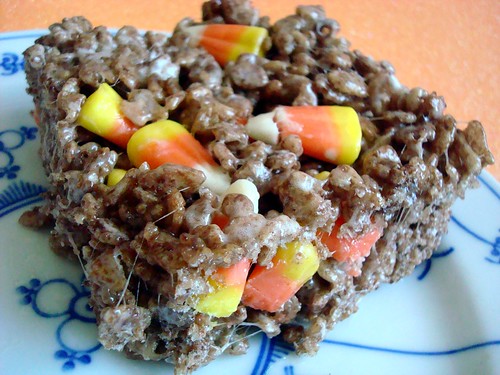
Cocoa Krispies Treats with Candy Corn

Guess what I did this weekend?

If you guessed "um, make cereal treats that are tricked-out with the magic of cocoa and candy corn"...well, you are correct.

I made some crispy cereal treats. They are inspired by Rice Krispies Treats (ever heard of 'em?) but a bit more magical. That is for a few reasons.

Cocoa Krispies Treats with Candy Corn

1. They have roughly double the butter.

2. Mine are made with Cocoa Krispies, not regular Rice Krispies. 

3. They get a boost of sweetness from the not-so-secret Halloween ingredient called Candy Corn.

How do these tricked-out treats taste? Like magic, fool! As magic as this illustration I worked on after making the treats.

Sweet! They have all of the good attributes of a classic Krispie treat, but are richer and more interesting than the original. Plus, the candy corn makes them very cute, which is important when dressing up for Halloween. Speaking of Halloween, have you ever noticed that costumes all seem to be either cute, clever, or kind of slutty? Well, these treats fit the former two categories. Cos seriously, I just can't place Rice Krispies Treats in the latter category. I wonder if anyone ever has?


Cocoa Krispies Treats with Candy Corn

But I digress. No more talking about sexy Krispie Treats. We are now talking about how you get these buttery delicious ones out of your dreams and into your mouth. Wait, they just did start sounding sexy...

Cocoa Krispies Treats with Candy Corn

Makes 24

  • 1/2 cup (1 stick) butter
  • 1 bag (10 ounces or so) Marshmallows - I used jumbo but you can use Mini too
  • 7 cups Cocoa Krispies cereal
  • pinch of salt
  • 1 cup Candy corn
  • Generously grease (go ahead, line it with parchment too) a 9x13-inch pan. Set aside.

Procedure

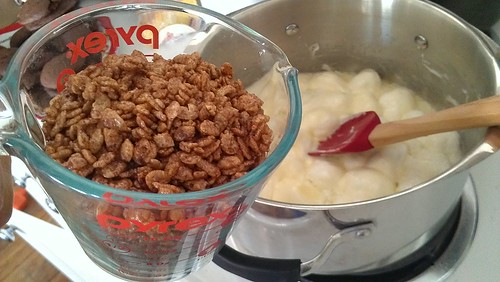
  1. In a large saucepan over low heat, melt the butter. Add the marshmallows and stir frequently until they're melted.
  2. Remove from heat and stir in the cereal. Stir with a wooden spoon until fully coated. Add that pinch of salt.
  3. Cereal
  4. Add the candy corn, stirring until it's evenly distributed. Turn the mixture out into the prepared pan, and smooth it evenly. Using a piece of waxed paper, flatten the treats so that they are pressed nice and tight in the dish. Let sit for about 2 hours or until they're fully set. Use a sharp knife to cut them when you're ready, and clean it between cuts to keep everything from sticking.

You're welcome.

Britishly Delicious: Battenberg Cupcakes

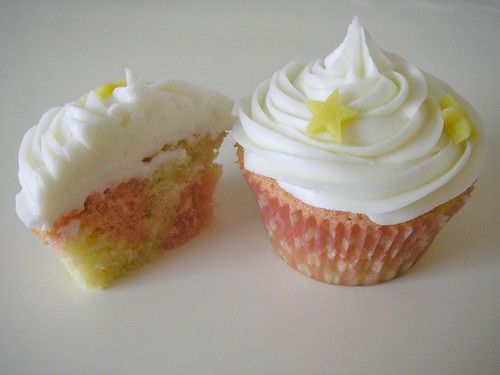
Battenberg Cupcakes

CakeSpy Note: This is a guest post from Nicola Cappin of Sunningdale Cakes.

The Americans have their cupcakes, the French their macarons, but the British are just plain bonkers for Battenberg.

Batten-what?! You ask? Battenberg is a tea time treat that like many other British cakes has risen in popularity in recent months.

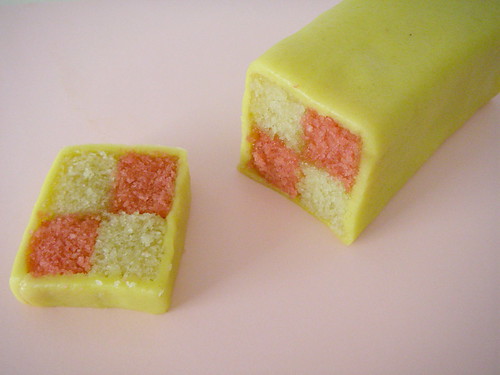
In the past couple of years the country has gone positively baking mad, thanks in part to a reality tv show called The Great British Bake Off, in which some of the country’s top amateur bakers battle it off baking traditional English goods such as the pink and yellow chequered cake called Battenberg.

Battenberg Cake

The whole concept of anything British has become much more popular over here in the UK in the last two years. Unlike the Americans and French, our national pride has never been particularly strong. But throw in a Royal Wedding, the Queen’s Golden Jubilee and a rather spectacular summer of Olympics and Paralympics and we are suddenly all very proud to be British again!

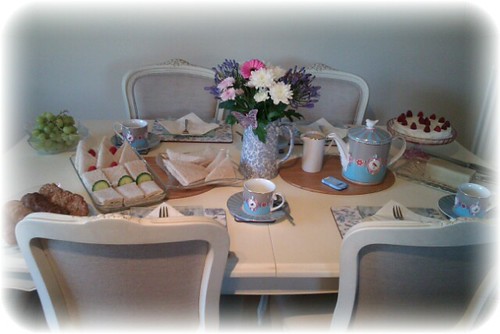
Ask any Briton over the age of about 70 what tea time is, and they will probably tell you its when they sit down at 4pm to a cup of tea (emphasis on the cup, not a mug) and a slice of cake and a biscuit.

Tea Time

The original custom is generally believed to be credited to Anna, the 7th Duchess of Bedford in the early 19th century, who needed something to stave off the afternoon hunger pangs between lunch and supper.

Queen Victoria favoured a slice of sponge with her afternoon cup of tea. And so, the Victoria Sponge was name. It’s still one of the most popular baked goods here and its a relatively simple two layer sponge, sandwiched with lashings of whipped double cream and raspberry jam and topped with a dusting of icing sugar

If you want to try your hand at it - check out this BBC Good Food recipe.

But, Battenberg is one of my favourites to go with my afternoon cup of tea. The rectangular cake is made up of strips of almond sponge - some tinted with pink food colouring in a chequered pattern, sandwiched together with apricot jam and wrapped in marzipan. Here's an interesting history of it.

Now, don’t get me wrong, we love our cupcakes to here also! The American-style Hummingbird Bakery has sent most of us positively crazy about these little sponge cakes with the beautiful enticing store and their cookbooks.

Here at Sunningdale Cakes, the business I set up, we are constantly in demand for cupcakes. So this week I though I would look outside the box (excuse the pun) and create a Battenberg cupcake.

Happy Baking!

Nicola Cappin is the owner of Sunningdale Cakes, based in Hertfordshire in the UK.


Battenberg Cupcakes

Sunningdale Cakes Battenberg Cupcakes

Note: This is not formatted as an American-style recipe; if you need conversions, this site is handy.

Makes 8 cupcakes

Cake:

  • 175g butter
  • 175g caster sugar
  • 3 eggs
  • 140g self raising flour
  • 50g ground almonds
  • ½ tsp baking powder
  • ½ tsp vanilla
  • ¼ tsp almond extract
  • Pink food colouring

Frosting:

  • 70g butter
  • 350g icing sugar
  • A couple of tablespoons of milk
  • ½ tsp of almond extract or more to taste

Procedures

  1. Preheat the over to 170 degrees C.
  2. Beat together butter, sugar and eggs until mixture appears light and creamy.
  3. Mix in flour, ground almonds and baking powder and the vanilla.
  4. Split the cake mixture between two bowls. In one bowl add a drop of pink food colouring and mix in. In the other bowl, add the almond extract.
  5. Place the pink cake mix in a food piping bag and put to the side. Put the almondy cake mix in a separate food piping bag.
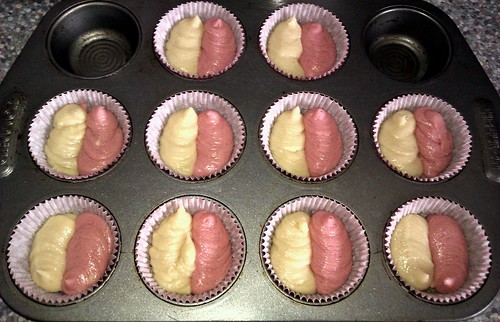
  6. Line a cupcake tray with cupcake cases and pipe a stripe of cream cake mix on one side of the cupcake case and a stripe of pink cake mix on the other side.
  7. Then repeat your piping - alternating. So that you pipe pink on top of the cream, and the other way round.
  8. Bake in the over for 22 minutes or until a skewer inserted into the cake comes out clean.
  9. While the cupcakes cool, prepare the frosting by beating the butter, then adding the icing sugar, almond extract and milk, until you get the right consistency.
  10. Pipe or spread frosting onto cooled cupcakes and decorate with marzipan if desired.

Pumpkin Bread Stuffed with Cookie Dough

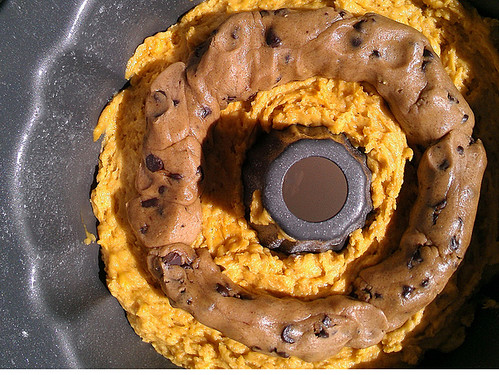
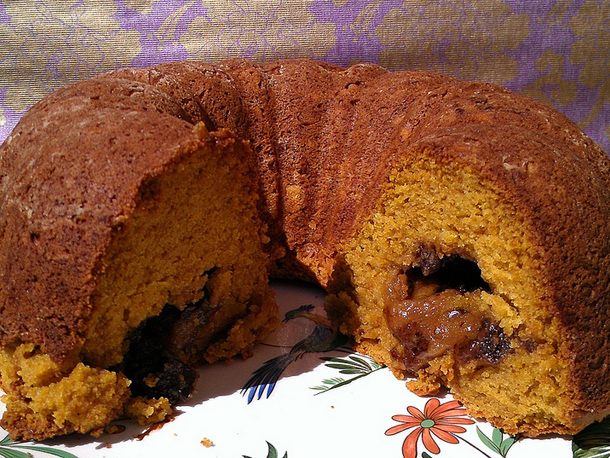
Pumpkin bread with cookie dough

Around this time of year, pumpkin begins a period of proliferation that lasts until Thanksgiving. The cooler weather is good for gourd-eating, as pumpkin lends a cozy heartiness to baked goods of all types, including one of my personal favorites, pumpkin bread.

While pumpkin bread is wonderful in its simplicity, it is possible to heighten your seasonal eating by adding a healthy helping of chocolate chip cookie dough to the batter. It gives the bread a decadently gooey center, and the spiciness of the pumpkin bread works beautifully with the brown sugar and chocolate in the cookies. Feel like gilding the lily? Go ahead, serve it with ice cream.

This post also showed up on Serious Eats!

Pumpkin Bread Stuffed with Cookie Dough

  • 1 (15-ounce) can pumpkin puree
  • 4 eggs
  • 1 cup (about 8 ounces) vegetable oil
  • 2/3 cup (about 5 1/4 ounces) water
  • 2 teaspoons vanilla extract
  • 2 1/4 cups (about 15 3/4 ounces) sugar
  • 3 1/2 cups (about 17 1/2 ounces) flour
  • 2 teaspoons baking soda
  • 1 1/2 teaspoons salt
  • 2 teaspoons ground cinnamon
  • 1/2 teaspoon ground ginger
  • 1 teaspoon ground nutmeg
  • 1/8 teaspoon ground allspice
  • 1/8 teaspoon ground cloves
  • 12 ounces chocolate chip cookie dough

Procedure

  1. Preheat oven to 350°F. Grease and flour either a large bundt pan or two 8 1/2- by 4- by 2 1/2-inch loaf pans.  
  2. In the bowl of a stand mixer fitted with the paddle attachment or in a large bowl with an electric mixer, combine the pumpkin, eggs, oil, water, vanilla and sugar until well blended. In a large bowl, whisk together the flour, baking soda, salt, cinnamon, ginger, nutmeg, allspice, and cloves until well combined.  
  3. Stir the dry ingredients into the pumpkin mixture until just blended. Spoon 3/4 of the batter into the pan.
  4. Roll the cookie dough into a long log. Place it along the center of the pan so that it forms an "inner" tube. Cover with the remaining batter so that dough is completely submerged. If using two loaf pans, simply make two "logs" of dough and insert them as a straight line in either pan.  
  5. Bake in the preheated oven until a toothpick inserted in the center comes out clean, 55 to 65 minutes.  
  6. Let cake cool in the pan(s) for 1 hour before turning out on to a serving platter.

Sweet Quaffing: Anejo Kiss Cocktail Recipe

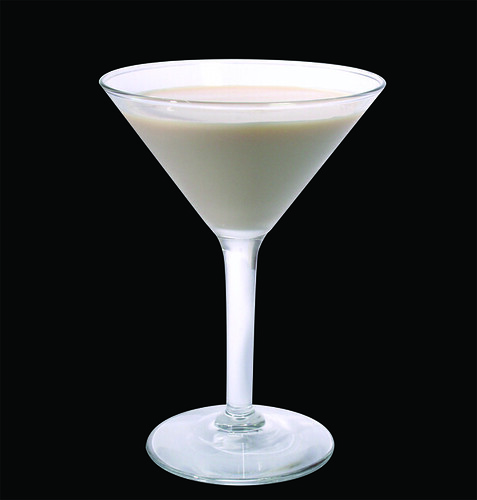
Anejo Kiss

Your passport to the weekend is here: a delicious and slightly deviant dessert cocktail. Why deviant? Well, it tastes sweet, but it has a devilish kick! Enjoy in moderation.

The Anejo Kiss 

1 1/2 oz. Partida Anejo Tequila
1/2 oz Creme de Cacao (white) 
1 oz. Amarula Cream 
Mix ingredients in a shaker with ice and shake well. Strain into a chilled martini glass. 

Taking the Cake: Chocolate Decadence

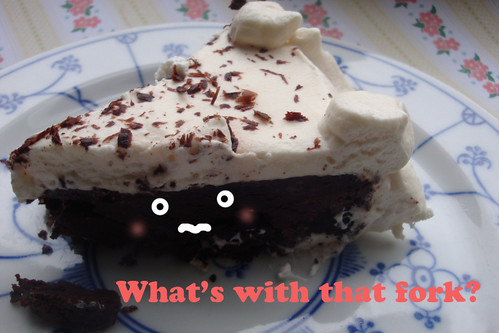
Decadence

“Chocolate Decadence” is probably not an unfamiliar term, but what exactly is it? While the term has expanded in recent years and can be applied to any number of chocolate desserts ranging from a flourless chocolate cake to floured but dense chocolate cakes with fudgy icing to even chilled chocolate desserts, the “original” chocolate decadence was dreamed up at a restaurant called Narsai's by pastry chef Janice Feuer.

The recipe appears in her book Sweets for Saints and Sinners , though it has been more widely published, adopted, and adapted. The original contains a whipped cream frosting and a raspberry puree, both of which may or may not be present in succeeding recipes. I tried the recipe with the whipped cream but no puree.

In my opinion, the whipped cream was dropped for a reason. A little goes a long way, and a dollop is actually far nicer than an all-over coating, which seems to distract a bit from the rich chocolatiness of the dessert, which, when you get down to it, is the beating heart of what makes it tick.

And while my non-expert baking may have resulted in a slightly less delicate dessert, it was still quite very tasty. It is the type of dessert which will make your guests very happy at the end of a dinner, that your mother will probably say “only a small sliver for me!” and then will sneak bites of everyone else's . It's going to leave everyone happy.

Although I did not include the raspberry, I am leaving the recipe as originally intended below so you can choose your own adventure.

Decadence

Chocolate Decadence

Ingredients

  • 1 pound chocolate
  • 4 large eggs
  • 1 tablespoon flour, all-purpose
  • 1 package raspberries
  • 1/4 pound butter
  • 1 tablespoon sugar
  • 1 cup heavy whipping cream

Procedure

  1. Flour and butter an 8-inch round cake pan. Cut a round of waxed paper to fit the bottom, butter it, and place in the pan. Preheat the oven to 425 degrees F.
  2. In a small saucepan over very low heat or in a microwave oven , melt the chocolate with the butter. Set aside.
  3. In the top of a double boiler over very hot water, whisk the eggs with the sugar. Beat over hot water until the sugar dissolves and the mixture is just lukewarm. Remove the top of the double boiler from the heat and beat the eggs until they quadruple in volume and become quite thick. Fold the flour into the eggs.
  4. Stir 1/4 of the egg mixture into the chocolate. Then, fold the chocolate back into the rest of the egg mixture. Pour the batter into the prepared cake pan.
  5. Bake for 15 minutes; the cake will be liquid in the center. Cover and freeze the cake in the pan overnight. To unmold the cake, carefully dip the bottom of the pan in hot water and invert onto a cake plate.
  6. Remove the pan and gently peel off the waxed paper. Decorate the cake with the whipped cream and shaved chocolate. Refrigerate until serving. Puree the raspberries and their juice in a blender or food processor. Pass the puree through a fine sieve and serve a tablespoon of the sauce with each portion.

Chocolate Avocado Pie

You might be hesitant to embrace the idea of Avocado Pie. After all, avocado is probably more famous for its starring role in guacamole, or as a sandwich or salad component than as a delicious dessert item. But avocado isn't unknown in the world of sweets: in fact, in several Asian countries (and in Brazil too, I hear) avocado shakes are quite popular.

Like the popular shake, the avocado in this pie gets its sugary boost from sweetened condensed milk. When pureed and mixed with the milk, the fruity side of avocado really comes out to play with your taste buds. And once you get past the vibrant Kermit color, it's got a nutty and surprisingly subtle flavor. Combined with chocolate, it gets even better—sweet, light yet satisfyingly rich, with a dark crunch from the chocolate chips and cookie crust. Though adding the chocolate morsels is optional, I find them to add a nice textural contrast to the creaminess of the avocado, and serve as a nice echo to the cookie crust.

While the unique flavor of this pie might not be for everyone, lovers of avocado would serve themselves well to give it a try.

Find the recipe with pictures on Serious Eats!

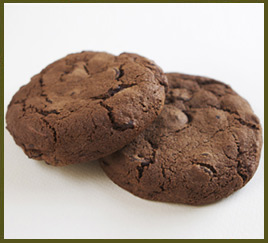
Vegan Chocolate Cookies Recipe from Macrina Bakery

My favorite thing about vegan baked goods is that even as a non-vegan, I CAN STILL EAT THEM.

And one that I enjoy eating is the vegan chocolate chocolate cookies at Macrina Bakery in Seattle. And--YES!--they are the "recipe of the month" which is now available to the public. Here's what Macrina has to say about them:

"This cookie was developed for a favorite teacher of one of our daughters here at Macrina. She would often request Olivia's Chocolate Chip cookies for her class but discovered her teacher couldn't eat them. I went to work on a vegan version so the cookies could be enjoyed by all! We test marketed it in our cafes with customers and they loved them, so we now offer them baked fresh daily!"

Here's the recipe:

Vegan Chocolate Chocolate Cookies

Makes 20 3-inch cookies 

  • 2-1/4 C unbleached all-purpose flour
  • 3/4 C cocoa powder
  • 1 tsp baking soda
  • 2 tsp egg replacement powder
  • 1 tsp kosher salt
  • 2-1/2 C bittersweet chocolate chips
  • 1/2 C (1 stick) vegan butter (preferably Earth Balance Vegan Buttery Sticks) at room temperature
  • 1/3 C palm shortening, at room temperature
  • 3/4 C light brown vegan sugar
  • 1 tsp pure vanilla extract
  • 3/4 C water


1. Sift together the flour, cocoa powder, baking soda, egg replacement and salt in a medium bowl. Add the chocolate chip and mix well to combine. Set aside.

2. In the bowl of a stand mixer fitted with the paddle attachment or in a large bowl using an electric mixer, cream the butter, shortening, sugar and vanilla. Start on low speed and increase to medium for a total of 5 to 8 minutes. The mixture will be fluffy and very pale. Add the dry ingredients in 3 additions, alternating with the water. Stop halfway and scrape the bowl with a rubber spatula. Mix until just incorporated, about 1 minute. Be careful not to over mix: the cookies may become tough. If the dry ingredients aren't fully incorporated, mix them in with the spatula. Transfer the dough to a medium bowl, cover it with plastic wrap and refrigerate for a minimum of 1 hour. At this point the dough can be formed into cookies or stored in the refrigerator for up to 5 days. This dough also freezes well for up to three weeks.

3. Position a rack in the center of the oven and preheat to 35o° F. Line two rimmed baking sheets with parchment paper and set aside.

4. Let the cookie dough warm at room temperature for 20 minutes to make portioning easier. Scoop the dough from the bowl with a large spoon or #30 ice cream scoop and form into 1-3/4 inch balls. Place about 2 inches apart on the prepared baking sheets, flattening them to 1/2 inch thickness while maintaining the circle shape. Bake for 18-20 minutes, or until the cookies are golden brown. (These cookies don't spread much, so they'll look a little different than standard chocolate chip cookies.) Cool them on a wire rack for 20 minutes before serving. Store baked cookies in an airtight container at room temperature for up to three days.

Taste the Rainbow: Kaleidoscope Cupcakes

Sometimes, things don't work out quite as you'd like. This happened recently when I set out to make some polka dot cupcakes based on an idea that I'd seen on the internet.

I prepared the batter, reserving about 3/4 cup before filling the cupcakes liners halfway. I tinted the remaining batter and used it to pipe pretty polka dots over the filled cups, hoping that they would bake into spotted masterpieces.

The cakes baked up beautifully, with perfectly shaped domes—which, unfortunately, ruined the polka dots. But all was not lost. While my cakes didn't bake with perfect polka dots, I ended up with a pretty, kaleidoscope-like multicolored starburst pattern which was rather sweet and elicited morale-boosting "ooh" and "ahh" sounds when served. Ultimately, they turned out so well that I decided to put the frosting in the middle, sandwich-style, rather than sully the artistic tops. Here's the simple recipe which is bound to delight in a most delicious way. 

For the full entry and recipe, visit Serious Eats!

P.S. Like the pictures in this post? I took them on my Xyboard tablet, part of the Midwest Savvy Gourmets program from Verizon!  Disclosure: I am participating in the Verizon Wireless Midwest Savvy Gourmets program and have been provided with a wireless device and six months of service in exchange for my honest opinions about the product.

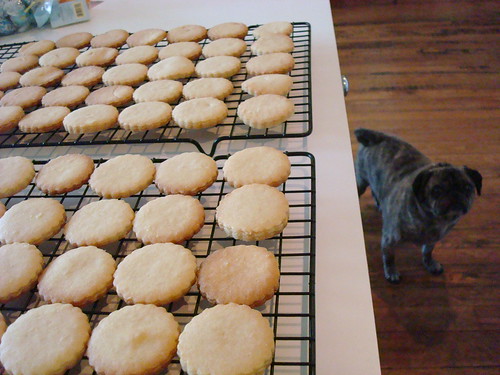
Simple but Sweet: Very Nice Cutout Biscuits Recipe

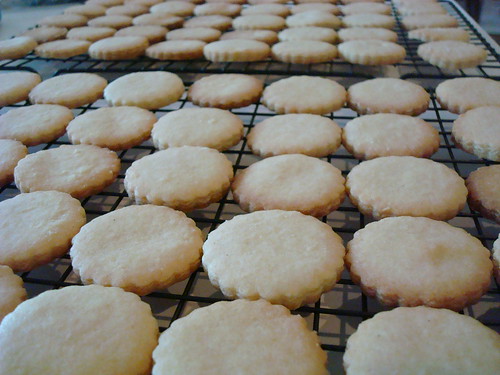
Very nice cutout cookies

Sometimes, you need an over-the top cream-filled and sprinkle-studded dessert.

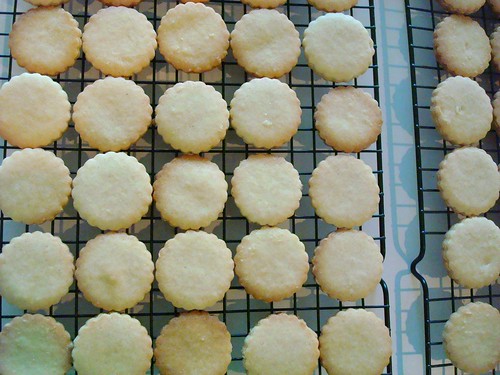
Well, this cookie is not for that time. This cookie should not be loved any less because of that, however: the fact is, it's a perfectly simple but sweet snacking cookie. In fact, I might go so far as to call it a biscuit, because for some reason I can't shake the idea of pairing these sophisticated treats with English tea.

Very nice cutout cookies

What more can I say about this biscuit? It's the perfect building block for a sandwich cookie or an ideal cookie to garnish an ice cream dessert; it would be wonderful dressed up with a dipping in chocolate and would be a very nice complement to a pot de creme. 

Of course, lightly crunchy and not overly sweet, they make a fine snack all on their own, too. 

No, it's not a showstopper. But this versatile cookie is a good one to have in your back pocket. They're not difficult to make, and the recipe yields a TON of cookies  if you use approximately 1.5-inch cutters. Keep it on file!

Very nice cutout cookies

Pleasant Biscuits

  • 2 1/2 cups all-purpose flour
  • 1 tsp. baking powder
  • 1/2 tsp. salt
  • 1/8 tsp. freshly grated cinnamon
  • 12 Tbs. (1 1/2 sticks) unsalted butter, at room temperature
  • 1 cup sugar
  • 1 egg
  • 1 tsp. vanilla extract

Procedure

  1. Over a small bowl, sift together the flour, baking powder, salt, and cinnamon. Set aside.
  2. In the bowl of an electric mixer fitted with the flat beater, beat the butter on high speed for 2 minutes. Reduce the speed to medium, slowly add the sugar and beat for 2 minutes, stopping the mixer occasionally to scrape down the sides of the bowl. Add the egg and vanilla and beat for 1 minute, stopping the mixer once to scrape down the sides of the bowl.
  3. Stop the mixer and add half of the flour mixture. Beat on low speed until most of the flour has been absorbed.
  4. Add the remaining flour and beat until all of the flour has been absorbed and the dough starts to pull away from the sides of the bowl, 2 to 3 minutes.
  5. Turn the dough out onto a work surface and divide into 2 equal balls. Shape each into a disk and wrap separately in plastic wrap. Refrigerate for at least 2 hours or up to 2 days.
  6. Let the dough stand at room temperature for 5 minutes. Place each dough disk between 2 clean, large pieces of plastic wrap. Roll out the dough to 1/8-inch thickness. (If the dough cracks while rolling, let it stand at room temperature for 5 to 10 minutes more.)
  7. Remove the plastic wrap and place the dough on a floured work surface. Lightly dust the top of the dough with flour.
  8. Preheat an oven to 350°F. Line several baking sheets with parchment paper. Dip cookie cutters in flour before cutting out shapes.
  9. Cut out cookies and transder to the prepared baking sheets.
  10. Freeze the baking sheets for 15 minutes, or refrigerate for 30 minutes. Gather up the scraps, reroll and cut out more cookies.
  11. Bake the cookies until very light golden brown, 14 to 16 minutes. Transfer the baking sheets to wire racks and let the cookies cool to room temperature. Makes many cookies (like 80 1.5-inch round ones).

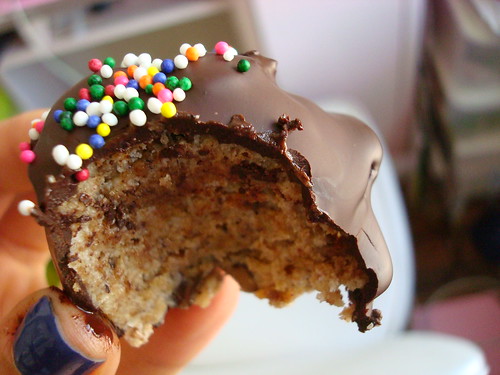
Sweet Idea: Hummingbird Cake Truffles

Hummingbird Cake Truffles

Cake Pops and truffles are getting a lot of press these days. And with good reason--they're delicious.

But they don't have to be an all-out production--they can also be a clever and quick way to use up cake scraps. For instance, when I recently made a delicious Hummingbird Cake, I found that I had several cake scraps left from when I leveled the cake layers. Rather than discard them, I did the following, and suggest you do so too, the next time you have some cake scraps:

Hummingbird cake

First, I mashed them up by hand, making them into cakey crumbs. Then, I mixed the crumbs with about a half-cup of the remaining cake frosting (I waited til after frosting the cake to make sure I had extra!). This doesn't have to be a scientific thing--you just need enough frosting so that the mashed cake will stick together and form into balls, but not so much that they turn into gooey, shapeless masses. Some more dense cakes actually don't need frosting at all to be able to shape into balls! You can shape them into balls by hand, or use an ice cream scoop for more free-form truffles.

Hummingbird cake truffles

Next, let the balls freeze for a good 2 hours - this will ensure that when you coat them in chocolate or candy coating, they won't melt, and will retain their shape.

At the end of the cooling period, set up a double boiler or just gently melt some chocolate or candy melt wafers (I did 2 squares of Baker's chocolate for about 10 truffles). Then dip your truffles directly from the freezer into the melted mixture, coating on all sides. Using a fork, tap them on the side of the pan to let excess chocolate drip off. Place on parchment paper or waxed paper and top with sprinkles or garnish while still quite wet, to ensure that it sticks (optional, but aren't sprinkles always cute?). 

Let them set for an hour or so before eating to ensure you're not going to get too messy. Then, enjoy! these keep quite well too, for up to a week. 

Sweet Summer: Watermelon Pudding Served in a Watermelon Shell

So, in case you didn't know it, I am part of the Verizon Wireless Savvy Gourmets group. And as part of this group, we occasionally have the chance to take part in challenges or are privy to special offers from Verizon. Booyeah! And this time, our mission, should we choose to accept, was to create a creative post about a favorite summer food, using photos taken on the Xyboard device.


Well, that sounded like a fun enough challenge.

So first, I thought about my favorite summer foods, and one that came to mind was watermelon. But since this is a cake and dessert blog, how could I make it relevant? So I hit the Epicurious application on the Xyboard (I love this because unlike a laptop, the tablet is a little more kitchen-friendly) and did a search for watermelon desserts. One that caught my eye right away was Watermelon Pudding. How refreshing does that sound? And based on the recipe, it seemed easy, too. SCORE!

And to make it even better and cuter, I decided to save the watermelon shell to use as a serving dish! Now how freaking cute is that? 

But here's where I need your help. If you think this is painfully adorable (and really, it is), could you please leave a comment on this post? Because the post with the most comments is eligible for a $250 prize. And I really feel like I'd like to use this money to go visit my little sister in San Francisco (and write about the bakeries I visit there, NATCH!).

Here's how I adapted the recipe I found to make the cute dish you see. 

And before I post the recipe, let me say this disclosure-ly stuff: I am participating in the Verizon Wireless Midwest Savvy Gourmets program and have been provided with a wireless device and six months of service in exchange for my honest opinions about the product.

Watermelon Pudding Served in a Watermelon Shell


Serves 4

For the pudding

  • 3 cups coarsely chopped seeded watermelon (about half of a small watermelon)
  • 1/3 cup cornstarch 
  • 1/4 cup sugar
  • 1 teaspoon fresh lemon juice, or to taste
  • 1/3 cup heavy cream

For the whipped cream topping

  • 1/3 cup heavy cream
  • 1/4 cup mini chocolate chips
  • red food coloring

Procedure

  1. Slice your watermelon in half; scoop out the watermelon from one half (it should be enough). Reserve the hollowed-out half, as this will be your serving dish. Eat the other half in slices, with friends.
  2. Purée watermelon in a blender until smooth, then pour through a fine-mesh sieve into a medium saucepan, pressing on pulp and then discarding any remaining solids.
  3. Ladle about 1/4 cup watermelon juice into a small bowl and stir in cornstarch until smooth.
  4. Bring remaining watermelon juice and cream to a boil with the sugar, stirring until sugar is dissolved.
  5. Stir cornstarch mixture again, then whisk into boiling liquid.
  6. Reduce heat and simmer, whisking occasionally, 3 minutes. Whisk in lemon juice.
  7. Pour pudding through cleaned sieve into a bowl, then transfer to your empty watermelon shell. Let cool for 30 minutes, until cold. Cover loosely and chill until set, at least 3 hours.
  8. Just before serving, beat cream with remaining 1 teaspoon sugar in another bowl with an electric mixer until it just holds stiff peaks. Stir in a drop or two of food coloring last, stirring only until incorporated. Top the pudding with the pink whipped cream, and scatter with mini chocolate chips to bring the watermelon theme home.  Enjoy chilled; this pudding will keep for 1 day in the fridge. 


Sweet to Eat: Stracciatella Truffle-Stuffed Cookies Recipe

Stracciatella truffle stuffed cookies

Now that I've got your attention, let me tell you about something I made.

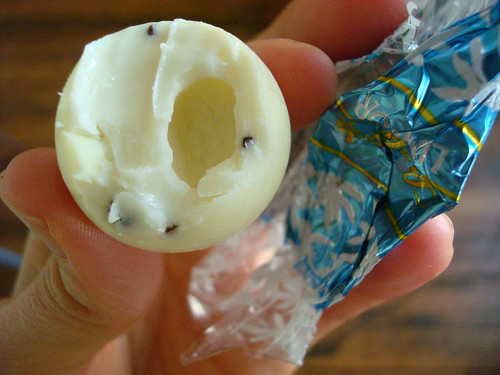
Recently, Lindt sent me a bunch of samples of their products. White chocolate and stracciatella truffles, in particular. Cool. I like their little Lindt Balls. OK, the technical name is "Lindor Truffles", but I kind of like my name better. But to clarify, even though my chosen name of Lindt Balls sounds like "lint balls", the chocolate variety is much more delicious. Trust me. 

I think Lindt wanted to see what I'd bake up with their treats, or possibly do a review on my site. Well, I don't need to review because I already know I love to stuff my face with these little morsels. Proof:

Stracciatella truffle stuffed cookies

But as for baking with them--after eating several of them straight from the wrapper, I thought "I have an idea". I happened to have on hand a fairly dense cookie dough which I was using to make Hamantashen, and I thought "I wonder what would happen if I stuffed these truffles in that dough?". 

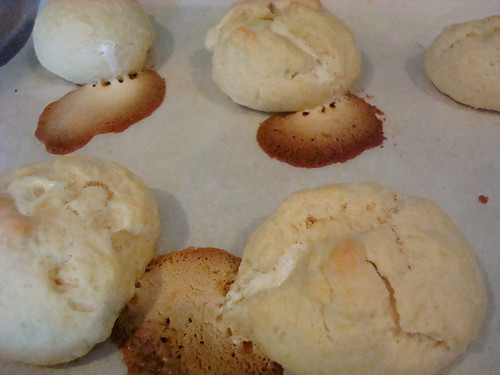
So I cut out some dough rounds and wrapped them around the chocolate balls. I tried to seal them off, but it seemed like a little white chocolate seeped out of most of them. Stracciatella truffle stuffed cookies

In general, though, they all retained enough white chocolate to give the cookies a highly delicious flavor. The cookie dough was fairly dry, but the baby-chocolate chip studded white chocolate centers were moist, and they are seriously an ideal cookie to pair with milk.

Stracciatella truffle stuffed cookies

Go ahead and try them -- I'd be willing to bet that you and your friends will do some serious damage to the batch.

Stracciatella Truffle Stuffed Cookies

Makes 18 or so

  • 3 cups  flour
  • 3 teaspoons baking powder
  • 1/2 cup sugar
  • 1/4 teaspoon salt
  • 3/4 cup butter, room temperature
  • 3 eggs
  • 24 white chocolate or Stracciatella Lindor truffles (why do you need 24 for a recipe that makes 18? Well, you might get hungry while baking!!)

Procedure

  1. Sift together the flour, baking powder, sugar, and salt in a large bowl. Set to the side.
  2. In the bowl of a stand mixer, cream the butter until fluffy. Add the eggs, one at a time, pausing to scrape down the sides of the bowl with each addition. It's gonna look kind of curdled. Don't panic.
  3. Add the dough a little at a time, mixing on low.
  4. Press the dough into a disc, wrap it in plastic wrap, and chill it in the fridge for an hour or so.
  5. Near the end of the cooling period, line 2 sheets with parchment paper. Preheat the oven to 400 degrees F. 
  6. On a well floured surface, roll out the dough to about 1/4 inch thick. You don't need to be too fussy about this though.
  7. Cut out 3 1/2 inch circles using a cookie cutter or the floured rim of a glass. Gather scraps and re-roll as needed.
  8. Place a truffle in the center of each cutout, and gather the dough around it and press it together on top, sort of like a hershey's kiss shape. Try to ensure no holes or openings (this will minimize filling dripping out).
  9. Place the filled dough balls on the prepared sheet, leaving 1.5 inches or so around each cookie.
  10. Bake on a well-greased cookie sheet or on parchment paper for 12-15 minutes. 
  11. Let cool on the sheet for about 10 minutes before transferring to a wire rack to cool completely.

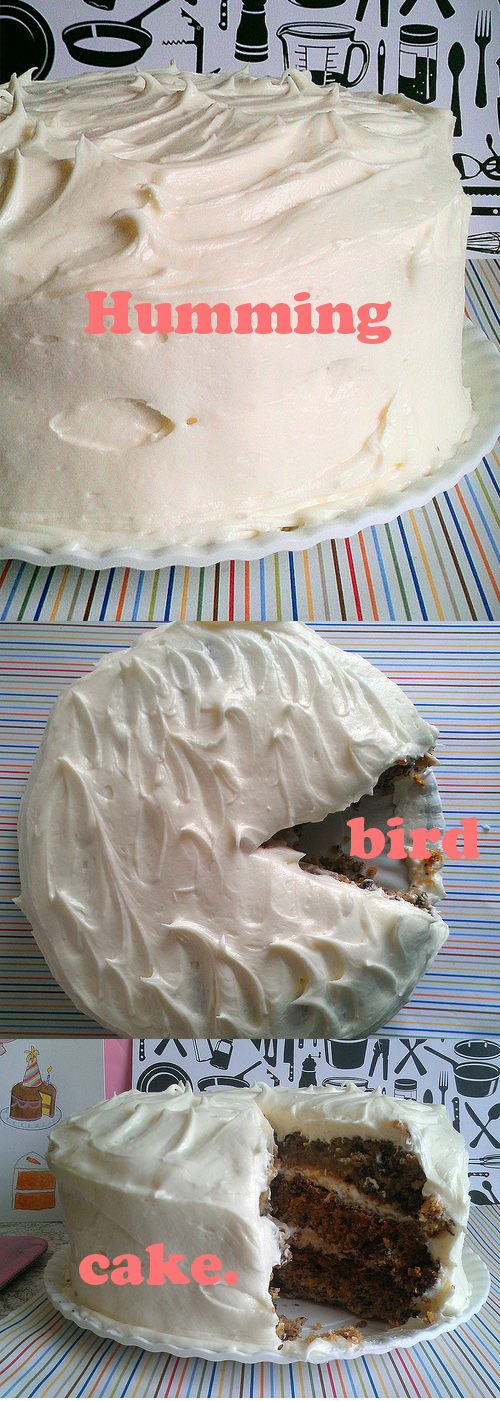
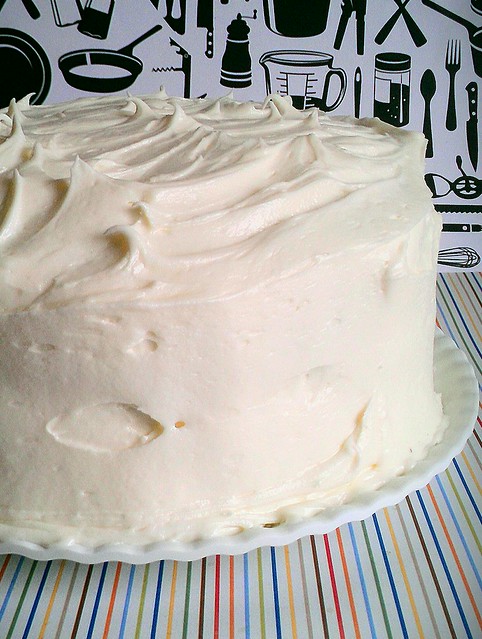
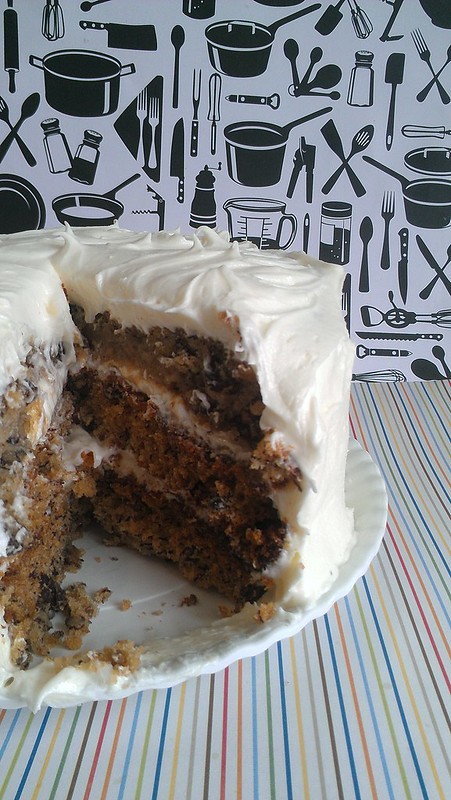
Hummingbird Cake Recipe

Hummingbird cake

Talk about things that will make you hum a happy tune: how about this moist banana spice cake, more sophisticated and delicious than any banana bread could hope to be, covered with swaths of cream cheese frosting ? Having trouble picturing it? An enlightened baker introduced me to the cake as being “like carrot cake, but with bananas.” While it's not quite that exact, it gives you a pretty good idea of what to expect.

Proof that cake loves banana!

The name hummingbird cake is a relatively recent phenomenon; the first known recipe published with this title is from the 1970s, when it appeared in Southern Living magazine. This doesn't imply that the cake was created out of the blue in the '70s; it's more likely that the recipe had been kicking around the South for years, but that it went under various names.

And it's still the South where this sweet reigns supreme; hummingbird cake is most commonly found below the Mason-Dixon line, or on the menus of restaurants specializing in Southern cuisine. While it's still less known than its famous layer-cake cousins the carrot cake and red velvet cake, it's certainly gaining popularity in bakeries and cupcake shops all around the United States.

Hummingbird cake

The cake came to the South from even further south--Jamaica, in fact, where a similar cake, made with earthy spices and flavorsome native bananas proliferates[diff word? Proliferate means to reproduce or multiply]. There, it's called Doctor Bird Cake, after a particularly rare type of swallow-tailed hummingbird. As the recipe immigrated north, it was sometimes referred to as “Jamaican Cake,” but especially following the aforementioned Southern Living feature, became far more popular as “Hummingbird Cake”. 

Regardless of whether you want to call it Doctor Bird or Hummingbird, why name this cake after a bird at all? Personally, I find an anecdotal reason most pleasing. The gist? Bake this cake in a house full of people, and see what happens while you bake it, while you frost it, and especially when you serve it. Chances are, a crowd will descend upon the cake, not unlike hummingbirds drawn to sweet nectar.

Hummingbird cake

When baking this recipe, take care to not overmix the batter. Like banana bread, you want to handle it as gently as possible. Additionally, you want your bananas to be very ripe--the tastiest cakes come from bananas that are well past their ideal eating-from-hand stage. If they look brown and almost to the point where you'd want to throw them out, they're at the perfect point to be baked into this cake. And if you're feeling especially festive, substitute Jamaican rum for the vanilla. It's very, very nice.

Hummingbird cake

Hummingbird Cake

Makes one 3-layer 9-inch cake

For the cake:

  • 3 cups all-purpose flour
  • 2 cups sugar
  • 2 teaspoons baking soda
  • 1/2 teaspoon salt
  • 1 teaspoon ground cinnamon
  • 1/4 teaspoon ground nutmeg
  • 3 large eggs, beaten lightly
  • 1 1/4 cups vegetable oil
  • 1 1/2 teaspoons vanilla extract
  • 4 oz canned crushed pineapple, drained well
  • 1 cup coarsely chopped toasted pecans, plus 1/2 cup toasted pecan halves, for garnish
  • 2 cups mashed, very ripe bananas (2 to 3 medium) 

For the frosting:

  • 1/2 cup unsalted butter, softened
  • 8 ounces (1 cup) cream cheese, softened
  • 1 teaspoon vanilla extract
  • 4 cups confectioners' sugar

Chopped pecans, for garnish

  1. Preheat the oven to 350 degrees F. Grease and flour three round 9-inch cake pans.
  2. Sift the flour, sugar, baking soda, salt, cinnamon, and nutmeg together several times. Put into a large bowl and set aside.
  3. Add the eggs and oil to the dry ingredients. Stir with a wooden spoon until ingredients are evenly moistened. Stir in the vanilla, pineapple, and the pecans. Add the bananas and stir just until combined. The batter will be very thick.
  4. Divide the batter equally between the prepared cake pans. Bake for 25 to 30 minutes, or until a toothpick inserted into the center comes out clean. Cool in the pan for 10 minutes, then run a small knife around the pan, loosening the edges of the cakes. Turn out onto a cooling rack, and let the cakes cool completely before frosting. 
  5. To make the frosting, in the bowl of a stand mixer fitted with the paddle attachment, combine the cream cheese, butter, and vanilla. Beat at medium-high speed until the mixture has a very smooth consistency; pause occasionally to scrape the sides of the bowl with a rubber spatula. Add the confectioners' sugar 1 cup at a time, mixing well after each addition, until the frosting is smooth and spreadable. 
  6. Place one cake layer, flat side up, on a serving plate; spread 3/4 cup of frosting on top. Leave a half-inch margin all around, as the weight of the second cake layer will push the frosting to the edges. Repeat with the second layer. Place the third cake layer, flat side up, on top of the frosted layers. Frost the sides and then the top; garnish by sprinkling more chopped pecans around the top edges of the cake.  
  7. Serve at room temperature. Because the cream cheese frosting is sensitive to heat, store lightly covered in the refrigerator for up to three days; let come to room temperature before serving.

Happy Birthday to Me: My Birthday Cake Recipe this Year

Birthday

When you think about it, birthday cake is kind of a funny thing: what other dessert do we put candles on, sing to, spit at as we try to blow out the candles, then watch as crowds clamor for a piece?

Yet in spite of the fact that it is a sharing food, birthday cake can also be a very personal thing, with the flavor really being up to the birthday person. It's an opportunity to celebrate another year going by with the cake you choose, be it strawberry shortcake, double chocolate cake, or even store-bought Funfetti.

Here's the classic I chose for my late August birthday this year: a fluffy golden yellow cake topped with a crowning glory of rich, stick-to-your-teeth fudge frosting. The contrast of light cake and thick frosting is simply beyond compare—a taste and texture combination which is guaranteed to take you back to the glee of the birthday parties of yesteryear, if only for a few bites.

For the full entry and recipe, visit Serious Eats!

Chocolate Covered Cake on a Stick

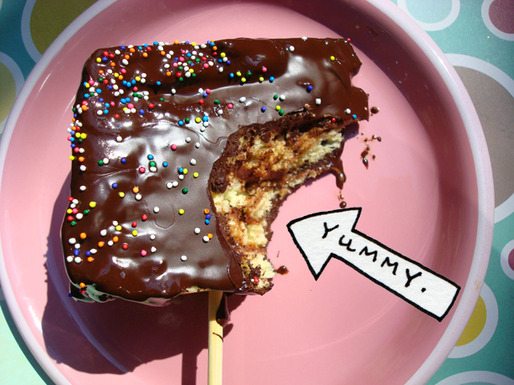
Cake is good, but it can be great—all you have to do is put it on a stick and cover it in chocolate. I formulated this theory following my first taste of "The Swingle", a slice of chocolate covered Key Lime pie on a stick, made by Steve's Authentic Key Lime Pies. I found myself wondering, what dessert wouldn't taste great covered in chocolate and put on a stick?

Instead of coming up with an answer (because really, that was a rhetorical question) why not set up a double boiler and set yourself to melting some chocolate? Since I was feeling fancy, I used slices of Dobos Torte, but really, any type of cake would work. See for yourself how enrobing a cake slice in chocolate brings it to indulgent new heights, and yet how eating it off of a stick somehow keeps the experience playful.

For the full entry and recipe, visit Serious Eats!

Raising the Bar: Apple Walnut Bars with Cream Cheese Frosting Recipe

What on earth do you do when you unexpectedly find yourself with a spare box of Betty Crocker Spice Cake
Mix?

If anyone even thought "mix and bake as-is", you're officially banned from this website. Because a quick peek into The Cake Mix Doctor Returns! reveals a far more appetizing concept: Applesauce Bars with Cream Cheese Frosting. Apparently, this is remnicient of a regional southern store-bought cake that enjoyed popularity at A&P stores called "Spanish Bar Cake", a dense spice cake studded with raisins and nuts and topped with delicious cream cheese frosting. Well, my version is doctored a bit more--with finely chopped apples instead of applesauce, no raisins (ew) and even fattier frosting than the one in the book, and I assure you, they're a delightful autumn treat. I don't have a picture but they are similar in appearance to this gorgeous specimen by PastryMama, pictured above (she's got a great recipe too!).

Perfect for breakfast.

Apple Walnut Bars with Cream Cheese Frosting

For the bars

parchment paper, to line pans

  • 1 package plain spice cake mix
  • 1/4 cup brown sugar, lightly packed
  • 3/4 teaspoon cinnamon
  • 1/2 teaspoon ground nutmeg
  • 1/4 teaspoon ground cloves
  • 2 apples, very finely chopped (I used Granny Smith, with the skin on)
  • 3/4 cup butter, softened
  • 4 large eggs
  • 1/2 cup finely chopped walnuts

For the frosting

  • 4 ounces cream cheese (I used full-fat, original recipe calls for light...whatever)
  • 1 tablespoon milk
  • 2 1/2 cups confectioners' sugar, sifted
  • 1 teaspoon vanilla
  • 1/2 cup coarsely chopped walnuts, for garnish/topping (optional)

Procedure

  1. Make the bars. Place a rack in the center of the oven and preheat oven to 350 F. Line a 15x10 inch jelly roll pan with parchment paper. Put the pan aside.
  2. Place the cake mix, brown sugar, spices, chopped apples, butter, and eggs in a large mixing bowl and beat with an electric mixer on low speed until the ingredients are incorporated, 30 seconds. Stop the machine and scrape down the side of the bowl with a rubber spatula. Increase the mixer speed to medium and beat until the batter is smooth, about 1 minute longer. Fold in the finely chopped walnuts. Transfer the batter to prepared pan, smoothing the top with a rubber spatula.
  3. Place the pan in the oven and bake the bars until the edges have set and the center is still a little soft (press it lightly with a finger), 25-30 minutes. Transfer the pan to a wire rack and let cool for about 35 minutes.
  4. Make the frosting. Place the cream cheese in a large mixing bowl and beat with an electric mixer on low until creamy, 1 minute. Stop the machine and add the milk, confectioners' sugar, and vanilla. Continue beating on low until the ingredients come together. Increase the mixer speed to medium low and beat until the frosting is creamy and light, 30 seconds longer. Spread the frosting evenly on top of the cooled cake. Run the tines of a fork through the frosting to make squiggles, or garnish with coarsely chopped walnuts. Let the frosting set for 10 minutes before slicing and serving.
  5. Storage suggestion: store the bars, covered withfoil, in the fridge for up to one week--or, freeze the bars in the pan, covered with foil, for up to three months. Let bars thaw overnight before serving.


Citrus Buttermilk Raisinets Muffins Recipe

Frequently, when publicists send me recipes, I just delete them. I am not trying to be a jerk, but a lot of them are kind of boring. And sometimes, even without trying, I am kind of a jerk.

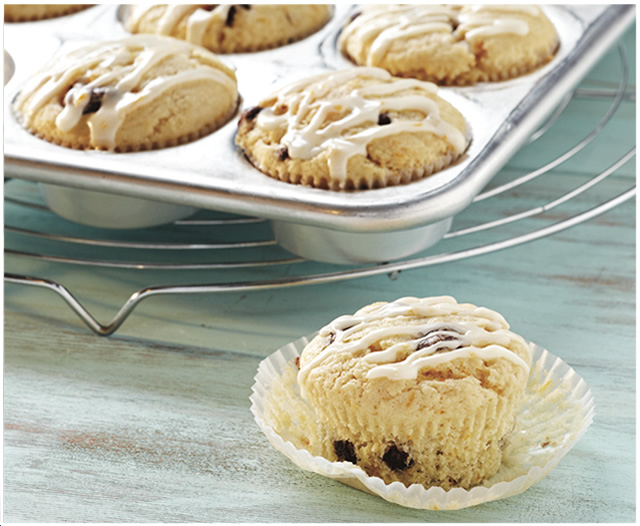
But I didn't delete this one, so that is saying a lot. After all, even though it's technically for muffins, they are veering deliciously close to cake territory what with their raisinets (AKA: acceptable raisins) and glaze topping. Well, you know how I feel about glaze, so why not triple the recipe? I bet they'd be even better with buttercream frosting, though. 

These aren't your ordinary muffins. What sets these apart are the addition of smooth buttermilk, the fresh juice and peel of oranges and chocolate covered raisins all topped with a citrus glaze. Pop one in a work or school lunchbox for an unexpected treat!

Citrus Buttermilk Raisinets Muffins

12 muffins for your time.

  • Nonstick cooking spray or paper baking liners
  • 1/3 cup granulated sugar
  • 2 teaspoons grated orange peel
  • 2 cups all-purpose flour
  • 1/3 cup packed light brown sugar
  • 2 teaspoons baking powder
  • 1/2 teaspoon salt
  • 1/2 cup unsalted butter, melted and cooled
  • 2 large eggs, lightly beaten
  • 2/3 cup buttermilk
  • 1 teaspoon vanilla extract
  • 1 cup NESTLÉ RAISINETS Dark or Milk Chocolate-Covered Raisins

ORANGE GLAZE

  • 2 tablespoons freshly squeezed orange juice
  • 3/4 cup powdered sugar
  • 1/2 teaspoon grated orange peel

Procedure

  1. FOR MUFFINS: PREHEAT oven to 375° F. Spray 12 muffin cups with nonstick cooking spray or line with paper liners.
  2. COMBINE granulated sugar and orange peel in small bowl. Rub together with your fingers until fragrant. Whisk together flour, orange sugar mixture, brown sugar, baking powder and salt in large bowl. Stir together melted butter, eggs, buttermilk and vanilla extract in medium bowl until well blended. Make a well in the center of flour mixture. Pour liquid mixture into the well; gently stir until combined. Fold in Raisinets. Spoon batter into prepared muffin cups.
  3. BAKE for 17 to 20 minutes or until a wooden pick inserted in muffins comes out clean. While the muffins are baking, make the orange glaze. Drizzle the glaze over the muffins while they are still warm. Allow the glaze to set before serving.
  4. FOR ORANGE GLAZE: COMBINE orange juice, powdered sugar and orange peel in a small bowl. Whisk together until smooth, adding more juice if necessary until desired consistency.