Iced Mocha Syllabub in a Jar

Syllabub

Hey bub. What's a syllabub?

Answer (according to the dictionary, anyway): A whipped cream dessert, typically flavored with white wine or sherry.

Basically, that's all I needed to get interested in this sweet treat. So I was really happy to find a recipe for a version which is--how cute--served in a jar! Everything tastes better in a jar. Where did I find this recipe? in a book called 150 Best Desserts in a Jar! Naturally!

Well, guess what? This almost tastes eggnoggy. Like, not quite, but like it could be related to the holiday treat. But I was delighted to find that it tastes just as good in the summer--like a boozy, tricked-out milkshake. If you really need more than that to be interested, then I don't know what's wrong with you. Here's the recipe!

Iced Mocha Syllabub

From 150 Best Desserts in a Jar

Makes 4 servings

  • Four 8-ounce tall jars, buttered
  • a blender
  • an electric mixer

Ingredients

  • 3 1/4 ounces dark chocolate (70%), melted
  • 1/4 cup granulated sugar
  • 2 tablespoons instant espresso powder
  • 1/2 teaspoon vanilla extract
  • pinch of nutmeg
  • 1/2 cup brandy
  • 1/2 cup mascarpone cheese
  • 2 cups heavy or whipping cream
  • 2 cups softened coffee ice cream
  • 1 tablespoon unsweetened cocoa powder

Procedure

  1. In a blender, process melted chocolate, sugar, espresso powder, vanilla, nutmeg and brandy until smooth.
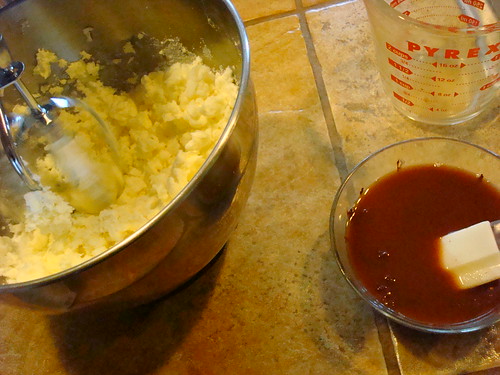
  2. In a large bowl, using electric mixer at medium speed, beat mascarpone for 2 minutes, until creamy. Add cream and beat until stiff peaks form. Gradually add chocolate mixture, beating constantly. Fold in the softened ice cream.
  3. Spoon into jars and refrigerate for 30 minutes. When ready to serve, dust each jar with cocoa powder, dividing equally.


Shortbread Cookie Truffles Recipe

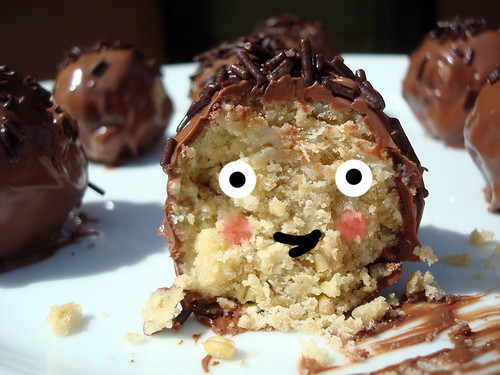
Shortbread truffles

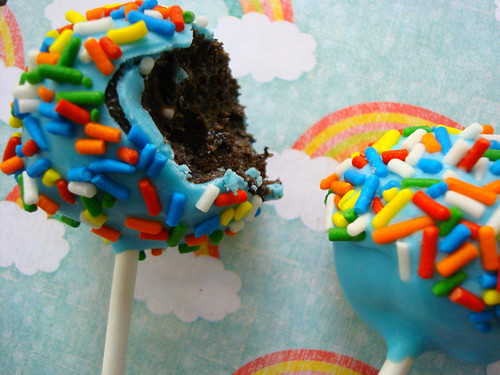
Recently, I wrote up a tutorial on How to Make Oreo Cake Pops for the lovely and amazing website Craftsy.com. An important life skill if ever there was one!

And naturally, they were delicious. Here's a sneak peek:

Oreo Cake Truffles

and gosh are they tasty! (tutorial for those can be found here).

But the process got me thinking...could I do this with other flavor combinations? For instance, could I substitute shortbread cookies for Oreos, and fancy chocolate for the candy melts?

Why the heck not?, I thought, especially as I have a boatload of freebies I'd recently received, including tasty shortbread (Duchy Originals) and Tcho Chocolate. I thought: I'm going to make some shortbread cookie truffles, or die trying!

Actually, it wasn't so dramatic. I didn't actually think death was a possibility. But I suspected deliciousness was dangerously close!

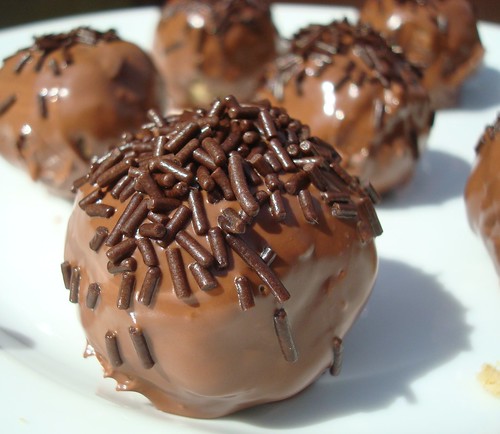
So, I won't keep you in suspense. Here's how they came out:

Shortbread Truffles

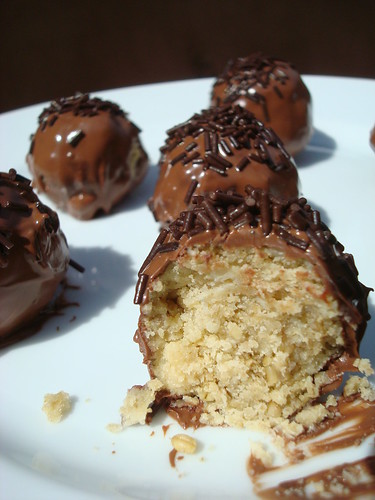
I know, beauties, right? Here's an inside shot. 

Shortbread Truffles

And I am happy to report that they taste as good as they look. Lightly salty. Very buttery. A little nutty, owing to the fact that I used part regular shortbread and part "oaten biscuits". Nice and moist inside--the shortbread didn't crumble as much as I thought it might. And the chocolate was to die for. I used the Tcho Milk Chocolate discs (from their baking chocolate series), and I can say with no hesitation that this is not your typical milk chocolate. It almost tasted...caramelly. The flavor just lingered in your mouth. Yum yum yum yum yum. They're pricey, but if you have a recipe that will really let the chocolate shine, I say go for it. 

Nice little morsels--decadent, but hey, that's why they're in small portions, right? Next time I try this recipe, I'd like to try using dulce de leche or melted caramels instead of the cream cheese to moisten the crumbled cookies. Yep: I have visions of Millionaire's Shortbread Truffles dancing in my head! 

But for now, here's the simple version. Gosh-darn are they good.

Shortbread Cookie Truffles (Printable version? Right here.)

Makes 12-16

  • 2 boxes Duchy Shortbread (I used one box of the plain butter kind, and one box of the "Oaten Biscuits")
  • 1/2 block cream cheese (4 ounces)
  • 1 bag chocolate morsels (I used an 8 ounce bag of Tcho Milk chocolate)
  1. Prepare the truffle innards. First, prepare a baking sheet like so: lay a sheet of waxed or parchment paper on top, and set to the side. You’ll be happy to have this handy a few steps down the line.
  2. Now, you need to crush the cookies. If you have a food processor, put the whole cookies inside, and pulse several times, until the cookies have been reduced to fine crumbs. If you don’t have a food processor, place the cookies into a heavy duty plastic bag and crush using the bottom of a heavy tumbler or the side of a rolling pin. This is very fun for kids (with supervision, of course!)!
  3. Once the cookies are completely crumbled, place them into a large bowl. Add the cream cheese, and using your impeccably clean hands, thoroughly mix the cookie crumbs and cream cheese. Since the shortbread is already pretty buttery, it should be able to form nicely into balls.
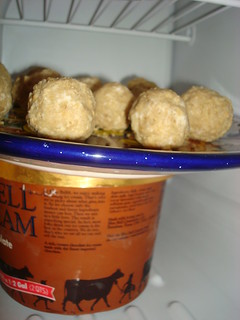
  4. Clean your hands so that you have a clean surface to roll the “dough” by hand. Roll it into balls, about 1 inch or so in diameter. Maybe an inch and a half. Place them on the baking sheet. If you're lazy, you can also just put them on a plate, but they might stick a little bit. I'll be honest. While I want to tell you how to do it the "right way", I in fact did not. I put them on a plate in the freezer on top of some ice cream. 
  5. Shortbread Truffles
  6. Speaking of which, you do want to chill them. Place the baking sheet into the refrigerator for an hour, or the freezer for about 20 minutes.
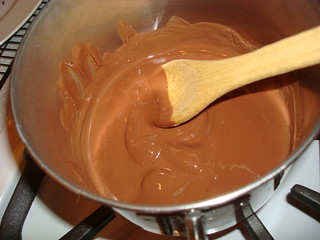
  7. With the dough still in its chilling place, begin to melt your chocolate over low heat.
  8. It will gradually begin to melt and become smooth. Once mostly melted, the last bits will melt rapidly in the residual heat, so keep a close eye on the pan. 
  9. Shortbread Truffles
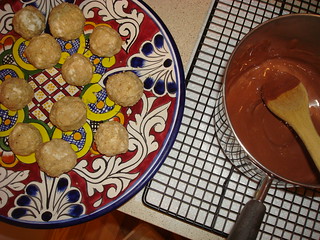
  10. Remove from heat, and take your baking tray out of the refrigerator or freezer. It's time to enrobe.
  11. Shortbread Truffles
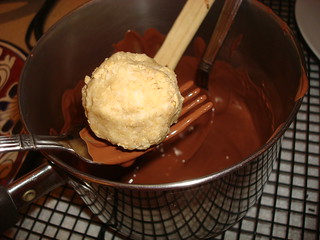
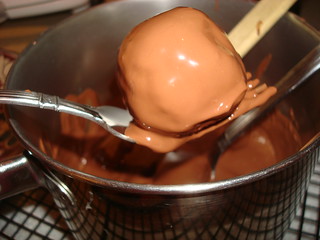
  12. I like to place the dough on a fork and drip the chocolate on top using a spoon--the tines seem to allow the excess coating to drip off.
  13. Shortbread Truffles Shortbread Truffles
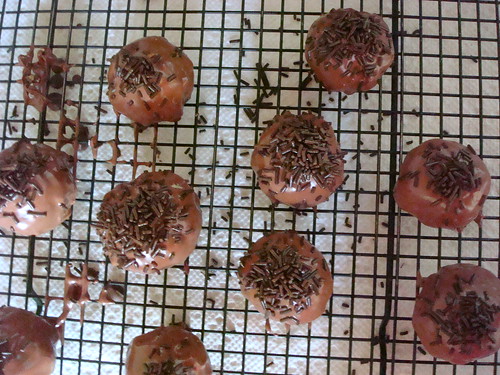
  14. Transfer to a wire rack with a sheet of waxed paper or paper towels beneath, to catch drips.
  15. If desired, drizzle sprinkles over the truffle. You need to do this directly after dipping or they will not stick.
  16. Shortbread Truffles
  17. Let set for at least an hour before serving.


Caramel Chocolate Pecan Ebelskivers

Ebelskivers!

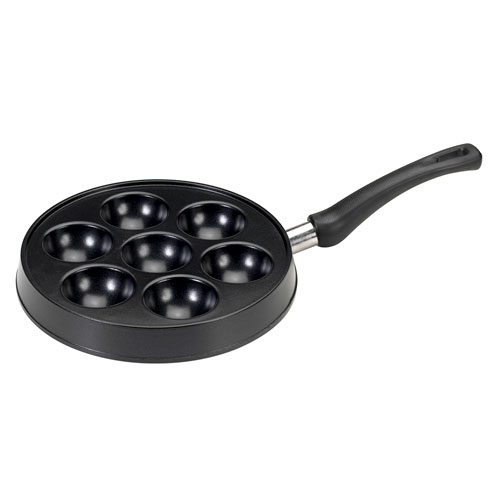
Where there's a well, there's a way. No, that was not a spelling error. I mean "well". Actually, I meant seven wells, because that's how many you'll need in your ebelskiver pan to make these tasty treats.

But...first things first. What the eff is an ebelskiver?

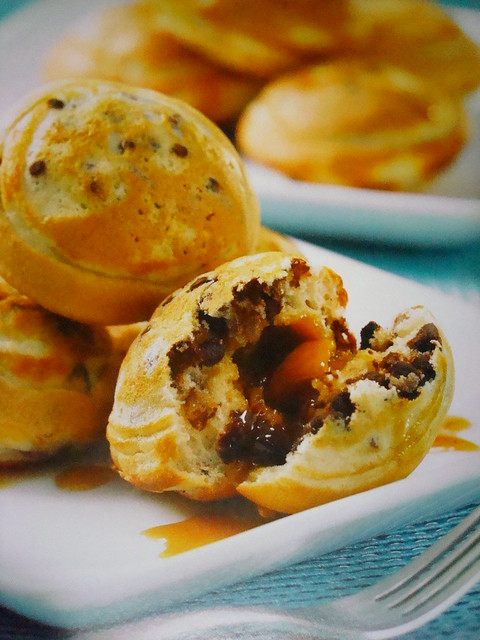
Well, first, picture a pancake. Now, shrink it to about the size of a ping-pong ball and puff it up a little bit, and fill it with something tasty. You're starting to get the idea. They're a traditional Danish pancake, and they're mighty tasty. They're filled with any number of different flavors and ingredients, but I think they're best when they're served sweet.

True or not, there is a rather charming story behind the history of the ebelskiver. As it goes, they were created by the Vikings following a long day of unsuccessful battle. Gathering around the fire, the weary soldiers set to making some pancakes (just what I want to do after a long day of battle, how 'bout you?). But they couldn't find the griddle! Instead of admitting defeat, a quick-thinking soldier thought to pour the batter into his dented shield. The batter settled into the dents and baked up as nubbly little pancake popover-type puffs. The ebelskiver was born! 

Truthfully, it's much more likely that the Danes picked up the idea in the course of their trade and travel in Asia, where one of the regional specialties they came across were a sort of pancake puff, notably the takoyaki, a savory pancake puff popular in Japan. It required a specific type of pan. In China, a pancake-y treat called gai daan jai, similarly called for a pan with wells. Likewise, in India, the paniyaram pan is used to make tender puffed breads called kuzhi paniyaram. It's likely that these concepts were adopted and adapted in Denmark, and it was a sort of evolution that led to the ebelskiver.

In case you didn't grasp it yet...with ebelskivers, you *do* need a specific pan. It's called (wait for it) an ebelskiver pan. It looks like of like this: 

Here's a recipe for chocolate caramel pecan ebelskivers, care of the book 150 Best Ebelskiver Recipes.  

Caramel Chocolate Pecan Ebelskivers

This recipe makes 28 puffs.

Ingredients

  • 1 1/4 cups all-purpose flour
  • 3/4 teaspoon baking powder
  • 1/4 teaspoon salt
  • 1 tablespoon packed light brown sugar
  • 2 large eggs, separated
  • 1 cup milk
  • 2 tablespoons unsalted butter, melted
  • 1 teaspoon vanilla extract
  • 1/2 cup chopped toasted pecan halves
  • 1/2 cup mini semisweet chocolate chips (works best for the small puffs)
  • vegetable oil
  • 14 individually wrapped soft caramel candies, unwrapped and cut in half
  • Confectioners' sugar, for dusting

Procedure

  1. In a large bowl, whisk together flour, baking powder, and salt.
  2. In a medium bowl, whisk together brown sugar, egg yolks, milk, butter, and vanilla until well blended.
  3. Add the egg yolk mixture to the flour mixture and stir until just blended (the batter will be slightly lumpy). Gently stir in pecans and chocolate chips.
  4. In a medium bowl, using an electric mixer on medium-high speed, beat egg whites until frothy. Increase speed to high and beat until stiff, but not dry, peaks form. Using a rubber spatula, gently mix one-third of the egg whites into the batter. Gently fold in the remaining whites.
  5. Brush wells of pan lightly with oil. Set pan over medium heat. When oil begins to sizzle, add 1 tablespoon of batter to each well. Place a caramel candy half in the center, and top with 1 more tablespoon of batter. Cook for 2 to 4 minutes or until bottoms are golden brown. Using two skewers, flip the puffs over. Cook for 2 to 3 minutes or until bottoms are golden brown and the puffs are firm to the touch. Remove pan from heat and transfer puffs to a plate. Let pan cool slightly.
  6. Repeat with remaining batter and caramels, brushing wells with oil and reheating the pan before each batch.
  7. Dust the ebelskivers with confectioners' sugar. Serve warm or at room temperature.

How to Make Doughnuts Using Biscuits from a Tube

Biscuit doughnuts

Want to make homemade doughnuts for National Doughnut Day (that's today, btw) but feel like it sounds, well, too hard?

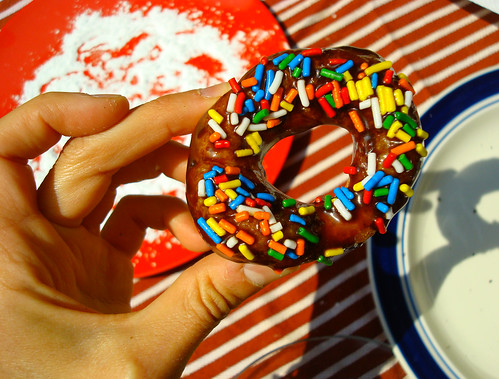
Well, listen up, sweeties, because I've got a tip that can take you from zero to doughnuts in less than 15 minutes. Seriously. This scene could be your life in less time than it takes to watch an episode of the Simpsons:

Biscuit doughnuts

The secret to this sweet success? Pop-n-bake tube of biscuits! Totally not kidding!

Pop the magic

They're a fantastic shortcut to surprisingly tasty doughnuts that you can make at home. And they're so, so easy! All you need is some oil, a skillet, and whatever sweet garnish you like on your doughnuts. 

Biscuit doughnuts

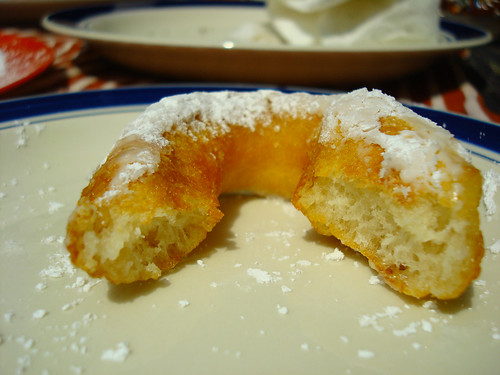
Donut believe me? Well, that's your right. But I can prove it by telling you how to make this delicious dish, right here and now. I donut know who invented this recipe, but I am so glad they did. And I'm happy to share it with you. You'll be rewarded with cakey, lightly sweet doughnuts that really do pass quite well for "real" doughnuts!

Biscuit doughnuts

How to Make Doughnuts Using Biscuits From a Tube (Printable version here!)

Makes 8 doughnuts, and 8 doughnut holes

Equipment: 

  • A heavy, large skillet
  • Tongs or a slotted spoon
  • Paper towels
  • Several shallow bowls or plates for putting toppings

Ingredients

  • 1 tube (usually 8 to 10) pop-n-bake biscuits. The brand doesn't matter.
  • Vegetable Oil, for frying (you want about 1/2 inch or so in the pan)
  • If desired, melted butter (to help toppings adhere)
  • Toppings: confectioners' sugar, crushed cookies, honey, nuts, chocolate sauce, sprinkles--whatever you want!

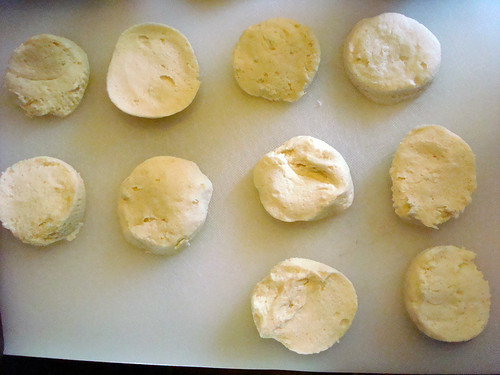
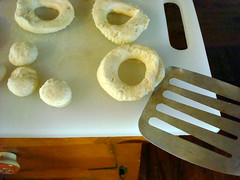
Pop open that tube of biscuits. Separate them.

Biscuit doughnuts

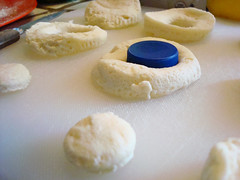
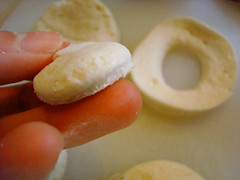
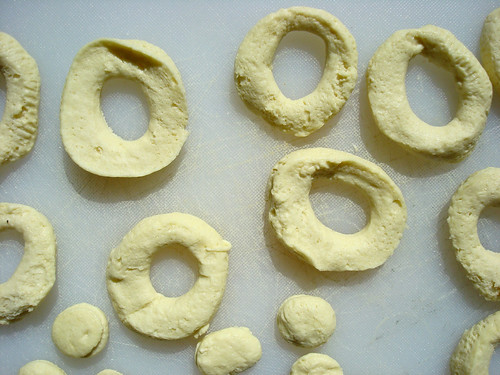
Using an apple corer (or, like me, the top from a bottle of water), cut the holes out of the centers. Gently remove them and set to the side (doughnut holes!). 

Biscuit doughnutsBiscuit doughnuts Biscuit doughnuts

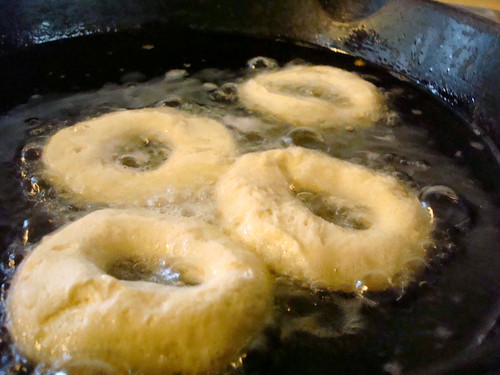
Pour the oil in your skillet until it is about 1/2 inch thick. Heat the oil on medium heat until it has reached 375 degrees. Don't have a thermometer? You can also break a small piece of dough off and toss it into the pan. If it starts bubbling assertively right away, you're probably ready to rock and roll.

Biscuit doughnuts

Gently transfer a couple of the doughnuts at a time into the pan (don't crowd them!). When they start to rise in the oil and turn brown.

Biscuit doughnuts Biscuit doughnuts

This won't take long--about a minute, if that. Now, turn them over using tongs or a slotted spoon. Once you've flipped them, the second side will take a slightly shorter amount of time.

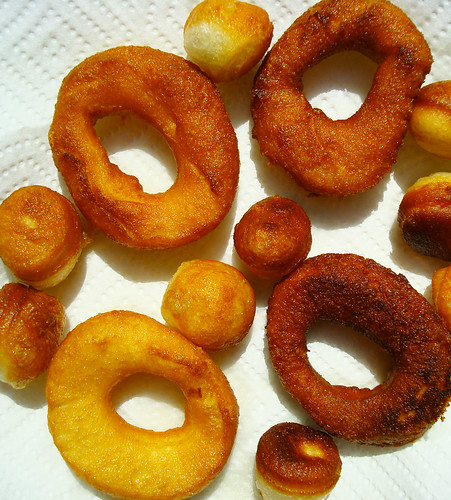
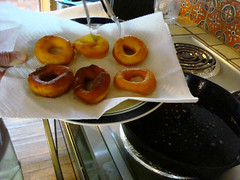
Once fully fried, transfer to the paper towels to blot excess oil. Continue with the remaining doughnuts and holes until everything is fried. Turn the heat off. 

Biscuit doughnuts

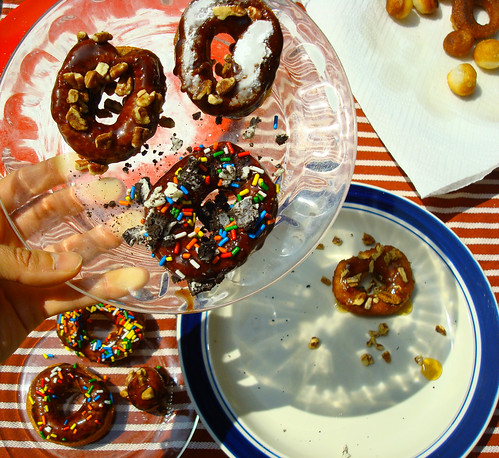
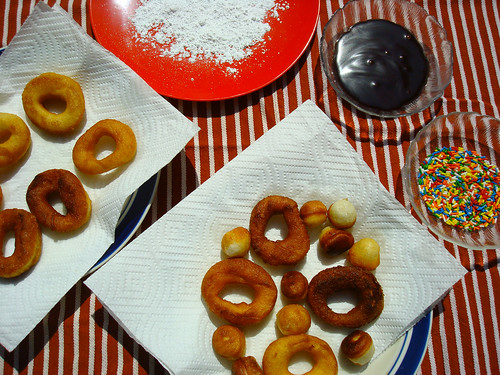
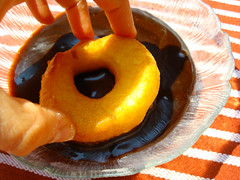
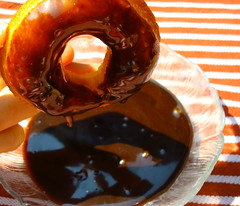
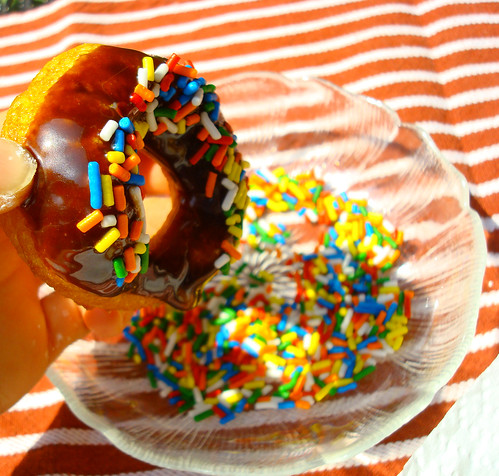
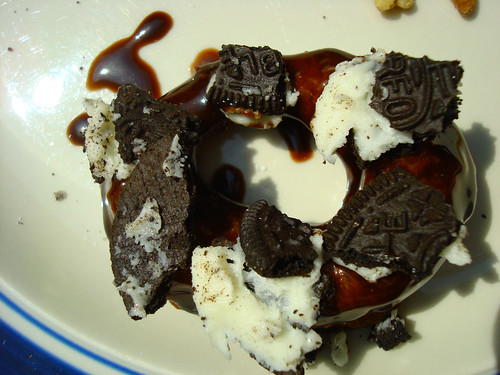
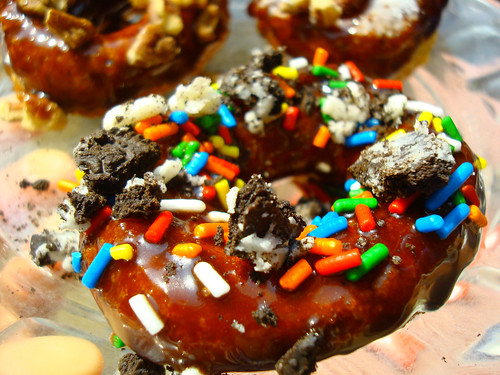
Now, you're ready to decorate! What I did was set up a little toppings bar / decorating area. I had shallow plates with confectioners' sugar, chocolate sauce (ice cream sauce), rainbow sprinkles, crushed cookies, pecans, honey, et cetera.

Biscuit doughnuts Biscuit doughnuts

If you want to dust them with confectioners' sugar, simply place them in the dish, and turn until coated. Tap to dust off excess. If you're not going to eat them right away, roll them again once more before serving because the sugar can become gummy if it sits for a few minutes on the doughnut. Some people find that brushing the tops with melted butter can make the sugar stick better.

Biscuit doughnutsBiscuit doughnuts Biscuit doughnuts

If you want to make a frosted doughnut, dip one side of the doughnut into the chocolate sauce; lift, and let the excess drip off. Once dripped off, dip it in the sprinkles gently, and transfer to a plate to set. 

Biscuit doughnutsBiscuit doughnuts Biscuit doughnutsBiscuit doughnuts Biscuit doughnuts

You could also garnish with honey and pecans...

Biscuit doughnuts

or crushed cookies...

Biscuit doughnuts

or a little bit of everything.

Biscuit doughnuts

But either way, you're bound to have a ball. Enjoy! 

Funfetti Gooey Butter Cake Recipe

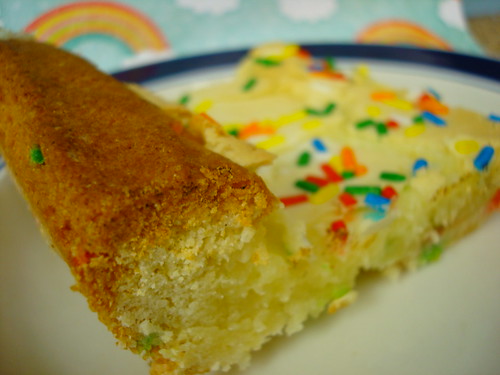
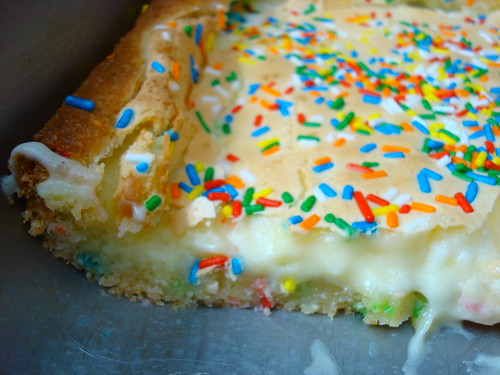
Funfetti Gooey Butter cake

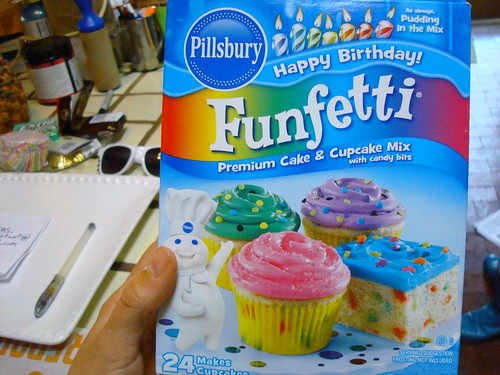
Gooey Butter Cake is one of those inherently perfect foods. I mean, just consider the name. Gooey Butter Cake. No part of that is wrong. But how to make it even more right? Since many St. Louis-style Gooey Butter Cake (if you want more about the history of the cake, btw, click here) recipes call for cake mix anyway, I figured, why not add an ingredient that has "fun" in the mix: Funfetti Cake Mix! Everyone knows that Funfetti is more fun than regular old yellow cake mix. Why? Well, last time I checked, yellow cake mix didn't have rainbows hidden inside. You simply can't argue that logic.

Funfetti Gooey Butter cake

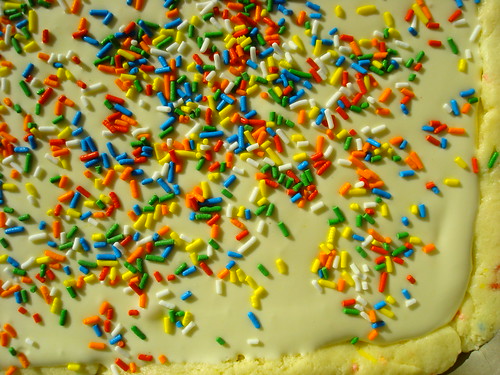
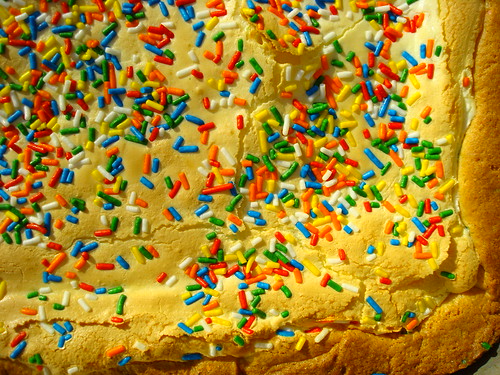
So, I broke out the Funfetti and got to work, simply swapping it out for the called-for yellow cake mix in the recipe. I also garnished it with rainbow sprinkles, you know, for additional magic.

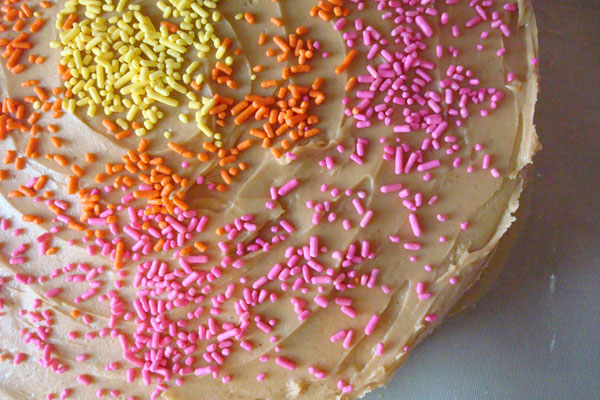
Sprinkles

Gooey Butter Cake is already sort of an indulgent, guilty-pleasure food, and the Funfetti made it even more so. The little pockets of sugary rainbow bits in the cake don't take away any of the pleasure of this cake, and the sprinkles on top made it festive. While it wasn't a huge change from the original recipe, I truly believe it was a small swap that made it magical! 

Funfetti Gooey Butter Cake

Here's the recipe; enjoy!

Funfetti Gooey Butter Cake Recipe (printable version here)

Ingredients: 
  • 1 box Funfetti Cake Mix
  • 4 extra large eggs 
  • 1 stick melted butter 
  • Pure vanilla extract 
  • 1 8 oz. package cream cheese 
  • 1 box confectioners' sugar (3 1/2 cups)
  • Butter or nonstick spray, for greasing pan
Equipment:
  • 9 X 13 Pan 
  • Stand Mixer
First, make the cake crust mixture. 
  1. Preheat the oven to 350 degrees F. Grease your 9 x13 pan generously.
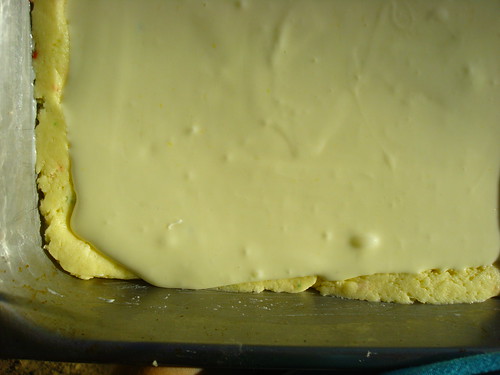
  2. Put the Funfetti mix in the bowl of your stand mixer. DO NOT FOLLOW THE DIRECTIONS ON THE CAKE BOX. Add 2 of the eggs, melted butter, and vanilla extract. Mix together on low speed until combined. The batter will be moist and quite thick, so you should be able to transfer all of it quite easily to the pan. Spread evenly along the bottom of the pan, pressing the sides up about 1/2 inch for a little "ledge", like a shallow swimming pool that the gooey batter will be resting in. 
  3. Clean off the mixers and bowl. 
  4. Now, it's time to make the gooey mixture. 
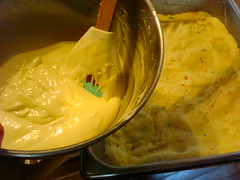
  5. Funfetti Gooey Butter cakeFunfetti Gooey Butter cake Funfetti Gooey Butter cake
  6. Put the softened cream cheese and about 3/4 of the confectioners' sugar in your mixing bowl; set aside about 1/4 of the box for topping to sprinkle on after the cake is baked and cooled (you can also skip this and just add sprinkles). Mix together on low speed until smooth. Add the remaining eggs and mix until smooth and creamy in consistency. Pour this mixture on top of the crust and spread to make it even. If desired, add rainbow sprinkles.
  7. Funfetti Gooey Butter cake
  8. Bake for 25-35 minutes or until the top of the cake is browned. You want to make sure the gooey mixture on top of the cake is not too gooey otherwise it will be like a liquid. It is okay if the edges are brown and the top of the cake is lightly browned as well. 
  9. Funfetti Gooey butter cake
  10. Once cooked remove from oven and let cool about two hours before cutting (you could also put it in the fridge) and adding remaining powdered sugar before serving (if desired). Slice and serve. Keep leftovers refrigerated.
  11. Funfetti Gooey Butter Cake

10 Layer Peanut Butter Cake for Peanut Butter and Co.

Let me take a brief break from telling you about my book tour (remaining dates here, btw--I'm in the Chicago area tonight, at the Aspen Drive Library, 701 Aspen Drive, Vernon Hills IL, from 7-8 p.m.) to tell you about this amazing cake I crafted for my friends at Peanut Butter and Company.

It's a 10 layer cake, inspired by Smith Island Cake (the recipe for that one is in the new book). 

Regarding the peanut butter cake, here's what I have to say about it:

Want to really show off with your next dessert offering? Well then, you’ll definitely want to make this cake. It looks like a pretty normal cake on the serving plate, but once cut into, the amazing interior is exposed. Composed of 10 thin stacked cakes, each sandwiched with a layer of White Chocolate Wonderful peanut butter frosting, this is “frosting with the cake,” a delightful treat that begs for a glass of milk. It’s a peanut butter-ized version of a famous cake from Maryland (actually, if you want to get technical, it’s the Official State Dessert!) called Smith Island Cake, which is given out as the prize during community events. But no need to sing and dance when you’ve got this recipe–everyone’s a winner!

Find the recipe here.

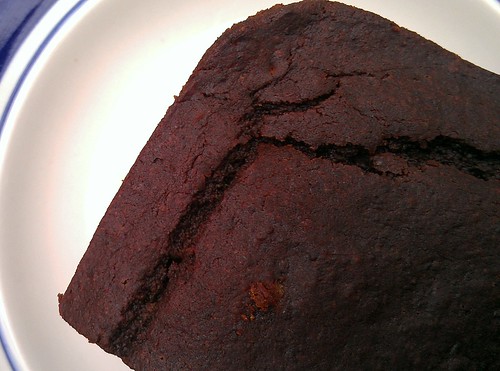
Aztec Chocolate Creme Fraiche Pound Cake. Yes.

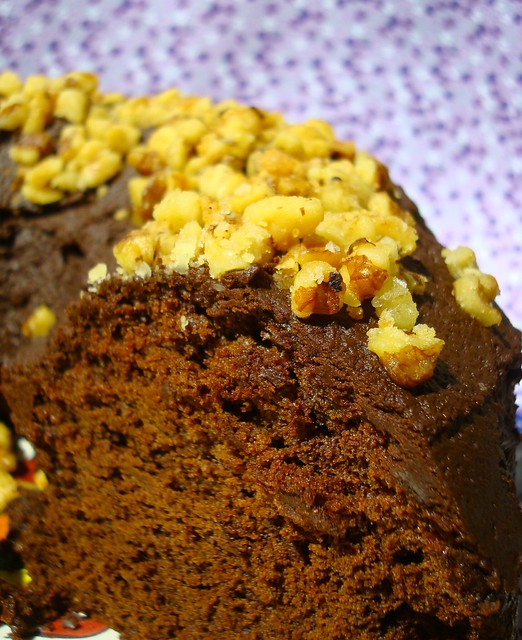
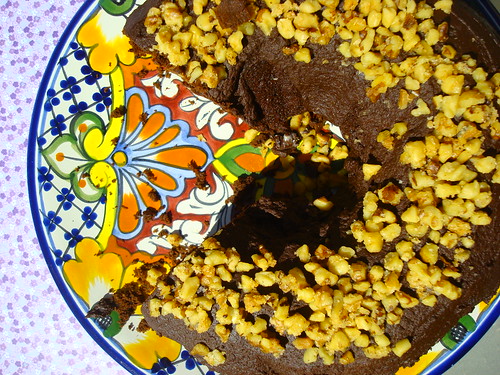
Aztec chocolate cake

Dear Gesine Bullock-Prado,

Dudette, I love you. Not in a creepy way, because it is true you're kind of a baking big-shot. And deservedly so. But right at this moment, I am in love with you because you are the one who brought a little something called Aztec Chocolate Creme Fraiche Pound Cake into my life.

Before, I enjoyed regular old pound cake like a jerk. But I am telling you that I will never--can never--go back. Because it's so much better when it's crammed full of chocolate and creme fraiche in addition to butter, sugar, flour, and egg. Thank you for the recipe, which I found in Bake It Like You Mean It: Gorgeous Cakes from Inside Out

Yours in deliciousness,

CakeSpy

P.S. Here's how you make that ambrosial treat, sweeties. You're welcome.

Aztec Chocolate Creme Fraiche Pound Cake. (printable version here!)

Aztec chocolate cake

For the cake

  • 4 ounces bittersweet chocolate, finely chopped
  • 1/2 cup coffee, very hot
  • 3/4 cup unsalted butter
  • 1 1/4 cups granulated sugar
  • 3 eggs
  • 1 tablespoon vanilla bean paste
  • 1 1/4 cups all purpose flour
  • 1/2 cup dutch-process cocoa powder, sifted
  • 1 teaspoon salt
  • 1 1/2 teaspoons baking powder
  • 1 teaspoon cinnamon
  • 1/2 teaspoon cayenne pepper
  • 3/4 cup creme fraiche

For the glaze

  • 8 ounces bittersweet chocolate, finely chopped
  • 1/2 teaspoon vanilla extract (my adaptation)
  • 1/4 cup heavy cream
  • 2 tablespoons unsalted butter
  • 1 tablespoon corn syrup
  • Candied walnuts, to garnish (my adaptation)

To Make the cake

  1. Preheat the oven to 350 degrees F. Liberally spray a large nonstick bundt pan with nonstick baking spray.
  2. In a small bowl, combine the chocolate and very hot coffee. Allow to sit undisturbed for a few minutes to allow the chocolate to melt, then stir to combine. Set aside.
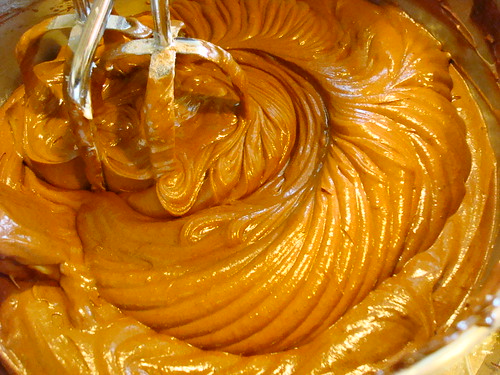
  3. In the bowl of a stand mixer fitted with the paddle attachment, cream the butter and granulated sugar together until light and fluffy. Add the eggs, one at a time, beating between additions until each egg is completely incorporated. Add the vanilla bean paste.
  4. Aztec chocolate cake
  5. In a bowl, whisk together the flour, cocoa powder, salt, baking powder, cinnamon, and cayenne.
  6. Add the creme fraiche to the chocolate mixture and stir to combine.
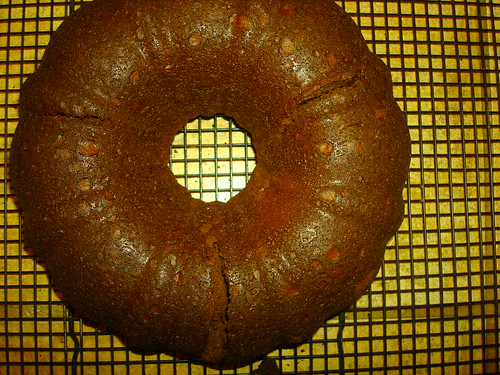
  7. Add one third of the flour mixture to the butter and sugar mixture and mix on low speed, then add half of the creme fraiche-chocolate mixture and stir to combine. Continue alternating additions until all the ingredients are incorporated and well combined. Aztec chocolate cakeSpoon the batter into the prepared mold and level the batter with the back of a spoon. Bake for one hour and 20 minutes, or until a wooden skewer comes out clean. Allow the cake to cool for about 20 minutes. Unmold onto a cooling rack.
  8. Chocolate cake 
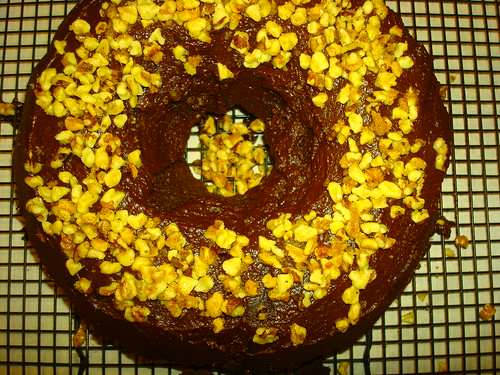
  9. To make the glaze, heat the cream and chocolate over low heat until combined. Add the butter, stirring in until combined. Stir in the corn syrup until nice and smooth. Drizzle over that tasty cake, and garnish with the candied walnuts. 
  10. Cake

My Yoga Teacher's Chocolate Beet Cake Recipe

Choco beet cake

Sometimes, recipes come from the most unexpected places.

For instance: I am at a yoga class. I'm doing yoga. Whatever. Then after class...

the teacher slips me a tupperware package. Inside of it is a piece of CHOCOLATE CAKE. YES! I love exercise!

Choco beet cake

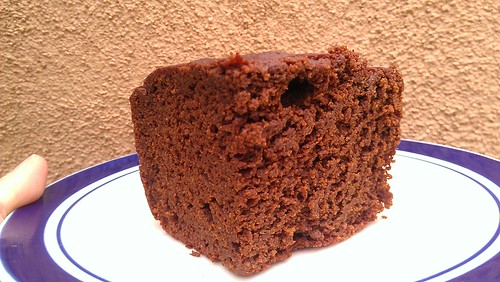
This was indeed a fascinating specimen: a chocolate cake sweetened with beets and maple syrup. Sound virtuous? Don't worry. It's not. The beets add a wonderful earthiness and natural sweetness to the dark richness of the chocolate, and the maple adds an interesting sweetness that works very nicely with the beets and chocolate. 

Choco beet cake

Now, I will confess, it was given to me sans topping. But I found that while the moist and tasty chocolate cake was great sans frosting...it was even better with a healthy dollop of creme fraiche or whipped cream. Yum!

Here's the recipe, with thanks to Blue Moon Hot Yoga for being the ones to introduce me to it. Doing yoga beforehand not necessary.

Chocolate Beet Cake

  • 1 1/2 cup cooked and pureed beets
  • 4 ounces unsweetened chocolate, coarsely chopped
  • 3 eggs
  • 1/2 cup buttermilk
  • 1 teaspoon vanilla
  • 1 stick butter
  • 3/4 cup or 1 cup grade B Maple syrup (depending on how sweet you want it)
  • 1 3/4 cup flour (can be whole wheat, spelt and rice flour, etc)
  • 1 1/2 teaspoon baking soda
  • 1/4 teaspoon salt
  • 1/2 teaspoon cinnamon
  1. Grease and flour a 9x13-inch pan.
  2. Scrub the beets well and slice into 1/4 inch rounds. Steam until tender; puree the cooked beets in a processor.
  3. Melt the chocolate in a double boiler. Melt the butter over low heat in a sauce pan.
  4. In a large bowl, cream together the butter and maple syrup. Add the eggs and combine thoroughly, then stir in the chocolate, beet puree, buttermilk, and vanilla.
  5. In another bowl, combine the flour, salt, baking soda, and cinnamon. Add this to the liquid ingredients and mix into a smooth batter.
  6. Pour into your prepared pan and bake at 350 degrees F for 30 minutes or a little longer until a cake tester comes out clean.


SpyMom's Not So Secret Chocolate Cream Pie Recipe

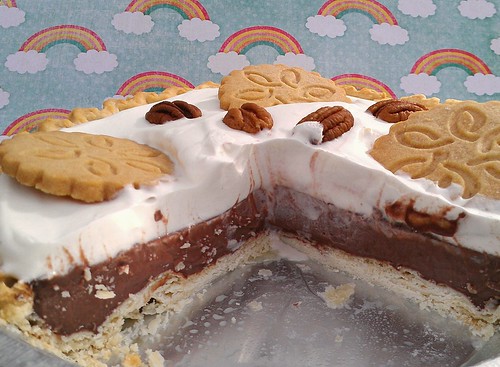
Chocolate Cream Pie

Oh, that's something tasty. Can't you just tell?

This is the chocolate cream pie I grew up with. The one SpyMom always made. The one we all devoured in about ten minutes after it was served. 

I guess the recipe was never a secret, but the pie was so good that it became a mythical thing in all of our minds. And recently, when SpyMom made it after not having made it for quite a while, I got up the nerve to ask if she'd share her recipe.

She was more than happy to tell me what it was: the recipe on the chocolate pudding box! All this pie is, my friends, is a pre-baked pie crust filled with cook and serve chocolate pudding and topped with whipped cream.

There is a reason why this back-of-the-box recipe has endured. It's simple as can be, but beautiful in its own way. It is creamy and chocolate-y and simply divine. You can dress it up in any number of ways: use part almond, chocolate, or flavored milk for the pudding, add a flavoring extract to the whipped cream, or add some chocolate chip or nuts to the pudding mix.

Chocolate Cream Pie

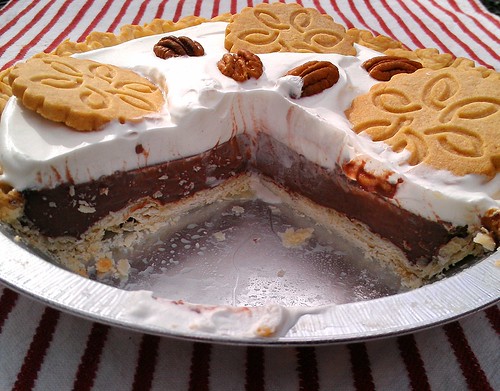
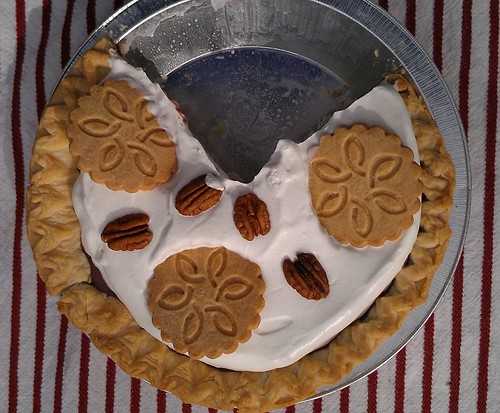
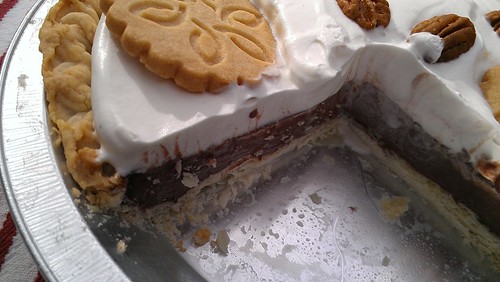
Here's the recipe.  With this pie, I played around a bit: I used 1 part almond milk and two parts regular whole milke for the pudding, and added a dash of vanilla extract to the whipped cream. I also garnished with shortbread cookies and a few pecans, for color contrast and cuteness.

Chocolate Cream Pie

Of course, that having been said, it's tremendous simply made straight-up--you go ahead and choose your adventure! 

Chocolate Cream Pie

Simple as can Be Chocolate Cream Pie (printable version here!)

Ingredients

  • One pre-baked 9-inch pie shell
  • One box (5.1 ounces--the big size) cook and serve chocolate pudding
  • 3 cups whole milk (can be part almond milk, etc)
  • 2 cups freshly whipped cream

Procedure

  1. Have your cooled pie shell at the ready, but to the side.
  2. Prepare the chocolate pudding according to the box instructions, bringing the milk to a boil and stirring frequently until thickened.
  3. Pour the pudding into the pie shell. Got a little extra pudding? Guess you'll have to eat it from the bowl, with a spoon. Life is hard sometimes.
  4. Let the pie set (sans whipped cream) in the fridge for several hours, 2 to 3 at least. Top with whipped cream and any garnish directly before serving. Enjoy!

Macrina Bakery's Almond Cake with Raspberries & Chocolate Ganache

You know what I love? Everything Macrina Bakery makes, that's what. And while I no longer live in Seattle, I keep track of them and their delicious recipes by virtue of their monthly newsletter. And I love to pass on what I have learned! So here's the most recent installment: Almond Cake with Raspberries and Chocolate Ganache. Here's what they have to say about it:

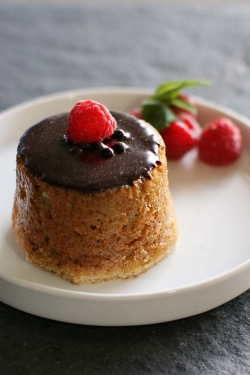
This combination of toasted almonds in a buttery cake, accompanied by fresh raspberries and bittersweet chocolate ganache is our best-selling wedding cake. It satisfies everyone's taste with nuts, fruit, and of course, chocolate. This recipe makes individually sized cakes that are baked in a jumbo muffin pan. Once they've cooled, you remove the paper liner, invert the cakes so the tapered side is up, fill with sweetened cream and raspberries, and top with chocolate ganache. 

Almond Cake with Raspberries & Chocolate Ganache

For the batter:
  • 1/2 cup raw almonds (skins on), toasted 
  • 1-1/2 cups cake flour
  • 1/2 teaspoon baking powder
  • 1/2 teaspoon baking soda
  • 1/4 teaspoon kosher salt
  • 1/2 cup plus 2 tablespoons low-fat plain yogurt, divided
  • 2 large eggs
  • 1/2 teaspoon pure almond extract
  • 1/4 teaspoon pure vanilla extract
  • 3/4 cup (1-1/2 sticks) unsalted butter
  • 1 cup plus 2 tablespoons sugar
For the whipped cream filling:
  • 1 pint fresh raspberries (about 24 berries)
  • 1/2 cup heavy cream
  • 2 tablespoons sugar
For the chocolate ganache:
  • 1/2 cup heavy cream
  • 1/2 cup semisweet chocolate chips
  • 1/2 cup bittersweet chocolate chips

Makes 8 Jumbo Cupcakes

  1. Position a rack in the center of the oven and preheat to 400°F. Lightly grease the top of a jumbo muffin pan with canola oil to prevent any stray batter from sticking, and line 8 cups with jumbo cupcake liners.
  2. To make the batter, first grind the toasted almonds in a food processor until they are very fine and powdery. (Alternatively, grind them by hand: chop the nuts as finely as you can with a chef's knife, then use the flat side of the knife to crush the chopped nuts into a powder.) Sift together the flour, baking powder, baking soda, and salt into a medium bowl. Add the almonds and toss with your hands to evenly distribute. Set aside. 
  3. Whisk 2 tablespoons of the yogurt, eggs, and almond and vanilla extracts in a small bowl. Set aside. 
  4. In the bowl of a stand mixer fitted with the paddle attachment, cream the butter and sugar; start on low speed and increase to medium, stopping to scrape down the bowl with a rubber spatula as needed to fully incorporate the ingredients. The mixture will be light, fluffy, and pale. Add the flour mixture and the remaining 1/2 cup yogurt, slowly mixing for 1 minute. Once the flour is incorporated, increase to medium speed and mix for 1 minute more, then scrape down the bowl again. Add the egg mixture in 3 additions, mixing for 20 seconds after each addition, then scraping down the bowl. 
  5. Using a large spoon or #30 ice cream scoop, fill the cupcake liners three-quarters full with batter. Smooth the tops for even baking. Place the pan on a rimmed baking sheet and bake for 30 minutes, or until the cupcakes are deep golden brown and a skewer inserted into the center comes out clean. (Note that these cupcakes will rise only to the top of the muffin pan as they bake.) Cool them in the pan for 45 minutes, then remove them and peel off the cupcake liners. Invert the cakes onto a plate, so the bottoms are up and using a teaspoon, scoop out a 1-1/2 inch ball from the center of each cake and discard (or eat!) the cake.
  6. To make the filling, pick through the raspberries, reserving 8 beauties for garnish. Whisk the heavy cream and sugar in a small bowl, whipping until they form medium-firm peaks, then fold in the raspberries. You want the berries to break up a bit—but don't let them get soupy. Spoon the raspberry whipped cream into the hole in the cakes, piling in as much as you can and leveling the top. 
  7. To make the ganache, pour the heavy cream into a small saucepan. Over medium heat bring the cream to a froth just before it boils. Turn off the heat and add the semisweet and bittersweet chocolate chips. Using a rubber spatula, stir until the chocolate completely melts, then remove the pan from the heat and set aside to cool for about 10 minutes. The ganache will thicken as it cools. 
  8. To assemble, top each cake with 1 tablespoon of the ganache; spread it evenly, but leave a little of the golden cake showing around the edges. Garnish with a raspberry. 
  9. These cakes taste best the day they are made. You can prepare them up to the point of making the filling and store, covered, at room temperature for 2 days. 

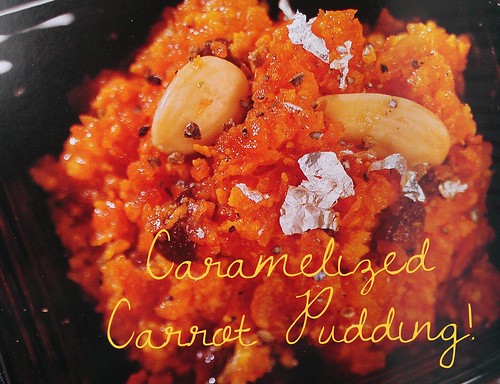
Unique Sweet: Gajar ka Halwa, Caramelized Carrot Pudding

Caramelized Carrot Pudding

Image: Easy Indian Cooking

I love carrots more than the average person. My favorite afternoon snack is a nice, fat carrot, cut into coins or even just eaten like Bugs Bunny. Carrots, I believe, can be a fantastic dessert ingredient: they add natural sweetness and moisture. But don't worry, am not about to go on a healthy dessert kick here. I still think carrot cake needs cream cheese frosting, for instance!

Considering the above, it shouldn't be too much of a surprise that when I received a review copy of Easy Indian Cooking, my eye went right to the recipe for Gajar ka Halwa, or Caramelized Carrot Pudding. As the recipe headnote reveals, "this is a favorite in north India and is particularly good when made with the sweet pink winter carrots grown in that area. The flavor is more delicate than other carrots, and they are juicier. I have never come across this variety in North America."

Well, thanks for tempting me with an unattainable carrot, dudette! But you know what? It works just fine with regular carrots, say I, not having tried the superior sort to tell the difference! Even regular old carrots make for an intriguing dish: sort of like a carrot cake-flavored pudding got a creamy chai kiss.

Oh, a as for the silver leaf? It's commonly used to garnish special dishes, so why not dress it up?

Gajar ka Halwa

From Easy Indian Cooking

Serves 8

Ingredients


  • 1 1/2 pounds carrots, grated (5 or 6 large)

  • 4 cups whole milk

  • 1 1/4 cups granulated sugar

  • 1/4 cup oil or unsalted buter

  • 1/4 cup raisins

  • 8 to 10 cardamom pods

  • blanched almonds, for garnish

  • silver leaf, for garnish


Procedure


  1. In a large, heavy bottomed saucepan, over medium heat, combine carrots and milk. Cook, stirring frequenly, until milk is completely absorbed and mixture begins to solidify, about 1 hour.

  2. Stir in 1 cup of the sugar, butter or oil, and raisins. When the sugar dissolves, give it a taste. Add the remaining sugar to taste if desired. Cook, stirring constantly, until the mixture begins to leave the side of the pan, 15 to 20 minutes.

  3. Remove the seeds from the cardamom pods, discarding the pods. Pound the seeds; stir into the pudding. Serve warm, or at room temperature. Before serving, garnish with almonds and edible silver leaf.


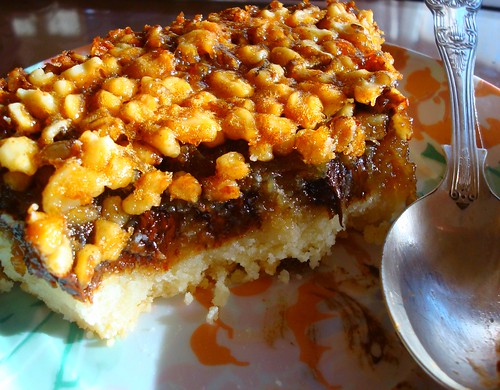
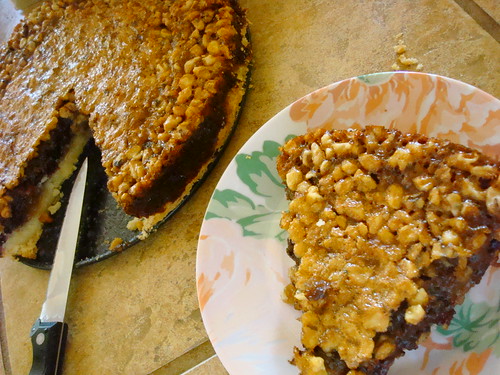
Choco-Walnut Pie With a Shortbread Crust

Choco-walnut pie

If you've ever heard of a pie called Derby Pie, you know that it's a thing of great beauty. It's got nuts, it's got chocolate, all tied together with plenty of butter and maybe even a little booze. 

Yeah, it's good stuff.

And it has a great story, if I do say so myself. That story is featured in my upcoming book, The Secret Lives of Baked Goods: Sweet Stories & Recipes for America's Favorite Desserts. I tell you all this because I love any chance to talk about the new book...but also because it's a nice lead-in for this recipe.

Choco-walnut pie

This recipe is not for Derby Pie. But, it is sort of like a cousin to the famous pie. Because yes, it has nuts and chocolate. But this version is special. It's ridiculously rich in toasty walnuts and chocolate, but is very special because it's baked with a shortbread base as the crust. The exposed caramelly sides form a sort of chewy crust that is sort of like the texture of Mary Janes candies. Now, this is not going to be a texture to everyone's liking, because it will make your teeth stick together. But I have always rather enjoyed that part of those particular candies, and found it a lovely alternative to the back crust on a pie with corn syrup, which can get hard (you know what I mean?). 

Choco-walnut pie

Choco-Walnut Pie with a Shortbread Crust (printable version here!)

For the shortbread crust

  • 1 cup butter, softened
  • 1/2 cup sugar
  • 2 1/4 cups flour

For the filling

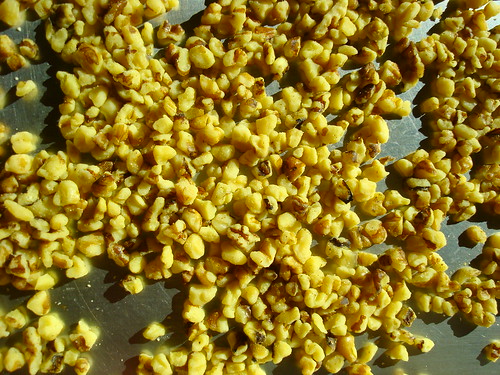
  • 1 1/2 cups chopped toasted walnuts
  • 1 cup (6 ounces) semisweet chocolate morsels
  • 1 cup dark corn syrup
  • 1/2 cup granulated sugar
  • 1/2 cup firmly packed brown sugar
  • 1/4 cup bourbon (water may be substituted)
  • 4 large eggs
  • 1/4 cup (1/2 stick) butter, melted
  • 2 teaspoons cornstarch
  • 2 teaspoons vanilla extract
  • 1/2 teaspoon salt 

Procedure

Preheat the oven to 325 degrees F.

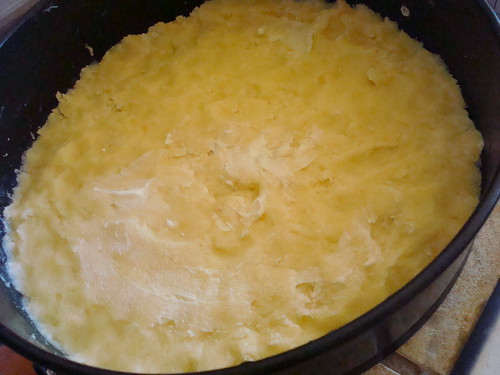
First, prepare the crust. Cream butter and sugar together until fluffy. Add flour and mix til fully incorporated. Press dough into a well greased 8-inch springform pan.

Choco-walnut pie

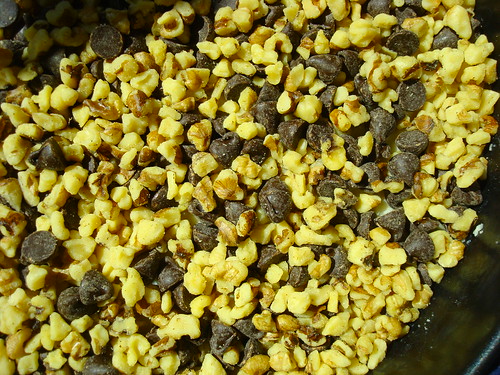
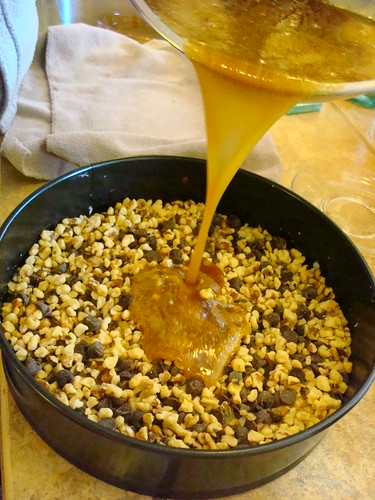
Sprinkle the walnuts and chocolate evenly onto the bottom of the crust; set aside.

Choco-walnut pie

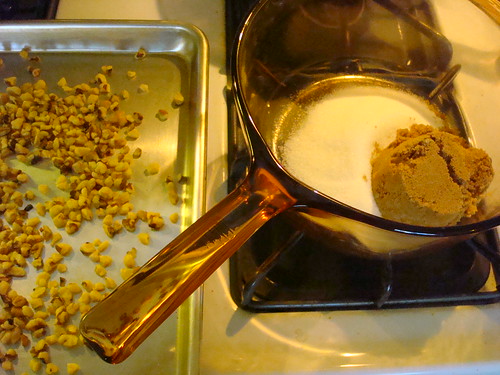
In a large saucepan, combine the corn syrup, granulated and brown sugars, and bourbon and bring to a boil over medium heat. Once boiling, cook for 3 minutes, stirring constantly to avoid scorching. Remove from the heat.

Choco-walnut pie

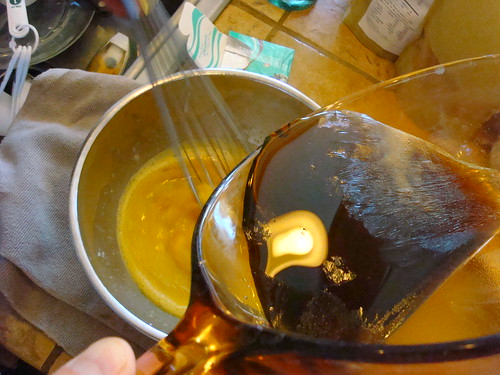
In a medium bowl, whisk together the eggs, butter, cornstarch, vanilla, and salt. Slowly pour about one fourth of the hot mixture into the egg mixture, whisking constantly (if you add the hot syrup too quickly, the eggs will cook). Add the remaining hot mixture, continuing to whisk. If you notice any small lumps in the mixture, strain through a mesh sieve.

Choco-walnut pie

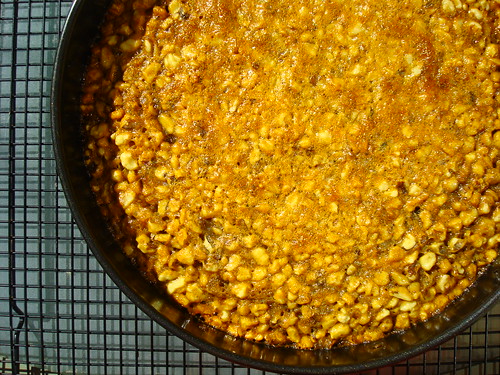
Pour the filling slowly over the nuts and chips, being careful not to move them around within the crust. Choco walnut pie Bake for 50 to 55 minutes, or until set in the center; transfer to a wire rack to cool. Immediately run a sharp knife along the edge of the pan to help loosen the sticky pie; then let it sit for at least 45 minutes before un-springing it from the pan. Serve the pie at room temperature with whipped cream or ice cream, if desired. To store the pie, wrap it tightly and refrigerate for up to five days. 

Choco-walnut pie

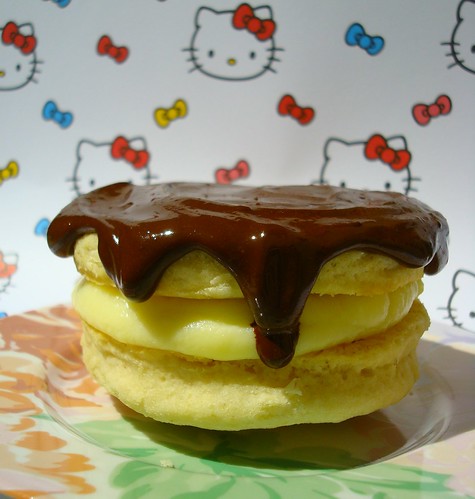
Heaven on a Plate: Boston Cream Shortcake Recipe

Boston Cream Shortcake

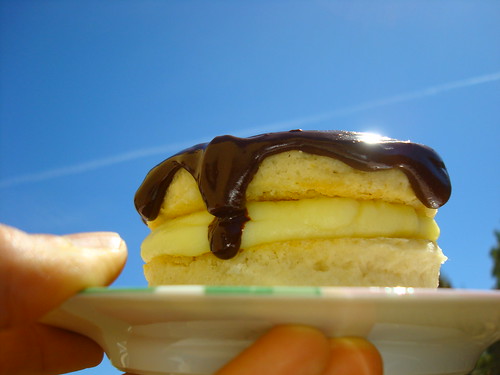
If that picture looks like an offering being made to the heavens, well, it should. Because right now, I'm about to say three words that may change your dessert-eating life forever.

Those words--those beautiful, heavenly words--are Boston Cream Shortcake. Go ahead, say hi.

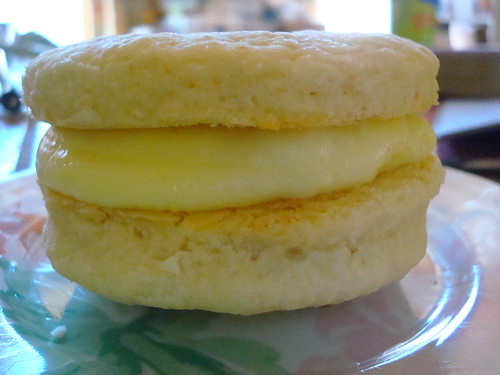
Boston Cream Shortcake

Now, this series of words probably sounds familiar. Probably you're like "well, I know Boston Cream Pie, and I know Strawberry Shortcake." Well, I'm glad that you thought those things, if you did. Because this treat is a beautiful combination of the best parts of those desserts.

Boston Cream Pie is an almost perfect dessert. It's got cream. It's got chocolate. But the cake? It's way too spongey and dries out too quickly. Some might argue that this makes it a great "sponge" to absorb all of the creaminess. I personally find that it's more like soggy stale cake, though.

And then you've got strawberry shortcake. When served with biscuits--do not even waste my time with that sponge cakey kind--this is a dessert of great beauty. Buttery biscuits. Gorgeous whipped cream. If only it weren't for those healthy strawberries. I mean, what is this, a smoothie? I'm not on a diet!

So...why not combine the best parts of both desserts, and end up with something totally amazing?

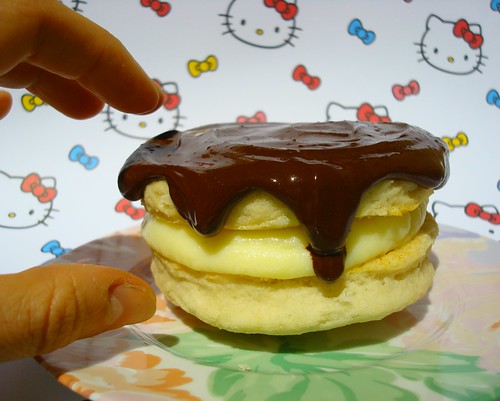
Boston Cream Shortcake

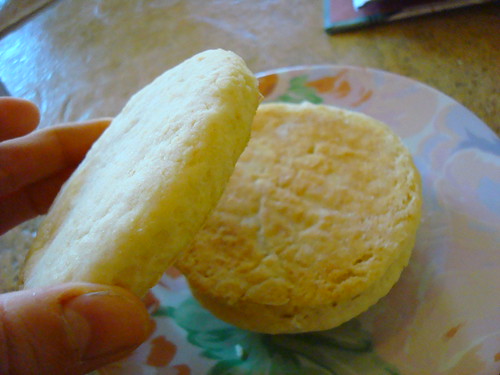
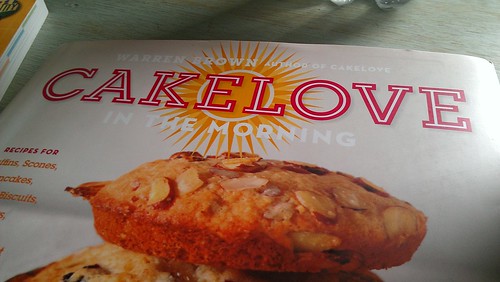
I started with some of the biscuits I'd baked from Warren Brown's swell new book, CakeLove in the Morning. A good start...

And then, I referred to my own newest oeuvre,  The Secret Lives of Baked Goods: Sweet Stories & Recipes for America's Favorite Desserts (it's out on May 7--lucky you!), for the Boston Cream pie filling and topping. I'll be honest, in the book the recipe has a regular old cake in the Boston Cream Pie recipe. I now wish I could go back and make it a biscuit. Actually, I wish I could edit every recipe ever for Boston Cream Pie and make it a shortcake. (OK, I am kidding. Sort of). So anyway, I didn't need to make the cake since I had the biscuits already. When it came to the cream and ganache, though, I decided to halve the recipes, since I didn't have too many biscuits left to fill. Let me tell you, it's a strange thing to prop open your own book and bake from it--but it's stranger still to adapt the recipe. 

I made up the half-batch of cream and ganache, and you know what? Both worked perfectly when halved. Just in case you ever need that info.

So, here's the way I made them. 

Boston Cream Shortcake

Boston Cream Shortcakes (print it here!)

Makes 5 or 6

Assembly

  1. First, pair biscuits together so that like-sized ones were mates. Face one down and one up, so that the bottoms are facing together. Got it? 
  2. Boston Cream Shortcake
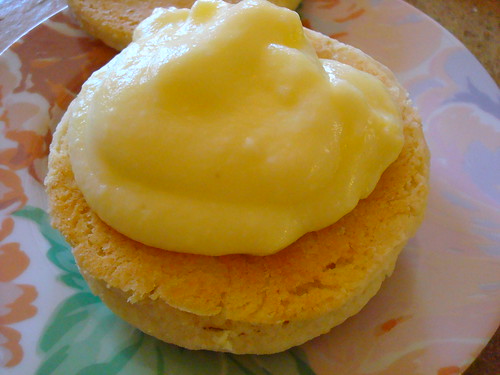
  3. Now, spoon some of the cream filling on to the "bottom" biscuit. Not too much or it will shoot out the sides. It will still taste good even if it does that, though.
  4. Boston Cream Shortcake
  5. Now, put biscuit 2 on top of it. Facing so that the bottom is the part going on top of the cream. Got it?
  6. Boston Cream Shortcake
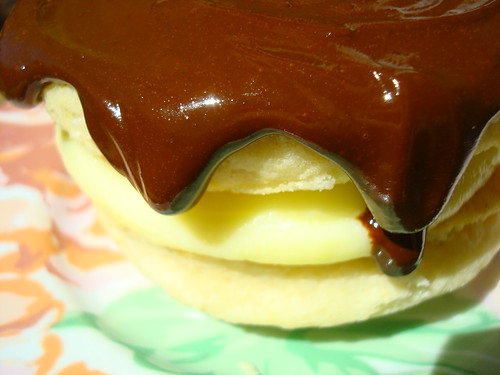
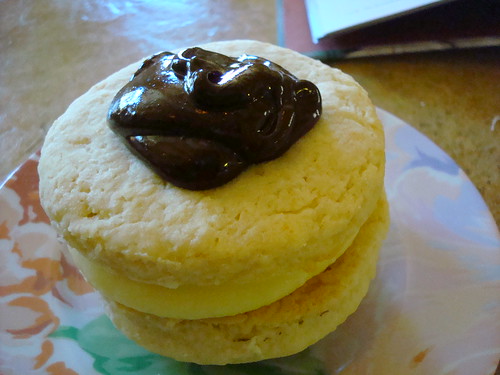
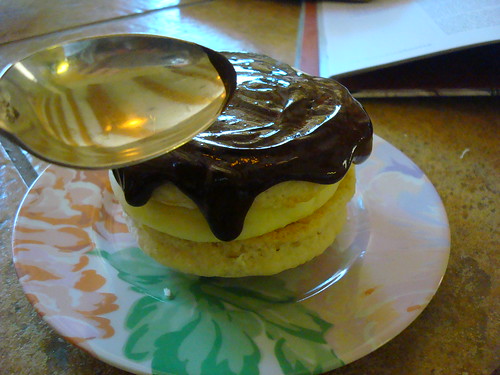
  7. Ok. Now, spoon a little of that lovely ganache on top. Yummmm. Let it drip over a little, it's ok. 
  8. Chocolate topping Boston Cream Shortcake
  9. Serve immediately, or refrigerate until ready to serve. These do taste best the same day made, dig it?

For the filling:

  • 1 tablespoon butter 
  • 1 cup milk
  • 1 cup heavy cream
  • 1/4 cup sugar 
  • 1 1/2 tablespoons cornstarch 
  • 3 large eggs

Procedure

  1. To make the filling (called "pastry cream" in French pastry parlance), in a medium saucepan over medium-high heat, combine the butter, milk, and cream. Bring to a simmer, then remove from heat.
  2. In a medium bowl, whisk the sugar and cornstarch until combined. Add the eggs, beating until the mixture is light yellow and form ribbons when you lift the whisk, about five minutes.
  3. Slowly pour the milk mixture into the egg mixture, whisking until completely combined.
  4. Pour the mixture into a medium-size pot and place  over medium heat. Cook, whisking constantly to keep the eggs from scrambling, until the mixture begins bubbling; continue whisking until the mixture has thickened to the consistency of a pudding; this will happen shortly after it comes to a boil This process can take up to 15 minutes. If any bits of egg have cooked, forming lumps, strain the mixture through a mesh sieve before proceeding to the next step.
  5. Transfer to a bowl and press plastic wrap directly onto the surface of the custard, to keep a skin from forming. Refrigerate for several hours, or until completely chilled. 

For the glaze:

  • 1/2 cup heavy cream
  • 4 ounces semisweet chocolate, finely chopped 

To make the chocolate glaze, in a medium saucepan over medium heat, bring the  cream to a boil. Place the chocolate in a medium bowl; pour the hot cream over chocolate, stirring until chocolate is melted and well combined. Set aside to cool slightly, about 10 minutes.

Biscuit Time: Warren Brown's Basic Biscuit Recipe

Warren Brown biscuit recipe

It's possible that there's a bread product that I love more than biscuits. It's just that none come to my mind at the moment.

As a lover and (in my opinion, connaisseur) of the biscuit, I was delighted to see a recipe for them in Warren Brown's new book, CakeLove in the Morning: Recipes for Muffins, Scones, Pancakes, Waffles, Biscuits, Frittatas, and Other Breakfast Treats.

Warren Brown Cakelove in the morning

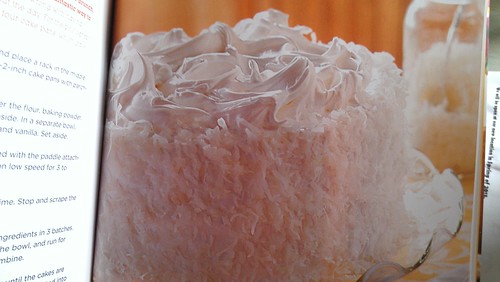
Now, you know I love Warren Brown and his cakes. And this is a rather pretty new book. For instance, I love the idea that this cake could be considered a brunch food, and can't stop looking at it.

Warren Brown Cakelove in the morning

But back to the biscuits.

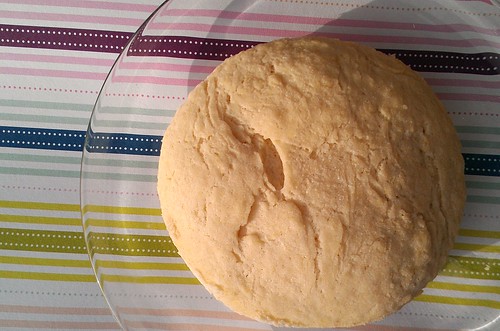
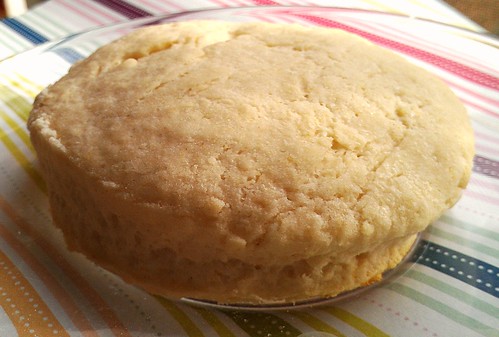
As for Warren's recipe: I love his biscuits. When I baked them I didn't get incredible rise on them, but I am going to warrant a guess that this is largely because I was baking at a high altitude (currently in Santa Fe!). Warren Brown's Biscuit Recipe

Nonetheless, these biscuits are fo' sho' very tasty. Nice and buttery and flavorful. A nice canvas for flavored butters, sugar butter topping, or a great base for shortcake. 

Warren Brown's Biscuit Recipe Warren Brown's Biscuit Recipe

Here's the recipe.

Warren Brown's Basic Biscuit Recipe (printable version here)

Makes 10 to 12

  • 13 ounces (about 2.5 cups) all-purpose flour
  • 1/4 cup sugar
  • 2 teaspoons cream of tartar
  • 1 teaspon baking soda
  • 1 teaspoon sea salt
  • 4 ounces (1 stick) unsalted butter, very cold
  • 1 1/2 cups half and half
  • 3/4 stick butter melted (optional--for brushing tops)

Procedure

  1. Preheat the oven to 375 degrees F and place a rack in the middle position. Line two baking sheets with parchment paper.
  2. In the bowl of a stand mixer fitted with the paddle attachment, combein the flour, sugar, cream of tartar, baking soda, and salt. Mix for 30 seconds on low speed.
  3. Cut the cold butter into small pieces and add them to the flour mixture with the mixer on low speed. Continue mixing until the mixture holds together when pinched, about 30 seconds. 
  4. Drizzle in the half and half until the dough is a wet, slightly pasty mass. You may not need all the liquid.
  5. Turn out the dough on to a floured work surface. Dust your hands well with flour. Lightly knead by hand and shape the dough into a disc 1/2 to 3/4 inches thick.
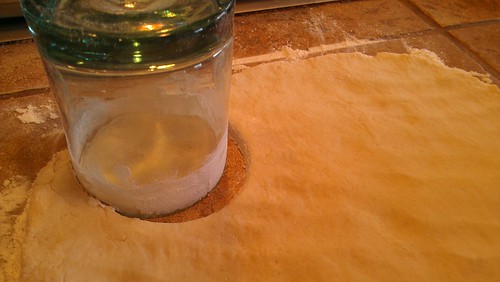
  6. With a 2 to 3 inch biscuit cutter (I used the floured rim of a drinking glass), cut as many biscuits as the dough will provide. Gently re-form any scraps into biscuits without cutting. Brish the tops with melted butter, if desired (do it!), and place them on the prepared baking sheets.
  7. Bake for 12 to 15 minutes, or until the biscuits are lightly browned on the bottom. Allow to cool for 5 minutes on the baking sheet before serving. Store in an airtight container and reheat in the toaster oven (or in the oven).

Sweet Treats: Semolina Sesame Cookies

Have I ever told you that one of my favorite bakeries, not only in Seattle, but in the world, is Macrina Bakery? From their biscuits to their morning rolls to their cookies, I can't get enough of their sweet treats. Every month they share a recipe via their newsletter, and I in turn enjoy to share with you. 

This month it's Semolina Sesame Cookies. As the headnote says, "These cookies are inspired by acclaimed baker Carol Field, who gathered a collection of wonderful regional recipes from bakers, grandmothers, and chefs on her travels through Italy. The essence of this recipe came from one of her books (I have them all!), and is so typically Italian. The semolina, a coarsely ground wheat flour used widely for making pasta, lends a beautiful crisp texture, and the sesame seeds make them a classic accompaniment to a sweetened shot of espresso. Buttery annd not too sweet, they'll totally satisfy the 4 p.m. nosh need!"

Makes 18 3-inch cookies

  • 3/4 cup plus 2 tablespoons unbleached all-purpose flour
  • 1/3 cup plus 1 tablespoon semolina flour
  • 1/4 teaspoon kosher salt
  • 7 tablespoons unsalted butter, at room temperature
  • 1/3 cup plus 1 tablespoon sugar
  • 1 large egg
  • 1/4 cup sesame seeds

Procedure

  1. Position 2 racks in the center of the oven and preheat to 325°F. Line 2 rimmed baking sheets with parchment paper. Set aside.
  2. Sift together the flours and salt in a medium bowl.
  3. In the bowl of a stand mixer fitted with the paddle attachment or in a large bowl using an electric mixer, cream the butter and sugar. Start on low speed and increase to medium for a total of 5 to 8 minutes, stopping to scrape down the bowl with a rubber spatula as needed. The mixture will be light, fluffy, and pale. Add the egg and mix on low speed until fully incorporated, then scrape the bowl down again. Gradually add the dry ingredients mixing until they're just incorporated and the dough is smooth, about 1 minute. Be careful not to overmix: the cookies may become tough.
  4. Turn the dough out onto a lightly floured work surface. Divide it into 4 equal pieces, then roll each piece into a 1/2-inch-wide rope. Use a ruler to measure and then cut the rope into 5-inch segments. Each segment will become a cookie. If the dough is too soft, chill for 10 minutes to make it easier to handle.
  5. Lay each rope in an S shape, 1 inch apart, on the prepared baking sheets. Tuck the ends under and compress slightly. Chill the sheets in the freezer for 20 minutes to help the cookies hold their shape while baking. (You may also freeze the cookies at this point, covered tightly, for up to 1 week. Let them thaw for about 20 minutes before baking.)
  6. Brush each cookie with a little bit of water and top with the sesame seeds. Bake for 18-20 minutes, or until the cookies are light golden brown. Cool on the sheet for 5 minutes, then transfer to a wire rack to cool completely. Stored in an airtight container at room temperature, these cookies keep their great flavor for at least 1 week. 

The Delicious Tale of Dobos Torte

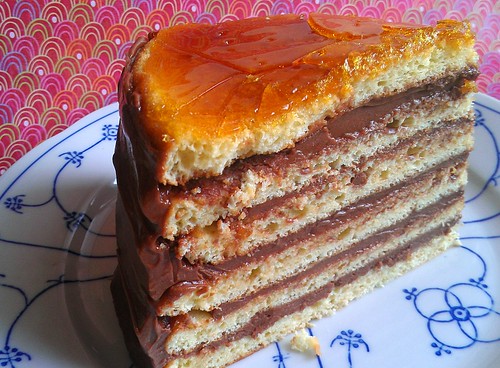
Dobos torte

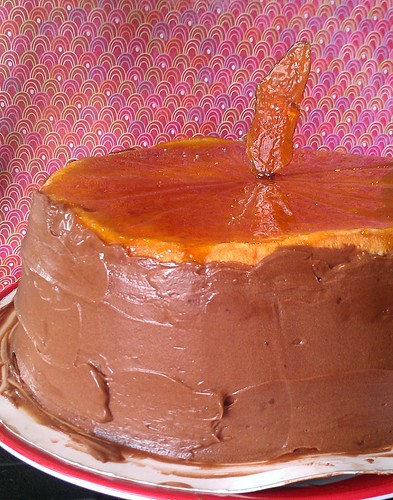
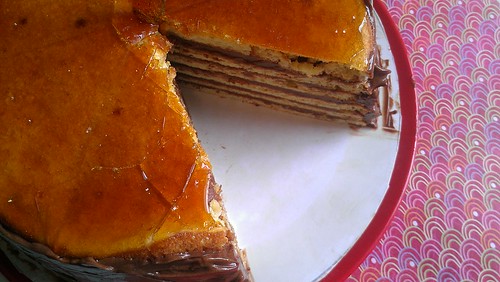
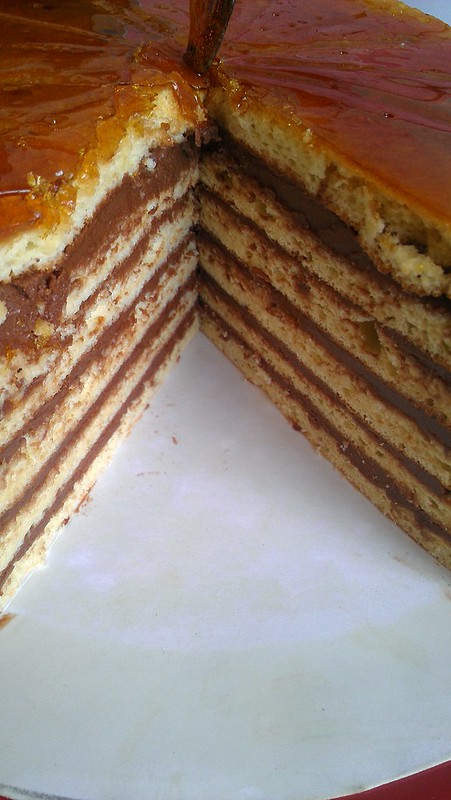
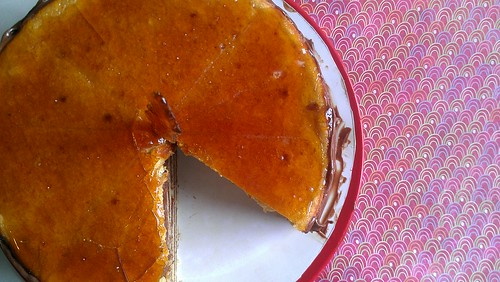
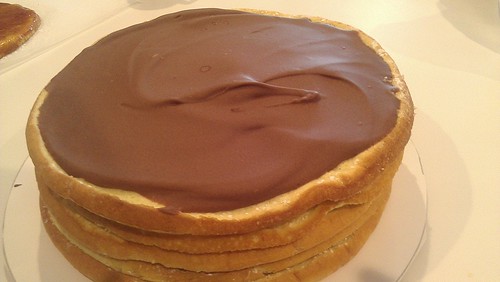
He may not have had nine lives, but József C. Dobos left a many-layered legacy that's considered a symbol of Hungary. It's called Dobos Torte, an elegant caramel-coated cake which, when cut into, becomes even better--because once you get past that eloquent exterior, you'll find several (between 7 and 11) layers of delicate sponge cake sandwiched with a luscious chocolate buttercream.
Dobos torte

Sometimes thought of as the Hungarian equivalent to Escoffier, the famous French foodie who was the inventor of, among other dishes, Cherries Jubilee, Dobos was a fancy chef from a long line of fancy chefs. After spending his life in the culinary arts, he settled down in his later years to open a gourmet food shop in Hungary. He created this cake as a pleasurable way to satisfy the need for a dessert that would keep well: refrigeration wasn’t as easy to come by as it is today, and the high ratio of rich frosting to cake ensured that the cake would stay moist for far longer than a plain sponge cake.
Dobos Torte

 But that wasn't the only selling point of the cake: Dobos, a true pastry pilgrim, had discovered buttercream in his travels to France--ooh la la! When he used it in his cake (at a time when most cakes were filled with cooked creams or custards), the sinfully luxuriant, sweet buttercream-filled Dobos Torte stood out. That's right: while the combination of cake with buttercream filling is commonplace today, at the time it was really quite a revolutionary dessert concept! 
Dobos Torte

Mr. Dobos also seemed to be quite the marketing expert for his time: after he grandly introduced his Dobos Torte at the National General Exhibition of Budapest in the 1880s, the cake became a sensation throughout Europe, earning devotees from far and wide. Dobos, like a modern-day pastry rock star, even toured European capitals, introducing the cake to different cities and presenting it in a special, custom-made container. Talk about hyping your brand!
 
Dobos went to the great meringue in the sky in the 1920s, but his very unique cake has lived on: among the many honors bestowed on him and his creation over the decades, my favorite remains the time when  a six-foot-diameter Dobos torte was paraded by pastry chefs through the avenues of Budapest! Dobos torte remains a classic today; look for it when you're traveling the world, visiting fancy hotels, restaurants, and pastry shops.
 

Dobos

When it comes to making Mr. Dobos' creation yourself, don't be daunted by the long list of ingredients and instructions: this is definitely a recipe that requires time and attention, but it's not very difficult to prepare, and once it's served, you'll secure a spot as baking royalty among your family and friends. The crowning glory is the caramel top layer, which, when applied, will undoubtedly make you feel as if you are adding the torch to the Statue of Liberty.

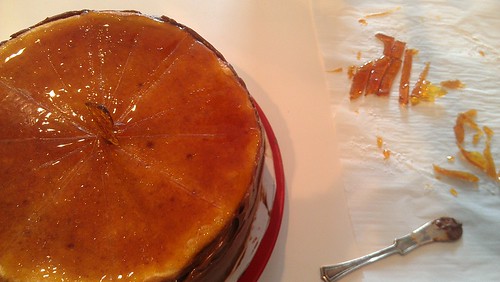
Full disclosure? When I made this cake, I made it slightly wrong. Usually the caramel is cut as triangles and then placed at a rakish angle along the cake's top, like this. I made it as a topping layer. You know what? Still tasty, even if not quite 100% traditional. So I have it that way in my tutorial!
Dobos

Dobos

Dobos Torte (Printable version here!)

Makes one tall 9-inch layer cake (16 servings) 

For the cakes:

  • 9 egg whites
  • 1 cup granulated sugar
  • 8 egg yolks (use the last egg yolk for the buttercream)
  • 1/4 cup milk (whole or 2%)
  • 1 tablespoon lemon zest, from 1 large lemon
  • 1 1/2 teaspoons vanilla extract
  • Pinch of salt
  • 1 1/2 cups all-purpose flour, sifted
  • Confectioners' sugar, for dusting 

For the buttercream:

  • 12 ounces bittersweet chocolate, chopped (about 2 cups)
  • 1 cup sugar
  • 1/4 cup water
  • 2 large eggs
  • 1 egg yolk
  • 1 pound (4 sticks) unsalted butter, cut into pieces 

For the caramel:

  • 1 cup granulated sugar
  • 3 tablespoons water

Preheat the oven to 400 degrees F. Generously grease and flour the bottom and sides of a 9-inch springform pan. Have ready two 10-inch cardboard circles.

 To make the cake, put the egg whites in the very clean bowl of a stand mixer fitted with the whisk attachment. Beat the egg whites until frothy, then gradually add the sugar. Continue beating just until soft peaks form. Transfer to a large, wide bowl to make later steps (folding, etc) easier.  

In another bowl, whisk the  8 egg yolks with the milk, lemon zest, vanilla, and salt until well blended. Fold about ¼ of the egg yolk mixture into the egg whites to lighten the mixture; fold in the rest of the yolks in a second addition. This will keep the mixture from deflating. Sift the flour over the egg mixture, and fold in two additions, making sure that the flour has been completely incorporated.  

Measure about 1 cup batter into the prepared pan, then spread and level it, using an offset or rubber spatula. Bake for about 4 to 7 minutes, or until lightly browned on the edges, with a dull finish on top, and the cake has begun to pull away from the edges of the pan slightly. Remove the cake from the oven, and let sit for a 3 to 4 minutes before removing the layer from the pan with a metal spatula. Dust the cake lightly with confectioners' sugar (this will keep the layers from sticking), and place on a rack to cool.

Clean and grease the pan; repeat this process until all of the batter is used, about 6 times more. As you bake, stack the layers between waxed or parchment paper, and cover with a clean towel. Refrigerate the layers until completely cold, about 2 hours.

To make the buttercream, start by melting the chocolate in a heavy-bottomed saucepan over low heat, or in the top of a double boiler. Stir slowly and constantly until the chocolate melts. Set aside.

Using an electric mixer, whisk the eggs and egg yolk on medium-high speed until they reach the ribbon stage (“ribbons” will drip when you hold up a whisk, rather than just drips). Turn off the mixer, but leave the egg mixture in the bowl.

In a small saucepan combine the sugar and water, stirring until the sugar is dissolved. Stop stirring and let the mixture come to a boil; cook to 240 degrees (the soft-ball stage) on a candy thermometer Take pan off the heat.  

Return to the egg mixture. Whisk on low speed,and pour the hot syrup into the egg mixture in a slow but steady stream. Increase the mixing speed and whip the mixture until it is roughly the texture of whipped cream and has cooled to room temperature (the mixing bowl may still feel slightly warm). Add the butter in 3 parts, stirring so that it gets mixed in. Then add the melted chocolate (it should be just slightly warm). Continue to whip until smooth and well blended.

To assemble the cake, start with one layer of cake; set it on one of the 10-inch rounds; cover the top surface with some buttercream ( a slightly overflowing 1/3cup), and then press down with another layer to make a good seal. Repeat this with all but one of the cake layers. Wrap the torte in plastic, and refrigerate for at least 6 hours; also wrap and chill the remaining buttercream (you should have about 2 cups left). Place a sheet of parchment paper on top of the other cardboard round, and place the last layer on it; wrap and refrigerate.

To make the caramel topping, in a medium saucepan, cook the sugar and water over moderately high heat, stirring occasionally, until an amber caramel forms, about 5 minutes.

Unwrap the single cake layer. Carefully pour the caramel over the cake layer and spread it thinly, using a small offset spatula. Don't worry if some of it drips off of the cake while you spread it. Working quickly, use an oiled or buttered sharp knife to indent the top of the caramel into 16 wedges (this will ensure that the caramel doesn't crack when you cut slices). Allow to cool slightly, and then retouch the indents with the knife again. Place the layer onto a countertop dusted with confectioners'sugar, and allow the caramel to cool completely.

Place more buttercream on top of the chilled torte, and top with the caramel round. Frost the sides with the remaining buttercream. Cover loosely, and chill the torte for about an hour before serving; let come to room temperature before serving.

Store, loosely covered, in the refrigerator, for up to 3 days. 

A Fine Breakfast: Easter Candy Toast

Easter Candy Toast

Let's be straight: you're going to need some serious energy if you're going to win the Easter egg hunt. And by "win" I mean hustle past all those nimble little kids for all of the best candy and plastic eggs filled with tasty prizes. 

So let's supercharge with a supersweet breakfast for all the power and energy you need, ok? 

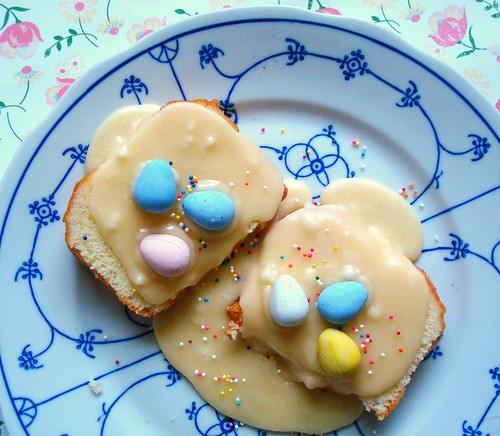
Easter Candy Toast

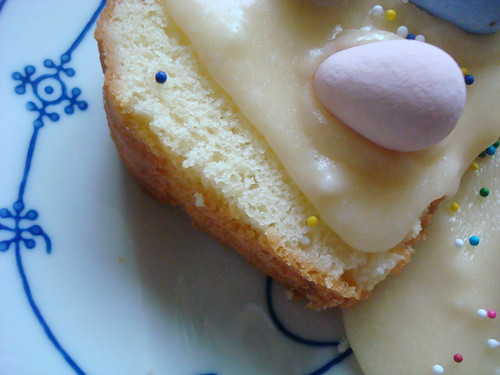
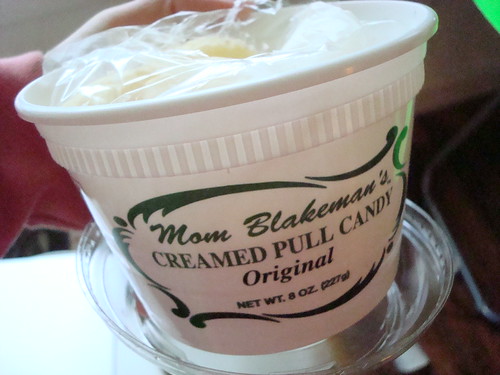
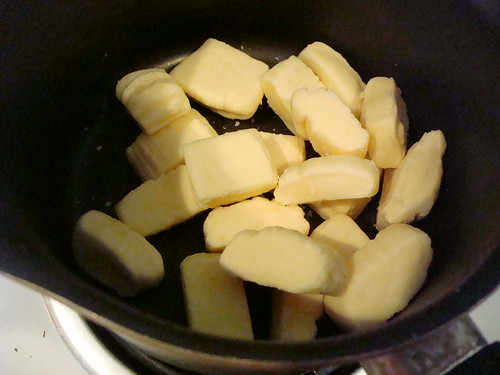
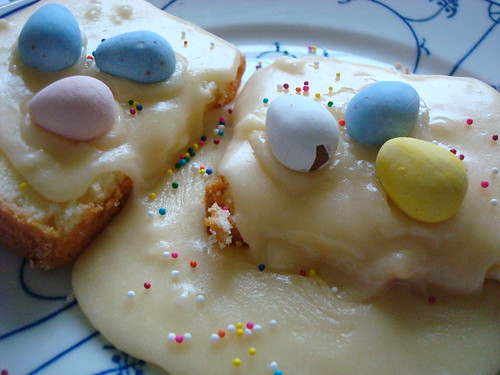
That perfect dish is, of course, a little something I call Easter Candy Toast. It basically goes like this: you gently toast thick slices of pound cake in the toaster oven. Then, you melt down some Mom Blakeman's pull candy (it's a Kentucky thing, you'll have to order online; if you're in a rush, you can use vanilla taffy or vanilla tootsie rolls, but it won't be quite the same). Mom Blakeman's Candy

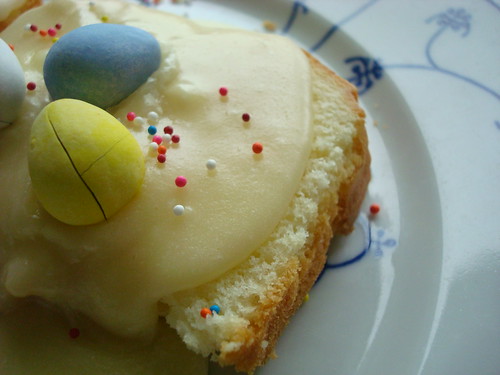
Once it's nice and melty, you pour a generous amount right on top of that toasty poundcake. And since it's Eastertime, you'll want to garnish it with some sprinkles and maybe a Cadbury Mini Egg or two. 

Easter Candy Toast

This, my friends, is what sweet victory tastes like. Because no matter what you are facing on any given day, this will give you such a powerful surge of pure sugar-energy that you will not only be able to perform with flying colors, but you might just stop fearing death. 

Just don't come crying to me when the inevitable sugar crash hits. Because I will just tell you to keep the sweetness going by having an Easter Candy taco plate for lunch.

Easter Candy Toast

Here's your recipe for destruction--er, perfection.

Easter Candy Toast (printable version here)

"breakfast of champions"

Serves 2

Ingredients

  • 4 thick slices of pound cake
  • about 1 cup Mom Blakeman's pull candy
  • a nice amount of cadbury mini eggs and sprinkles, for garnish
  1. Toast your pound cake in the toaster oven until it's slightly crispy around the edges. You can do this in the oven too, by setting the oven to 300 and toasting for just a cople minutes, but please don't do it in the toaster. It will stick.
  2. Set the toasty pound cake to the side by putting two slices on each plate (then it will be ready to eat later) while you melt down your candy. Simply place the pull candy in a medium saucepan and heat on low-medium, stirring frequently to prevent scorching. It won't seem like it wants to melt, but it eventually will.
  3. Pour the melty candy over the "toast" and garnish immediately with candy and sprinkles. Enjoy while still warm.

Easter Candy Pie Recipe

Candy Pie

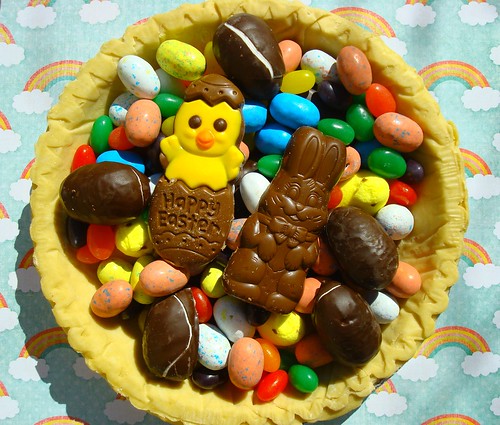
It's hard to choose a favorite Easter candy. They're all just so festive and sweet! Bunnies made of chocolate, rainbow arrays of jelly beans, adorably speckled robin's eggs, pretty pastel Easter corn, and of course, Cadbury treats, both small (mini eggs!) and large (Cadbury Creme Eggs!).

But instead of trying to pick a favorite, I decided this year that they're all good enough to share real estate in my mouth. I did this, of course, by putting them ALL into an Easter Candy Pie.

Easter Candy Pie

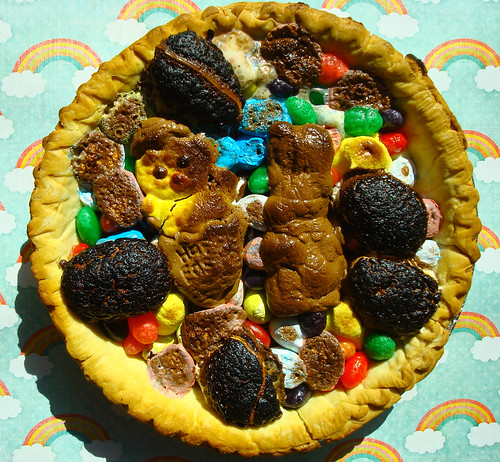
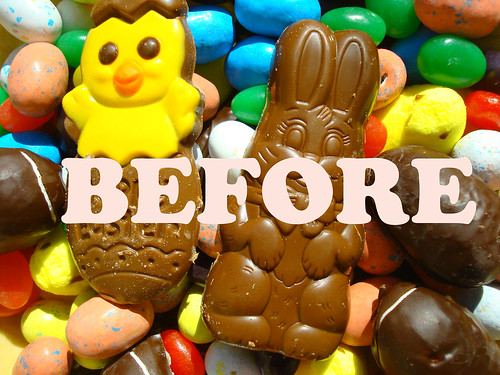
This may beg a simple question: What happens when you put all of your Easter candy in a pie shell and bake it up?

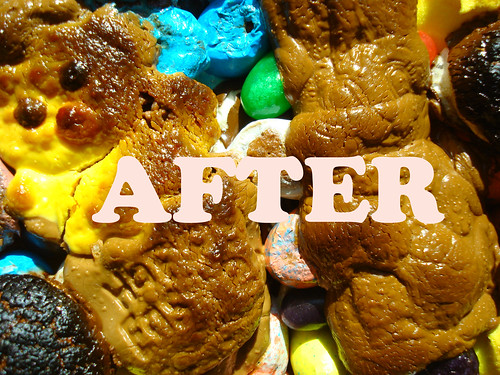
I won't beat around the bush. Here's what happens.

BEFORE AFTER

It's surprising that it took me so long to do this, what with the success I had doing something similar with Halloween candy. But seriously--Easter candy is so much more fun! So many more textures, flavors, and colors.

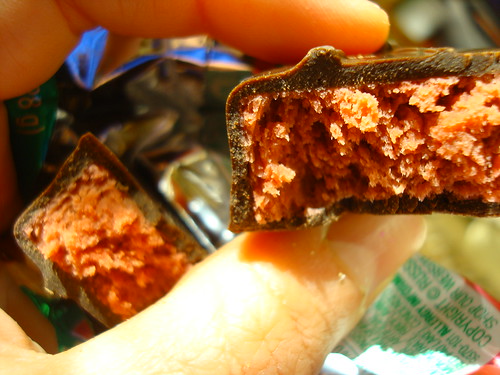
Plus (this is an aside) did you know that Russell Stover makes a Red Velvet chocolate covered Easter Egg candy?

Easter candy pie

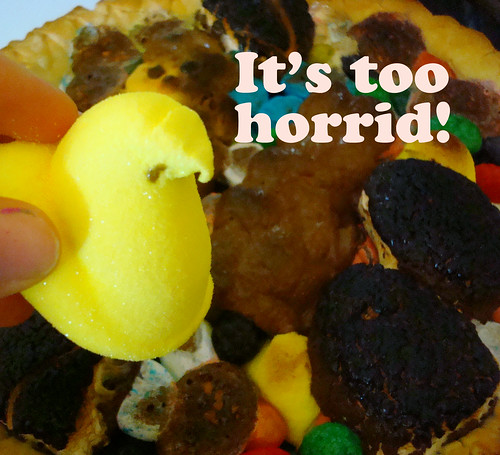
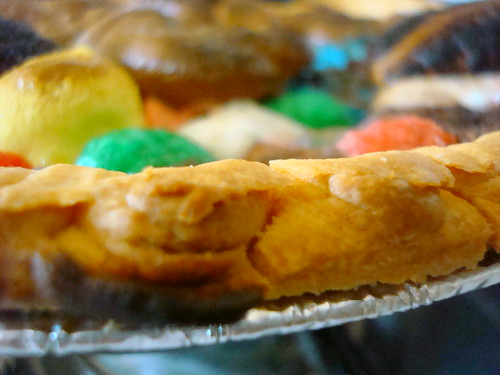
So monstrous when it all melts together. So fascinating to watch the festive candies melt and become gnarled and scary. So gratifying to eat the gooey mound of what was once Easter candy. Together in your mouth, there is a beautiful fusion of sweet textures and tastes: jelly texture from the 'beans, toastiness from the scorched marhmallow chocolates. Is that a bit of coconut you taste, or shrapnel from the shell of a candy egg? Probably both, fused together with melty fondant from the nearby Cadbury creme egg.

Peep's thoughts

Friends, I realize that you might not want to take my word for it and might desire--nay, need--to try this for yourself. And in that case, I am happy to share my recipe with you.

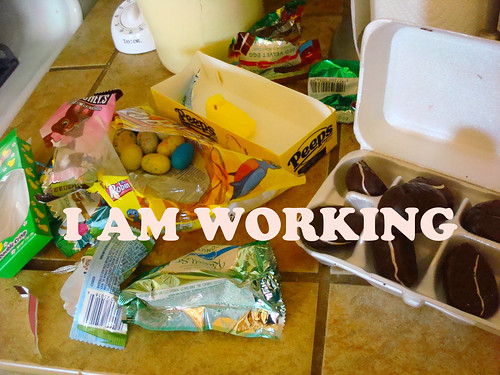
I'm busy now.

Easter Candy Pie

Serves between 1 and 8, depending on how hungry you are.

Ingredients


  • One unbaked pie shell

  • Three generous handfuls of Easter Candy (I used a melange of jelly beans, robin's eggs, Russell Stover Easter egg chocolates, and a few other treats)


Procedure

  1. Preheat the oven to 400 degrees F.

  2. Take your unbaked pie shell and look at it for a moment. Are you sure you want to do this? Yes, you are.

  3. Fill the mofo with that Easter candy. You want it to be full, but level (don't get greedy and mound it above the top height of the pie crust. It will get messy).

  4. Bake at 400 degrees for oh, 20 to 30 minutes. (Note: I did the Halloween candy pie at 350 degrees for 30-40 minutes. You could do that too, but I was hungry, so I did it this way this time. Don't judge me).


Easter Candy Pie

Chocolate Peanut Butter Eggs for Peanut Butter and Co.

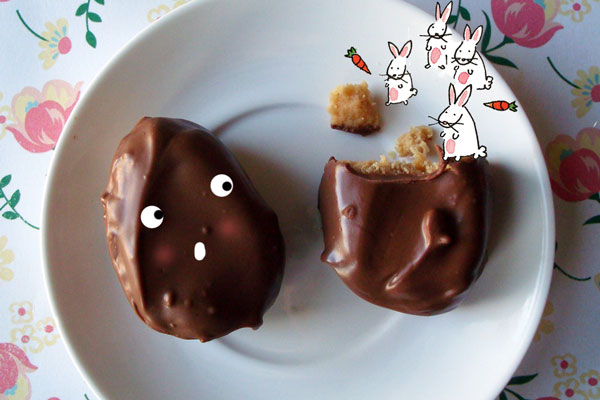
Easter Candy has come a long way. When I was young, it seemed as if it was a matter of chocolate bunnies, jelly beans, and your choice of creme eggs or mini eggs in terms of treats. Then…along came the peanut butter egg. A delectable nugget of sweetened peanut butter coated in rich chocolate, it rocked my Easter basket and my world. Here’s a homemade version of a store-bought treat, made yet awesomer by incorporating peanut butter in the filling and the topping.

A word of advice? If you’re creating these confections for a crowd, please make a double batch. They’re seriously that simple, that addictive, and that good.

For the recipe, visit Peanut Butter and Company!
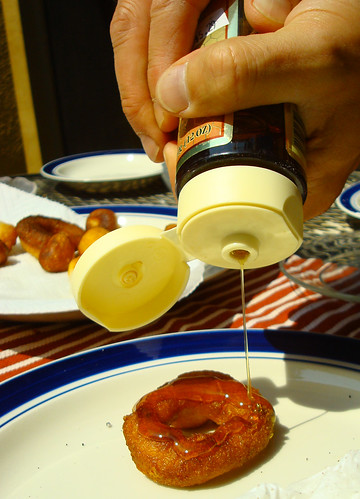
Cadbury Creme Scotch Eggs

Let's take a moment to discuss what constitutes a "proper" Scotch Egg. This decidedly non heart-healthy delicacy starts with a hard-boiled egg, which is then wrapped in sausage meat, coated in breadcrumbs, and deep-fried.

But around Easter-time, I prefer to make mine sweet rather than savory, with Cadbury Creme Eggs.

The Cadbury Creme Scotch Egg is coated with a thick cocoa-kissed batter, then coated in cookie crumbs and deep-fried. When eaten warm, the taste calls to mind that of a deep-fried candy bars that one can find at state fairs. Though in my opinion, these have slightly more complex flavor thanks to the cocoa in the batter and the vanilla cookie crumbs. Speaking of the crumbs, they also give the treat a pleasing crunch, which acts as a nice texture contrast to the cakey batter and soft, gooey chocolate and sugar-filled interior.

It's the perfect dessert counterpart to the classic Scotch Egg: similar visually, and every bit as decadent. Happy Easter indeed.

For the full entry, visit Serious Eats! And possibly also of interest: Cadbury Creme Eggs Benedict (from my book, CakeSpy Presents Sweet Treats for a Sugar-Filled Life), Cadbury Creme Egg Salad Sandwiches, Cadbury Creme Egg Foo Young, and Cadbury Creme Deviled Eggs.