The Bake-Off is Coming: Lemon Pistachio Blackberry Thumbprints Recipe

Lemon cookies

CakeSpy Note: OMG! The 46th Annual Pillsbury Bake-Off is coming! Since I so deeply loved attending the 45th Bake-Off, I thought I would get you excited early by sharing some of the finalists' recipes. Narrowed down from zillions of entries, I'll profile some of the 100 finalists--but of course, based on the subject matter of this site, I will focus on sweets! You can follow them by clicking the bakeoff tag below the post to see which ones have been posted so far. Enjoy! 

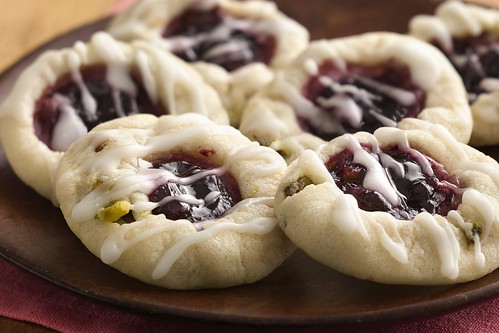
I appreciate the power of a promise. And these cookies, designed by Joan Cossette of Colbert, WA offer a delectable one: "Each bite of these sugar cookies promises a bit of sweet jam and a drizzle of sweet icing." Oh, yum.

Lemon Pistachio Blackberry Thumbprints

Prep Time: 25 Min Total Time: 35 Min Makes: 36 servings

Ingredients

  • 1 roll Pillsbury refrigerated sugar cookie dough
  • 1/2 cup shelled salted roasted pistachios, chopped
  • 1/3 cup All Purpose Flour
  • 1 teaspoon grated lemon peel
  • 1/2 cup Blackberry Jam
  • 1 cup powdered sugar
  • 1 tablespoon honey

Procedure

  1. Heat oven to 325°F. Line large cookie sheets with parchment paper. Let cookie dough stand at room temperature 10 minutes to soften.
  2. In large bowl, break up cookie dough. Add pistachios, flour and lemon peel. Mix with wooden spoon or knead with hands until well blended.
  3. Shape dough into 1-inch balls.
  4. Place 2 inches apart on cookie sheets. With thumb or handle of wooden spoon, make indentation 3/4 inch wide in center of each cookie. Spoon about 1/2 teaspoon jam into each indentation.
  5. Bake 10 to 13 minutes or until set but not browned. Remove to cooling racks. Cool 3 minutes.
  6. In small bowl, mix powdered sugar, honey and 1 tablespoon water until smooth. If necessary, stir in water, 1 teaspoon at a time, until of drizzling consistency. Drizzle honey glaze over warm cookies. Store in covered container.

The Bake-Off is Coming: Strawberry Cream Cheese Cream Puffs Recipe

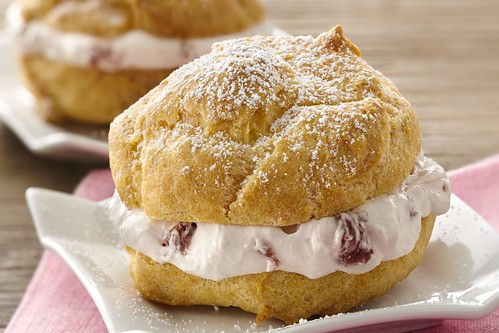
Strawberry Cream Cheese Cream Puffs Recipe

CakeSpy Note: OMG! The 46th Annual Pillsbury Bake-Off is coming! Since I so deeply loved attending the 45th Bake-Off, I thought I would get you excited early by sharing some of the finalists' recipes. Narrowed down from zillions of entries, I'll profile some of the 100 finalists--but of course, based on the subject matter of this site, I will focus on sweets! You can follow them by clicking the bakeoff tag below the post to see which ones have been posted so far. Enjoy! 

These sweet treats are a sure-fire recipe for success. They have so much going for them:

  • Strawberries and cream are a match made in heaven, not to mention the fashionable style of a cartoon icon.
  • Cream Puffs are delicious and delicate.
  • And when it comes to baked goods, cream cheese makes just about any flavor richer, creamier, tangier, and tastier. 

See? I've bullet-pointed the reasons why these scientifically rule, so it's now fact.

These Strawberry cream cheese cream puffs were dreamed up by Dawn Logterman of Verona, Wisconsin, who says "Who doesn't love strawberries and cream? Here's a tasty way to serve up the combo."

Simple but sweet, and they come together in just 30 minutes of active time. Score!

Here's the recipe.

Strawberry Cream Cheese Cream Puffs Recipe

Prep Time: 30 Min Total Time: 1 Hr 30 Min Makes: 12 servings

Ingredients

  • 1/2 cup butter
  • 1 cup Pillsbury BEST® All Purpose Flour
  • 4 eggs
  • 1 package (8 oz) cream cheese, softened
  • 1/2 cup Strawberry Preserves
  • 1 container (8 oz) frozen whipped topping, thawed
  • 1tablespoon powdered sugar

Procedure

  1. Heat oven to 400°F. Line large cookie sheet with parchment paper.
  2. In 2-quart saucepan, heat 1 cup water, the butter and 1/4 teaspoon salt to boiling over medium-high heat. With wooden spoon, stir in flour. Reduce heat to low; beat vigorously about 1 minute or until mixture forms a ball. Remove from heat. Beat in 1 egg at a time, beating vigorously after each addition until mixture is smooth and glossy. Drop dough by 1/4 cupfuls, 3 inches apart on cookie sheet, forming 12 mounds.
  3. Bake 30 to 40 minutes or until puffed and golden brown. Remove from pan to cooling rack; prick side of each puff with tip of sharp knife to release steam. Cool completely, about 20 minutes.
  4. Meanwhile, in medium bowl, beat cream cheese and preserves with electric mixer on medium speed until smooth. Fold in whipped topping until combined; refrigerate.
  5. Just before serving, cut each puff in half horizontally. Spoon about 1/3 cup cream cheese mixture into bottom half of each puff. Place tops over filling. Sprinkle with powdered sugar. Serve immediately. Store in refrigerator.


The Bake-Off is Coming: Breakfast Panini with Caramelized Bananas in Coffee Syrup

Breakfast Panini with Caramelized Bananas in Coffee Syrup

CakeSpy Note: OMG! The 46th Annual Pillsbury Bake-Off is coming! Since I so deeply loved attending the 45th Bake-Off, I thought I would get you excited early by sharing some of the finalists' recipes. Narrowed down from zillions of entries, I'll profile some of the 100 finalists--but of course, based on the subject matter of this site, I will focus on sweets! You can follow them by clicking the bakeoff tag below the post to see which ones have been posted so far. Enjoy! 

Monday! It does not have to be no fun-day. Nope. Not when you start the day right, with a sweet breakfast sandwich made with bananas, choco-hazelnut spread, and some coffee liqueur sandwiched sweetly between biscuits. 

It's not hard to see why this tasty morsel is a finalist in the Pillsbury Bake-Off. Let's all take a moment to silently thank Lisa Speer of Palm Beach, Florida, for dreaming it up.

Breakfast Panini with Caramelized Bananas in Coffee Syrup

Prep Time: 25 Min Total Time: 40 Min Makes: 8 servings

Ingredients

  • 1 can Pillsbury® Grands! Flaky Layers refrigerated buttermilk biscuits
  • 1/2 cup packed brown sugar
  • 1/4cup unsalted butter
  • 1/4 cup coffee-flavored liqueur or brewed coffee
  • 2 ripe firm large bananas, cut into 1/2-inch slices
  • 1/2 cup Chocolate Flavored Hazelnut Spread
  • 8 small strawberries, halved

Instructions

  1. Heat oven to 350°F. Bake biscuits as directed on can. Cool 15 minutes.
  2. Meanwhile, in 10-inch nonstick skillet, cook brown sugar, butter and coffee liqueur over medium heat, stirring constantly, 3 to 5 minutes or until slightly thickened. Stir in bananas; cook 2 to 3 minutes. Remove from heat; keep warm.
  3. Heat closed medium-size contact grill or panini maker for 5 minutes. Spray grill plates with Crisco® Original No-Stick Cooking Spray.
  4. Split biscuits. Spread 1 tablespoon of the chocolate hazelnut spread on cut side of each biscuit bottom to within 1/2 inch from edges; top with remaining biscuit halves. Place filled biscuits 3 to 4 at a time on grill; close grill. Cook 1 to 2 minutes or until golden brown. Repeat with remaining 4 filled biscuits.
  5. Top panini with bananas and syrup. Garnish with strawberries.

Nacho Mamma's Cake: Nacho Cakelets inspired by Bake and Destroy

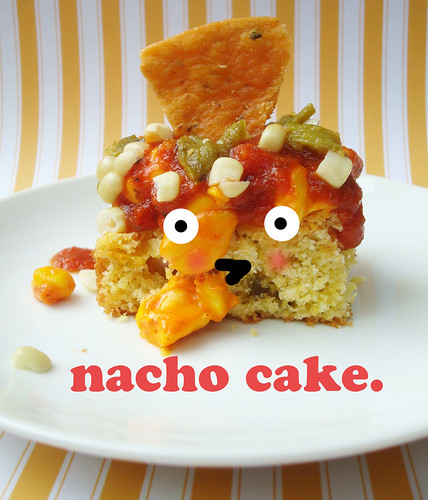
Nacho cake.

This is nacho mamma's cake. Well, unless that is your mom is prone to making savory nacho cake. 

(crickets)

Listen. My bloggy BFF Natalie of Bake & Destroy has a book out. Bake and Destroy: Good Food for Bad VegansThis book is totally vegan, but I don't care about that. What I do care about, and what is even more important, is that it is wonderful. When the book came, I all but had to restrain myself from doing a happy dance. 

 It's funny, it's creative, it's edgy, it's covered in tattoo art...just like Natalie. It's illustrated by Betty Turbo. There's a blurb on the back written by...well, me. Awesome!

So when her publicist (I love casually mentioning how my friends have publicists) contacted me to see if I'd help promote the book by posting a recipe on my site, I said of course. Because Natalie is pretty awesome and she's always supportive of what I do. 

The recipe for Nacho Cupcakes caught my eye right away, because it sounded...interesting. And I like keeping things interesting.

If you're expecting a real nacho-infused cake, think again. As the headnote reads, 

"technically this is a muffin. I think I just enjoy the horrified look on people’s faces when I say things like, “Have you tried the nacho cupcake?” Sadistic. Anyway, serve these with a bean salad and a side of guacamole and you’ve got yourself a fiesta. Better yet, bake the muffins and let your guests top their own!"

Now. I don't know why exactly, but probably because I couldn't find cupcake liners at the moment of baking, but I baked the cornbread batter in a 9x13 inch pan instead of as cupcakes, and treated them as cakelets. I chose my own adventure with the decoration, garnishing with "cheez" sauce, green chile (I'm in New Mexico at the moment, and when in Rome...), corn, salsa, and...of course, a nacho chip on top. 

These are a wonderful snack cake, and could even make a nice light lunch with a salad. A candy salad, that is!

Nacho cake

Bake and Destroy: Good Food for Bad Vegans

Makes 12 cupcakes

Ingredients

  • 1 cup (235 ml) soy milk
  • 1 teaspoon apple cider vinegar
  • 1 cup (125 g) all-purpose flour
  • ¾ cup (127 g) yellow cornmeal
  • 1 tablespoon (14 g) baking powder
  • ½ teaspoon salt
  • ½ teaspoon freshly ground black pepper
  • 2 medium-size jalapeños, diced with seeds
  • ⅓ cup (50 g) corn kernels (thawed, if frozen)
  • ¼ cup (60 g) blended silken tofu
  • ⅓ cup (67 g) sugar
  • 2 tablespoons (30 ml) vegetable oil
  • Unhydrogenated vegetable shortening, for greasing pan

TOPPINGS:

  • 1 (15-ounce [425 g]) can refried beans
  • Sliced olives
  • Additional jalapeño slices, ground seitan, guacamole, etc. (optional)
  • Tortilla chips
  • Nacho Chee-Zee Sauce

Directions

  1. Preheat your oven to 400°F (200°C) and grease a twelve-cup muffin pan or a 9x13 inch pan.
  2. In a measuring cup, combine the soy milk and apple cider vinegar and set aside to curdle for a few minutes while you prepare the other ingredients.
  3. In a medium-size bowl, combine the flour, cornmeal, baking powder, salt and pepper. In another bowl, whisk together the soy milk mixture, jalapeños, corn, tofu, sugar and oil. Add to the dry ingredients and stir until just combined.
  4. Fill the prepared muffin cups two-thirds full. Bake until golden brown and a toothpick inserted into the center comes out clean, 15 to 20 minutes.
  5. Remove from the pan and let cool completely on wire rack.
  6. To nacho-fy the “cupcakes”: Warm the refried beans on your stovetop; spread a layer of beans on top of each muffin. Sprinkle with olives and additional peppers or other toppings, if desired. Top it with a tortilla chip, serve with Nacho Chee-Zee Sauce, and get ready to party.

Triple Chip Peanut Butter Cookie Dough Dip from Peanut Butter Comfort

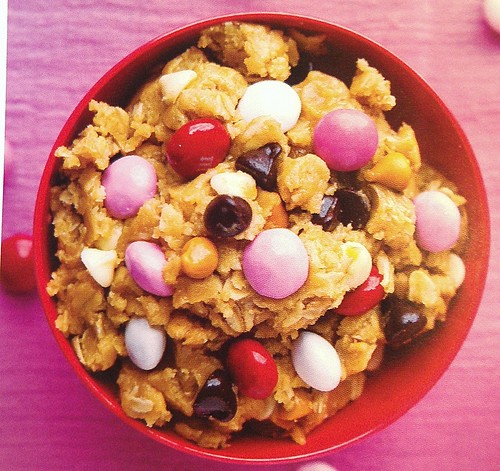
Cookie dough dip

When I think of peanut butter, visions of happiness, butterflies, unicorns prancing, and cotton candy clouds dance in my head. I love the stuff that much.

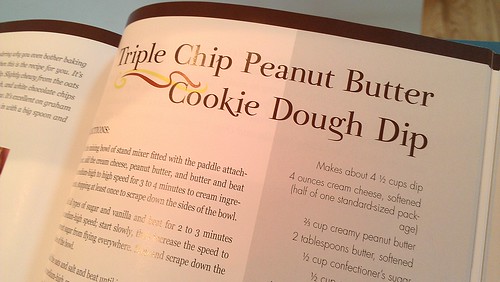
So when I received the book Peanut Butter Comfort: Recipes for Breakfasts, Brownies, Cakes, Cookies, Candies, and Frozen Treats Featuring America's Favorite Spread, I was pretty psyched. Especially since I happened to have plenty of peanut butter around at the moment.

Naturally, I was drawn in pretty instantly by this recipe because it had pink thingies in the photos. But then, upon futher review, I found that the recipe was for something amazing: Triple Chip Peanut Butter Cookie Dough Dip. Like, OMG. That's a dip I can get into!

Cookie dough dip

Even better, the dough is egg free, so that dough can get right in your mouth.

What would one use cookie dough dip for, you ask? Well, that's kind of a dopey question because I really hope you already have some ideas. It would be a great, indulgent frosting, or a nice dip for graham crackers, or...you know, great by the spoonful. Yum.

Here's the magical recipe.

Peanut Butter Triple Chip Cookie Dough Dip

Adapted from Peanut Butter Comfort: Recipes for Breakfasts, Brownies, Cakes, Cookies, Candies, and Frozen Treats Featuring America's Favorite Spread

Makes 4 1/2 cups dip, or 2-3 servings (kidding)

Ingredients

  • 4 ounces cream cheese, softened to cool room temperature
  • 2/3 cup creamy peanut butter
  • 2 tablespoons butter, softened to cool room temperature
  • 1/2 cup confectioners' sugar
  • 1/2 cup granulated sugar
  • 1/2 cup light brown sugar, packed
  • 1 1/2 teaspoons vanilla extract
  • 1 1/2 cups old-fashioned whole rolled oats (not quick cook or instant)
  • 1/2 teaspoon salt
  • 2 to 4 tablespoons all purpose flour
  • 1/2 cup m&m candies--plain, peanut, or peanut butter
  • 1/2 cup semi-sweet chocolate chips
  • 1/3 cup white chocolate chips
  • 1/3 cup butterscotch chips

Procedure

  1. In a stand mixer fitted with the paddle attachment, cream the cream cheese, peanut butter, and butter, mixing on high speed for 3 to 4 minutes until nice and smooth and creamy. Pause to scrape down the sides of the bowl. 
  2. Add all the sugars and the vanilla, and beat for 2 to 3 minutes on medium high speed. Start slowly, then increase the speed to keep from having a sugar snowstorm. Pause to scrape down the sides of the bowl.
  3. Add the oats and salt and beat until incorporated, 1 minute on medium high speed. Stop and scrape down the sides of the bowl. Add the flour, one tablespoon at a time, mixing after each addition. Only add enough to give it your desired dip consistency.
  4. Fold in the m&m candies and all those chocolate and other chips by hand or with a couple swipes of the mixer on low speed. Serve right away, or keep chilled. Keep this tastiness in the fridge for up to a week.

The Bake-Off is Coming: Decadent Chocolate Hazelnut Tart

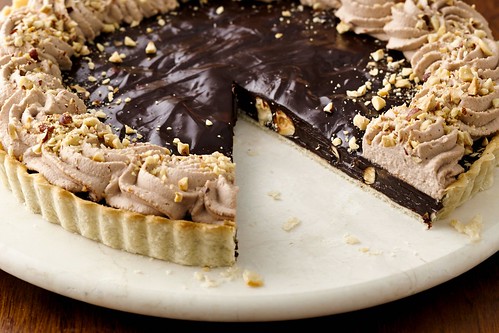
Hazelnut chocolate tart

CakeSpy Note: OMG! The 46th Annual Pillsbury Bake-Off is coming! Since I so deeply loved attending the 45th Bake-Off, I thought I would get you excited early by sharing some of the finalists' recipes. Narrowed down from zillions of entries, I'll profile some of the 100 finalists--but of course, based on the subject matter of this site, I will focus on sweets! You can follow them by clicking the bakeoff tag below the post to see which ones have been posted so far. Enjoy! 

Generally, I like to make it clear to people that I am CakeSpy, not MathSpy.

However, every now and again I like to riddle with numbers and equations. Here's one that I feel pretty good about:

Flaky pastry + super rich creamy fudgy filling  = deliciously indulgent dessert.

Now, this type of addition makes sense to me. And the delicious result is beautifully illustrated in the form of this Decadent Chocolate Hazelnut Tart, a Bake-Off finalist recipe dreamed up by Marie Bruno of Greensboro, Georgia. 

Seriously. It's got crust. It's got chocolate. It's got hazelnut. What is not to love? Oh, and it only takes 30 minutes to make, and including cooling time, you'll be eating this treat in under 2 hours. YES!

Decadent Chocolate Hazelnut Tart

12 servings - 30 min active time, 1 hr 30 min total time

Ingredients

  • 1 Pillsbury refrigerated pie crust, softened as directed on box
  • 2 cups heavy whipping cream
  • 8 oz semisweet baking chocolate
  • 1 cup mascarpone cheese
  • 1/2 cup Jif Chocolate Flavored Hazelnut Spread
  • 4 egg yolks
  • 1 1/4 cups toasted hazelnuts

Procedure

  1. Heat oven to 450°F. Unroll pie crust; place in 10-inch tart pan with removable bottom. Press crust firmly against bottom and side of pan; trim edges. Bake 8 to 12 minutes or until light golden brown. Remove from oven to cooling rack. If crust puffs in center, flatten gently with back of wooden spoon. Cool 15 minutes.
  2. Meanwhile, in 2-quart saucepan, heat 3/4 cup of the cream over medium heat until bubbles begin to form around sides of pan. DO NOT BOIL. Remove from heat. Stir in chocolate until melted. Stir in 1/4 cup of the mascarpone cheese and 6 tablespoons of the chocolate hazelnut spread until well blended.
  3. In small bowl, beat egg yolks with fork. Gradually add about 1/4 of the melted chocolate mixture to the egg yolks, stirring constantly. Stir egg mixture back into the pan of hot chocolate cream. Cook over medium-low heat, stirring constantly for 3 to 5 minutes until mixture begins to thicken; remove from heat. Spread 1/2 cup of the chocolate mixture in bottom of cooled crust. Press 1 cup of the toasted hazelnuts into hot filling. Carefully spoon remaining chocolate filling over nuts. Refrigerate at least 1 hour or until completely cooled.
  4. In medium bowl, beat remaining 1 1/4 cups cream with electric mixer on high speed until slightly thickened. Slowly add the remaining 3/4 cup mascapone cheese and the remaining 2 tablespoons chocolate hazelnut spread. Continue beating until stiff peaks form.
  5. Pipe or spoon whipped cream mixture over top of cooled tart. Finely chop remaining 1/4 cup hazelnuts; sprinkle over whipped cream. Store covered in refrigerator.

New Orleans Bread Pudding: Palace Cafe Recipe

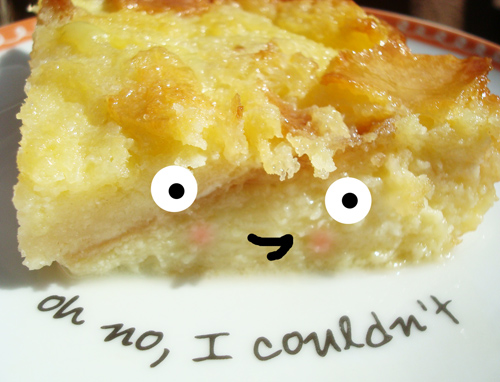
White Chocolate Bread Pudding

I like bread pudding. But usually, "like" is about as far as my affection goes. I like it. I'll eat it. But I'm never like "yeah! Bread pudding!" and happy dancing about it or anything.

That changed when I tried bread pudding in New Orleans. I said to myself, "they get it here, man. They really get it." The texture is not so much like custardy, soaked bread as it is like velvet. It's so smooth. And they put this sauce on it which is as addictive as I imagine crystal meth to be. At just about every establishment at which I sampled bread pudding in New Orleans, it was one of those situations where I was like "OK, I'll have a bite" and then ended up eating the whole thing and scraping the spoon on the bottom wanting more. 

White Chocolate Bread Pudding

Upon inspection of a variety of recipes and talking to bakers from the area, I think I've pretty much figured out the secrets behind the bread pudding success in New Orleans: they basically double the butter, cream, and eggs, and add booze besides. And the results are stellar.

I'd like to try as many of these New Orleans bread pudding recipes as I can. Will you taste along with me? 

First up is the White Chocolate Bread Pudding from the Palace Cafe. It's owned by Dickie Brennan, a famed restaurateur in the area. 

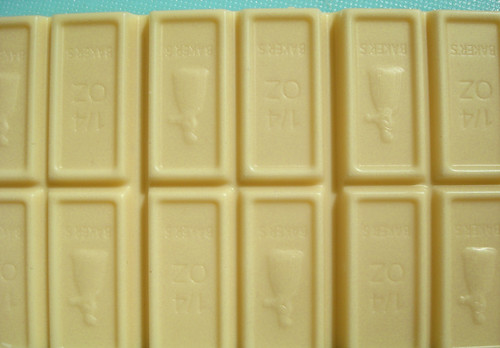
This recipe intrigued me, quite frankly, because I had a lot of white chocolate on hand. 

White chocolate

I'll tell the truth: I made some changes. First, I halved the original recipe. I just didn't have 15 eggs on hand, and it seemed like it would make more bread pudding than two people needed in my household. 

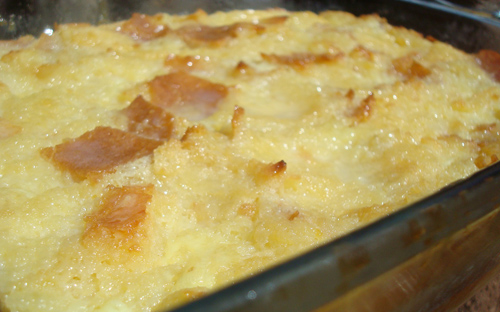
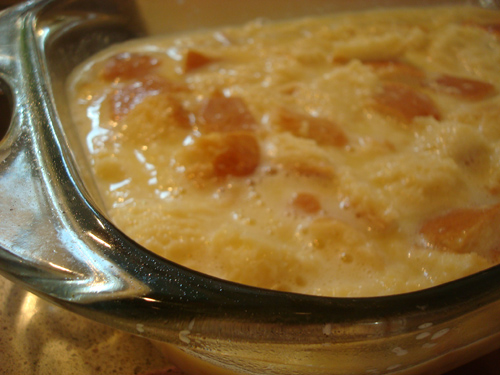
Halved, the recipe worked great. The texture is like butter. It's so soft, and so moist, it practically oozes like a tres leches cake.

YES!

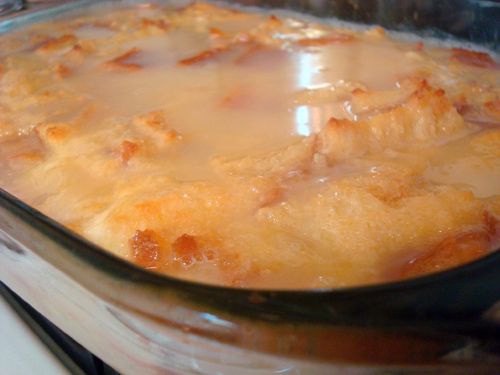
This is probably owing to the glaze. It seems like an obscene amount of liquid at first, but somehow the bread pudding absorbs it all. The white chocolate tastes wonderful with the dash of bourbon I took the liberty of adding to the recipe. Actually, after a few bites, everything in the world looks glorious.

White Chocolate Bread Pudding

White Chocolate Bread Pudding

Adapted from Palace Cafe: The Flavor of New Orleans - printable version here

6 servings

  • 1 loaf French bread (you are not going to use the whole thing, but have it on hand)
  • 3 cups whipping cream
  • 1 cups milk
  • 1/2 cup sugar
  • 1/2 teaspoon salt
  • 10 ounces white chocolate, chopped (or use chips)
  • 2 whole eggs
  • 7 egg yolks
  • A rather generous glug of bourbon

White Chocolate Sauce

  • 8 ounces white chocolate (broken into small pieces)
  • 1 1/2 cups milk

Procedure

  1. Cut the bread into 1-inch cubes. Divide it in half--you'll definitely use half, and you might use some of the rest of the cubes. If you don't, you can make croutons, yo. Place the half you're using in a large bowl. Set to the side.
  2. Preheat oven to 350 degrees. Grease a 9x13-inch pan. Set to the side.
  3. In a large saucepan, heat the whipping cream, milk, and sugar over medium heat. Dash in the salt. When hot, take off the heat and add the white chocolate pieces; stir until melted.
  4. Combine the whole eggs and egg yolks in a large bowl. Slowly pour the hot cream mixture into the eggs in a steady stream, whipping the eggs as you pour. If you wanna, add that glug of bourbon now. 
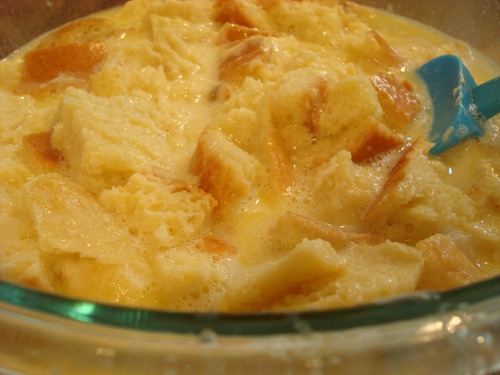
  5. Add the mixture to the bowl with the bread pieces.
  6. If the bread is positively swimming, add some more bread until the bread is covered, but not by much.
  7. White Chocolate Bread Pudding
  8. Feeling good? Now, transfer it to the prepared pan. The cubes of bread will poke up but it's really liquid-y.
  9. Using a spatula press down the bread so everything is absolutely saturated.
  10. White Chocolate Bread Pudding
  11. Bake for 40 to 50 minutes, or until set and golden on top. You don't want brown, just lightly golden. 
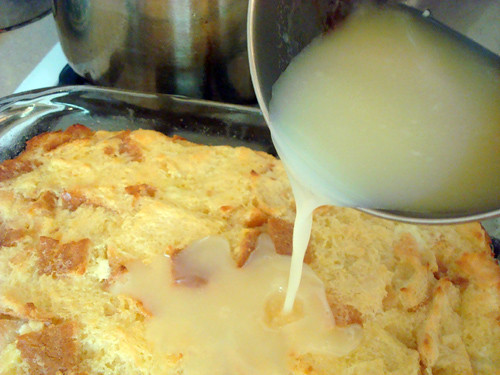
  12. While it bakes, prepare the sauce. Bring the milk to a boil in a small sauce pan. Take off the heat and add white chocolate; stir until smooth and completely melted. It's going to be a fairly liquid sauce. White Chocolate Bread PuddingPour over the bread pudding right when it comes out of the oven. It may look like an obscene amount of liquid but the bread pudding will absorb it. White Chocolate Bread Pudding
  13. Let cool and enjoy. Store leftovers in the fridge for up to 2 days.

SpyMom's Devil's Food Cake with Buttercream Frosting

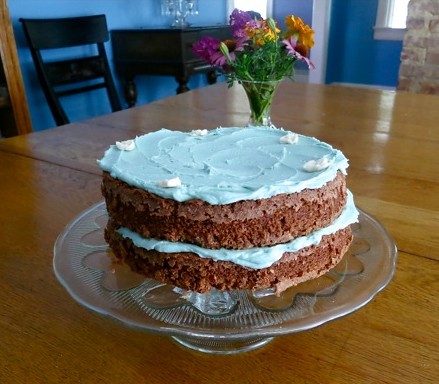
Devil's food cake

There are many good things about moving out of your parents' house. You get to watch tv whenever you want, not be told to make your bed, and eat cupcakes for dinner if you wanna. And often, I wanna.

But one of the less awesome aspects of moving away from home is that if your mom is a great baker, you don't as often get to indulge in her delicious creations. 

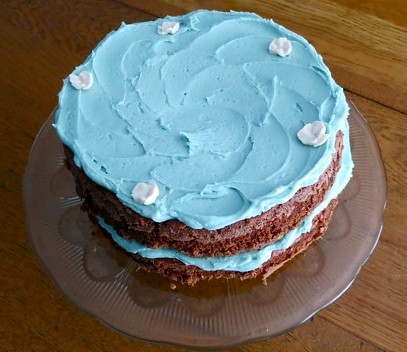
But in an effort of maintaining a baking bond even from a fairly long distance, SpyMom recently sent over a recipe success with me, which I am in turn sharing with you. It's a Homemade devils food cake (from an old Fannie Farmer book), brought up to modern times with a generous coating of Magnolia Bakery's buttercream frosting recipe. As SpyMom says, "Imperfect looking but the taste was perfect." 

I disagree that it looks imperfect--those layers of tender-crumbed, moist chocolate cake beautifully held together with light blue tinted buttercream look perfect--and completely delicious--to me. Like a classic cake dream come true.

Here's the recipe.

Devil's food cake

Devil's Food Cake with Buttercream Frosting (Printable version here)

Makes 1 2-layer 8-inch cake

Adapted from recipes in The Magnolia Bakery Cookbook: Old-Fashioned Recipes From New York's Sweetest Bakery and The Fannie Farmer Cookbook

For the cake

  • 4 tablespoons cocoa
  • 1 cup plus 3 tablespoons sugar
  • 1/2 cup whole milk
  • 1/4 pound unsalted butter, softened
  • 1 teaspoon vanilla
  • 2 eggs, separated
  • 1 cup flour
  • 1/2 teaspoon cream of tartar
  • 1/2 teaspoon salt
  • 1/2 teaspoon baking soda

For the frosting

  • 1 cup (2 sticks) unsalted butter, softened
  • 6 to 8 cups confectioners' sugar
  • 1/2 cup milk
  • 2 teaspoons pure vanilla extract

Procedure

  1. Heat oven to 350 degrees f. Butter and lightly flour two 8-inch round cake pans. Put the cocoa, 3 tablespoons of the sugar, and 3 tablespoons water in a small pan and cook over low heat until smooth and blended. 
  2. Remove from the heat and stir in the milk. Set aside.
  3. Cream the butter, add the vanilla and 1/2 cup of the remaining sugar, and beat until light.  Beat in the egg yolks, and then add the cocoa mixture, beating well. Mix the flour, cream of tartar, salt, and baking soda together, add to the first mixture, and blend until smooth.
  4. Beat the egg whites separately until they are foamy. Slowly add the remaining 1/2 cup of sugar, and beat until stiff but not dry. Fold the whites into the rest of the batter.
  5. Spread in your prepared pans and bake for 30 to 35 minutes, or until a toothpick inserted comes out clean. Cool cakes in pans for 5 minutes before turning on to racks to cool completely before frosting.
  6. To make the frosting, In the bowl of an electric mixer fitted with the paddle attachment, combine butter, 4 cups sugar, milk, and vanilla. Beat on medium speed until smooth and creamy, 3 to 5 minutes. Gradually add remaining sugar, 1 cup at a time, beating for about 2 minutes after each addition, until icing reaches desired consistency; you may not need to add all the sugar. Store in an airtight container for up to 3 days.

Peanut Butter Honey Banana Oatmeal Bars, with Love from Haydn

Haydn Bars

When it comes to cookbooks, are you attracted to the unusual ones? 

Well, you're not alone. I simply cannot pass by a rummage sale, secondhand store, or bookstore's dollar rack without checking out the unusual cookbooks they always seem to have.  I've found a few great ones this way, including my personal fave, Cooking in WetLeather (a biker recipe book). Yes, it exists. 

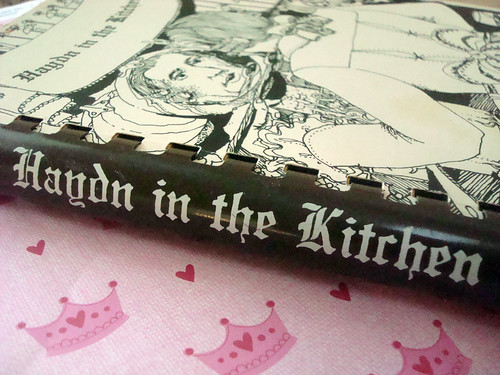
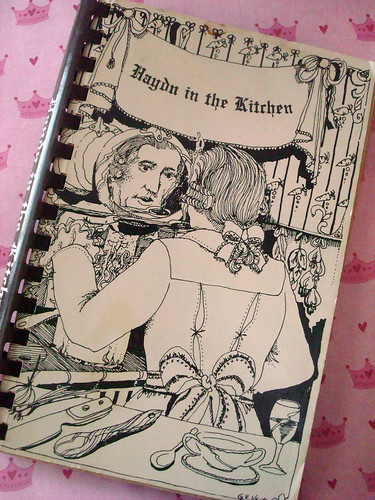
At a yard sale recently, I was purchasing a $10 sofa and this book caught my eye: Haydn in the Kitchen.

haydn2 haydn

Since I was already shelling out for the sofa, they gave it to me for free. Score!

As it turns out, this recipe book was put together by the Denver Symphony Guild to benefit the orchestra. Unfortunately, the recipes have little to do with famous composers, and the only way that they incorporated music was to call the chapters things like "Symphonic Variations", "Finales", and "Intermezzi". Nestled in the Intermezzi chapter was a recipe for Peanut Butter Oatmeal Bars. 

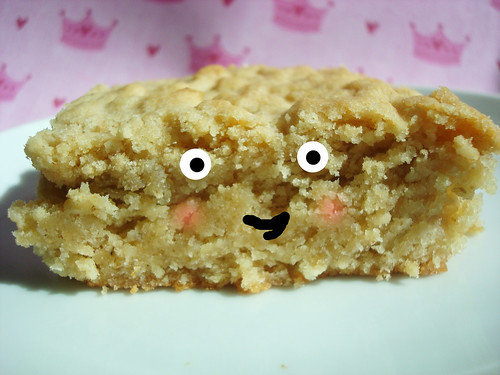
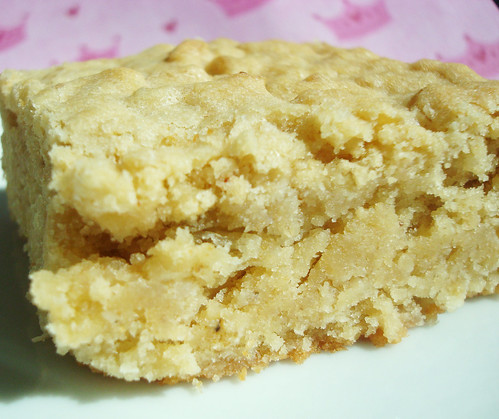
I made a few changes to the recipe, one of which was using honey peanut butter, and then I added banana. Oh my, were they ever good. Sort of in the blondie family, but with a much more mellow, rounded flavor. The rich peanut butter with the golden, sunshine-y honey. haydn7 haydnbars2

The moist and gooey banana bits. The vaguely healthy tasting oats, adding a nice nuttiness. The slightly caramel-y taste from the brown sugar. All in a fairly dense bar cookie. They're very, very good. 

They certainly disappeared quickly in my house. Bet they'll disappear faster than a symphonic overture (is that a thing?) in yours, too. 

Haydn Bars

Makes 16 - printable version here.

Ingredients

  • 1/2 cup granulated sugar
  • 1/2 cup brown sugar
  • 1/2 cup butter, softened
  • 1/3 cup honey peanut butter (or, plain peanut butter with 1 teaspoon honey mixed in)
  • 1 egg
  • 1/4 cup milk
  • 1/2 teaspoon vanilla extract
  • 1 cup flour
  • 1/2 teaspoon salt
  • 1 cup quick cook oats
  • 1/2 a banana, cut into small pieces

Procedure

  1. Preheat the oven to 350.
  2. Cream the sugars, butter, and peanut butter until smooth (or as smooth as the chunky peanut butter will get). 
  3. Mix in the egg, milk, and vanilla. Scrape down the sides of the bowl occasionally to ensure that they're mixed fully.
  4. Stir in the rest of the ingredients all together, until combined.
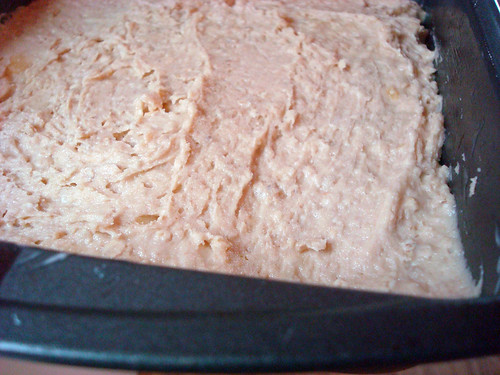
  5. Spread in your prepared 8x8-inch pan. Bake for 30-40 minutes or until golden on top and a tester inserted in the center comes out clean. Let cool in the pan, then slice into squares. These bars keep well for 3 to 4 days, well wrapped.

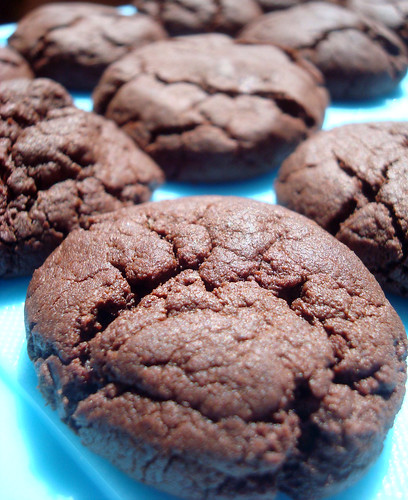
Chocolate Cookies With Real Pieces of Cookie Monster

Cookie monster cookies

As Aunts go, I am probably the worst and most evil one in the world. I realize that you probably think I am joking, but allow me to illustrate this statement with an example.

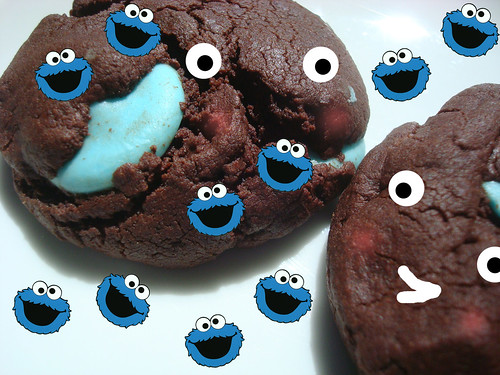
So. My young nephew, Dylan (code names: Dilly, Dil, Dillybar), age three, just loves a flavor of ice cream from Hoffman's Ice Cream called Cookie Monster. It's a blue ice cream with all sorts of cookies mashed into it. The last time I took him for ice cream, I asked if he knew why it was blue. He indicated that he did not in fact know, so I revealed "that's because it's made with real pieces of the Cookie Monster!".

Now, I'll tell you what happened then. Dylan stopped eating ice cream, and his lower lip kind of started trembling. I'll tell you the truth--he was closer to crying than not.

"Oh my god! I mean, gosh!" I said. " Aunt Jessie was just kidding. It's blue because it's cookie monster's favorite flavor!".

Thankfully, this weak save was sufficient and the happy ice cream twinkle came back into his eye and he continued eating. I did notice, however, that the next time we went to Hoffman's he ordered Mint Chocolate Chip. 

Now, don't tell my sister (Dylan's mother) because I'm sure that she will agree that this is proof that I am the absolute worst Aunt ever, not only because I scared her son but because I took him out for ice cream at a non-approved snack time. 

Chocolate Cookies

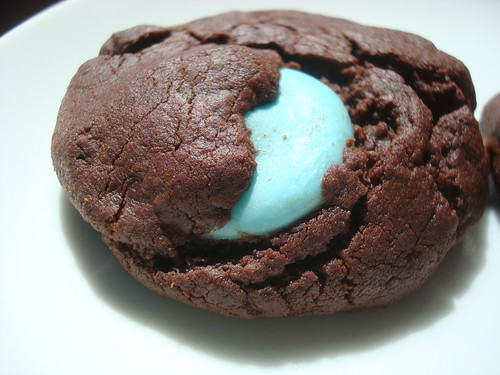
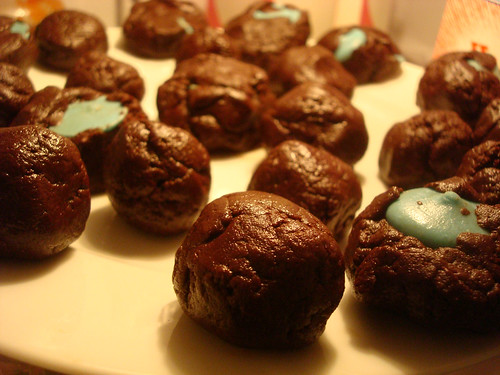
But since I apparently cannot learn my lesson, I made these chocolate cookies recently and couldn't resist adding some blue candy melts. You know, to give the look of real pieces of cookie monster melted into the batter. I'm dedicating them to young Dylan, and can't wait to tell him that they're made with real pieces of cookie monster.

Joking aside, these cookies are fantastic. They are surprisingly light in texture for their extreme chocolate to other ingredients ratio, but very flavorful. I added a dash of dark coffee to the mix to heighten the chocolate flavor, I trick I learned from the BAKED brownie recipe. It worked well.

This is a great cookie to have in your jar. And they taste great without the candy melts, too.

Chocolate Cookies

Chocolate Cookies With Optional Real Pieces of Cookie Monster

Makes about 24 - printable version here

  • 1 2/3 cups (10-oz. pkg.) Dark Chocolate Morsels
  • 1 cup all-purpose flour
  • 1/4 cup unsweetened cocoa
  • 1 teaspoon baking soda
  • 1/2 teaspoon salt
  • 1/2 cup (1 stick) butter, softened
  • 1/2 cup packed light brown sugar
  • 1/4 cup granulated sugar
  • 1 large egg
  • 1/2 teaspoon vanilla extract
  • 1/2 teaspoon strong brewed coffee (optional)
  • 1 healthy handful light blue candy melts

Procedure

  1. Preheat oven to 325° F. Line baking sheets with parchment paper.
  2. Melt the morsels in in a saucepan or in the microwave. If on the stovetop, stir frequently to prevent scorching. Set aside.
  3. Sift the flour, cocoa, baking soda and salt into a medium bowl.
  4. Cream the  butter, brown sugar and granulated sugar until smooth and light, 3 to 5 minutes.
  5. Add melted chocolate and mix well. Add egg and vanilla extract, mixing until well blended, about 1 minute. Add flour mixture, mixing just until blended. If you want, press a couple of blue candy melts into the cookies.
  6. Chocolate Cookies
  7. Shape into balls and place them on to your prepared baking sheets.
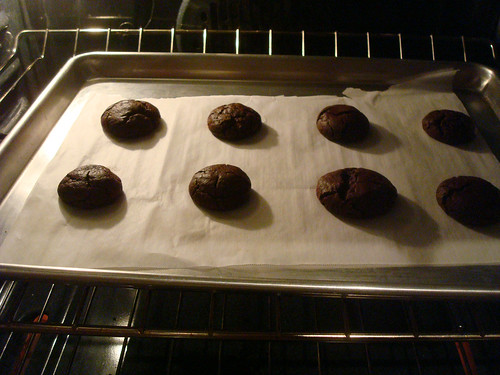
  8. Bake for 16 to 18 minutes or until wooden pick inserted in center comes out with moist crumbs and the tops have a cracked appearance.
  9. Chocolate Cookies
  10. Cool on baking sheets for 5 minutes before transferring to a wire rack to cool completely.


Double Trouble: Double Crust Chocolate Chip Cookie Dough Pie

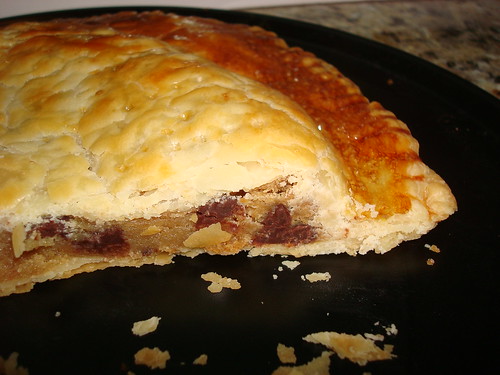
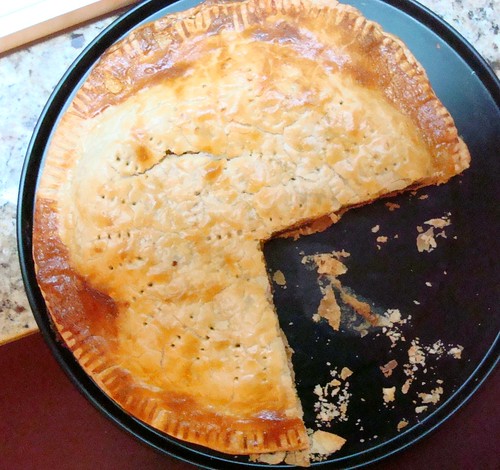
Frisbee pie

Have you ever eaten a chocolate chip cookie and found yourself thinking “if only this had more carbohydrates...”?

If so, you're not alone, and boy, oh boy, do I have a recipe for you. Double Crust Chocolate Chip Cookie Dough Pie.

Cookie Pie

It starts with rich, decadent chocolate chip cookie dough that is given a bear-hug by a deliciously carbohydratey pie crust.

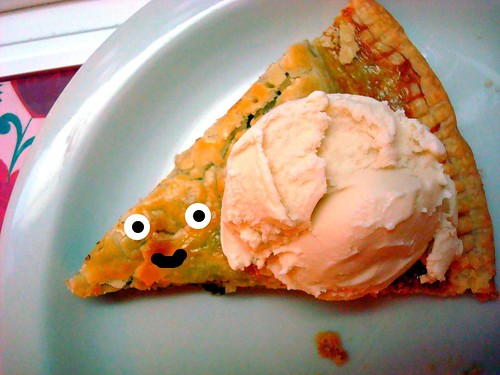
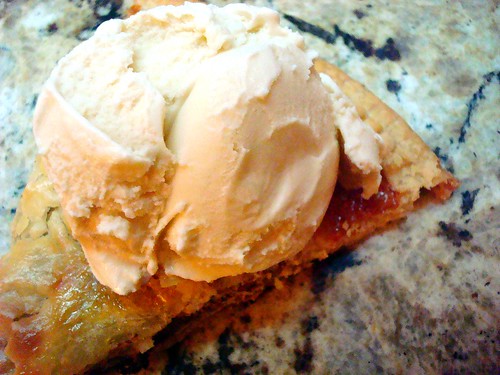
PieThis treat is truly a delight, and works beautifully when served a la mode. And by "a la mode" I mean with ice cream, lots and lots and lots and lots of it.

A perfect late summer treat. Enjoy!

pie

Double Crust Chocolate Chip Cookie Dough Pie

For the crust


  • 2 cups all-purpose flour
  • 1 teaspoon salt
  • 1 cup shortening
  • 1/2 cup water

For the filling

  • 16 ounces chocolate chip cookie dough
  1. In a large bowl, combine flour and salt. Cut in shortening until mixture resembles coarse crumbs. Stir in water until mixture forms a ball. Divide dough in half, and shape into balls. Wrap in plastic, and refrigerate for 4 hours or overnight.
  2. Roll out one of the balls of dough to about 10 inches in diameter. On top of this, pat the cookie dough into a circle, leaving about 1 ½ inches in diameter uncovered.
  3. Brush part of the egg wash around the uncovered diameter.
  4. Roll out the second round of dough to about 10 inches; place this on top of the cookie dough topped round, and press down on the sides, crimping the edges with your fingers or a fork.
  5. Poke the top of the dough several times with a fork for ventilation. Brush with the remaining egg wash.
  6. Bake in a 400 degree oven for 15-20 minutes, or until golden in the middle and medium- brown on the edges.
  7. Serve with ice cream.

The Bake-Off is Coming: Hot Pink Raspberry and Cream Cake Recipe

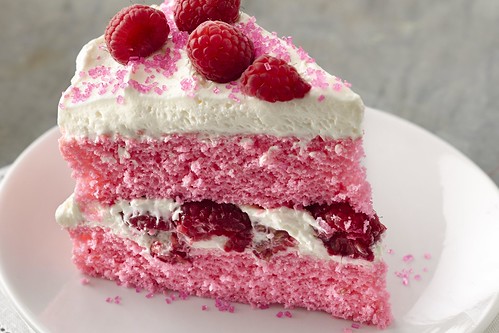
Hot Pink Raspberry Cake - Bake-Off

CakeSpy Note: OMG! The 46th Annual Pillsbury Bake-Off is coming! Since I so deeply loved attending the 45th Bake-Off, I thought I would get you excited early by sharing some of the finalists' recipes. Narrowed down from zillions of entries, I'll profile some of the 100 finalists--but of course, based on the subject matter of this site, I will focus on sweets! You can follow them by clicking the bakeoff tag below the post to see which ones have been posted so far. Enjoy! 

Darn-tooting you love this cake. It's the perfect color: pink! Since we eat with our eyes first, why not treat yourself to something as sweet, both literally and figuratively, as this Hot Pink Raspberry and Cream Cake? This Bake-Off finalist recipe comes from Dawn Onuffer of Crestview, Florida. The tartness of the raspberries is a wonderful complement to all of those luscious, creamy layers. Enjoy!

Hot Pink Raspberry and Cream Cake

Active time: 30 mins

Total time: 1 hour, 40 mins

Ingredients

  • 1 1/4 cups Pillsbury BEST® Self-Rising Flour
  • 2 eggs
  • 1 cup Pillsbury® Funfetti® Hot Pink Vanilla Flavored Frosting
  • 3/4 cup sugar
  • 1 package (8 oz) cream cheese, softened
  • 1 container (8 oz) frozen whipped topping, thawed
  • 2 cups fresh raspberries

Procedure

  1. Heat oven to 350°F. Line bottoms of 2 (8-inch) round cake pans with parchment paper; spray paper with nonstick spray.
  2. In a medium bowl, beat flour, eggs, frosting, 1/4 cup of the sugar and 1/3 cup water with electric mixer on low speed 30 seconds. Beat on high speed 2 minutes, scraping bowl occasionally, until blended. Pour and spread batter evenly in pans.
  3. Bake 18 to 20 minutes or until toothpick inserted in center comes out clean. Cool in pans 15 minutes. Carefully invert cake layers from pans onto cooling racks; remove parchment paper. Cool completely, about 30 minutes.
  4. To make filling, in medium bowl, beat cream cheese and remaining 1/2 cup sugar with electric mixer on medium speed until smooth. Beat in whipped topping on low speed until blended.
  5. To assemble cake, place 1 cake layer top side down on serving plate. Spread half of filling to edge; top with 1 cup of the raspberries; pressing berries into filling. Sprinkle with half of the pink decorator sugar. Place remaining cake layer, rounded side up on raspberries; press gently. Spread remaining filling on cake. Top with remaining raspberries and pink decorator sugar. Store in refrigerator.

The Bake-Off is Coming: Sweet and Salty Cookie Pie Recipe

Cookie Pie

CakeSpy Note: OMG! The 46th Annual Pillsbury Bake-Off is coming! Since I so deeply loved attending the 45th Bake-Off, I thought I would get you excited early by sharing some of the finalists' recipes. Narrowed down from zillions of entries, I'll profile some of the 100 finalists--but of course, based on the subject matter of this site, I will focus on sweets! You can follow them by clicking the bakeoff tag below the post to see which ones have been posted so far. Enjoy! 

I don't know about you, but this recipe SPEAKS to me. As a bona fide carb-o-holic, the fact that this dessert contains cookie dough baked atop pie crust with a bunch of other tasty stuff added (like choco-hazelnut spread, which makes everything better) is very, very appealing.

It also vaguely brings to mind my own Cookie Cake Pie, which is a personal and web reader favorite from this site.

This version combines sweet and salty with some serious carb-on-carb action. It comes at you from Bobbie Harms of Boulder, Colorado. The recipe headnote reads, "Is it a cookie? Is it a pie? It's a cookie pie with rich chocolate and a sprinkle of sea salt." Yes!

Sweet and Salty Cookie Pie

  • Prep Time: 15 Min
  • Total Time: 1 Hr 20 Min
  • Makes: 12 servings

Ingredients

  • 1 Pillsbury® refrigerated pie crust, softened as directed on box
  • 1/3 cup Jif® Chocolate Flavored Hazelnut Spread
  • 1/2 cup miniature semisweet chocolate chips
  • 1/2 package (12 cookies) Pillsbury® Ready to Bake!™ refrigerated sugar cookies
  • 1/2 cup toffee bits
  • 1/4 teaspoon kosher (coarse) or sea salt

Procedure

  1. Heat oven to 350°F. Unroll pie crust on ungreased cookie sheet; prick generously with fork. Bake 5 minutes.
  2. Spread chocolate hazelnut spread evenly over crust to within 1/4 inch of edge. Sprinkle with chocolate chips.
  3. Cut sugar cookies in half horizontally. Place over chocolate hazelnut spread, 1/2 inch from edge and about 1 inch apart. Sprinkle with toffee bits and salt.
  4. Bake 20 to 25 minutes or until pie crust edges are golden brown. Cool 30 minutes; cut into wedges.

Fat and Sweet: Roly Polies Recipe

Making Pie crust with Spymom

Growing up, when SpyMom brought out the pie plate and the rolling pin, the entire family got very excited. 

You may assume that it was because it was pie time.

I know what time it is.

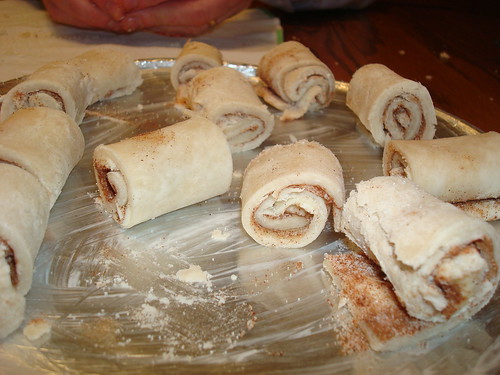
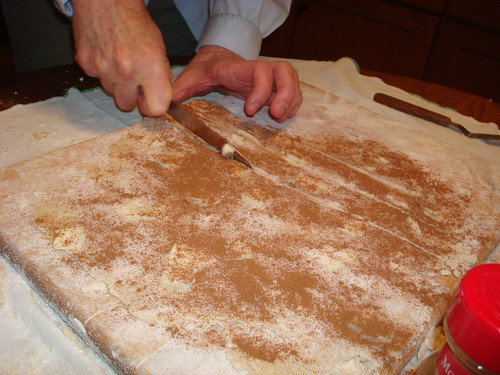
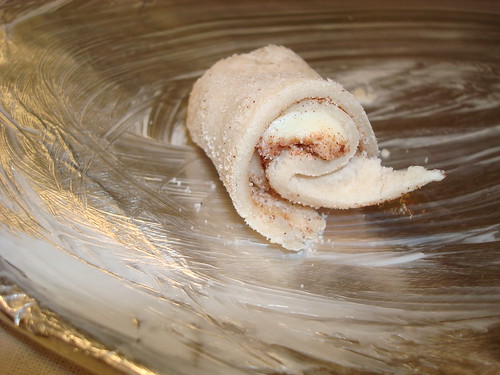
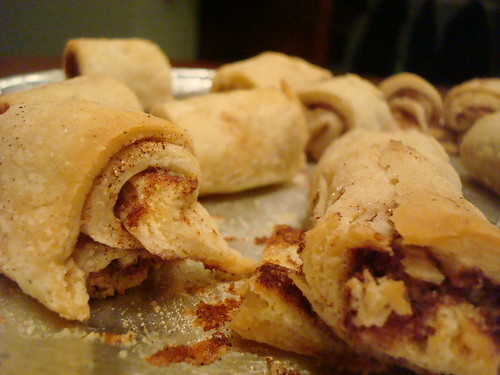
But, well, you'd be wrong. Because although we weren't going to turn away one of SpyMom's pies, what we really craved were the precious bits created with the leftover scraps of dough, which she'd polka-dot with butter then sprinkle with cinnamon and sugar and then roll into spirals, baking them in the residual heat of the oven and presenting them to her hungry masses under the name Roly Poly. 

I have no idea why SpyMom called them Roly Polies--she said that she had started making them because that's how she'd been taught to use the leftover pie dough from a neighbor, when she was a girl. It's likely owing to their short and squat nature. After all, when I just now looked up the definition of "roly-poly" in the dictionary (it was there!), it said "A short plump person or thing."

Making Pie crust with Spymom

I don't know how to scientifically explain how such a simple thing as coating pie crust with butter, cinnamon, and sugar creates a treat with an almost crack-like addictive quality. But just take a bite. You'll lose yourself in the gooey midsection of this pie crust cookie-treat, which is soft, but lightly salty, and gooey. You'll want more. I guarantee it.

And to prove it, I will present evidence of how beloved these treats have become in my family. No longer are they the way to use up leftover pie crust: my mom will actually make up an extra batch just to make roly polies.

Making Pie crust with Spymom

Me, I'm just as happy cutting simple strips. You can see for yourself the next time you've got some extra pie crust rolling around--but be warned, you may be setting yourself up for a lifetime of craving.

Roly Polies

Ingredients

  • Leftover pie crust
  • Butter
  • Cinnamon
  • Light or dark brown, or granulated sugar

Is your oven already heated? If not, preheat it to 400 degrees F.

Making Pie crust with Spymom

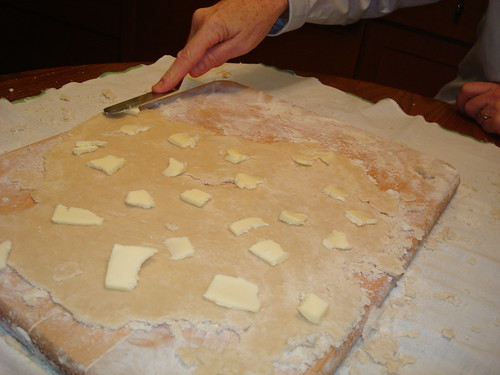
Dot the crust all over with butter. Making Pie crust with Spymom

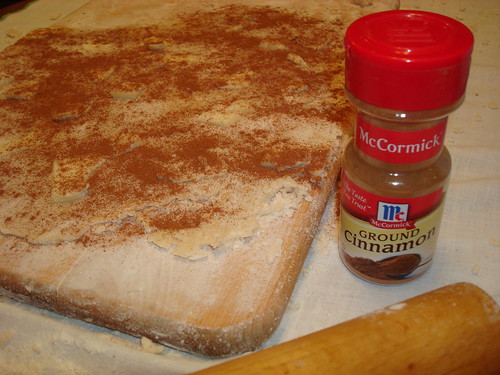
Now, coat it with cinnamon. If you want, give it a sprinkle of sugar, too. Making Pie crust with Spymom

Now, slice it into strips.

Making Pie crust with Spymom

And then roll them up.

Making Pie crust with Spymom

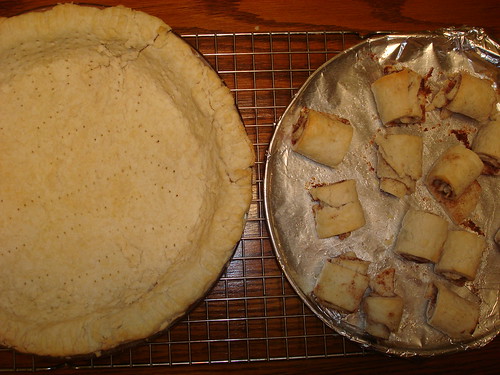
Place them on a greased baking sheet. Making Pie crust with Spymom

Bake for 5-10 minutes, or until golden.

Enjoy! Did you have any treats like this in your house while you were growing up?

Ingredient Availability Cake: Brown Sugar Congo Cake

Brown sugar congo cake

Something I really, truly love is the phenomenon of how recipes evolve over time. What makes a recipe change? I suppose a number of things play into it: modern tastes, ingredient availability, time constraints, technological advances. Sometimes all of these things. Sometimes just one. 

I bring this up because it's a very roundabout path that led me to sharing this cake recipe with you. 

Brown sugar congo cake

What happened first, many years ago, before I was a professional CakeSpy, was that a little boy brought Congo Bars (made by his mother perhaps) to a class event. A little girl who may have already taken a shine to the boy for SURE took a shine to these bars, and kept the recipe. When she went to college, she began baking, but the recipe changed because of her limited equipment and ingredients. One notable change, for the better, she thought, was swapping out vanilla for kahlua or Baileys or liqueur. It didn't hurt anything, she realized.

I'm not this girl, but I met her recently. She brought these Congo Bars to my book signing in Collegeville, PA, and was kind enough to share the recipe with me.

But then, the other day, when I pulled out the recipe, I realized there were several alterations I'd have to make. For one thing, the recipe didn't include how many eggs went into it, so I took a guess and decided on three, because I have a blondie recipe that has that many eggs. Why not?

Second, I realized that I only had one stick of butter; the recipe called for two. So I wondered...what would happen if I used half butter and half cream?

Brown sugar congo cake

Third, I decided that since I was messing with the formula anyhow, why not try making them more in the method of the Katharine Hepburn brownies from my book? So, I messed with the recipe again in that way.

The resulting recipe differed quite a bit from the delicious Congo Bars that were brought to the event, so I am going to save that recipe and share it with you another time. But I can say that while my result was very different, it was still pretty darned good. So here's the recipe as I made it, which I'll dub Brown Sugar Congo Cake.

Brown sugar congo cake

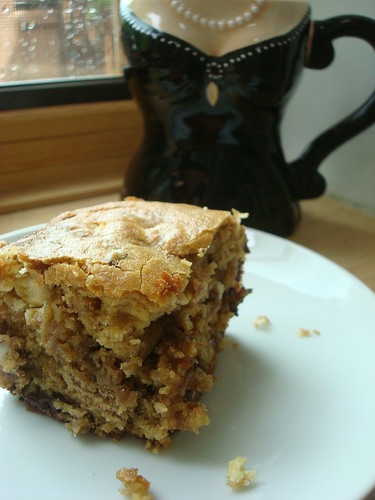
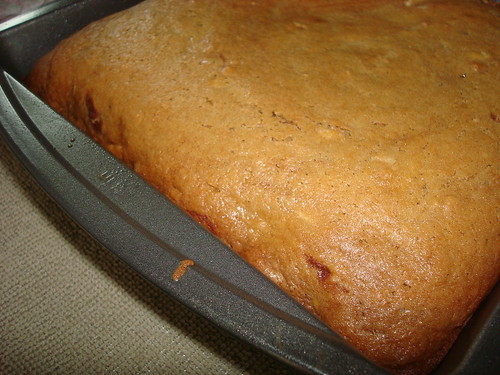
This light and fluffy cake is nicely chewy in the areas that have chocolate or gooey fillings, and it actually seems appropriate as a morning cake. I found it was especially lovely when topped with cream cheese or almond butter. 

Brown sugar congo cake

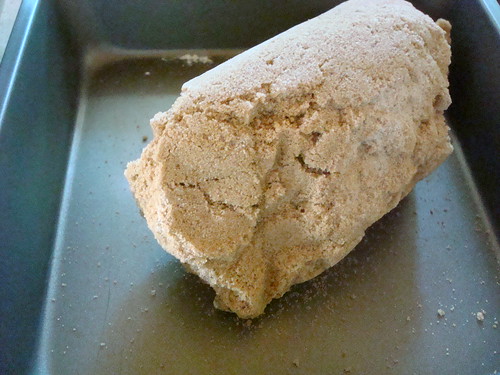
I should also tell you that the brown sugar I used was hard as a rock. But it wasn't a worry! All I did before making the recipe was heat the oven to 300, and then place the rock of brown sugar on a large plate and into the oven. After a few minutes the heat made it soften enough that I could break it up. Keep in mind, though, that this method must only be used pretty directly before baking, as the sugar will re-harden after an hour or so if not used. 

Brown sugar congo cake

Brown Sugar Congo Cake (Printable version here)

Makes 9 servings

Ingredients

  • 2 cups flour
  • 1 tsp baking powder
  • 1/4 tsp baking soda
  • a hefty pinch of salt
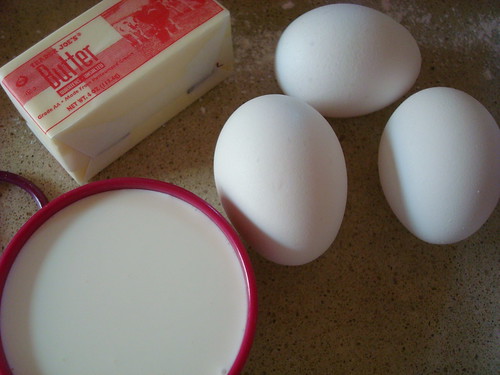
  • 1 stick butter
  • 1/2 cup heavy whipping cream
  • 2 cups brown sugar (light or dark. Your preference. I used light.)
  • 3 eggs
  • 2 tbsp. Coffee Liqueur or any liqueur that strikes your fancy.  
  • 12 oz chocolate chips or discs (semi-sweet)
  • 1/2 cup toasted sweetened shredded coconut
  • 1/2 cup toasted almonds
  • 1/2 cup toasted pecans

Procedure

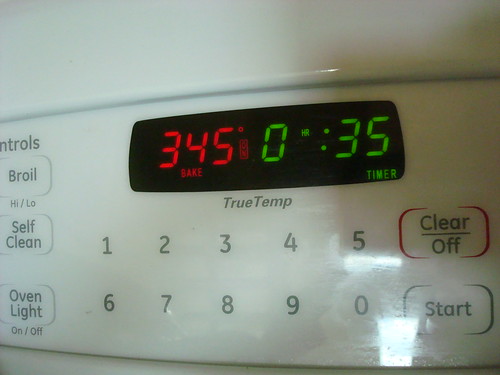
  1. Preheat your oven to 345 degrees (yep-- not 350).
  2. Brown sugar congo cake
  3. Sift together the dry ingredients; set to the side. Grease (with BUTTER) an 8x8-inch pan very well, especially the corners.
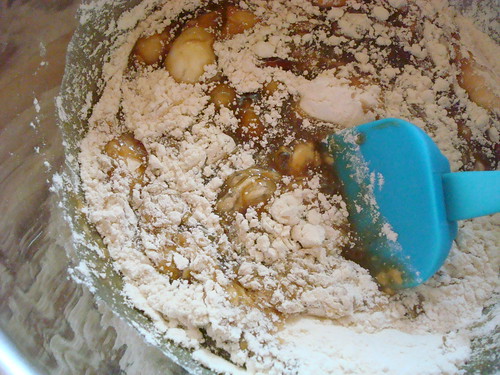
  4. In a large saucepan over medium-low, melt together the butter and cream, until the butter has completely disappeared. Add the brown sugar, stirring until completely dissolved into the mixture. Remove from heat.
  5. Add eggs, and mix until smooth. Add the dry ingredients in 3 batches.
  6. Brown sugar congo cake
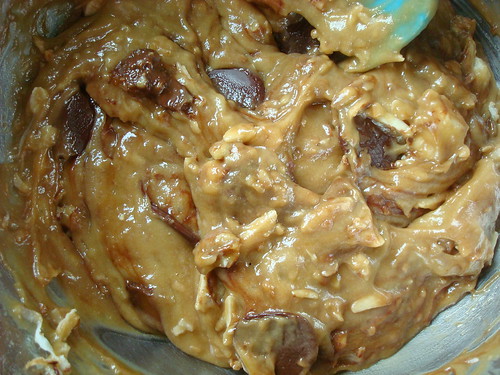
  7. Mix in chocolate chips and any other stuff you want to add.
  8. Brown sugar congo cake
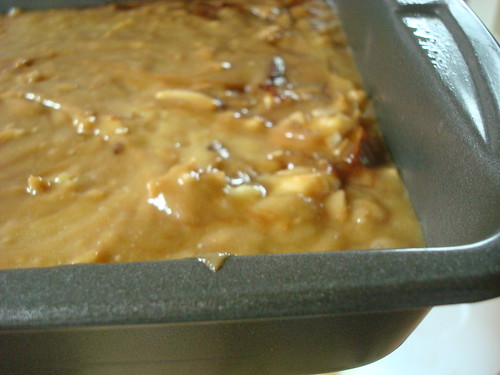
  9. Pour mixture into pan and spread evenly.
  10. Brown sugar congo cake
  11. Bake in your preheated oven for 30-35 minutes, or until golden on top and a cake tester comes out mostly clean.
  12. Brown sugar congo cake
  13. Remove from oven. Let them cool, and serve! Great in the morning with cream cheese or almond or peanut butter; great at night with ice cream. 

Sweet Finish: Dessert Croutons Recipe

Dessert Croutons

Recently, while making bread pudding, I found myself in posession of a unique problem: too many cubes of bread. The recipe I was using required about 5 cups of cubed day-old bread, and I had about 7 cups. It was a good bread, too: a loaf of Rubicon Bakery's cinnamon bread (something they make exclusively for Whole Foods, I just learned while looking at their website).
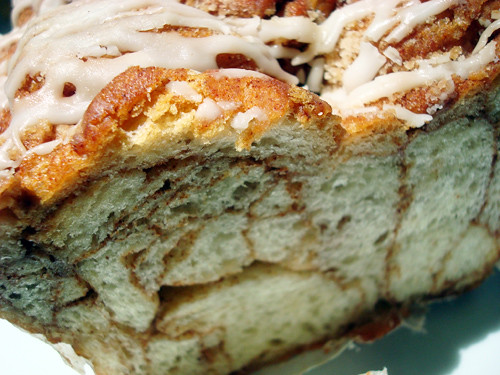
Homemade bread pudding

It's a very nice loaf of bread, so I didn't want to waste the cubes by throwing them out. But then again, it was too many cubes to use in the recipe...so what to do?
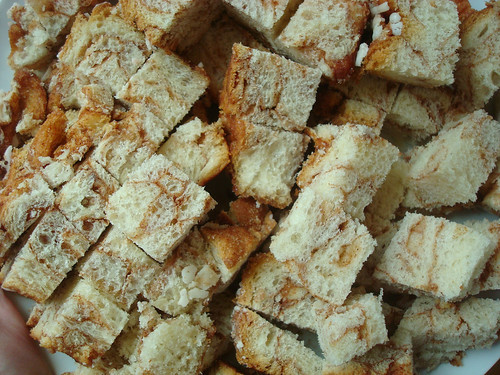
Homemade bread pudding

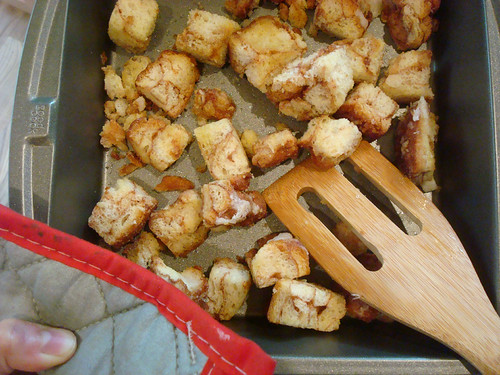
That's when it hit me. I would exactly what I would if it were a non-sweet bread: I'd make croutons. Only since this bread was already sweet, I wouldn't try to make them savory croutons for salads--I'd make them sweet croutons, for dessert toppings.

Dessert Croutons! Are you not shivering with sweet anticipation right now?

I looked at a homemade crouton recipe as a reference, and then set to tailoring the recipe to work as a sweet dish.

I was going to cover them with butter, but then I realized I had no butter. But I did have olive oil. I remember hearing a radio interview in which Alice Medrich gushes about the utter loveliness of olive oil on ice cream, so I thought...why not give this a try? If the dessert croutons are made with olive oil, maybe they'll work really nicely with ice cream. 

So, I preheated the oven then coated the cubes with some olive oil and gave them a gentle but thorough stir. Then, I dusted them with a little cinnamon sugar (why not?). 
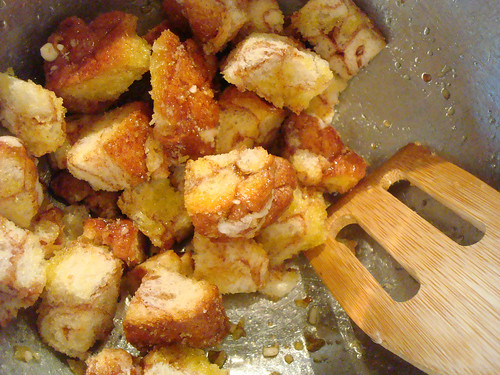
Dessert Croutons

Then, I put them in a pan.

Dessert Croutons

Then, I baked 'em up, pausing to flip them over after about 8 minutes.

At about 16 minutes, I took them out. I let them cool for a while, then broke out the ice cream.
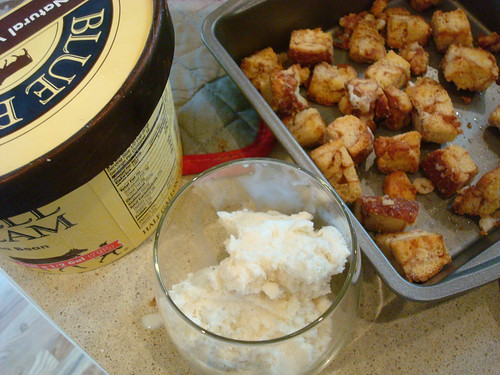
Dessert Croutons

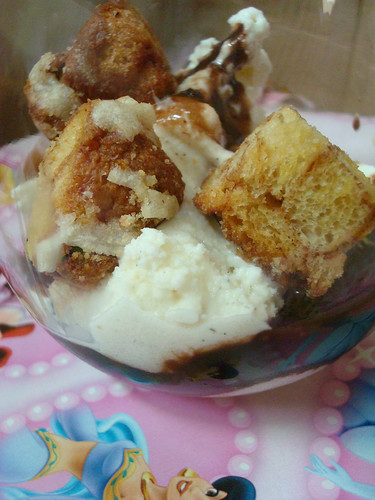
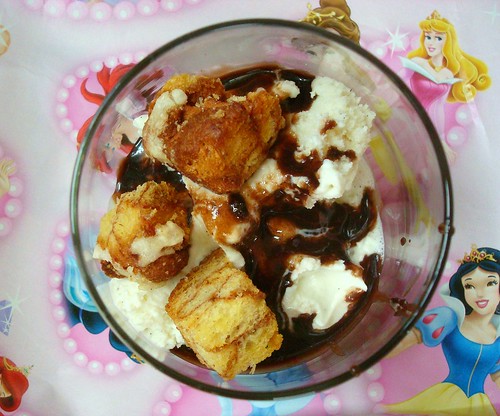
Wait...I think I'll add some chocolate sauce, too. That never hurts anything. Plus, I reasoned, it would add a color contrast and help the croutons stick for a nice photo. I am, after all, a food blogger.
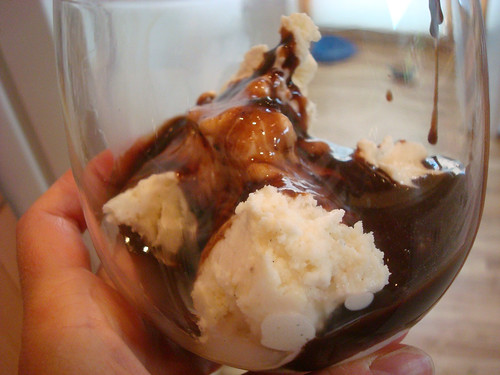
Dessert Croutons

Now let's add those croutons...

Dessert Croutons

YES! Just look at how the cinnamon swirl adds a pretty echoing color to the chocolate sauce. Look at how wonderfully golden and toasty they look. 

Upon tasing them, these croutons were proclaimed a rousing success. They're not as sweet as crumbled cookies or cake, but they act in the same manner as an ice cream topping: adding a little extra flavor and texture. The crunchiness was also more intense than that of a cookie or cake crumb, so it added a really nice contrast to the soft ice cream and chocolate sauce. The ideal moment was about 1/4 to 1/2 of the way in, when the croutons just started to become soft as they absorbed the ice cream and chocolate. Perfect. 
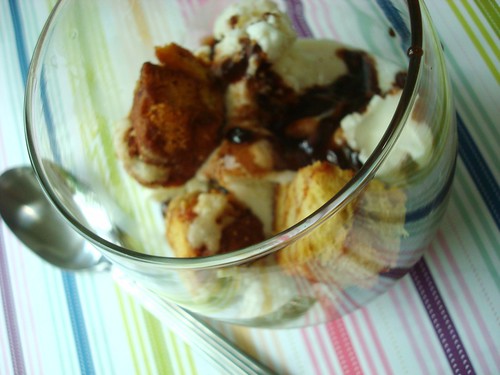
Dessert Croutons

The olive oil actually worked out excellently. It acted as a nice counterpart to the sweetness of the other toppings, and added a complexity to the other flavors--especially the chocolate. The glaze on the bread, too, contributed to the deliciousness: in the oven, it appeared to have melted into the bread, but upon crunching into one of the croutons, I learned that it actually formed a sort of sweet shellac all over them. It also made for a fascinating flavor combination with the olive oil.

While I am eager to try this again with butter, I have to say, I was really rewarded by the olive oil version. 
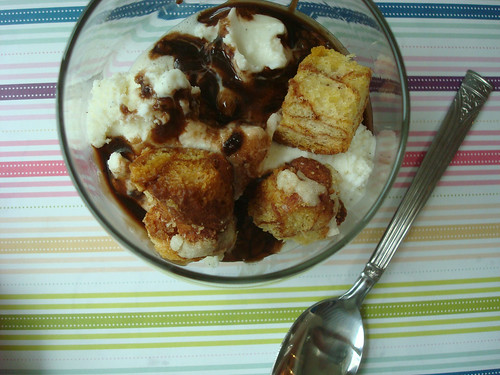
Dessert Croutons

Here's the recipe so you can try it out at home! Keep in mind since you're probably using this recipe with leftover bread, I am going to make it open ended for you. 

Dessert Croutons--a field guide (printable version here)

Ingredients

  • Cubed day old bread (at least a cup's worth, to make it worth your while)
  • Olive oil or melted butter--about 2 tablespoons per 1 cup of bread
  • Cinnamon and sugar, to taste 

Procedure

  1. Preheat the oven to 300 degrees F.
  2. While the oven preheats, put the cubed bread in a large bowl. Drizzle evenly with the olive oil or butter, stirring so that everything gets coated. You can add more if you feel that they're too dry. 
  3. Add cinnamon and sugar, if desired, and stir to coat.
  4. Transfer the cubes to a baking pan where they can lie in a single, flat layer. 
  5. Place in the preheated oven, and bake for anywhere between 15 and 25 minutes (it will vary depending on the bread you use). Turn the croutons about 8-10 minutes in, so that they will be browned evenly. You'll know they're done when they're golden and toasty.
  6. Remove from the oven and let cool before using. Store leftovers in an airtight container. They'll keep very well for a few weeks.

 

The Bake-Off is Coming: Toasted Coconut Cheesecake Parfaits

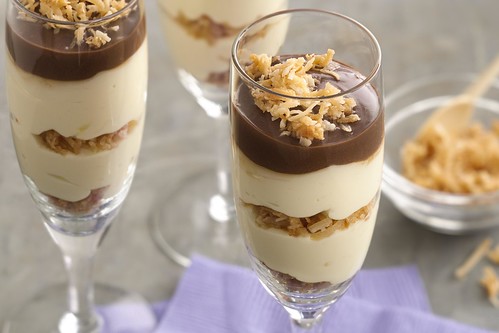
Bakeoff recipe - mini cheesecake parfaits

CakeSpy Note: OMG! The 46th Annual Pillsbury Bake-Off is coming! Since I so deeply loved attending the 45th Bake-Off, I thought I would get you excited early by sharing some of the finalists' recipes. Narrowed down from zillions of entries, I'll profile some of the 100 finalists--but of course, based on the subject matter of this site, I will focus on sweets! You can follow them by clicking the bakeoff tag below the post to see which ones have been posted so far. Enjoy! 

Hey! Did you know that today (July 28) is National Milk Chocolate Day? And Tuesday (July 30) is National Cheesecake Day? It's true. And it's a great day to enjoy these easy to prepare Toasted Coconut Cheesecake Parfaits, which, as the name might imply, are packed with tasty stuff--including milk chocolate frosting! Therefore, it's the perfect sweet to celebrate this extra special week. This recipe is from Bake-Off finalist Gloria Seymour of Rohnert Park, California.

Toasted Coconut Cheesecake Parfaits

Prep time 30 minutes - Total Time 1 hour, 30 minutes

Makes 12

  • 1 1/2 cups sweetened flaked coconut
  • 1 tablespoon Smucker's® Caramel Flavored Topping
  • 1/2 cup Pillsbury® Creamy Supreme® Milk Chocolate Frosting
  • 2 teaspoons brewed coffee, room temperature
  • 3 packages (8 oz each) cream cheese, softened
  • 1 can (14 oz) Eagle Brand® Sweetened Condensed Milk
  • 2 tablespoons vanilla instant pudding and pie filling mix (from 4-serving size box)

Procedure

  1. Heat oven to 350°F.
  2. Spread 1 cup of the coconut in ungreased shallow pan. Bake 5 to 7 minutes, stirring occasionally, until golden brown. Cool 15 minutes.
  3. In small bowl, mix toasted coconut and caramel topping. Meanwhile, in small microwavable bowl, microwave frosting on High 15 seconds or until smooth and creamy. Stir in coffee until well blended. Set aside.
  4. In large bowl, beat cream cheese with electric mixer on medium speed until fluffy. Gradually beat in sweetened condensed milk, scraping bowl occasionally until smooth. Add remaining 1/2 cup coconut and pudding mix; beat on low speed until well blended.
  5. To assemble, spoon 1 1/2 teaspoons of the toasted coconut mixture into each of 12 (4 oz) glasses. Top with 3 tablespoons of the coconut cream cheese mixture, 1 teaspoon of the toasted coconut mixture and remaining coconut cream cheese mixture. Top each with about 2 teaspoons frosting mixture; sprinkle with remaining toasted coconut mixture. Refrigerate 1 hour. Store in refrigerator.

The Bake-Off is Coming: Red White and Blue Dessert Tacos

Dessert tacos

CakeSpy Note: OMG! The 46th Annual Pillsbury Bake-Off is coming! Since I so deeply loved attending the 45th Bake-Off, I thought I would get you excited early by sharing some of the finalists' recipes. Narrowed down from zillions of entries, I'll profile some of the 100 finalists--but of course, based on the subject matter of this site, I will focus on sweets! You can follow them by clicking the bakeoff tag below the post to see which ones have been posted so far. Enjoy! 

The first recipe I'll feature? A wonderful one: Red, White, and Blue Dessert Tacos. Created by Charlotte Giltner of Mesa, AZ, all you have to do is "Fold flaky biscuits around whipped cream and berries to create a taco-inspired dessert." Easy and sweet! Here's the recipe.

Red, White, and Blue Dessert Tacos

Total time: 30 minutes

8 servings

  • 2 cups sliced fresh strawberries
  • 1cup fresh blueberries
  • 2/3 cups sugar
  • 1 cup whipping cream
  • 1 can Pillsbury® Grands!® Flaky Layers refrigerated Butter Tastin'® biscuits
  • 2 tablespoons Pillsbury BEST® All Purpose Flour
  • 1/4cup Crisco® Pure Vegetable Oil


  1. In medium bowl, gently mix strawberries, blueberries and 4 tablespoons of the sugar. Cover; refrigerate, stirring occasionally.
  2. In small bowl, beat whipping cream with electric mixer on low speed until slightly thickened. Increase speed to medium. Slowly add 2 tablespoons of the sugar, beating until stiff peaks form. Cover; refrigerate.
  3. Separate dough into 8 biscuits. Sprinkle flour on work surface; press or roll each biscuit into 6-inch round.
  4. In 12-inch skillet, heat 2 tablespoons of the oil over medium-high heat. Add 2 biscuit rounds to skillet; cook 30 seconds to 1 minute on each side or until light golden brown. Repeat with remaining biscuit rounds, adding more oil as needed. Drain on paper towels. Sprinkle one side of the biscuit rounds with the remaining 4 tablespoons sugar.
  5. With slotted spoon, spoon 1/3 cup fruit mixture lengthwise in middle of unsugared side of each biscuit round. Spoon rounded 1/4 cup whipped cream along outside edge of fruit; fold biscuit round over to form taco. Serve immediately.

For more Bake-Off fun, visit the official website.

The Story of Animal Crackers

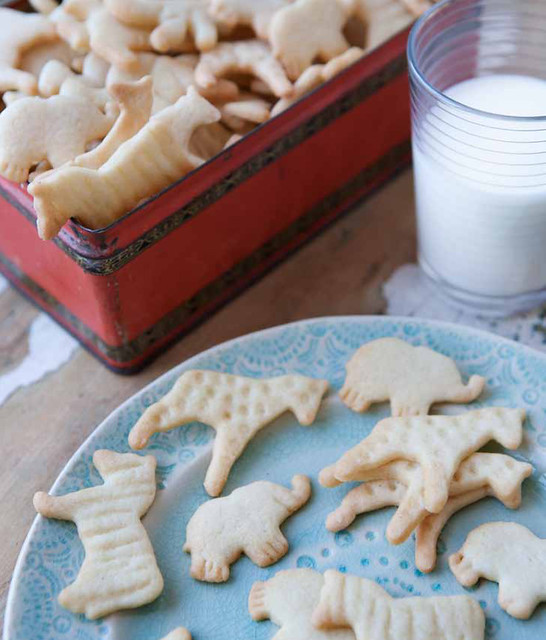
Animal crackers

CakeSpy Note: Sometimes, I like doing sweet things for you, readers. And so I decided to share an inside look at one of my favorite stories--and recipes!--from my new book, The Secret Lives of Baked Goods: Sweet Stories & Recipes for America's Favorite Desserts. This tale is all about animal crackers. Enjoy! 

“Animal crackers and cocoa to drink that is the finest of suppers I think; when I am grown up and have what I please I think I shall always insist upon these.”

—Actor and writer Christopher Morley

Everyone loves those curious animal-shaped cookies that pack a crunch and are called “crackers.” But how is it that these proud little animals began marching their way into our mouths and hearts?

Well. The custom of crafting cookies that resemble creatures is nothing new— as early as the 1600s in Germany, bakers were making sweet treats resembling savage beasts. But it wasn’t until the 1800s that the wheels began to turn, set- ting off the chain reaction that made these sweet crackers a snacking staple. For this we owe a thank-you to the industrial revolution: that’s when biscuits, cookies, and crackers began to be manufactured in factories.

In Victorian England, “crisp biscuits”—that’s sweet, cracker-like cookies, to Americans— were very popular. Some of these biscuits were shaped like animals. A hint of things to come was evident when Zoologicals, animal-shaped cook- ies made by Philadelphia baker Walter G. Wilson, were sold at the Centennial Exposition of 1876—the first world’s fair in America. (This pivotal event yielded many innovations, including the introduction of the Dewey Decimal system, the ice cream soda, and the grand debut of the Statue of Liberty’s torch, before it was affixed to the rest of her body in New York City.)

After acquiring two New York City bakeries that produced animal-shaped biscuits, the National Biscuit Company (later Nabisco) began producing animal-shaped biscuits on a commercial scale which allowed for widespread distribution.

Animal Crackers

Serendipitously, this timing coincided with P. T. Barnum’s growing reputation as an international showman and circus owner. Perhaps sensing a sales opportunity, several companies had begun marketing foods of all sorts with circus-themed packaging, and these biscuits were a natural tie-in. The National Biscuit Company did it most famously, with their 1902 debut of the animal-shaped crackers. Marketed as a specialty holiday item, they were sold in a small box resembling a circus cage with a handle at the top, for displaying as an ornament.

The crackers proved so popular that they were soon being produced year-round, the ornament string promoted as an easy way for children to transport the cookies. In 1948, they were renamed Barnum’s Animal Crackers, which is what they’re still called today. But for all the glittering success of the Barnum associa- tion, the circus man did not receive payment for the use of his name: according to an article in the Washington Post, he never got a cent for the crackers.

Ready for a recipe? Here's an adaptation of the one in the book. For more sweet stories and recipes, buy the book: The Secret Lives of Baked Goods: Sweet Stories & Recipes for America's Favorite Desserts.

Homemade Animal Crackers (Printable version here)

Makes about 6 dozen

Ingredients

  • 2 1⁄2 cups all-purpose flour
  • 1⁄4 teaspoon salt
  • 1 teaspoon baking powder
  • 1⁄8 teaspoon cinnamon
  • 3⁄4 cup (1 1⁄2 sticks) unsalted butter, softened to cool room temperature
  • 1 cup sugar
  • 1 egg
  • 1 1⁄2 teaspoons vanilla extract

Procedure

  1. In a medium bowl, stir together the flour, baking powder, salt, and cinnamon. Set aside.
  2. In the bowl of a stand mixer fitted with the paddle attachment, cream the butter and sugar on medium speed until light and fluffy, 3 to 5 minutes. Add the egg and vanilla, stirring until combined.
  3. Add the flour mixture in 3 additions, mixing after each addition just until incorporated. Scrape down the sides of the bowl as needed.
  4. Form the dough into 2 disks and wrap well with plastic; refrigerate for at least 2 hours or overnight. Chilling the dough will ensure that the shapes hold once cut out and that the dough will not spread too much during baking.
  5. Preheat the oven to 350 degrees F. Line 2 baking sheets with parchment paper and set aside.
  6. Allow the cookie dough to warm slightly at room temperature before rolling it. On a floured work surface, use a floured rolling pin to roll the dough to about 1⁄4 inch thick. Use small animal-shaped cut- ters to cut the dough (of course, other small cutters will work, too). Using a metal spatula, transfer the cookies to the prepared baking sheets. Gather up the dough scraps and re-roll to make more cookies. Leave a small amount of room around each cookie to allow for spreading. If desired, you can use toothpicks to enhance the details on the animals, or add faces.
  7. Let the cookies chill (on the baking sheets) in the refrigerator for 30 minutes before baking. This will ensure even further that the dough retains any details you’ve added.
  8. Bake for 12 to 15 minutes ,or until firm, just lightly brown on the edges, and with a dull finish on top. Let cool on the pan for several minutes, then transfer to a flat surface (they may fall through a wire rack) to cool completely. Store the cookies in an airtight container for up to 7 days.

And in closing:

Per Panati's Extraordinary Origins of Everyday Things, children across America tend to “nibble away at the animals in definite order of dismem- berment: back legs, forelegs, head, and lastly the body.”

Taste of Summer: Cherry Pie Shortbread Bars

Cherry pie shortbread bars

Confession: I love cherries, but I do not love cherry pie. I can't tell you why. Maybe because it tastes like health food to me? 

But, you know, I believe that every now and again it's worth taking a moment to re-evaluate your likes and dislikes. Like, do you actually despise cherry pie, CakeSpy? Or is it a notion that you have about yourself that you haven't bothered to challenge for a while? 

I figured that if there was going to be a way to make cherry pie into something loveable for me, I figured that adding shortbread probably be a good place to start.

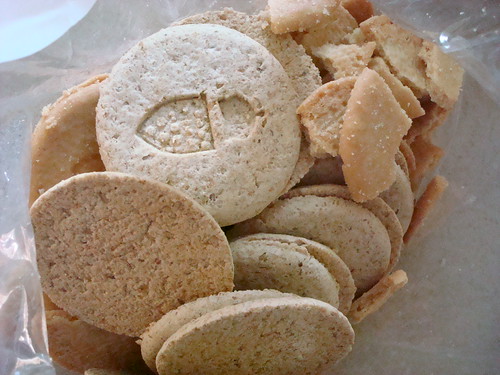
Biscuits

Basically, I altered a cherry pie recipe into one for bar cookies. I swapped the typical pie crust for a pressed crust of mashed shortbread, and then topped the crust layer with a fairly classic cherry pie filling. I baked for the same amount of time specified in the recipe, and hoped for the best.

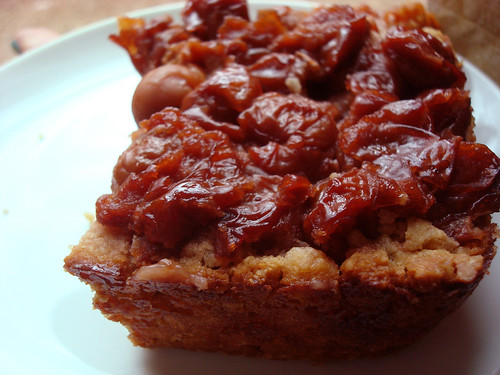
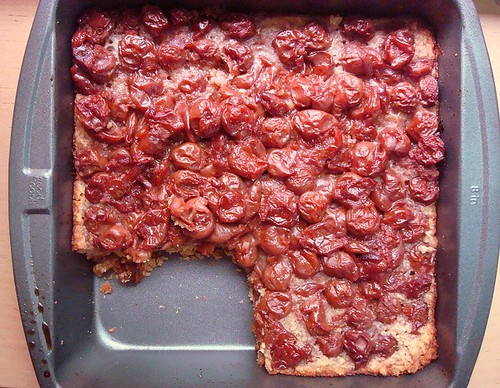
But oh, oh, oh! They turned out even better than I thought.

Cherry Pie Shortbread bars

For one thing, they sliced cleanly and beautifully, even while still warm (who can wait til it cools entirely?). For another, the tart cherries I used were wonderful--not overly sweet, and beautifully paired with the slightly oaty shortbread I used--they almost tasted like cherry pie mashed together with an oatmeal cookie (no raisins!). 

Cherry pie shortbread bars

They made for a true taste of summer: tart and sweet and refreshing, but that shortbread and butter crust kept it firmly in dessert, and definitely not health food, territory.

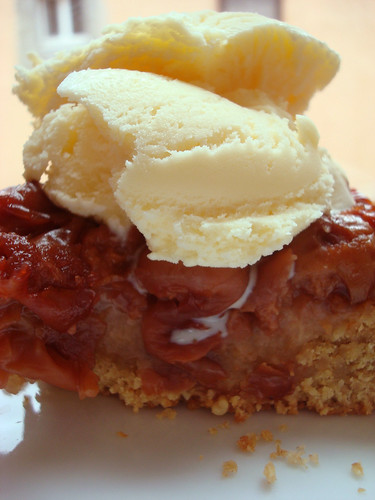
Oh, and in case you're wondering if they go well with ice cream...don't be stupid. Of course they do!

Cherry Pie Shortbread bars

A fantastic recipe to try!

Cherry Pie Shortbread Bars (Printable version here!)

For the crust

  • 2 boxes Duchy Shortbread (I used one box of the plain butter kind, and one box of the "Oaten Biscuits")
  • 2 tablespoons melted butter

For the topping


  • 2 cups pitted sour cherries  
  • 1 cup white sugar 
  • 1/3 cup cornstarch 
  • 1 tablespoon butter 
  • 1 teaspoon vanilla extract

Procedure

  1. Preheat oven to 375 degrees F.
  2. Mix together the crushed cookies and butter; press into a well greased 8-inch square pan. Set aside.
  3. Place the cherries, sugar, and cornstarch in a medium-sized non-aluminum saucepan. Allow the mixture to stand for 10 minutes, or until the sugar draws out the cherries' juices. Bring to a boil over medium heat, stirring constantly. Lower the heat; simmer for 1 minute, or until the juices thicken and become translucent. Remove pan from heat, and stir in butter and vanilla. Allow the filling to cool to lukewarm.
  4.  Pour the filling on top of the crust. Bake in a preheated 375 degree F oven on the baking tray for 45 to 55 minutes, or until the crust is golden brown. Allow to cool for several hours before slicing.