It's Not My Birthday: Marvelous Marble Swirl Cake Recipe

Taste of home cake

I understand that sometimes you want a pinkies-out, delicate and beautiful dessert.

And other times...you just wanna stuff your face with cake.

A week or so ago, I was having one of those days. And almost as if it was a sign from the heavens, I opened up Taste of Home Magazine--you know, to gaze at the feature which included my mini pies. Here I am with the spread:

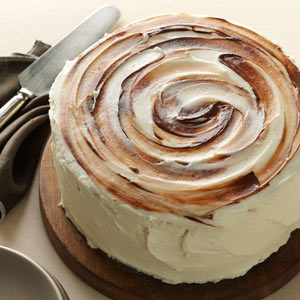
Listen. The cake in the magazine looked like this.

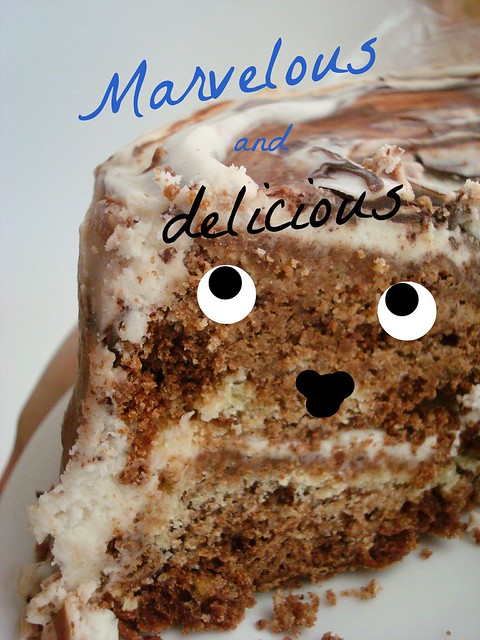
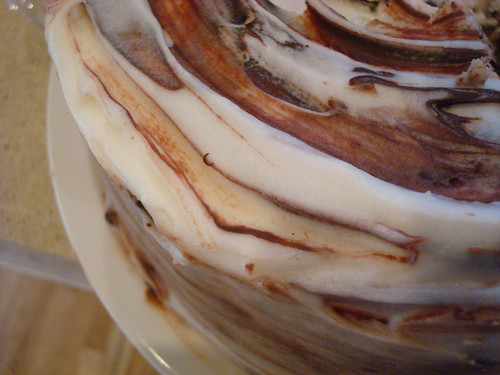
I am not a photographer...but here is mine.

Taste of home cake

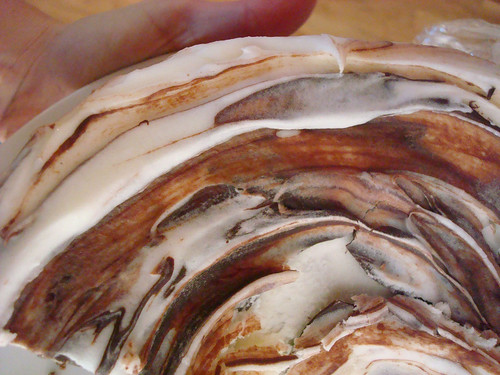
The photos in this post prove that. But I hope that my words can convince you that in spite of the "not ultra pinnable" images, this cake is worth giving a try. Because gosh-darn was it good. It is such a rich cake that I am honest, a slice will do it for you. It's almost like the cake part of a crumb cake, swirled with chocolate. So buttery, so creamy.

And then, the frosting. I sort of improvised with it, and decided to try a sort of sour cream frosting. It was a good decision--the slight tang of the frosting worked so beautifully with the rich cake. The overall result was richer than a king's ransom, and far tastier. 

The decorating was fun, too. Swirling chocolate in the frosting was surprisingly easy, and looked pretty. It also gave a wonderful flavor contrast, adding a solid, dark undertone to go with the sweet and buttery stuff.

Please, please tell me you'll try this cake. It's like having your birthday again, no matter what day of the year. 

Taste of home cake

Marvelous Marble Swirl Cake

Adapted from Taste of Home

For the cake

  • 4 ounces bittersweet chocolate, chopped
  • 1 tablespoons, plus 1 1/4 cups butter, softened, divided
  • 2 cups sugar
  • 5 eggs
  • 3 teaspoons vanilla extract
  • 2 1/4 cups all purpose flour
  • 2 teaspoons baking powder
  • 1/2 teaspoon salt
  • 1/2 cup sour cream
  • 1/2 cup chocolate chips

Frosting

  • 3/4 cup sour cream
  • 6 3/4 cup confectioners' sugar
  • 2 teaspoons vanilla
  • some milk on hand, to thin if needed
  • 2 tablespoons chocolate chips

Procedure

  1. In a metal bowl over barely simmering water, melt the chocolate and 3 tablespoons of butter; stir until smooth. Cool to room temperature.
  2. Meanwhile, preheat the oven to 375 F. Line the bottoms of two 8-inch round baking pans with parchment paper; grease the paper, too.
  3. In a bowl, cream the remaining butter with the sugar until light and fluffy. Add eggs, one at a time, beating well after each addition. Beat in the vanilla. In another bowl, whisk flour, baking powder, and salt; add to creamed mixture alternately with the sour cream, beating well after each addition.
  4. Remove 2 cups batter to a small bowl; stir in cooled chocolate mixture. Drop plain and chocolate batters by tablespoonfuls into the prepared pans, dividing the batter between the pans. 
  5. Bake for 20 to 30 minutes, or until a toothpick inserted in the center comes out clean. Cool in the pans 10 minutes before removing to wire racks. Peel off the parchment, and let cool completely.
  6. When you have a feeling the the cake will be cool soon, begin on the frosting. In a large bowl, cream the sour cream with the confectioners' sugar until nice and smooth but thick. If it gets too thick and stiff, add the milk as needed to thin. 
  7. If the cakes have rounded tops, level them with a serrated knife. 
  8. Place one cake layer on a serving plate; spread with 3/4 cup frosting.
  9. Top with remaining cake layer. Apply a thin crumb coat and let chill for 20 minutes to lightly set. 
  10. Now, put a nice dollop on the top of the cake. Drop the remaining chocolate on top, and spread the frosting in a circle so that it is woven with chocolate, too. Yum.
  11. Ice the sides with the remaining (plain) frosting. 

Enjoy.

Simple and Sweet: Homemade Vanilla Pudding

Pudding

What in the world do you do after you've just made Pavlova and find yourself with four unused egg yolks?

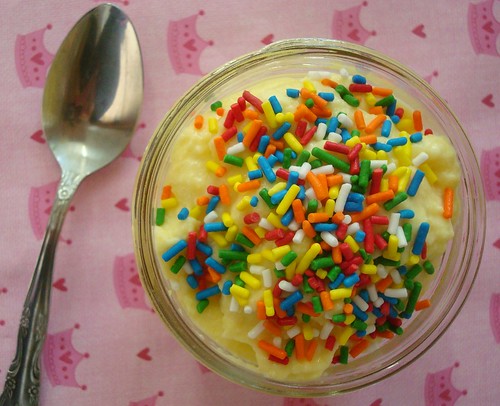
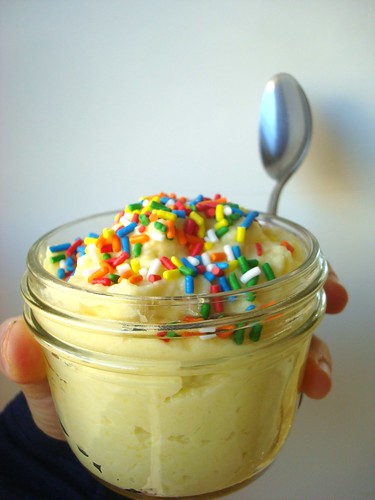
Here's an idea: you make pudding. Delicious, rich, not low-fat pudding. And you top it with sprinkles, as above. And you think to yourself, "why isn't topping pudding with sprinkles a thing?". Seriously, why not?

Why don't people put sprinkles on pudding?

Pudding

But anyway, back to the pudding. I did find myself with a few extra yolks, so I decided to pudding it up. I adapted a recipe by Baking Bites, but made it eggier with one extra yolk and didn't fuss with a vanilla bean this time (I wanted this to be quick, after all). 

The pudding came out unbelievably rich, and was especially pleasant served warm. Custardy and comforting and cozy. 

About pudding...
It makes me wonder: what are your thoughts on pudding? I used to be bored by it, but I guess you could say I have a somewhat newfound appreciation. It's so simple, but is capable of being so comforting, hitting the spot in a way that isn't as assertively sweet and cold and creamy as ice cream, but is more satisfying, sweet-wise, than yogurt.

As I made the pudding, there were little flecks that remained when I tempered the eggs. I had a few spoonfuls and thought "meh, it tastes fine".

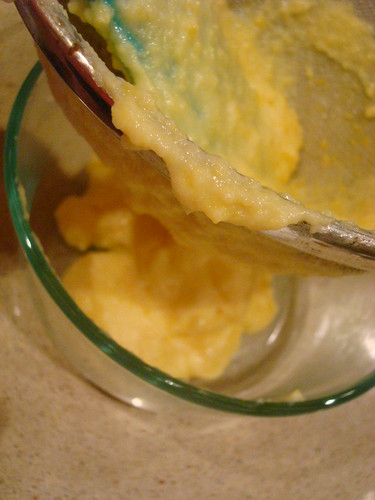
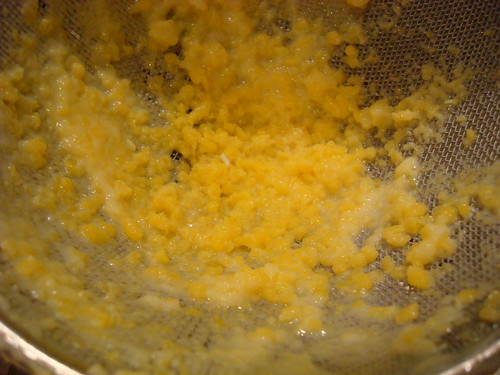
But then, just as I am thinking, these little bumps are not a big deal, a thought crystallizes in my mind about what they actually are: eggy bits. Instantly, I can't get past it. Eggy bits, outta my pudding!  Luckily, there is a solution. Press the pudding through a mesh strainer. Push with the back of a spoon or a spatula. Strainer

The pudding will strain through with minimal eggy bits, which will all form a deposit on the inside of the strainer. That's right: stay outta my pudding! Down the disposal with you lumps.

Vanilla Pudding

Makes 2 or 3 servings

  • 2 teaspoons good quality vanilla extract
  • 2 1/2 cups whole milk
  • 1/2 cup sugar
  • 3 large egg yolks
  • 2 tablespoons cornstarch
  • 1/4 tsp salt

Ingredients

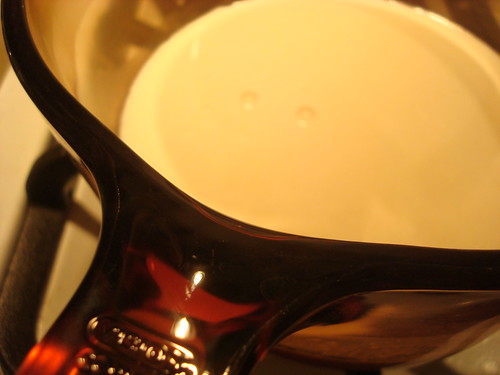
  1. In a medium saucepan, combine the vanilla, milk, and sugar. Bring to a low boil. Remove from heat.
  2. Boil
  3. Now, whisk together the yolks, cornstarch, and salt in a medium bowl.
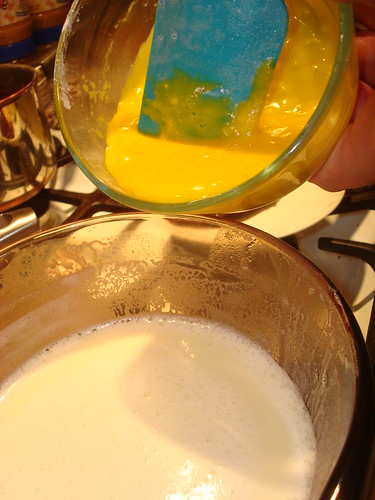
  4. Whisking constantly, pour this into the hot milk mixture in the saucepan.
  5. Incorporate
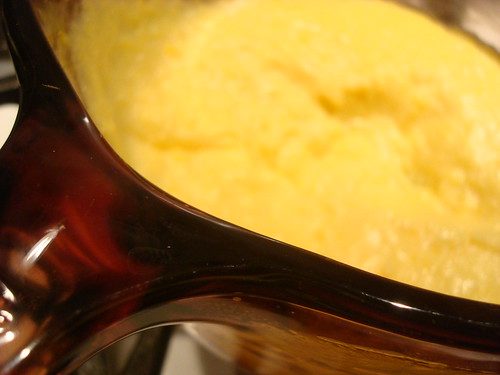
  6. Put the saucepan back on heat, and cook on medium heat until it comes to a simmer, stirring frequently with a rubber spatula. Cook for 2-3 minutes at a simmer, or until the pudding thickens. Remove from heat. Pudding 
  7. If there are eggy bits, strain the mixture through a mesh strainer to remove them. Eggy bits
  8. Place in serving dishes. It tastes best served warm, in my opinion. 


Have you ever made pudding at home?

Baker's Dozen: 13 Quick and Easy Christmas Cookies

Look, I'm not going to judge you for waiting til right now to start your Christmas cookie baking. I understand that stuff happens.

What I want to do is enable you to make delicious magic for yourself and all your friends, so I have assembled this list of 13 easy, quick, and highly delicious Christmas cookies. You might not be able to make all of them, but at least choose a couple! 

1. Snowballs: no matter what you wanna call them, they're an easy, classic, and best of all, crowd-pleasing cookie.

2. Nanaimo bars: Seriously. I can't believe you haven't made these yet!

3. Gingerbread Nanaimo bars: the aforementioned everyday classic gets a holiday makeover. Yum!

4. Pistachio cookies: a personal favorite of mine, and a "lost" recipe I revived from family archives.

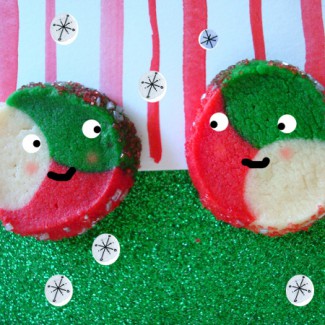
5. Christmas Kaleidoscope cookies: Taste the rainbow...or, you know, many holiday hues at once.

6. Berlinerkranser: I believe the official translation is "highly tasty cookie".

7. Gingerbread men: or, make them look like characters from a TV show: Gingerbread Mad Men!

8. Candy cane cookies: This is such a nostalgic cookie - give it a try if you've never made them.

9. Jam thumbprints: another classic, these ones are bound to please a crowd. Nutty and with a touch of fruit from the jam, so that means they're health food.

10. Mint candy butter cookies: Great for cookie swaps, or just stuffing in your mouth (let's be honest).

11. Eggnog Nanaimo bars! Seriously. A great accompaniment when you're sloggin' some nog.

12. Baby buche de noel cookies: not to who off, BUT, I contributed this adorable recipe to Food and Wine.

13. Red and green christmas cookies: like black and white cookies...but green and red! Festive!

While you're baking, kill time waiting for cookies to bake by reading about the first published Christmas cookie recipe in America, and the history of the tradition of Christmas cookies.

Season's sweetings! 

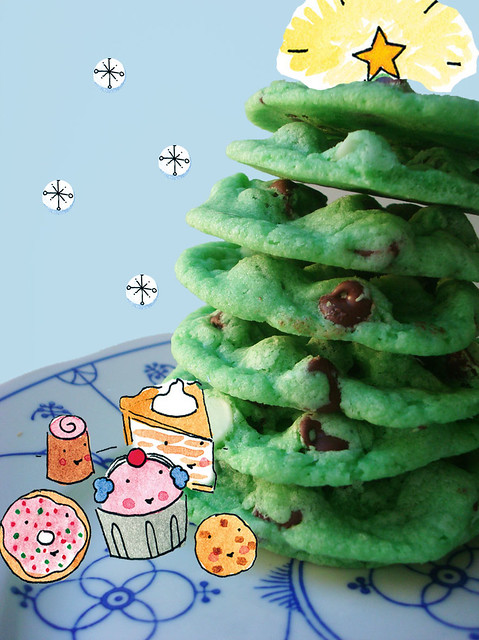
Tubular: Easy Mint Chocolate Chip Cookies Using Refrigerated Sugar Cookie Dough

Cookie tree

Somehow, it's happened: you find yourself in need of a batch of homemade cookies, STAT. It might be for the cookie swap you thought was tomorrow, not today, or the school party you totally forgot, or maybe you just want to whip up something sweet in record time.

Green cookies

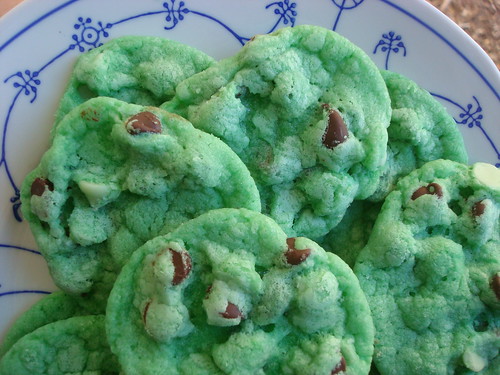
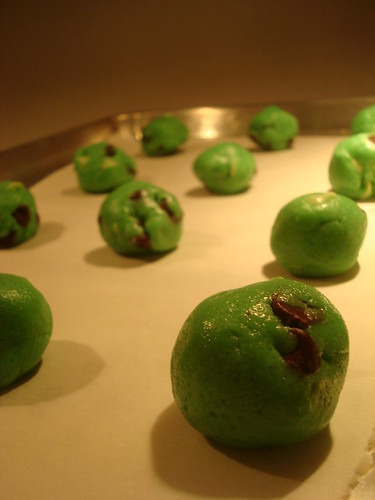
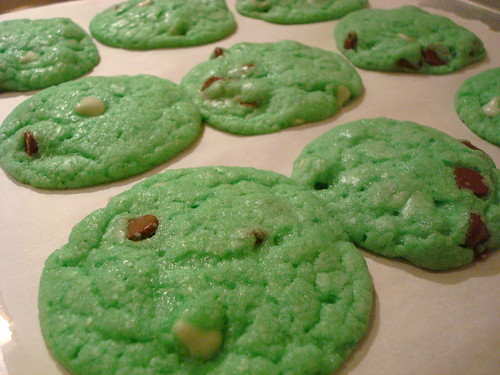
As these cookies prove, a time crunch need not mean that you sacrifice all the fun of baking--they are actually made from "doctored" refrigerated sugar cookie dough. They're assembled in less than five minutes and baked in about 10 minutes--even with cooling time, the process of going from mere ingredients to "let's party" all happens in about 30 minutes. 

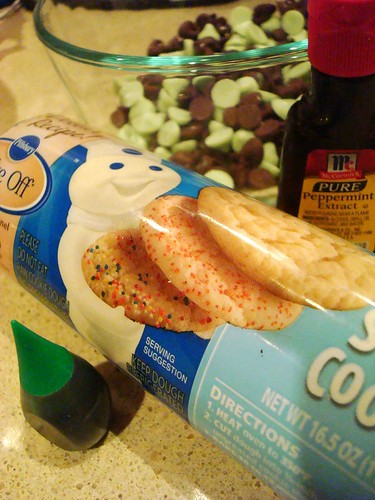
ALL YOU NEED:

Green cookies

All you have to do? Mix that dough with mint and chocolate chips (they're easily found in the baking aisle this time of year), a teaspoon of peppermint extract and maybe a few drops of green food coloring. Roll into balls and bake as specified on the package. They bake up like a minty, buttery, sweet Christmas miracle!

Mint Chocolate Chip Cookies Using Refrigerated Sugar Cookie Dough

Makes about 24

  • 1 tube refrigerated sugar cookie dough
  • 1 teaspoon peppermint extract
  • 1 cup mint and chocolate chips, mixed together
  • 4-5 drops green food coloring

Preheat the oven to 350 degrees F. Line two baking sheets with parchment paper.

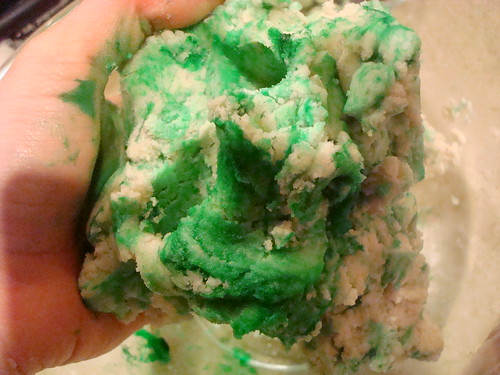
In a large bowl, break up the refrigerated cookie dough by hand. Add the food coloring and peppermint extract. Combine well.

Make them green

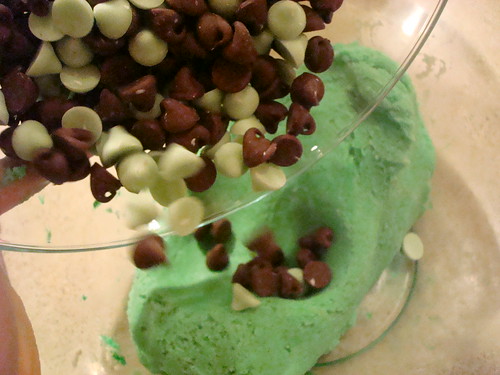
Add the morsels, mixing by hand to knead them evenly but gently throughout the dough.

Green cookies

Divide the dough into 24 equal parts. (First divide in two, then those two pieces into two to make four, then break each of those parts into three pieces, then divide those in two. You'll have 24. Don't get confused.)

Roll each piece into a ball and place on the baking sheet, well spaced. Green cookies

Bake for 8-11 minutes, or until soft in the center but lightly browned on the edges. I don't know how to say it other than this, but the middles might not look 100 percent set. They will bake a touch more when you remove the cookies, though, so it's ok.

Green cookies

Note: At this point, instead of baking, you can freeze the dough balls on the sheets if you prefer not to bake right now (if you want to do it in the morning, say). Just don't forget to turn off the oven and remember to preheat it again before you bake. 

Let the cookies cool on the sheets for 6 minutes before transferring to a wire rack to cool completely. Use a spatula for the transfer; if the cookies seem too soft, wait another minute or two before transferring.

Mon petit Cherry: The Most Amazingly Delicious Cherry Buttercream

Cherry buttercream

I have a deep-seeded belief that among cake lovers, there are two types.

There's the type of cake lover who deeply loves and appreciates the cake. These people have a high appreciation for a tender crumb, and know that a fine cake doesn't need frosting.

Personally, I have no idea what is wrong with that sort of cake lover. I'm part of the other type: Team Frosting! Members of team frosting think that cake is great, but its primary function is delivery vehicle for all that delicious, creamy frosting. 

That having been said, I would like to introduce you to the new buttercream that has me wondering if I can invent a sort of IV drip so as to just keep a constant stream of this coming into my body.

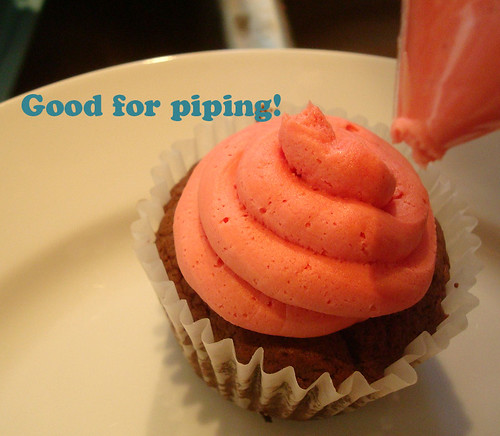
It's cherry buttercream, but don't worry, it's not made with health food. It's made with cherry morsels. 


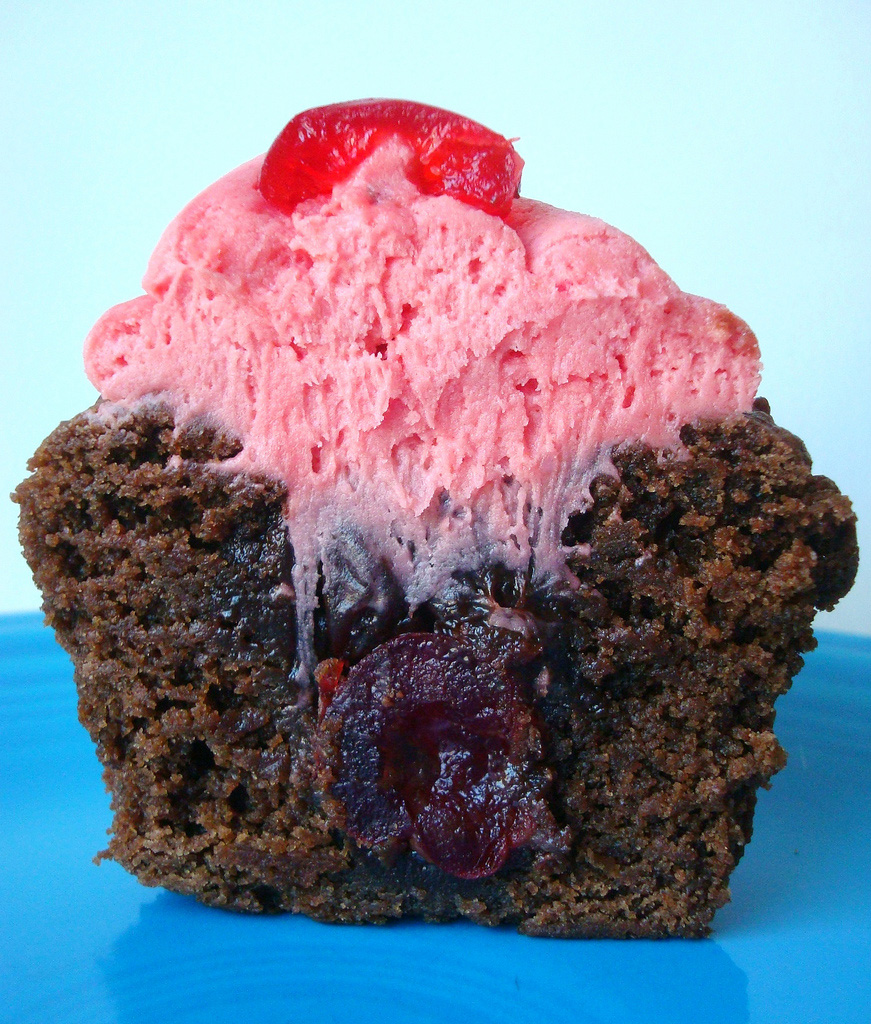
Chocolate covered cherry stuffed cupcakes

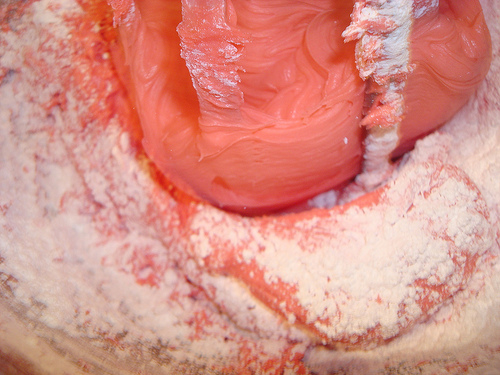
I know! Cherry morsels! They carry them at the Albertson's near where I'm living right now. I think they're the bee's knees. And they tint the buttercream pink with no additional food coloring needed!

I got a bee in my bonnet to create a cherry buttercream for a very exciting recipe I'll be sharing soon on Craftsy, and I'm proud to give you a sneak peek (just the buttercream, you'll have to wait for the entire package!). It's a good piping buttercream, too.

Cherry buttercream


Here is my recipe for cherry buttercream. I could eat it by the spoonful, and think that if you don't happen to have a fine cake on hand, you might find that you can do the same.

Cherry Buttercream

Makes a big bowl (enough for a batch of cupcakes or to frost a two layer cake)

  • 12 ounces (1 bag) cherry morsels
  • 1 stick unsalted butter
  • 1 brick (8 ounces) cream cheese, softened to cool room temperature- not low fat
  • pinch of salt (optional)
  • 4 cups (give or take) confectioners' sugar, sifted

Procedure


  1. In a double boiler (or carefully over low heat) melt the morsels with the stick of butter. It goes quicker if you cut the butter in pieces, FYI. This mixture will look ugly and weird, but it will all come together in the next step.
  2. Remove from heat once melted, and let it mellow out on a cool surface while you cream the heck out of your cream cheese in a stand mixer, beating until nice and fluffy and smooth--5 to 7 minutes.
  3. Add the morsel and butter mixture. Heck, add a pinch of salt if you want. Stir until combined.
  4. Now, with the mixer on low, add in the confectioners' sugar, one cup at a time, until your desired spreading or piping consistency has been achieved.


Are you team cake or team frosting?

Best Gift Ever: Chocolate Spoons With a Dollop of Cookie Dough

Happy Holidaze, sweeties! Here's a wonderful guest post from Heather Saffer, also known as the author of The Dollop Book of Frosting: Sweet and Savory Icings, Spreads, Meringues, and Ganaches for Dessert and Beyond.

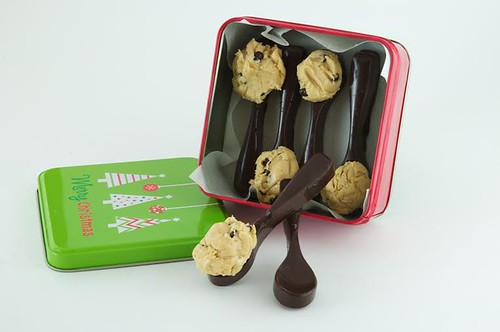
Cookie dough on choco spoons

Hello CakeSpies! Can I call you that? I hope so because it sounds really super cool! I’m Heather, author of the newly released cookbook, The Dollop Book of Frosting, and winner of Food Network’s Cupcake Wars! And I’mhonored to be guesting on CakeSpy today!

I’ve been following Jessie for quite some time now and I’m honestly enamored with her creative genius. Add the fact that she’s a fellow published author with a newly released gorgeous dessert book? Well, I literally danced a (very poor) samba when she agreed to participate in my 2013 Holiday Blog Tour!

The theme of this blog tour is “Frosting Gift Guide” so all month long up until Christmas I’m showing you entertaining ways to gift the creamiest, most delightful frostings for that frosting lover in your life.

From frosting filled candies, to frosting covered popcorn, my goal is to help you break away from the grocery store frosting jar you once relied so heavily upon!

With that said, today I’m sharing with you one of my all-time favorite frosting recipes from The Dollop Book of Frosting: Cookie Dough Frosting.

Not just a frosting, this recipe is spreadable and bakeable! Whip it, pipe it, scoop it, roll it, bake it—there are SO many things you can do with this Cookie Dough Frosting.

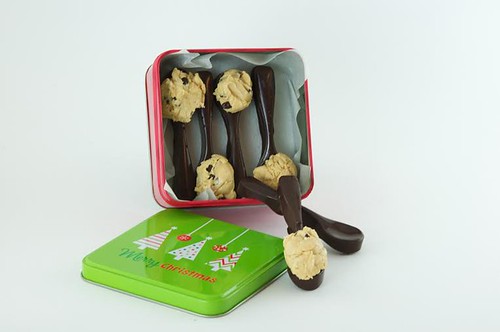
For this holiday gift I’m showing you today how to make chocolate spoons as the FDV’s (Frosting Delivery Vehicles) for your Cookie Dough Frosting. Packaged in pretty tins and paired with a jar of your favorite hot cocoa mix, I guarantee your friends will squeal with sweet delight at this perfect present!

Hey Jessie—I’m curious, what’s the history of Cookie Dough Frosting??!

Cookie dough on choco spoons

Cookie Dough Frosting Served on Chocolate Spoons 

Yield: 24 Cookie Dough Frosting dolloped spoons

For the frosting:

  • 1 cup unsalted butter, softened
  • ¼ cup granulated sugar
  • ½ cup light brown sugar
  • 1 teaspoon salt
  • 1 teaspoon pure vanilla extract (I get the best result from J.R. Watkins’ pure vanilla extract)
  • 1 1/8 cups flour
  • 1 teaspoon baking soda
  • ½ cup semisweet chocolate chips 

In the bowl of a stand mixer fitted with a paddle attachment, cream butter until soft by mixing on low speed, about 2 minutes until smooth. Add both sugars, salt, vanilla, flour, baking soda, and chocolate chips and mix until light and fluffy, about 5 minutes.

To make the Chocolate Spoons:

  • 2 bags of chocolate candy melts
  • Chocolate spoon silicone mold

In a microwave safe bowl melt the chocolate at 30 second intervals, stirring in between, until smooth. Scoop chocolate to fill spoon molds. Place in freezer for 5-10 minutes to set. Dollop a teaspoon of Cookie Dough Frosting on each spoon and place in festive tins.

Recipe adapted from The Dollop Book of Frosting by Heather “Cupcakes” Saffer.

To follow along on the remainder of the Holiday Blog Tour, head over here! And for more ideas check out my Gift Guide for Frosting Lovers!

Happy Frosting, everyone!

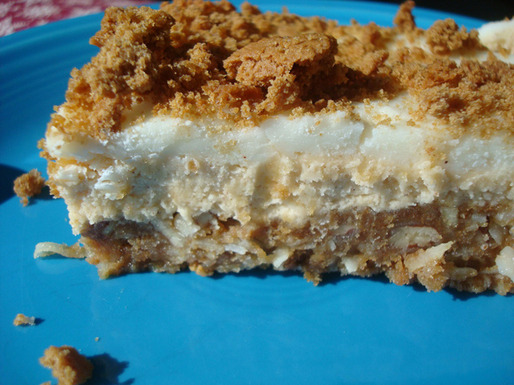
Pucker Up: Lemon Walnut Bars Recipe

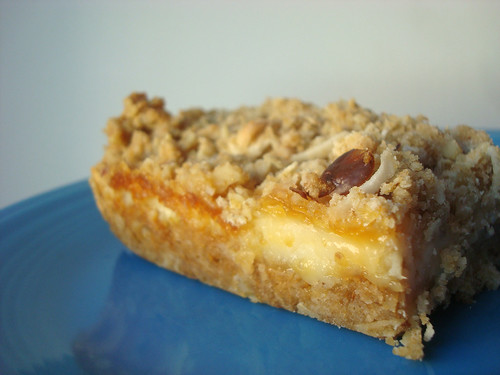
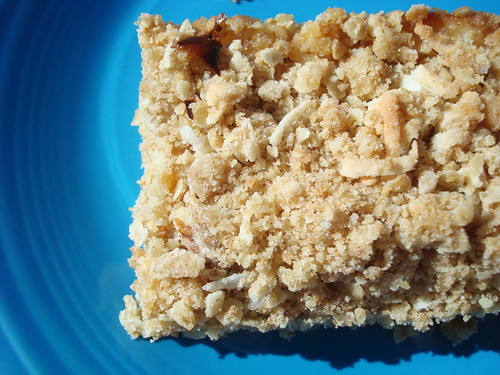
Lemon walnut bar

After Thanksgiving, people crave light treats that will make them feel refreshed, in contrast to the fullness they may have felt over the holiday.

These Lemon Walnut Bars are perfect, because owing to the lemon they taste refreshing, and the addition of oats gives them the slightest tone of healthfulness.

But don't worry--they're not actually healthy. With creamy sweetened condensed milk and plenty of butter, rest assured, these are definitely dessert.

Lemon walnut bar

I had a brief love affair with the lemon crumb bars sold at Tully's Coffee Shops in Seattle a few years ago--they certainly weren't fancy, they were made by a commercial bakery in the area and wouldn't be what I would consider "artisan". But there was something about the tart-sweet lemon filling paired with a streusel-like topping that had me hooked.

So when I saw a recipe for Lemon Walnut Bars in the new cookbook Butter Baked Goods: Nostalgic Recipes From a Little Neighborhood Bakery (also the source of this fab marshmallow recipe), I knew I had to try it.

Lemon walnut bar

Seriously, this recipe is a classic. It's like the bars I so loved at Tully's, but tastier since they were baked fresh. The filling is tart with lemon but so smooth and creamy with the sweetened condensed milk, which makes it almost like a key lime pie filling, but with lemon. The sweet-salty streusel has all of these notest that work well with the lemon: brown sugar, coconut, walnuts, and oats--which make it also slightly crunchy, and a perfect texture complement to the creaminess. I promise, if you love lemon bars and you love crumb cake, you will adore these squares. You won't be able to stop eating them. 

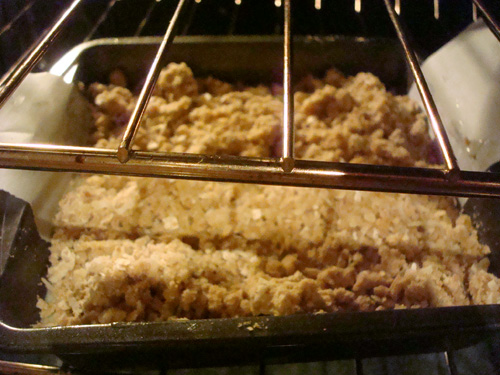
Lemon walnut bar

Lemon Walnut Bars

adapted from Butter Baked Goods: Nostalgic Recipes From a Little Neighborhood Bakery

Ingredients

  • 1/2 cup butter
  • 1 cup large flake rolled oats
  • 1 cup all purpose flour
  • 3/4 cup brown sugar (dark)
  • 1/2 cup unsweetened shredded coconut
  • 1/2 cup ground walnuts
  • 1 teaspoon baking powder
  • 1 can sweetened condensed milk
  • 1/2 cup lemon juice (2 lemons)

Procedure

  1. Preheat oven to 350.
  2. In a small saucepan over low heat, melt the butter.
  3. In a large bowl, combine oats, flour, sugar, coconut, walnuts, and baking powder. Pour in the melted butter and mix until the butter is evenly distributed. Press half of the oat mixture into the prepared pan, and press it in firmly. If you wanna, line the bottom with a strip of parchment to make for easy removal later.
  4. In a medium mixing bowl, whisk together the consensed milk and lemon uice until thick and combined. Pour the mixture over the base. Use the back of a spoon or spatula to make sure it's an even layer. Sprinkle the remaining crumb mixture over the filling.
  5. Bake in the preheated oven for 22 to 25 minutes or until golden on top.
  6. Remove from oven and cool completely into the pan. Run a knife along the edges of the pan. Cut into bars.


DIY Croissant Doughnuts Made from Crescent Rolls

Listen, once I heard that you could make DIY croissant doughnuts (I'm not mentioning them by name, but we all know what I'm talking about here), I simply had to try it at home. 

And I am beyond delighted to report that it is easy, and the results are so highly delicious that you just might gain a hundred pounds before Christmas if you make them as frequently as you'll want to after giving it a try.

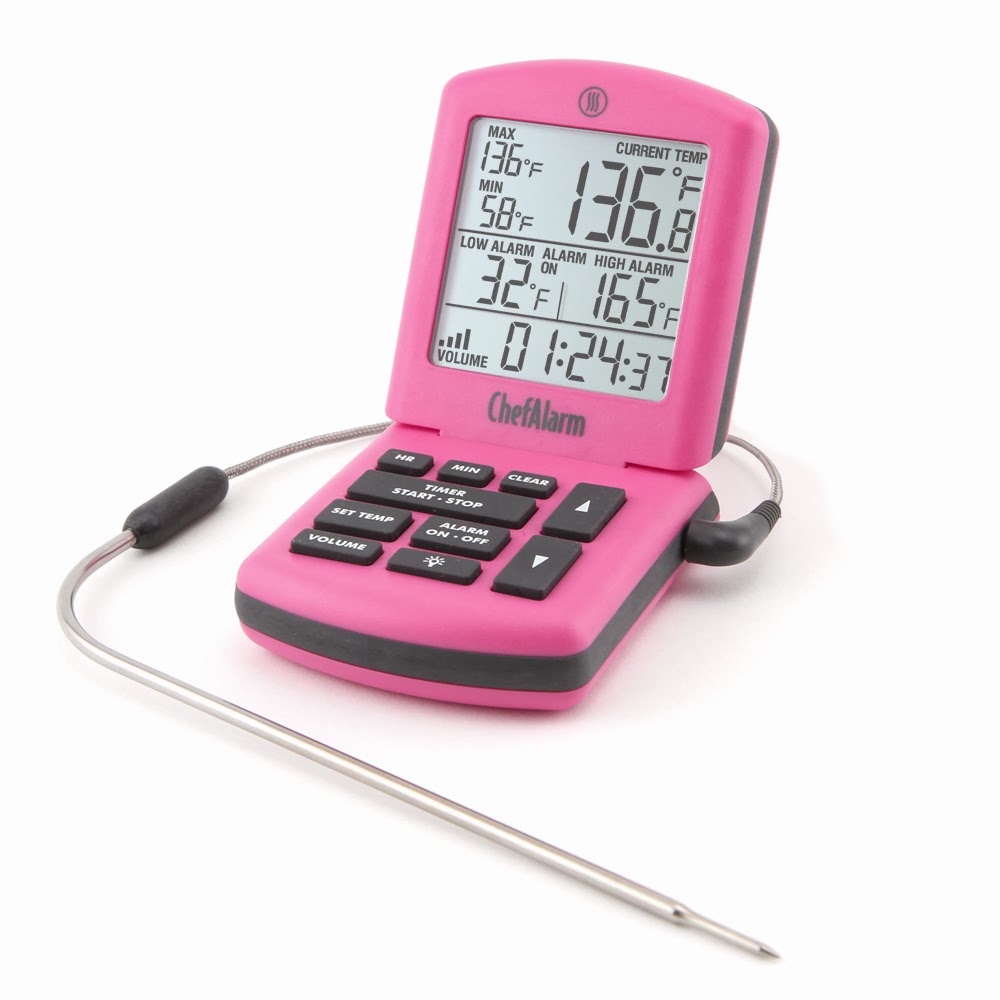
The only tough part is monitoring the temperature of the oil for frying. I am lucky because in a stroke of fate, a company that makes something called Chef Alarm had contacted me just a week before I decided to get frying at home and asked if I wanted to try out their product. Um, yes. So while they sent me the device for free, they didn't pay me to say good stuff about it. But happily, I liked it. This helpful gadget includes timers, a temperature probe, and temperature monitoring so it will notify you if things are going outside of the comfort zone. But the absolute best part is that it comes in pink. YES! I think it's a nifty tool and would probs make a good present for the baker in your life this holiday season. 

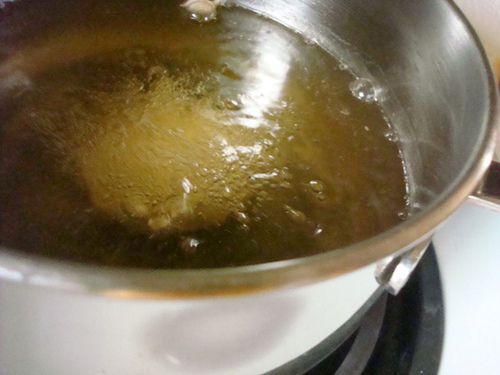
The reason why you have to monitor the temperature for frying? A few reasons, but from my point of view, a huge reason is that you can't tell how hot the oil is at any given time. It looks the same whether it's 280 or 390 degrees. If it's too hot, your doughnuts can fry too fast on the outside and be doughy on the inside. If the oil is too cool, it will take too long to fry them and they'll be leaden. Nobody wants either!

But anyways, I know you're frying--er, dying--to read more about the doughnuts, so let's get down to business. 

How to make Croissant Doughnuts using Crescent Rolls

You need: 

  • One roll of crescent rolls
  • oil, for frying
  • about a cup and a half of buttercream, pudding, ice cream, custard, or whatever filling you want.
  • confectioners' sugar glaze (1 1/4 cups confectioners' sugar mixed with 2 tablespoons or so of cream) if desired 

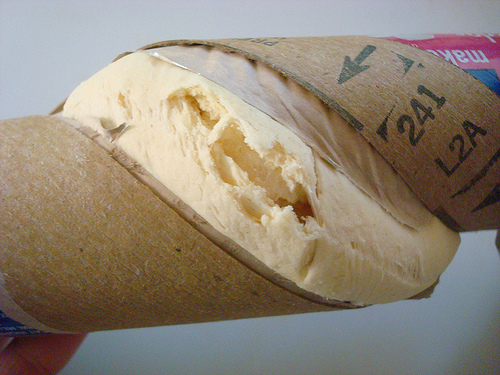
Step 1: The first thing you do is open up the can of crescent rolls. Enjoy that "pop" as they release themselves in their carbohydratey glory into the world. 

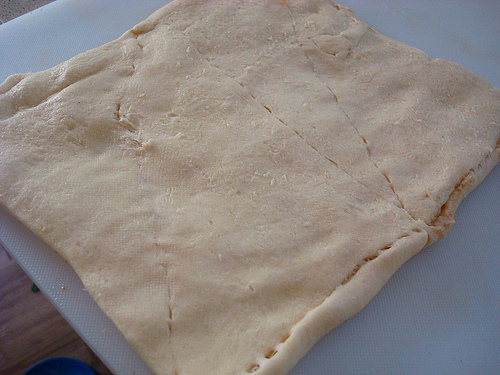
Step 2: Now, roll them into one big rectangle. Then, fold it on top of itself so you have a big square. Press gently to remove the "seams". The better you work the seams, the prettier your doughnuts will look later.

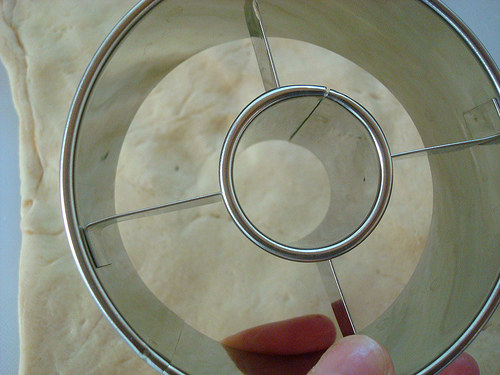
Step 3: Now, grab a doughnut cutter (just go buy one if you don't have them - they're like $2!). Cut out as many doughnut shapes as you can. Re-roll the scraps and cut more, but be aware that the re-rolled ones, to be frank, will be the ugly ones. 

Step 4: Fill a frying pan with some vegetable oil. You want at least a few inches of oil in the pan. Heat it until it reaches about 350 degrees. You will want a thermometer of some sort for this, trust me. 

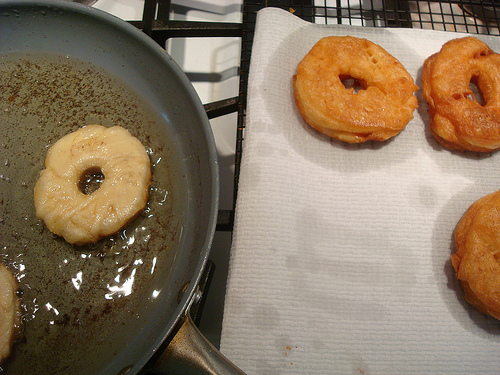
Step 5: Place the doughnut cutouts a few at a time into the hot oil. Fry on each side until golden and puffy. It won't take long. Remove gently, using a slotted spoon, and transfer to paper towels to blot excess oil. 

Step 6: Cut the doughnuts in half like you would a bagel, and fill with buttercream, pudding, custard, or whatever your heart desires. Glaze if you wanna, or just stuff your face immediately. 

Do you enjoy frying at home?

Cranberry Sauce Jelly Doughnuts For Serious Eats

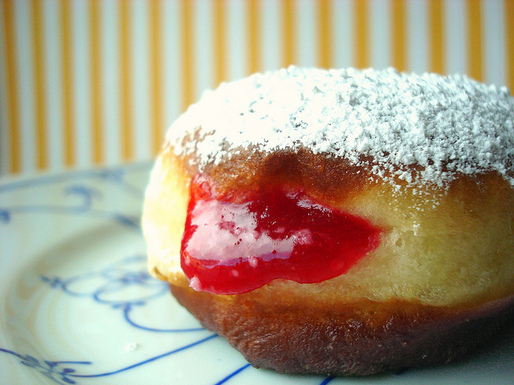
It's Thanksgiving! It's Hanukkah! All at once! With this momentous overlap of food holidays, why decide on one type of cuisine? These jelly doughnuts, inspired by the Hanukkah specialty sufganiyot, have a Thanksgiving flair thanks to a cranberry sauce "jelly" inside.

Are you sad that they don't include turkey, like some infamous versions in bakeries and around the internet? Don't be. These doughnuts might not have the shock value, but they taste good enough that you'll actually enjoy every bite, with a sweet-tart cranberry filling which is perfectly complemented by a snowy dusting of confectioners' sugar on top.

For the recipe, visit Serious Eats!

Adorable and Delicious: Mini Pecan Pies Recipe

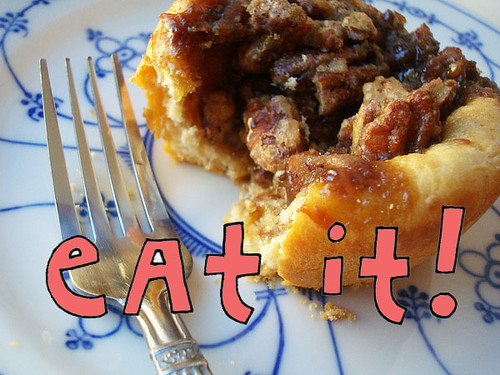
Mini pecan pies

Since I recently attended the Pillsbury Bake-Off, I have been thinking about creative ways to use Pillsbury products quite a bit.

So it should be no surprise that recently I found myself eying a package of crescent rolls, thinking "I wonder if I could pie-ify that". Well, turns out it was amazingly easy--I just rolled out the crescent rolls, cut them out into circles, which I pressed into cupcake liners to form baby pie crusts. Since I love healthy eating, I filled them with a protein-rich pecan mixture (with some sugar and other stuff added, of course).

They came out awesomely.

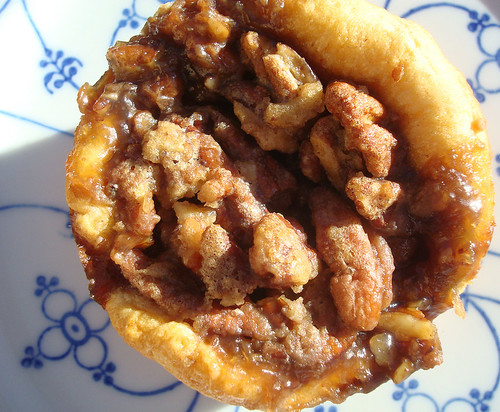
Basically, these mini treats are like a hybrid between a pecan tassie cookie and a pecan pie. Nice and buttery, and the crescent roll crust is sturdy enough to please crust lovers like me. Bigger than a cookie but smaller than a pie, they made lovely individual desserts that are as pleasing to the eye as they are to the palate.

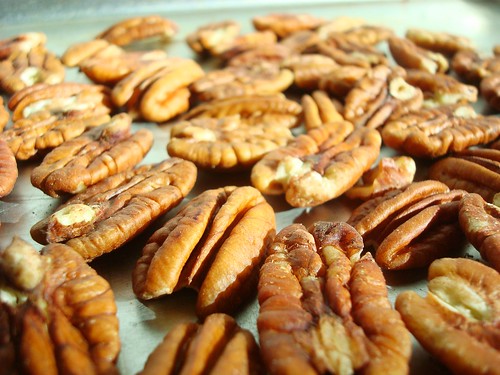
Pecans for pie

Mini Pecan Crescent Roll Pies

Makes 6 mini pies Active time: 20 minutes Total time: 1 hour

For the crust

1 tube Pillsbury Original Crescent rolls

For the filling 

  • ¾ cup dark brown sugar, packed 
  • ⅛ teaspoon salt 
  • 1 cup chopped pecans
  • 1 large egg, lightly beaten
  • 1 tablespoon unsalted butter, melted
  • ½ teaspoon vanilla extract

Procedure

  1. Preheat oven to 350 degrees F. Generously grease a 6-cup muffin tin.
  2. Open the tube of Crescent Rolls dough, and gather the dough into a ball. Using a knife or pastry scraper, divide into six equal parts.
  3. Using a rolling pin, roll each portion into an approximately 5-inch circle.  
  4. Press each circle into one of the greased cups, and press the sides to reach up about halfway up the sides of the cup. Don’t worry if they look small in there—the dough will rise and you’ll have a nice-sized treat at the end of the baking process. Once each of the cups have been filled, prepare your filling.
  5. To make the filling, mix together the brown sugar, salt, chopped pecans, egg, melted butter and vanilla extra with a spoon and then evenly divide it between the dough-lined cups. Try to make sure that the filling does not mound higher than the sides of the dough “cup”.
  6. Place the cupcake tin on top of a cookie sheet. Place the sheet in the oven, and bake for 14 minutes, or until the pies are golden on the sides and set in the middle. Note: The filling will bubble quite a bit during the baking process. The baking sheet below the cupcake tin is to catch any possible drips.
  7. Remove from the oven, and run a sharp knife along the perimeter of each cup to loosen any sticky bits. Let cool in the pan for 10 minutes before transferring to a wire rack to cool completely.


Mini pecan pies

The Bake-Off is Coming: Cherry Sugar Cookie Macaroons

Cherry sugar cookie macaroons

CakeSpy Note: OMG! The 46th Annual Pillsbury Bake-Off is coming! Since I so deeply loved attending the 45th Bake-Off, I thought I would get you excited early by sharing some of the finalists' recipes. Do I need to tell you that the winner will receive one million dollars? My posting is on hyperdrive since the event is less than a week a day--check back often, because I will be posting recipes like crazy until the big event! 

Of course Sue Odren of Sand Lake, Michigan  is excited about cherries. She's in the land of delicious cherries, Michigan! These sugar cookie macaroons are made wonderful with the addition of tart cherries.

Cherry Sugar Cookie Macaroons

Prep Time: 25 Min Total Time: 1 Hr 40 Min Makes: 36 servings

Ingredients


  • 1 roll Pillsbury refrigerated sugar cookie dough
  • 3/4 cup chopped macadamia nuts
  • 3/4 cup coarsely chopped dried tart cherries
  • 1 bag (7 oz) sweetened flaked coconut (about 2 1/2 cups)
  • 2 teaspoons vanilla
  • 1 cup Smucker's Michigan Red Tart Cherry Preserves


  1. Heat oven to 350°F. Line large cookie sheets with parchment paper. Let cookie dough stand at room temperature for 10 minutes to soften.
  2. In medium bowl, break up cookie dough. Add nuts, cherries, coconut and vanilla. Mix with wooden spoon or knead with hands until well blended. Shape rounded tablespoonfuls of dough into balls. Place 2 inches apart on cookie sheets.
  3. Bake 15 to 20 minutes or until edges are light golden brown. Cool 3 minutes. With back of teaspoon, make indentation in center of each cookie. Spoon 1 teaspoon preserves in each indentation. Cool completely, about 20 minutes. Store in covered container.


The Bake-Off is Coming: Dark Chocolate Orange Mousse

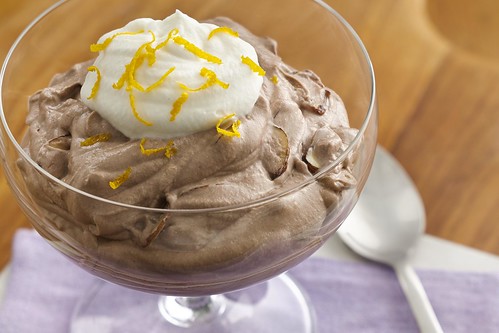
Dark chocolate orange mousse

CakeSpy Note: OMG! The 46th Annual Pillsbury Bake-Off is coming! Since I so deeply loved attending the 45th Bake-Off, I thought I would get you excited early by sharing some of the finalists' recipes. Do I need to tell you that the winner will receive one million dollars? My posting is on hyperdrive since the event is less than a week a day--check back often, because I will be posting recipes like crazy until the big event! 

Dion Frischer of Ann Arbor, Michigan took inspiration from fancy restaurant desserts to create something that comes together in just 10 minutes. Woot!

Dark Chocolate Orange Mousse

Prep Time: 10 Min Total Time: 10 Min Makes: 4 servings

Ingredients

  • 1 1/2 cups whipping cream
  • 1/2 cup Pillsbury Creamy Supreme Dark Chocolate Flavored Frosting
  • 1/4 cup Smucker's Sweet Orange Marmalade
  • 1/2 cup sliced almonds
  • 2 tablespoons powdered sugar
  • 1 teaspoon grated orange peel, if desired

Procedure

  1. In large bowl, beat 1 cup of the whipping cream with electric mixer on high speed until stiff peaks form. Add frosting and marmalade; beat until well blended. Fold in almonds. Spoon mixture into 4 small dessert dishes.
  2. In small bowl, beat remaining 1/2 cup whipping cream and the powdered sugar with electric mixer on high speed until soft peaks form. Spoon over each serving of mousse; sprinkle with orange peel. Store in refrigerator.

The Bake-Off is Coming: Creamy Peanut Butter Truffles

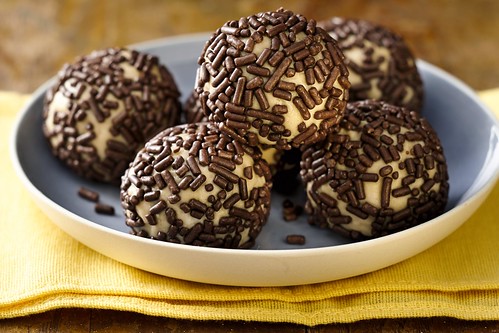
Peanut butter truffles

CakeSpy Note: OMG! The 46th Annual Pillsbury Bake-Off is coming! Since I so deeply loved attending the 45th Bake-Off, I thought I would get you excited early by sharing some of the finalists' recipes. Do I need to tell you that the winner will receive one million dollars? My posting is on hyperdrive since the event is less than a week a day--check back often, because I will be posting recipes like crazy until the big event! 

Five ingredients! Just 20 minutes! These creamy peanut butter truffles are a winner for sure. Thanks, Denny Gross of Troy, Michigan!

Creamy Peanut Butter Truffles

Prep Time: 20 Min Total Time: 30 Min Makes: 15 servings

Ingredients

  • 3/4 cup white vanilla baking chips
  • 1/2 cup Jif Creamy Peanut Butter
  • 1/2 cup Pillsbury Whipped Supreme Cream Cheese Flavored Frosting
  • 1 teaspoon whipping cream
  • 1/2 cup chocolate sprinkles

Procedure

  1. Line cookie sheet with sides with waxed paper. In medium microwavable bowl, microwave vanilla baking chips on High 30 to 60 seconds, stirring once, until melted. Stir in peanut butter, frosting and whipping cream until well blended.
  2. Spread sprinkles in small shallow dish. For each truffle, roll 1 rounded tablespoon peanut butter mixture into a ball. Roll in sprinkles to completely cover; place on cookie sheet. 
  3. Refrigerate truffles 10 minutes before serving. Store covered in refrigerator.


The Bake-Off is Coming: Peanut Butter Layer Brownies

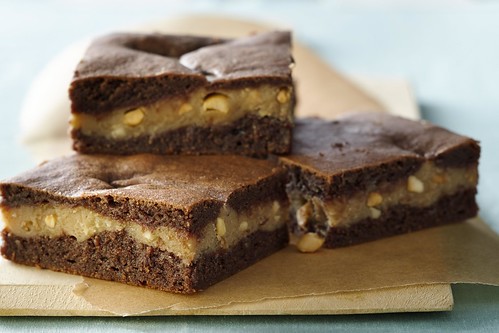
Peanut butter layered brownies

CakeSpy Note: OMG! The 46th Annual Pillsbury Bake-Off is coming! Since I so deeply loved attending the 45th Bake-Off, I thought I would get you excited early by sharing some of the finalists' recipes. Do I need to tell you that the winner will receive one million dollars? My posting is on hyperdrive since the event is less than a week a day--check back often, because I will be posting recipes like crazy until the big event! 

Brownies love peanut butter. These ones love it so much that they hug it all around and keep it cradled in the center. This embrace also makes the brownies delicious. Thanks to Heidi Splete of Chevy Chase, Maryland for entering it in the Bake-Off!

Peanut Butter Layer Brownies

Prep Time: 30 Min Total Time: 3 Hr 15 Min Makes: 24 servings

Ingredients

  • 12 tablespoons Crisco Baking Sticks All-Vegetable Shortening
  • 1 1/2 cups sugar
  • 4 eggs  
  • 2 cups Pillsbury BEST All Purpose Unbleached Flour
  • 2 cups instant hot cocoa mix
  • 1 can (14-oz) Eagle Brand Sweetened Condensed Milk
  • 1 cup Jif Extra Crunchy Peanut Butter

Procedure

  1. Heat oven to 350°F. Spray 13x9-inch pan with Crisco® Original No-Stick Cooking Spray.
  2. In large bowl, beat shortening and sugar with electric mixer on medium speed until well mixed. Add eggs; beat until smooth. Add flour and cocoa mix. Beat, scraping bowl occasionally, until blended. Spread half of batter in pan.
  3. In large microwavable bowl, mix sweetened condensed milk and peanut butter. Microwave on High 1 minute, stirring once or until softened. Carefully spread peanut butter mixture over brownie layer. Spoon and carefully spread remaining half of brownie batter over peanut butter layer.
  4. Bake 35 to 45 minutes or until toothpick inserted 1 inch from edge comes out almost clean. Cool completely, about 2 hours. Store covered.


The Bake-Off is Coming: Peach and Plum Skillet Coffee Cake

Skillet coffee cake

CakeSpy Note: OMG! The 46th Annual Pillsbury Bake-Off is coming! Since I so deeply loved attending the 45th Bake-Off, I thought I would get you excited early by sharing some of the finalists' recipes. Do I need to tell you that the winner will receive one million dollars? My posting is on hyperdrive since the event is less than a week a day--check back often, because I will be posting recipes like crazy until the big event! 

I love it when Bake-Off Finalists are from New Jersey! Donna Pochoday-Stelmach of Morris Township, New Jersey has come up with a wonderful recipe for a morning cake made in a skillet. Yum!

Peach and Plum Skillet Coffee Cake

Prep Time: 25 Min Total Time: 1 Hr 10 Min Makes: 8 servings

Ingredients

  • 1 can Pillsbury® refrigerated orange flavor sweet rolls with icing
  • 6 tablespoons unsalted butter
  • 1/2 cup packed brown sugar
  • 2 large firm ripe peaches, peeled, sliced 1/4-inch-thick
  • 1 medium firm ripe plum, sliced 1/4-inch-thick
  • 1 cup walnuts, pecans or almonds, chopped
  • 1/2cup Smucker's Orchard's Finest Northwest Triple Berry Preserves

Procedure

  1. Heat oven to 350°F. Place oven rack in lower third of oven. Remove rolls and icing from can; set rolls aside.
  2. In 10-inch cast iron or ovenproof skillet, melt 4 tablespoons of the butter over medium heat. Stir in brown sugar and icing. Heat 1 to 2 minutes or until icing is melted; remove from heat. In skillet, arrange peach slices over butter mixture around outer edge, overlapping slightly. Arrange plum slices in center of skillet, overlapping slightly. Top with nuts.
  3. Separate dough into 8 rolls. Using sharp knife, cut each roll horizontally into 2 rounds. Place 12 dough rounds over fruit around outer edge of skillet, edges touching. Place remaining dough rounds in center of skillet. Cut remaining 2 tablespoons butter into small pieces and place on dough.
  4. Bake 30 to 40 minutes or until deep golden brown. Cool 5 minutes.
  5. Run knife around edge of skillet to loosen cake. Place heatproof serving plate upside down over skillet; carefully turn plate and skillet over. Remove skillet.
  6. In small microwavable bowl, stir preserves and 1 tablespoon water until blended. Microwave on High 30 to 60 seconds or until mixture boils.
  7. To serve, cut coffee cake into wedges. Drizzle 1 tablespoon preserves mixture over each wedge. Serve warm.


The Bake-Off is Coming: Orange Cardamom Blueberry Crostada

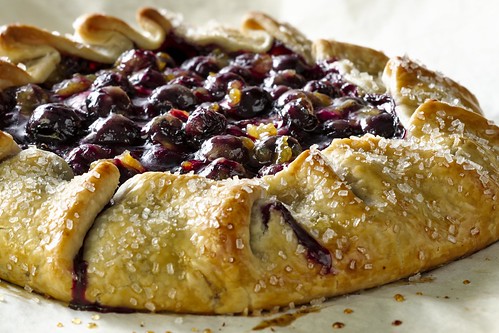
Blueberry Crostada

CakeSpy Note: OMG! The 46th Annual Pillsbury Bake-Off is coming! Since I so deeply loved attending the 45th Bake-Off, I thought I would get you excited early by sharing some of the finalists' recipes. Do I need to tell you that the winner will receive one million dollars? My posting is on hyperdrive since the event is less than a week a day--check back often, because I will be posting recipes like crazy until the big event! 

How cool is this? A rustic dessert with minimal effort. It was cleverly dreamed up by Cathy Wiechert of Mound, Minnesota.

Orange Cardamom Blueberry Crostada

Prep Time: 10 Min Total Time: 1 Hr 5 Min Makes: 6 servings

Ingredients


  • 1 Pillsbury refrigerated pie crust, softened as directed on box
  • 1/2 cup Smucker's Orchard's Finest Pacific Grove Orange Marmalade Medley
  • 2 tablespoons Pillsbury BEST All Purpose Flour
  • 1/4 teaspoon ground cardamom
  • 2 cups fresh blueberries
  • 1 egg yolk
  • 1to 2 tablespoons coarse white sparkling sugar


  1. Heat oven to 425°F. Line 15x10-inch pan with sides with parchment paper.
  2. Unroll pie crust in pan. In medium bowl, mix preserves, flour and cardamom. Carefully fold in blueberries. Spoon mixture over crust to within 2 inches of edge. Fold edge of crust over filling, pleating crust as necessary. In small bowl, beat egg yolk with two teaspoons water. Lightly brush crust edge with egg mixture; sprinkle with sugar.
  3. Bake 17 to 23 minutes or until crust is golden brown and filling is bubbly. Cool at least 30 minutes before serving.


The Bake-Off is Coming: PB+J Mini Walnut Muffins

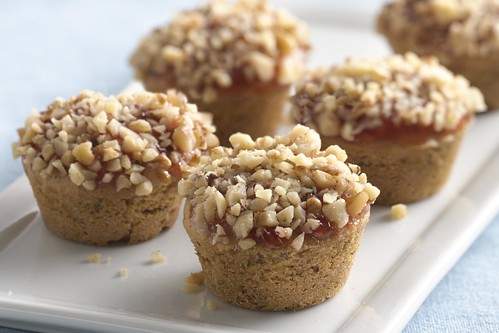
Mini pb+j muffins

CakeSpy Note: OMG! The 46th Annual Pillsbury Bake-Off is coming! Since I so deeply loved attending the 45th Bake-Off, I thought I would get you excited early by sharing some of the finalists' recipes. Do I need to tell you that the winner will receive one million dollars? My posting is on hyperdrive since the event is less than a week a day--check back often, because I will be posting recipes like crazy until the big event! 

It's like the classic sandwich got a breakfast makeover! This tasty treat comes from Anne Johnson of Vincent, Ohio.

Peanut Butter and Jelly Mini Walnut Muffins

Prep Time: 30 Min Total Time: 1 Hr Makes: 48 servings

Ingredients

  • 1 roll Pillsbury refrigerated peanut butter cookie dough
  • 1/3 cup All Purpose Flour
  • 1 teaspoon baking soda
  • 2 eggs
  • 1/3 cup buttermilk
  • 3 cups finely chopped walnuts
  • 1/2 cup Smucker’s Seedless Strawberry Jam

Procedure

  1. Heat oven to 350°F. Spray 48 mini muffin cups with Crisco® Original No-Stick Cooking Spray. Let cookie dough stand at room temperature 10 minutes to soften.
  2. In small bowl, mix flour, baking soda and 1/4 teaspoon salt; set aside. In large bowl, break up cookie dough. Beat in eggs and buttermilk with electric mixer on medium speed until smooth. Stir in flour mixture just until moistened. Stir in 1 1/2 cups of the walnuts. Spoon about one tablespoon batter into each muffin cup, filling 2/3 full.
  3. Bake 8 to 12 minutes or until light golden brown and toothpick inserted in center comes out clean. Remove from pans to cooling rack. Cool 5 minutes or until cool enough to handle.
  4. Meanwhile, in small microwavable bowl, microwave jam on High 45 to 60 seconds or until melted. Place remaining 1 1/2 cups walnuts in small bowl.
  5. Dip tops of muffins in jam; roll tops in remaining 1 1/2 cups walnuts. Serve warm or cool.


The Bake-Off is Coming: Berry Filled Shortbread Brunch Tart

Brunch tart

CakeSpy Note: OMG! The 46th Annual Pillsbury Bake-Off is coming! Since I so deeply loved attending the 45th Bake-Off, I thought I would get you excited early by sharing some of the finalists' recipes. Do I need to tell you that the winner will receive one million dollars? My posting is on hyperdrive since the event is less than a week a day--check back often, because I will be posting recipes like crazy until the big event! 

It's breakfast! With shortbread involved! This nummy recipe comes from Laura Majchrzak of Hunt Valley, Maryland.

Berry Filled Shortbread Brunch Tart

Prep Time: 20 Min Total Time: 1 Hr 40 Min Makes: 12 servings

Ingredients

  • 1 1/2cups Pillsbury BEST® All Purpose Flour
  • 1 cup powdered sugar
  • 3/4 cup cold unsalted butter, cut in 1/2-inch cubes (do not use margarine)
  • 2 teaspoons vanilla
  • 1/2 cup Smucker's Northwest Triple Berry Preserves
  • 1/2 cup mascarpone cheese
  • 1tablespoon coarse white sparkling sugar

Procedure

  1. Heat oven to 375°F. In food processor, place flour, 3/4 cup of the powdered sugar and 1/2 teaspoon salt. Cover; process until well blended. Add butter and 1 1/2 teaspoons of the vanilla; process with on-and-off pulses until mixture is consistency of fine crumbs.
  2. Press 1 1/2 cups of the mixture evenly in ungreased 9-inch tart pan with removable bottom. Bake 12 minutes. Remove to cooking rack; cool 15 minutes.
  3. Meanwhile, in small bowl, stir preserves to soften; set aside. In another small bowl, mix mascarpone cheese, remaining 1/4 cup powdered sugar and remaining 1/2 teaspoon vanilla until well blended. Cover; refrigerate.
  4. Spread preserves evenly over cooled crust to within 3/8-inch of edge. Sprinkle remaining crust mixture evenly over top, covering preserves completely. Pat gently; sprinkle with white sparkling sugar.
  5. Bake 18 to 26 minutes longer or until edges are golden brown. Cool 25 minutes on cooling rack; remove side of pan. Using sharp knife, cut into 12 wedges. Serve warm with sweetened mascarpone mixture.


The Bake-Off is Coming: Coconut Pecan Chocolate Fudge

Coconut pecan fudge

CakeSpy Note: OMG! The 46th Annual Pillsbury Bake-Off is coming! Since I so deeply loved attending the 45th Bake-Off, I thought I would get you excited early by sharing some of the finalists' recipes. Do I need to tell you that the winner will receive one million dollars? My posting is on hyperdrive since the event is less than a week a day--check back often, because I will be posting recipes like crazy until the big event! 

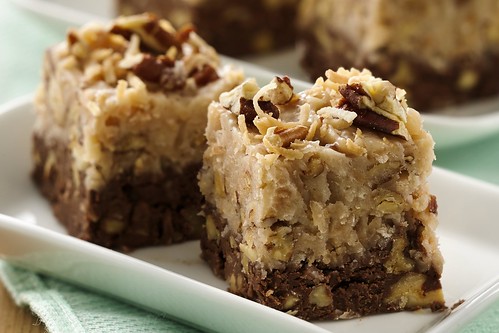
Dudes. Dudettes. This is like German Chocolate Cake in fudge form! Good stuff. It comes from Lesley Pew of Lynn, Massachusetts.

Coconut Pecan Chocolate Fudge

Prep Time: 25 Min Total Time: 1 Hr 55 Min Makes: 64 servings

Ingredients

  • 1 cup milk chocolate chips (6 oz)
  • 1 can Pillsbury Creamy Supreme Milk Chocolate Frosting
  • 2 teaspoons vanilla
  • 2 cups chopped pecans, toasted
  • 2 cups sweetened shredded coconut, toasted
  • 1 cup white vanilla baking chips (6 oz)
  • 1 can Pillsbury Creamy Supreme Coconut Pecan Frosting

Procedure

  1. Line 9-inch square pan with foil, extending foil over 2 opposite sides of pan. Spray foil with Crisco® Original No-Stick Cooking Spray.
  2. In medium microwavable bowl, microwave chocolate chips on High 1 to 2 minutes, stirring every 30 seconds, until melted. Stir in milk chocolate frosting and 1 teaspoon of the vanilla. Reserve 2 tablespoons of the nuts and 2 tablespoons of the coconut. Stir half of the remaining nuts and half of the remaining coconut into the chocolate mixture. Spread in pan.
  3. In medium microwavable bowl, microwave white vanilla chips on High 1 to 2 minutes, stirring every 30 seconds, until melted. Stir in coconut pecan frosting and remaining 1 teaspoon vanilla. Stir in remaining half of the nuts and coconut. Spread over chocolate mixture. Sprinkle reserved nuts and coconut over fudge.
  4. Refrigerate 1 1/2 hours or until firm. Remove foil; cut into 8 rows by 8 rows. Store covered in refrigerator.