Bali Diary: How to Make Black Rice Pudding

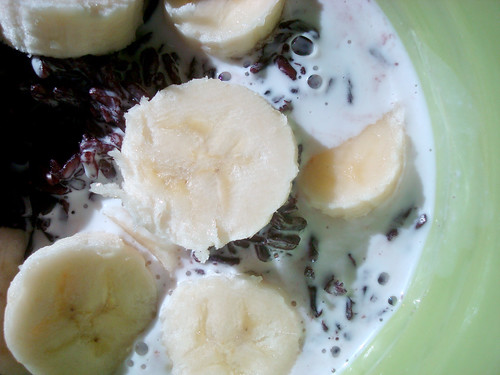
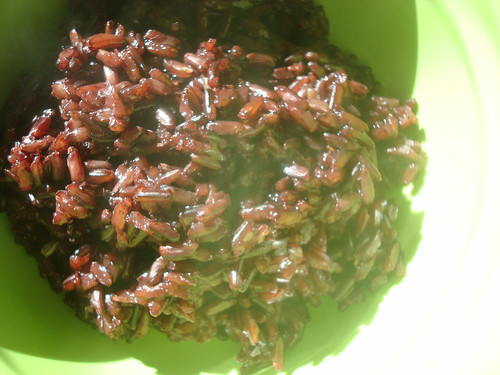
Homemade black rice pudding

During my time in Bali, it didn't take too long for me to become obsessed with black rice pudding.

So you can bet your bottom donut that as soon as I got back stateside, I set forth to recreating this bali magic in my own kitchen.

As it turned out, the most difficult part was sourcing the ingredients. I assumed (with a typical American sense of entitlement, I suppose!) that I could get all of the typical Balinese ingredients at my local grocery store or Asian grocer. Ultimately, I was able to find almost everything, but it took a number of stops.

Homemade black rice pudding

The coconut cream was easy; that was in the grocery store. The black rice, in theory, shouldn't have been difficult to locate, but they happened to be out of it at the Asian grocer, so I had to buy it at Whole Foods for a slightly more premium price. As for the bananas, I sought out firm, ripe ones that I felt could best replicate the dense and super-sweet variety I tasted in Bali. 

Homemade black rice pudding

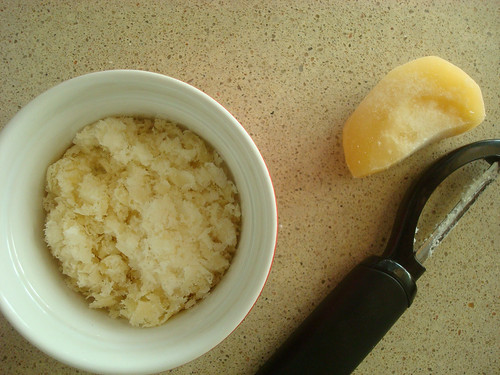
The two hardest ingredients to find were the palm sugar and panadus. After searching a number of stores for dark palm sugar I still came up dry, so finally I settled on this more honey-toned version, which did work just fine. But keep in mind that if you shave it, don't shave too much, as the sugar will harden in a couple of hours. If you couldn't find palm sugar or just can't be bothered to go and seek it out, brown sugar would do.

The panadus leaves, often used as a flavoring, were tougher to source. After scouring the web for possible substitutes I couldn't find any that quite sounded right, so I just used vanilla extract for flavoring. Maybe not traditional, but highly delicious. 

Homemade black rice pudding

Whew! That having been said, this recipe is worth seeking out the ingredients. This lovely morning porridge is almost caramelly when the sugar meets the rich coconut cream; the bananas bring all of the flavors together into an earthy, creamy, caramelly form of edible bliss.

Here's how you make this traditional Balinese treat. 

Black Rice Pudding (printable version here)

adapted from Indonesian Cakes and Desserts, a Periplus Mini Cookbook

6 servings

Ingredients

  • 1 3/4 cups uncooked black glutinous rice (or Asian black rice)
  • 6 cups water
  • 2 panadus leaves, tied into a knot (I used 2 teaspoons vanilla extract)
  • 1/4 cup (or more, to taste) shaved palm sugar
  • 1 can coconut cream (14 ounces or so) 
  • pinch of salt

Procedure

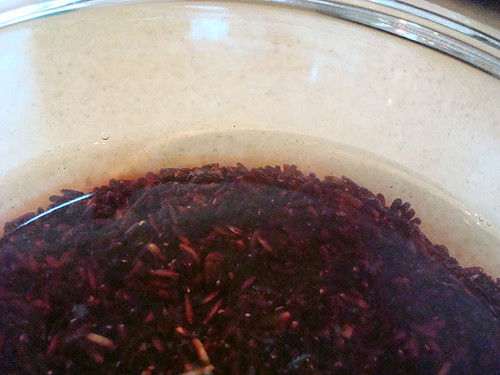
  1. Rinse the rice in two to three changes of water, or until the water runs clear. Once clear, place the rice in a bowl and cover with clean water. Let it soak overnight (I did this on the countertop).
  2. Homemade black rice pudding
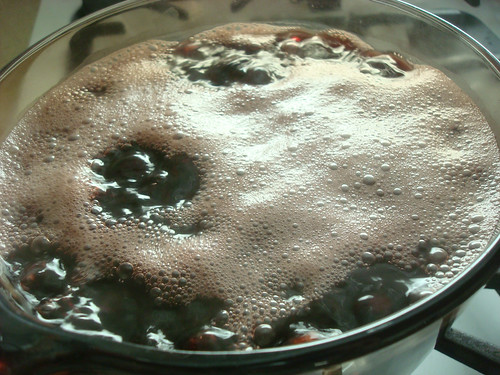
  3. In a saucepan, bring the rice, along with 6 cups of water and the panadus leaves (if using vanilla extract don't add it yet, though), to a boil over medium heat, and simmer uncovered for about 40 minutes, stirring occasionally until the rice is softened to a slightly al dente consistency. Discard the panadus leaves, if using. Add the sugar and vanilla (if using) and let the mixture continue to simmer on low heat for about 5 more minutes. 
  4. Homemade black rice pudding
  5. Remove from heat. Set to the side for the moment.
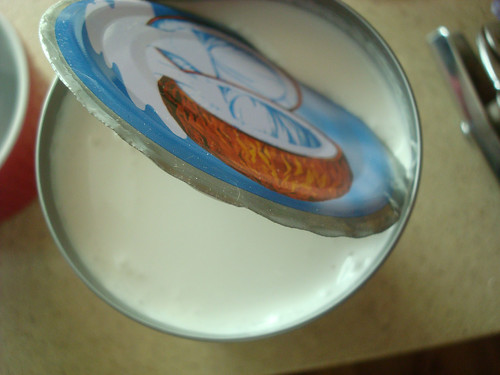
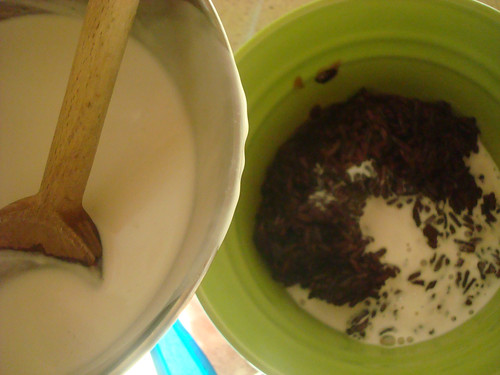
  6. In a bowl, combine the coconut cream with a pinch of salt and mix well.
  7. Homemade black rice pudding
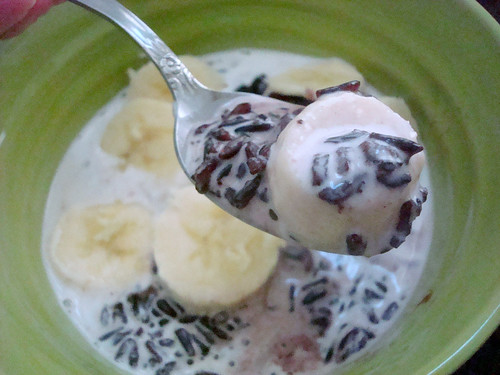
  8. To serve, place a healthy spoonful of the rice mixture into a bowl. Homemade black rice pudding
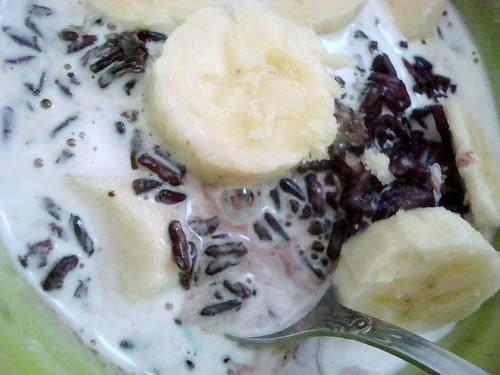
  9. Spoon coconut cream on top to taste. Enjoy immediately. 
  10. Homemade black rice pudding

If storing, keep the coconut cream and the rice separate, and combine before serving.

Have you ever tried black rice?

Magic in the Airheads: Magical Rainbow Candy Bowls

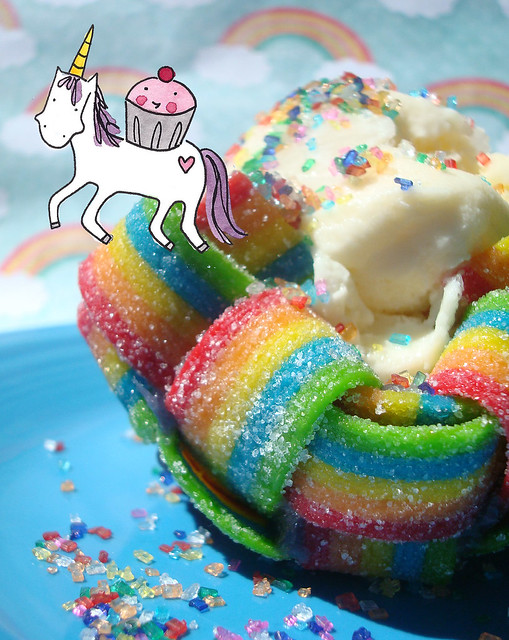
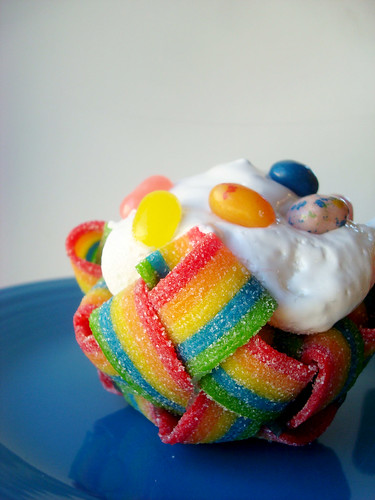
Rainbow candy baskets

April showers bring May flowers. But let's not get all doom and gloom and April-is-the-cruelest month, OK? Because where there are rain showers, there is bound to be a rainbow or two. Or ten!

To celebrate this magical rainbow-filled month, I would like to present a project sponsored by Airheads candy which has attained this site's highest status as unicorn-approved: rainbow candy dessert bowls. 

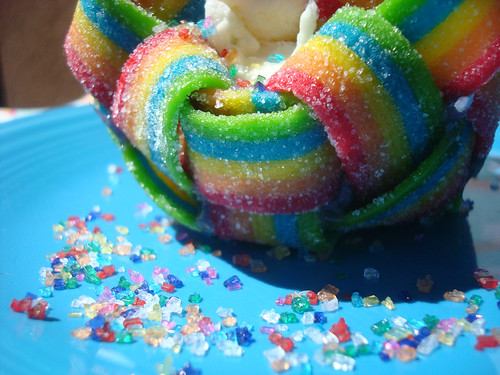
Rainbow candy baskets

These confections are woven from candy, and are a perfectly magical setting for all of your favorite desserts. You could fill them with whipped cream or marshmallow fluff for a light and sweet cloud-like treat, or you could place an entire cupcake inside. They could even be used as decorative candy bowls at parties for a sweet table setting. 

Rainbow candy baskets

I should tell you too that this project was inspired by my time in Bali. Perhaps not for the reason you think, though! 

You see, I had agreed to come up with a project for Airheads before I left, and I figured "meh, I'll find someone's oven to bake in.". Well, as it turns out, they don't have ovens in Bali! So I had to revise my plans and figure out a no-bake treat. I thought back to my friend Not Martha's bacon bowls and an idea was born--a sweet idea, indeed.

Rainbow candy baskets

I have to say, I was rather pleased with my experimentation. It took a little figuring out, because once I wove the rainbows I had trouble getting them to stay together while I shaped the baskets. By employing regular Airheads candy, I melted them down and then used them as a sort of sealant for the inside of the baskets. It helped keep the candy together, and as an added bonus, sealed the inside so that if eating ice cream or something of the like, it would stay contained in the basket. 

You could go for a plain, cloud-like look with the finished baskets, or include additional rainbows. Definitely not excessive.

Rainbow candy baskets

Anyhow, I know that you're probably keen to make this magic happen in the comfort of your own home, so here's how I did it. I realize it seems like a long process based on my writing, but it's really not; I just wanted to be thorough in my explanations. You're welcome!

Rainbow candy baskets

You'll need:

  • 1 cupcake tin
  • double boiler
  • a spatula for stirring, a spoon, and a knife

Rainbow candy baskets

Ingredients

(Per basket)

  • 10 strips Airheads XTremes Sweetly sour candy, in berry rainbow
  • 3 small Airheads candies, unwrapped (choose similar colors for best results)
  • 1 teaspoon water
  • 3 2 tablespoons confectioners' sugar

Procedure

Grab a work surface and let's get weaving. First, grab yourself 10 strips of the rainbow colored Airheads Extreme candy. Line five strips side by side, so that the ends are facing you. 

Leaving an inch of space on the top, begin to weave one of the remaining strips of candy horizontally, over and under the vertical rows.

Grab your next piece, and weave it directly below the previous one, weaving under-and-over so that it forms a basketweave pattern.

Continue alternating with the remaining strips. 

Here's a photo-collage of the process if that all seems confusing:

Weaving a rainbow

OK, set this woven piece of rainbow art to the side for the moment. 

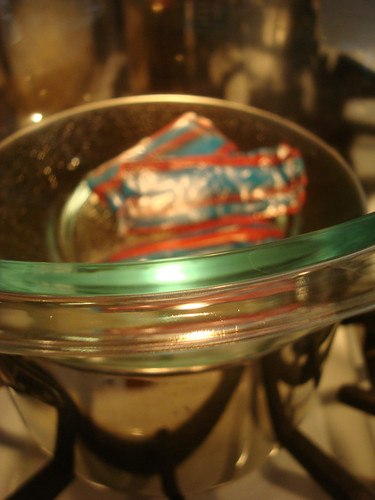
Now, set up your double boiler. Place three Airheads candies (the regular kind) in the top, along with the water and confectioners' sugar. 

Heat on medium, stirring every few minutes. While at first the sugar, water, and candy will remain quite separate, as it melts, the mixture will become thick. You'll see now why it was a good idea to use candy in the same color scheme--the color melts together. It might be ugly if you use different colored candies (like I did the first time) but it will taste fine. Promise. But even so, this won't be the prettiest part of the process.

Rainbow candy baskets

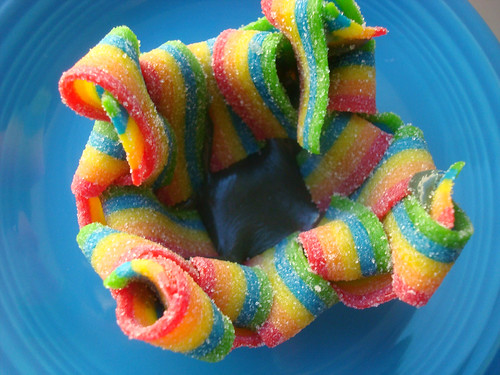
Once the mixture is lightly bubbly, remove from heat. You'll want to work without hesitating at this point as the candy is easier to use while still quite liquid. Gently spoon the candy in the center of your basketweave square. Use a spoon or knife to spread it to cover the woven portion as thoroughly as possible. 

At this point, I decided that rather than slice off the extra bits, I would fold over the non-woven portions. This is easier to do if you start with the pieces which are "under". They will adhere easily to the still sticky candy.

The four corners, I sliced off.

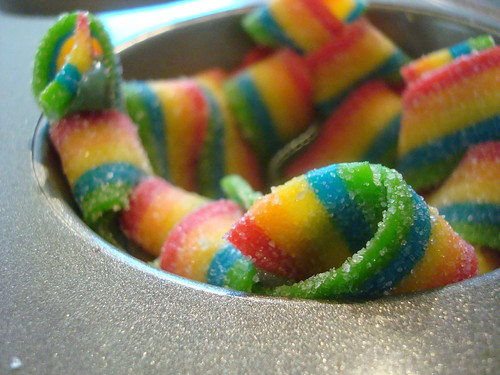
Give it about five minutes for the candy to set slightly, and transfer the candy bundle to your cupcake tin. Gently place it, centered, on top of one of the cups. Using your fingers, gently finesse it into a bowl shape.

Once again, here it all is in pictures. My apologies again for the weird melted candy color. Folding basket

Rainbow candy baskets

Repeat, making as many bowls as you'd like.

To help the bowls "set", I put them in the freezer (right in the cupcake pan) for about 5 to 10 minutes. They easily popped out of the cupcake tin at this point.

Rainbow candy baskets

Fill the bowls with whatever toppings you'd like. If you're not using them immediately, keep them in the cupcake tin so that they will retain their shape.

What would you put in a rainbow bowl?

Make This: Tropical Fruit Medley Eclairs

I know, I know.

After I tortured you, absolutely tortured you, with a great interview with Ruth Clemens, baker extraordinaire who blogs at The Pink Whisk, and now author of Creative Eclairs: Over 30 Fabulous Flavours and Easy Cake Decorating Ideas for Eclairs and Other Choux Pastry Creations.

But I didn't give you even a hint of a recipe, I just talked about how great they were. 

Well, I am going to remedy that, sweet readers, because Ruth has been kind enough to share a recipe from the book, for Tropical Fruit Medley Eclairs. It being that I am in Bali at the moment, it seemed like an appropriate recipe to share. Enjoy!

This is part 2 of my entry as part of the book tour blog hop; to see the other entries, click here

Tropical Fruit Medley Eclairs

Makes 10–12 x 15cm (6in) éclairs

Ingredients

1 x quantity choux pastry (recipe here)

1 x quantity vanilla or tropical crème patissière (recipes follow) 

  • 60g (21/4oz) fresh pineapple, sliced
  • 70g (21/2oz) fresh kiwi, sliced
  • 50g (21/4oz) fresh mango, sliced
  • 1 x quantity regular or orange fondant glaze (recipes follow)

Decorations

  • Yellow and lime green sugarpaste (rolled fondant/ready-to-roll icing) (see Sugarcraft Techniques)
  • Small and medium pointed blossom cutters
  • Small pearl dragées (sugar balls)

Method

  1. Preheat the oven to 160°C (fan)/180°C/350°F/Gas Mark 4. Fill a piping (pastry) bag fitted with an 18mm (3/4in) nozzle (tip) with the chilled choux pastry. Pipe 15cm (6in) éclairs onto a baking sheet lined with non-stick baking (parchment) paper or a silicone liner (bake-o-glide). Spray the éclairs lightly with vegetable or sunflower oil and bake in the oven for 50 minutes until golden brown. Transfer to a wire rack and allow to cool completely.
  2. Roll out the yellow sugarpaste and cut out two medium-pointed five-petal blossoms for each éclair. Roll out the lime green and cut one small blossom for each. Using a cocktail stick (toothpick), imprint lines along each petal. Set the yellow blossoms on top of each other, slightly offsetting the petals, and place the green blossom in the centre. Carefully pick up the pieces and pinch together gently from the back to ruffle the petals. Set aside to dry in the recesses of an egg box.
  3. Assembly: Whisk the prepared tropical crème patissière with an electric hand mixer until smooth.
  4. Split each éclair with a sharp serrated knife (see Filling, Dipping & Splitting) and spoon the tropical crème patissière into the base of each.
  5. Top the crème patissière with a mix of sliced tropical fruits.
  6. Warm the orange fondant glaze gently until of a dipping consistency and place in an open shallow bowl. Dip the top of each éclair in the fondant to coat and place on top of the fruit filling.
  7. Apply a dab of water to the centres of the flowers and sprinkle on the dragées. Add a tropical flower to the top of each éclair and serve.

Vanilla Crème Patissière

Ingredients

  • 600ml (20fl oz) whole milk
  • Seeds scraped from 1 vanilla pod, 5ml (1 tsp) vanilla bean paste or 5ml (1 tsp) vanilla extract
  • 100g (3½oz) caster (superfine) sugar
  • 4 large egg yolks
  • 50g (1¾oz) cornflour (cornstarch)

Equipment

  • Large jug
  • Whisk
  • Medium-sized pan
  • Cling film (plastic wrap)
  • Large bowl
  • Electric hand mixer

How to make it tropical

Omit the vanilla and replace with the grated zest of 1 lime, half an orange and half a lemon. Before transferring to a bowl to cool, whisk in 15ml (1 tbsp) coconut liqueur.

Method

  1. In a large jug whisk together the egg yolks and caster (superfine) sugar until the mixture is light and foamy. Add the cornflour and whisk again until of an even consistency. Set to one side.
  2. Place the milk and vanilla in a medium pan and heat gently until just below boiling point. Whilst whisking the egg mixture continuously, add the warmed vanilla-infused milk a little at a time until both mixtures have been fully worked together. TIP: Make sure you whisk together the egg yolks as soon as the caster (superfine) sugar is added to them. This will prevent the sugar from pulling the moisture out of the yolks, which could result in ‘egg burn’, where you would have yellow flecks in your finished crème patissière.
  3. Transfer the mixture back to the pan and over a medium heat, whisking continuously, bring to the boil. Continue to cook the crème patissière for 2 minutes until thick and glossy.
  4. Remove the pan from the heat and transfer the mixture to a bowl. Contact-cover the top of the crème patissière with cling film (plastic wrap) to prevent a skin from forming, and allow to cool. Refrigerate once cooled.
  5. When you are ready to use it, transfer the chilled crème patissière to a large bowl and beat with an electric hand mixer until it is a smooth and even consistency.

Fondant Glaze

Ingredients

  • 300g (101/2oz) white sugarpaste (fondant/ready-to-roll icing)
  • 30ml (2 tbsp) water

Equipment

  • Heatproof bowl
  • Small pan or microwave
  • Electric hand mixer

Method

  1. Break the fondant into small pieces and place in heatproof bowl with the water.
  2. Heat gently in the microwave in short bursts, or over a pan of steaming water, stirring frequently, until the fondant melts.
  3. Mix with an electric mixer until the consistency is smooth and even and no lumps remain. The glaze will begin to set while it cools, so use while it is still warm. It can easily be reheated to pouring consistency if it cools too quickly for use.

TIP: Fondant glaze can be coloured with food gel pastes and easily flavoured with a wide range of extracts. Simply add a small amount of gel paste colour in the required shade to warmed fondant that is ready to be used. Make sure that it is evenly mixed to avoid any streaks before using to coat the tops of éclairs.

TIP: The temptation is to add more water to keep the fondant in a liquid state but if you do this the fondant will not set once the éclairs are coated. Gently warming the fondant before use is the best method.

Make it orange:

Add the grated zest of 1 orange  in 30ml (2 tbsp) hot water before adding to the fondant and heating together.

Enjoy!


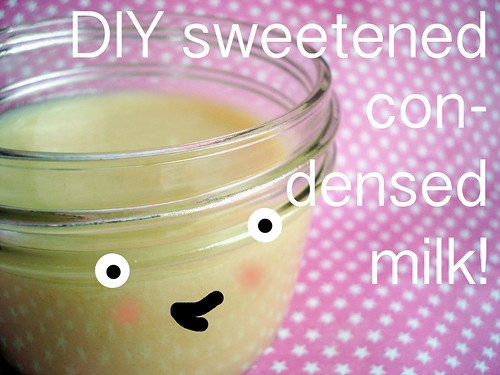
DIY Sweetened Condensed Milk

Sweetened condensed milk

Did you know that you can make your own sweetened condensed milk?

It's true. Provided you have milk, butter, sugar, and a little time, you can make sweetened condensed milk at home. It will not only give you a super sense of accomplishment and a serious something to brag about to your friends, but it also tastes amazing. That means that this homemade sweetened condensed milk will make all manner of recipes sing, from flan to Vietnamese coffee to magic cookie bars. Or, just use it as a particularly decadent dessert topping. Go ahead, you deserve it.

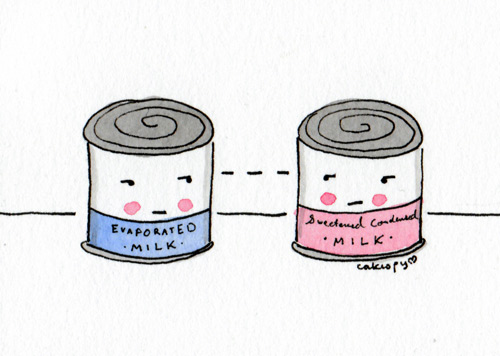
Sweetened Condensed and Evaporated Milk

Homemade sweetened condensed milk also means you have control over your ingredients. Not to show off, BUT, I made mine with home-ground confectioners' sugar, homemade butter, and a great local dairy brand. Trust me, it made a difference. We couldn't stop eating this stuff. 

Yes, the recipe requires quite a bit of time. But it's relatively passive time--you can keep the burner on low, and be working on something else nearby. As long as you can check and stir occasionally, you're good to go. It's a great project for while you're playing Scrabble (you can check the milk when it's not your turn!) or while reading a book on a rainy day.

Sweetened condensed milk

How to Make Sweetened Condensed Milk 

  • 2 cups milk (whole will yield the richest and best flavor, in my opinion)
  • 2/3 cup homemade confectioners' sugar (the store bought kind may have cornstarch, which might not incorporate properly) or 1/2 cup granulated sugar
  • 5 tablespoons unsalted butter, cut into pieces
  • 2 teaspoons vanilla extract

Step 1: Place the sugar and milk in a heavy bottomed, medium sized saucepan. Whisk to combine. Apply medium heat, and stir frequently until the sugar has completely combined and the mixture comes to a low boil.

Step 2: Reduce the heat to the lowest possible setting on your stovetop. Add the butter; it should melt fairly rapidly.

Step 3: Now comes the waiting game. Let the mixture hover over this very low heat until it has reduced to a sweetened condensed milk type of syrupy thickness. Check it out every 10 minutes or so to monitor things. Listen--this can take up to 4 hours. 

Sweetened condensed milk

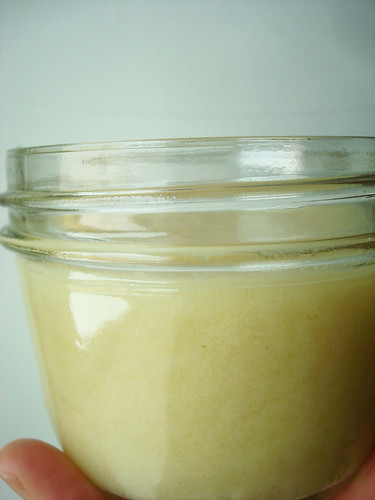
You may find that the amount of the finished liquid is comparable to that in a can of sweetened condensed milk, but be sure to weigh it before using in a recipe--a can holds 14 ounces. Homemade sweetened condensed milk 

Either way, you've got yourself an impressive finished product on your hands. You made sweetened condensed milk! You officially win. 

Sweetened condensed milk

What's your favorite recipe with sweetened condensed milk?

How to Make Doughnuts from Cookie Dough Mix

DSC06332

I have done something so, so naughty. And I'd like to tell you how to do it, too.

The subject of our conversation today, dear ones, is this: how to doctor up cookie dough mix so that you can fry it like doughnuts. And then eat it in all its gooey, rich glory. 

How I got this brilliant idea

I first had this idea shortly after making doughnuts from biscuits in a tube. I thought of how you can make cake mix into pancakes, too, and I was all like, "why can't I do something like this with cookie mix?".  

So I grabbed some cookie dough mix. I used this pumpkin kind, but you could probably try it with any Betty Crocker type.

How I made it happen

So I started out with some cookie mix, and basically followed the instructions (mix with some melted butter and a pasteurized egg--this was important, as the resulting doughnuts were pretty gooey and it was nice to know that I'd killed harmful bacteria)

and then shaped the dough into little rounds and tried to fry 'em in oil. Mission: failure. They melted!

Doughnut cookie

But then, I decided to see what would happen if I froze the dough. So I put the doughnut shaped cookie dough mounds in the freezer for like 2 days. Then I was brave enough to try again.

I heated oil in a frying pan, and then added the freezing cookie doughnut rounds, a few at a time, keeping the rest in their chill.

Cookie Doughnuts

And guess what...this time, it worked. They held their shape long enough to become crisp all over, but with a gooey, oozy interior.

Cookie Doughnuts

Ooey gooey aside, though, they were rather ugly.

Cookie Doughnuts

Don't worry, there's a solution: add glaze and sprinkles! I made a simple confectioners' sugar glaze and added rainbow sprinkles. 

Cookie Doughnut

OK. So here's what you do if you want to give it a try.

Cookie Dough Doughnuts

  • Betty Crocker cookie dough mix, mixed per the package instructions (use a pasteurized egg for safest results)
  • A pan
  • enough vegetable oil to fill the pan about an inch full
  • A spatula
  • 1 1/2 cups confectioners' sugar
  • 1-3 tablespoons milk, to thin the sugar for a glaze
  • food coloring, if desired
  • sprinkles

Step 1: Mix the cookie dough as specified on the package instructions. Shape the cookie dough into little doughnut shapes. Now, place them on a plate or parchment-lined baking sheet and put them in the freezer for several hours or overnight. 

Step 2: Keep the dough in the freezer, but start fryin' some oil. Place it in the pan and heat it until it hovers between 350 and 375 degrees F. 

Step 3: Add the dough, a few rounds at a time, keeping the rest in the freezer. Fry until it is browned and crispy, then flip the doughnut rounds. It's ok if they slightly melt around the edges, as long as they mostly stay together. Be very gentle when flipping, as they are delicate. 

Step 4: Fry side two, and transfer to a plate lined with paper towels to blot excess oil. Don't put them on a cooling rack because they will melt through (they will be fragile until they set). 

Step 5: Grab more rounds from the freezer and continue frying. Repeat til you've fried 'em all. Let cool.

Step 6: Once set and cool, mix up the confectioners' sugar, enough milk so that it is pourable, and food coloring, if desired. Drizzle over the cookie doughnuts, and immediately garnish with sprinkles (they stick best when the glaze is freshly applied). 

Step 7: Enjoy. Die(t) another day.

Have you ever fried something unexpected for dessert? 

Make Mornings Magical: Unicorn Pop-Tarts Recipe

Unicorn pop tarts

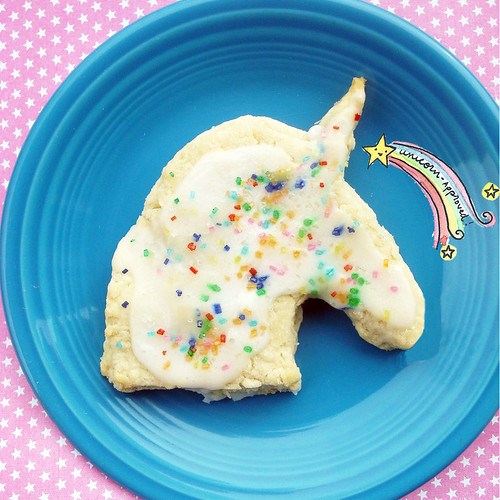
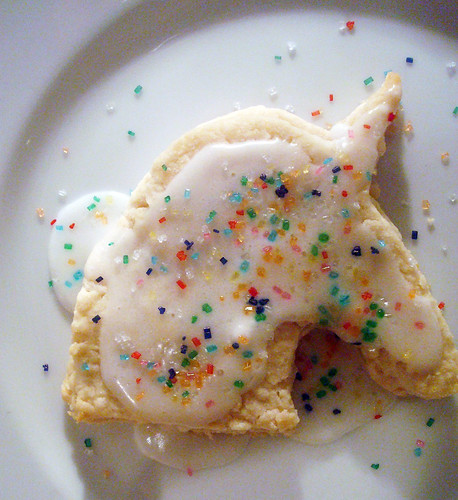
I would be lying if I said I wasn't proud as a prancing unicorn about my latest creation: Unicorn Pop-Tarts.

To be completely honest, this wasn't the first time the combination had occurred to me. I mean, Pop-Tarts employ rainbow sprinkles and taste like happiness. Unicorns are trailed by rainbows and are the embodiment of happiness. See? They have loads in common. 

But there are some real technical issues with making Unicorn Pop-tarts. Mainly, the shape of unicorn cookie cutters. They're generally thin in places, which is fine, but not conducive to filling pastry with jam or chocolate. I didn't want these to just be double-decker pie crust cookies. I wanted them to have filling, and taste like pop-tarts. Homemade, of course.

Cookie cutter

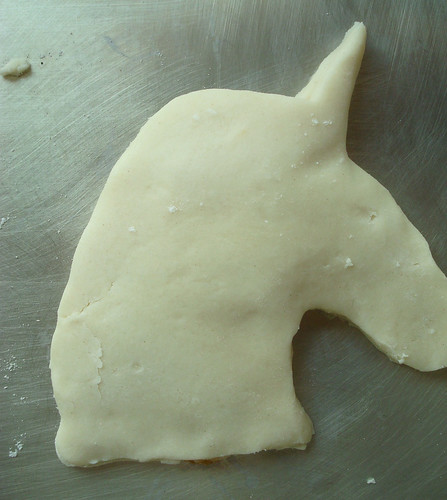
I figured that a unicorn bust would be perfect, as it would have the horn but be a larger shape to hold together, but such a cookie cutter was not easy to find.

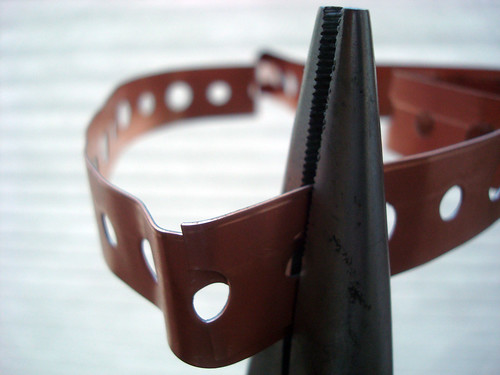
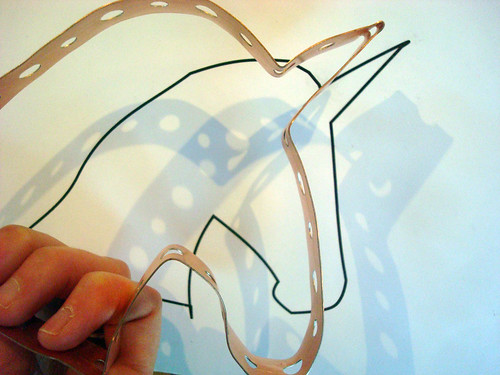
So I dealt with that issue by making my own. I'll post a tutorial soon on how to do that, but rest assured it required a trip to the hardware store, which is DEFINITELY not my natural element. 

Cookie cutter

It was worth it. The cutter was easy to make, and within hours I had unicorn pop-tarts, which are truly the most magical start to the day. Any day. 

Unicorn pop tarts

Here's the recipe. 

Homemade Pop Tarts

Makes about 6 unicorn-shaped tarts; adapted from wonderful, wonderful Culinary Concoctions by Peabody

For the crust
  • 1 1/2 cups flour
  • 1/2 teaspoon salt
  • 1/2 cup (1 stick) cold unsalted butter, cut into cubes
  • 3 tablespoons cold water

For the filling

Jam, about 1 heaping teaspoonful per pastry (your choice of flavor)

For the icing

  • 1 cup confectioners' sugar, sifted
  • heavy cream, to thin (you could use milk...but I like cream)

Procedure

  1. Preheat oven to 450°F. Line a baking sheet with parchment paper; set to the side.
  2. Combine flour and salt in a large bowl. Add butter and blend with a fork, pastry cutter, or your impeccably clean hands. Blend until the mixture is fairly coarse. Add the water, bit by bit, gently mixing the dough after each addition, until the dough is cohesive enough to form a ball.
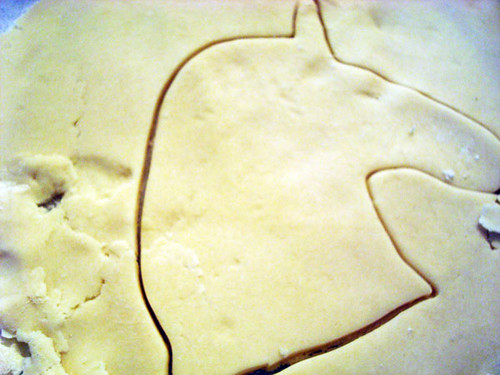
  3. Place dough on a lightly floured surface and roll into a rectangle, about 1/8 inch thick. Cut out using your unicorn cutter. Re-roll the scraps and cut out more unicorns. You should get 10 to 12 cutouts, which means 5 or 6 tarts.
  4. Unicorn pop tarts
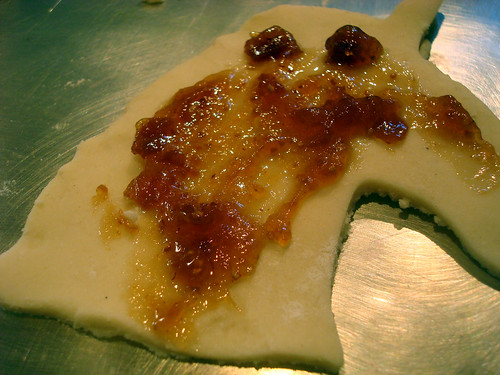
  5. On half of the unicorn heads, place a small spoonful of the jam of your choice in the center. You don't want it to be too thick or the top crust will mound on top of it. Spread it where it makes sense (easy on the horn).
  6. Unicorn pop tarts
  7. Place the remaining unicorn head cutouts on top of the ones with jam. Crimp all four edges by hand... Unicorn pop tarts or with a fork to ensure that your filling won't ooze out. I also poked the top of each with a fork, to vent them.
  8. Place the tarts on your prepared baking sheet, and bake for 7 to 8 minutes, or until light golden on the edges. Remove from the oven and let them cool completely.
  9. While the tarts cool, prepare your icing; make sure it is fairly thin but not so thin that it will just drip off. Once the pop tarts are cool, drizzle it on top. Garnish with sprinkles.
  10. Unicorn pop tarts

Sta-Puft in Style: How to Make Funfetti Marshmallows

Marshmallows

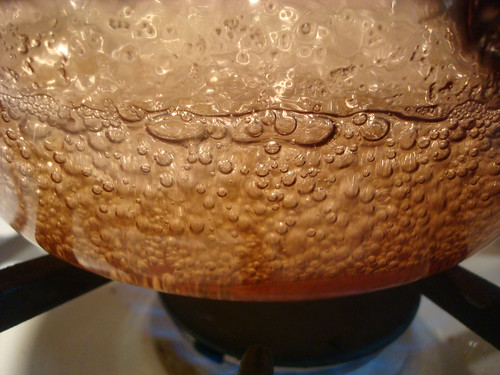
Recently, I was making homemade marshmallows for an upcoming Craftsy post, and during the process, I found myself slightly hypnotized by the bubbling of the boiling sugar mixture.

Can't you see why? Just look:

mallowboil

So. It was during this time that I thought these magical words: "I'm going to make these marshmallows funner." How exactly? Well, the typical way one would usually make something funner:  ADD FUNFETTI. 

The process of funfetti-ing something up, I have determined, is pretty simple: all you have to do is stir in rainbow sprinkles. Yup. Science.

Marshmallows

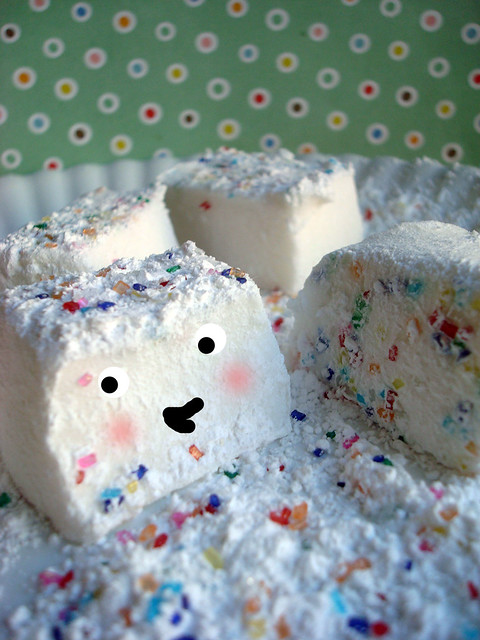
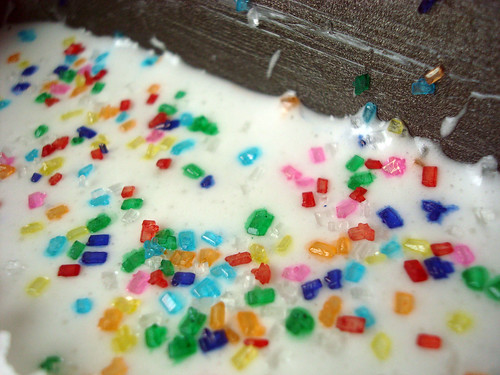
So when I finished the marshmallow batter, I stirred in some rainbow sprinkles into the mix, then let them set. Miraculously, the sprinkles didn't bleed too much--I was a little worried it would look like rainbow soup. But nope. They were pretty as could be.

Marshmallows

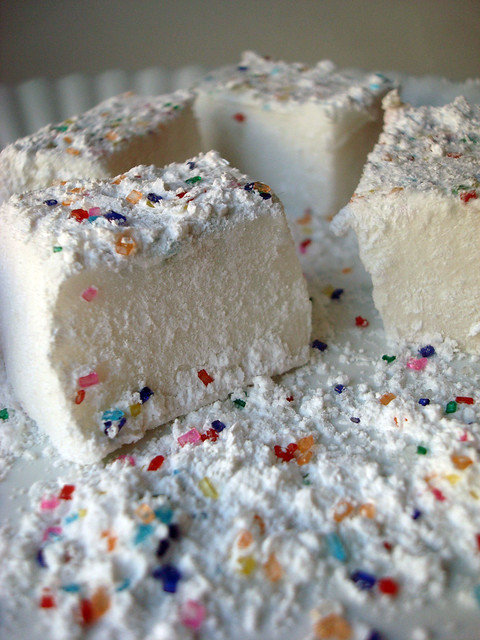
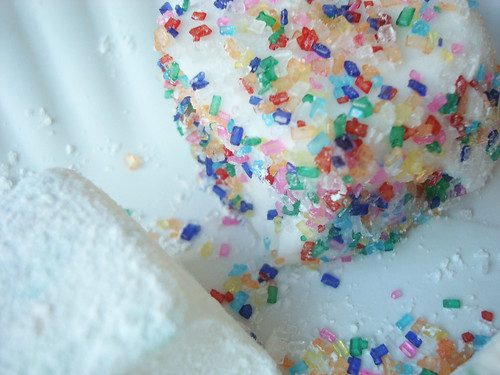
So after they set, I further funfetti-ized them by dusting them in a sprinkle and confectioners' sugar mix. I had tried just sprinkles, which was pretty, but the coverage was spotty and they crunched too much in the mouth. 

Marshmallows

Listen, if you decide you'd like to make funfetti marshmallows, here is how I suggest you do it.

Funfetti Marshmallows

Makes about 64 marshmallows

Step 1: Follow the instructions for making homemade marshmallows from this post, for the brilliant marshmallows from  Butter Baked Goods: Nostalgic Recipes From a Little Neighborhood Bakery. I will have a step by step tutorial coming up on Craftsy--I will post a link when it's up, OK?

Step 2: When you've finished mixing the batter but before you pour it into your pan, quickly stir in a hefty handful of rainbow sprinkles. I used the translucent kind--you know, the kind you'd find on a pop-tart. 

Marshmallows

Step 3: Let the marshmallows set as specified in the recipe. When finished, dust them with a mixture of confectioners' sugar and about 1 tablespoon of sprinkles, mixed together to evenly distribute everything.

Marshmallows

And there you go. Fun! Both inside and out. 

 Marshmallows

Look at that! Couldn't be easier, and now you have magical marshmallows. Watch out--you just might make your s'mores and hot chocolate jealous.

Sweet Tarte: The Story of Tarte Tatin

Image via CraftsyI know, sweet readers, that you probably love a sweet story as much as me, so I thought I would tell you the tale of Tarte Tatin.

To the uninitiated, Tarte Tatin is an upside-down apple tart which is famous in France. It's upside down because it's baked with a slurry of apples, butter, sugar and some spices in a pan, with the pastry bottom on top. After it's baked, you flip the pan, and the yummy gooey stuff drips down on top of the apples to form a caramelly, buttery awesome apple topping on a pastry crust. It's easy and good eating, for sure. 

Among its many fine points, it's also largely viewed as a precursor to America's beloved pineapple upside-down cake. 

So how did the tart get its start? Well, one thing is for certain: the ones who made it famous in the 1880s were the Tatin sisters, Stephanie and Caroline, proprietresses of the Hotel Tatin, located about 100 miles south of Paris. 

How, exactly, the tart was developed depends on who you ask. There are several stories; I'll share a few with you.

Some say that it was a flub where sister Stephanie was cooking some apples on the stovetop and misjudged how quickly they were cooking. To try to chill out the fast-cooking pommes, she tossed a pastry crust on top and tossed the whole thing in the oven to slow the cooking. When she extracted it, the inverted tarte was well-received, and a new classic was born. In another similar variation, she simply forgets to put the crust below the apples so decides to put it on top and bake.

Other versions of the story make out Stephanie as a kitchen novice, accidentally assembling the tart in the wrong order before baking but deciding to go with it. Yet others include an unfortunate incident in which a tart is assembled and soon before baking, is accidentally flipped upside down, but she decides to go with it anyway.
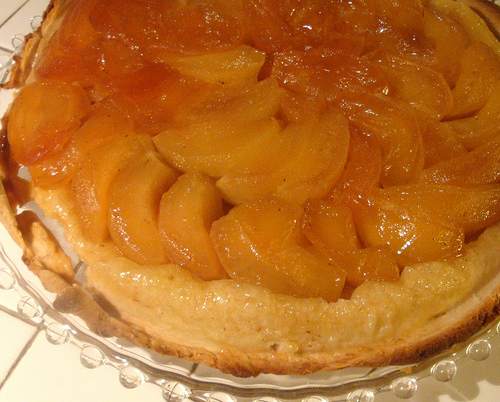
If you've heard another variation of the story, or a slightly different version of any of the above, I'm not surprised. As I found out while writing my second book, The Secret Lives of Baked Goods: Sweet Stories & Recipes for America's Favorite Dessertsmany of the stories behind popular baked goods are like playing a game of telephone: they're slightly different depending on who tells the story. 

It's also probable that it wasn't an accident at all, but a matter of the baker following baking trends, since it's probable that the concept of upside-down desserts actually preceded the sisters Tatin. In his Le Pâtissier royal parisien, published in 1841, the famed pastry chef Marie-Antoine Carême had already referenced "gâteaux renversées" , or "reversed cakes", made with various fruits.

But to me, this is the most interesting part of the story: it wasn't even the sisters Tatin who made the tarte famous. In fact, it was a matter of word of mouth. 

Maurice Curonsky, a French author and gourmand, adorably nicknamed "the Prince of Gastronomy"was the first to famously revere the tart, referring to it in his writing as "tarte des desmoiselles Tatin". To the best of my high school French knowledge, "desmoiselles" is a more kind term than "old maids", but it does refer to their unmarried status. Word of the "tarte Tatin" spread, and this became its nickname--it had not previously been referred to by name like this.

Sealing the tarte's fame was the love of Louis Vaudable, an influential foodie and owner of Parisian restaurant Maxim's. According to the official Tarte Tatin website, Vaudable is said to have written "I used to hunt around Lamotte-Beuvron in my youth, and had discovered in a very small hotel run by elderly ladies a marvelous dessert listed on the menu under tarte solognote. I questioned the kitchen staff about its recipe, but was sternly rebuffed. Undaunted, I got myself hired as a gardener. Three days later, I was fired when it became clear that I could hardly plant a cabbage. But this was long enough to pierce the secrets of the kitchen. I brought the recipe back, and put it on my own menu under "Tarte des Demoiselles Tatin".

As the website continues, however, "Unfortunately, Mr. Vaudable was born in 1902, and the sisters retired in 1906. They died in 1911 and 1917, while Maxim's was purchased by the Vaudable family in 1932." So while it's a cute story, it doesn't quite line up. 

Nonetheless, the tarte did appear on the Maxim's menu, and became a popular favorite.

Today, you might not see tarte tatin on restaurant menus with great regularity, but it's a delicious and worthwhile experience to make your own. It's fairly simple--if you've ever made an apple pie, and if you've ever flipped a Pineapple upside-down cake, you're well equipped with all the skills you need. 

Happy Apples

Regarding apples: The French Calville apple is the specimen of choice for this recipe; however, if you can't find those, try Pippin, Cortland, or Gala apples. Interestingly, some older recipes call for unpeeled apples, though the recipe I suggest calls for Granny smith apples, cored and peeled. I have used Gala when I have made this recipe, but you choose your own bliss. You're not going to be wrong if you use Granny smith.
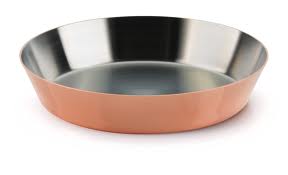
Regarding pans: You know, there actually exists a tarte tatin pan. But if you don't want to make the investment...go ahead and use an oven-safe skillet.
Regarding serving: Although old versions call for serving the tarte warm, by itself, go ahead and serve it with ice cream if you wanna (you probably do, right?). You won't regret it. 

Want a recipe? I will tell you, I have used the New York Times recipe pretty exactly, so I won't even try to adapt it here--rather, I will give you a link.

Find a recipe for Tarte Tatin here.

Have you ever tried Tarte tatin?