Single Serving Dessert: Microwaveable Chocolate Cake in a Bowl

To some, the idea of a "single serving dessert" seems sad. Like, poor you, you don't have anyone to share dessert with.

I don't find single serving desserts sad at all. I see it as a definite reason not to have to share. It only makes one! So you can see, it's a decision that you can make to treat yourself and no one else. The recipe which follows is for a quirky little single-serving chocolate cake which you can make in the microwave. I stuffed mine with hershey's kisses so it would be a little gooey inside, but you can do whatever you want, from topping it with ice cream or fruit (if you're into health food) or even some buttercream frosting

If you started to feel panicky there, don't: you won't be sharing the toppings either.

If this all sounds quite terrible of me, so be it, but I wasn't planning on sharing dessert with you anyway.

I'm going to try something a touch different today and put all of the photos before the recipe, so that if you want to follow the recipe, you can easily follow it without picture breaks. Which way do you prefer? 

All right, here we go.

Next time you're feeling greedy and want something all for you that nobody else can have, here's how you do it. 

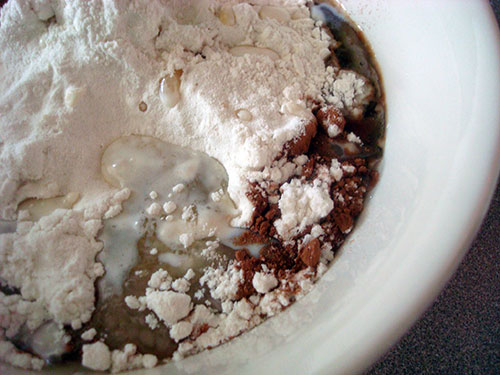
First, you'll mix up a couple of wet ingredients.

Then you'll add some dry ones and mix til it's smooth.

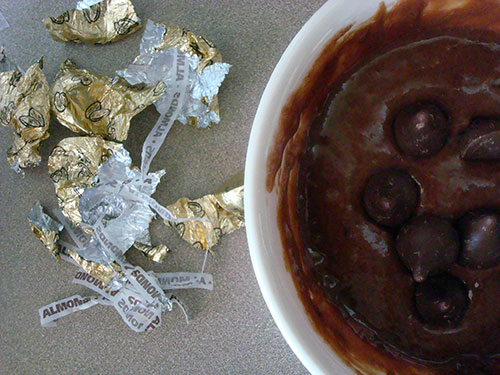
If you want, add a generous handful of (unwrapped!) chocolate candies such as Hershey's Kisses.

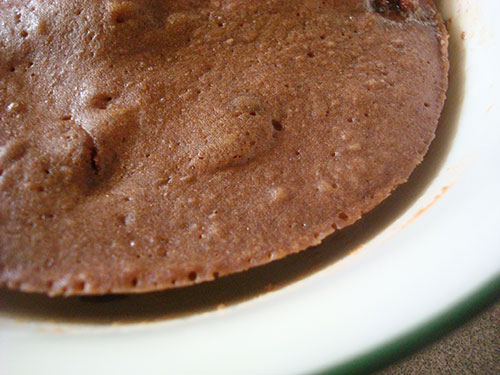
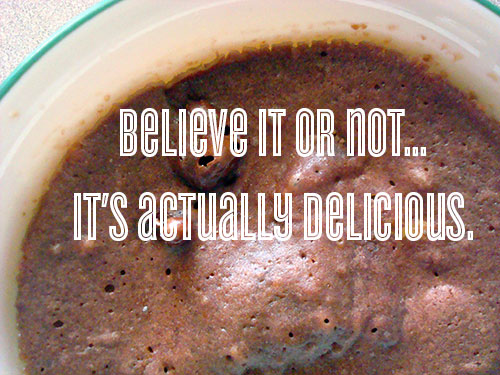
Then you'll put the bowl you mixed it in right in the microwave for a few minutes. It will puff up and pull away form the sides of the bowl. Actually, it will kind of look ugly. But...

Go for it. Don't share. What do you think?

Single Serving Chocolate Cake in a Bowl

Makes one

  • 4 tablespoons sugar
  • 1 egg
  • 3 tablespoons canola oil
  • 1 teaspoon vanilla extract
  • 4 tablespoons flour
  • 1 tablespoon unsweetened cocoa
  • 3 tablespoons milk
  • a handful of chocolate candies

Procedure

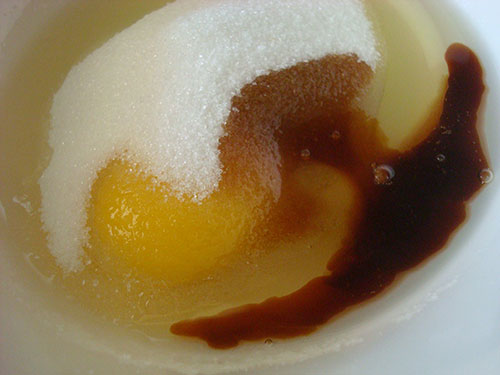
  1. Mix together the sugar, egg, oil, and vanilla in a bowl. And by "a bowl" I mean the one you indend on microwaving. Use one with decently high walls, so that the cake has room to rise.
  2. Add the flour and cocoa. Mix until incorporated. Add the milk and mix until smooth. You can use a fork, spoon, or mini spatula for this.
  3. Fold in the chocolate candy.
  4. Put the bowl in the microwave and heat on high for 3 minutes (if you know your microwave is a lower powered model, go four minutes. It will puff up, and then deflate once removed from microwave.
  5. What are you waiting for? Top it, if you want to, and eat.

What's your favorite dessert to not share?

Unicorn Pom-Pom Puffs

Here's an important question to which I would like an honest response. It is this:

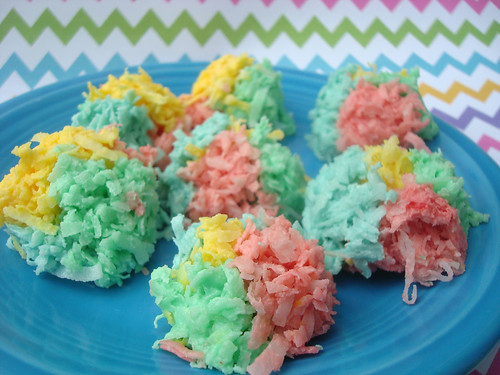
Would you rather eat a macaroon-esque "white chocolate coconut cluster"...

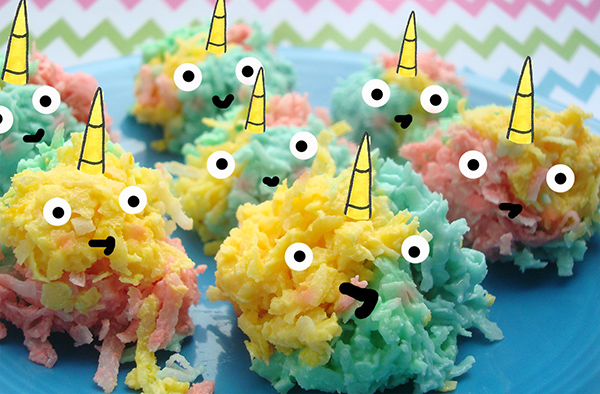
or a unicorn pom-pom puff?

Hey, remember how I said I wanted an honest answer? I lied: I don't even need or want it. Because I've made the executive decision: the unicorn ones are better.

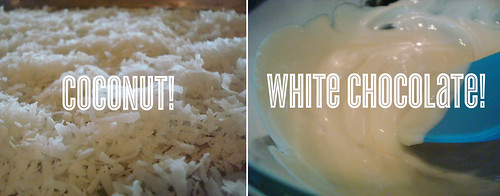
Basically, I dreamed up this confection thusly: upon pondering a simple use for the white chocolate cache I had at the time, I discovered an easy way of combining melted white chocolate with shredded coconut to form a super-sweet (and simple) confection. I like multipurpose treats, though, so I thought "well, how could I make these a lure for unicorns in addition to satisfying my sweet tooth?". 

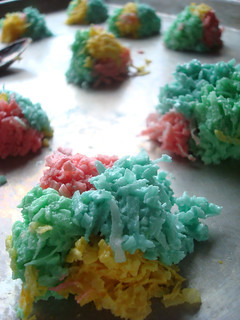
The answer was simple: add a little rainbow magic. By divvying up the mix and tinting portions in different colors before forming clusters, I ended up with fuzzy-cute treats that tasted like the Spirit Of Sugar had descended and was knocking right on my taste buds (that is to say--very sweet). I settled on the name "Unicorn Pom Pom Puffs" because, well, look at them.

Unicorn pom pom puffs

If you don't love white chocolate or coconut, make them anyway. You might just catch a unicorn!

Unicorn Pom-Pom Puffs

Unicorn pom pom puffs

  • 2 cups lightly toasted coconut (very light color is important)
  • 7 ounces white chocolate
  • food coloring

Procedure

  1. Melt the white chocolate. Remove from heat.
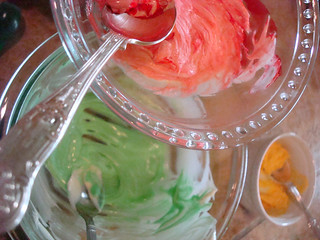
  2. Divide the chocolate into four separate bowls large enough to do some stirrin'.
  3. Tint each portion with the color desired (I used red, yellow, blue, and green) until it reaches the tone of your liking.
  4. Unicorn pom pom puffs
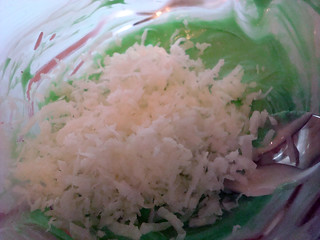
  5. Add 1/4 of the coconut to each bowl. Stir til combined.
  6. Unicorn pom pom puffs
  7. Gather a small lump of each color together, and clump them lightly so that they adhere. Place on a baking sheet as you finish them. Continue until you've used all of the mixtures.
  8. Unicorn pom pom puffs
  9. Let them set for an hour or more before eating for the best texture. Store leftovers at room temperature in an airtight container.

Taste the rainbow!

Waste Not Want Not: Compost Cookies Recipe

CakeSpy note: this is a guest post from Stefanie Ellis. When she's not busy masquerading as a giant Thin Mint, Stefanie writes about food and relationships. She is a former restaurant critic and food writer for the St. Louis Post-Dispatch and St. Louis magazine, and is the PR director for Girl Scouts of Western Washington. You can reach her via email here.

I have a confession to make: I don’t really like cookies. I’ve tried really hard to like them. I was even sprawled out on a settee while some handsome man fed some to me, and that STILL didn’t work. Crazy? Maybe. But I’m more of a cake kind of girl. I would ditch a handsome man if it meant I could spend an evening on my settee with a devil’s food cake slathered in bittersweet chocolate ganache. For me, cake takes the cake.

However, there have been a handful of experiences in my life where cookies have actually competed with my love for cake, and left a rather remarkable impression.

Like when I was little, and my mom would serve me chocolate chip cookies warm from the oven when I came home from school. I never knew when these magical, melty kitchen table sessions would happen, so it made it even more exciting. The chocolate would get all over my face, and we’d laugh and talk about our days. I can’t imagine anything more wonderful than that feeling, or that perfect marriage of sugar, butter and chocolate. My local grocery, Metropolitan Market, started making giant chocolate chip cookies with several types of chocolate. They make them every five minutes, so when you walk into the store, there’s always a fat, gooey cookie waiting for you. Instantly, I am catapulted back to my kitchen table, laughing with mom. Sometimes I eat one while I walk through the store, only to realize I had chocolate all over my face the whole time.
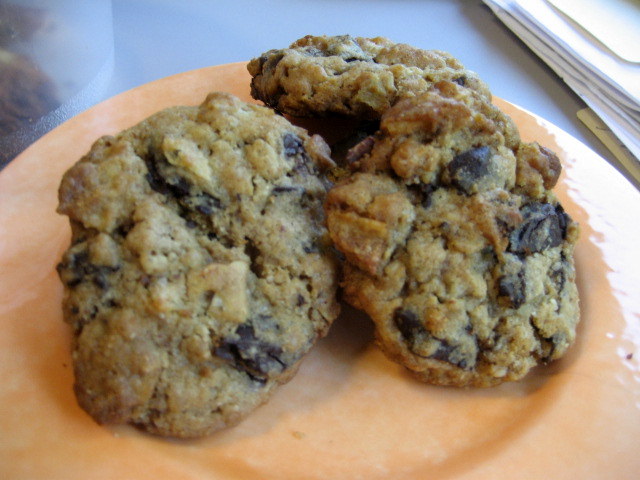

When I went to college, my grandmother would send me care packages filled with oatmeal cookies with apricots and pecans. I don’t like oatmeal cookies, but hers were saucer-sized orbs of the softest, silkiest, cinnamon-kissed dough I’ve ever tasted. The apricots paired beautifully with the cinnamon, and she ground the oatmeal so fine you didn’t even know it was in the recipe. These are the only oatmeal cookies I could ever imagine eating every day for the rest of my life.
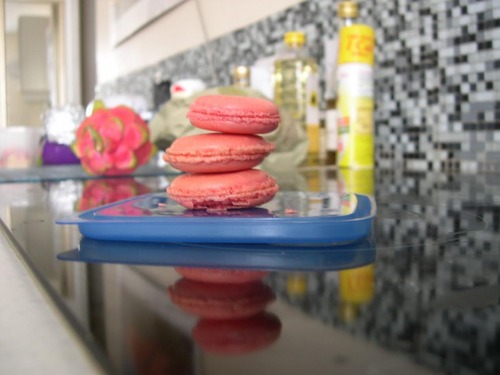
 

When I went to pastry school, I made my first macarons. They were pink. But more than that, they were so crisp and delicate, it seemed as though they might shatter if you laughed within close proximity. The insides were tender and ethereal, like a pillow made of cotton candy. When I melded the fragile shells together with homemade raspberry jam, it felt like I was painting the inside of a princess castle.

And let’s not forget Girl Scout Cookies. I’m not just saying this because I work for Girl Scouts. I couldn’t, even if I wanted. Girl Scout honor. I’ve had a love affair with Girl Scout Cookies ever since I can remember. To me, Samoas and Thin Mints are right up there with Nutella eaten straight out of the jar. They’re a luxury, and I don’t eat them year-round, as many people believe (people also think our office has stairs made of Do-Si-Dos). When I do eat them, I’m transported back to the sweetest moments in my childhood, when my biggest stressor was whether or not to play freeze tag, jump rope or eat the blackberries from my neighbor’s yard.

Each one of these cookie memories has been completely different – sort of like a bunch of different experiences were dumped into my brain and mixed around, creating a sweet feeling of joy in my heart.

I realize they’ve created the perfect base for these Crazy-Sexy Compost Cookies, my new favorite. Yes, that means I kind of like cookies now. I guess I can thank Christina Tosi for that. I’ve been hearing of her compost cookies from Momofuku Milk Bar for years, and love that her recipe uses coffee grounds. I’m a big compost geek. I have my master composter’s certification, and have even been known to take my compostables on planes from time to time.

I always have random bits of ingredients in my pantry that can never really be used for a single recipe, and that’s why I love these cookies so much. Have just a few ingredients that don’t go together at all? No problem! You might even find, as I have, that cookies are even better when you start adding in wacky ingredients. Goldfish crackers or Almond Roca, anyone?
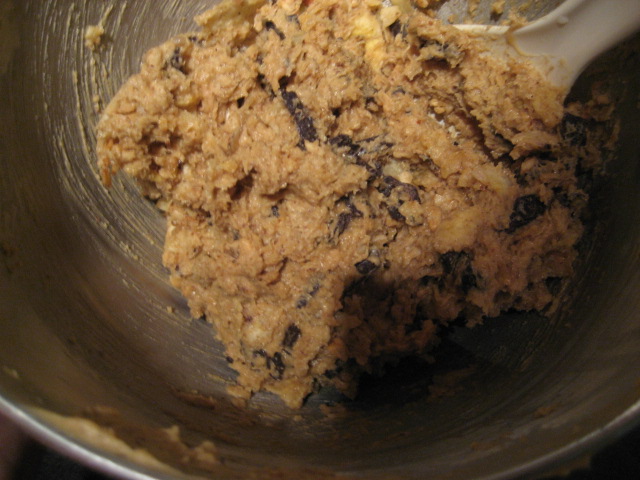

Tosi’s recipe calls for butterscotch, pretzels, graham cracker crust and oats, and I have eliminated those ingredients, replacing the oats with maple pecan granola, and adding in banana chips and crystallized ginger. I also use almond flour in place of some of the regular flour, which makes for a wonderful texture. All in all, this cookie has really challenged my perception of what a cookie can or should be. Not to mention it has done a nice job in helping me remember that cookies, like memories, are much better when you throw a bunch of different things together and mix them around to create a sweet feeling of joy in your heart – and in your stomach.

Crazy-Sexy Compost Cookies

Note: Compost cookies are trademarked by Momofuku. These cookies were not made for resale.

YIELD: Approximately 25 cookies

INGREDIENTS

1½ sticks butter, room temperature (12 T)

3/4 cup raw sugar

¼ cup coconut sugar

1 egg

1 teaspoon vanilla bean paste

1 cup unbleached flour

1/4 cup ground almonds

1/2 teaspoon baking powder

1/4 teaspoon baking soda

1 teaspoon salt

1 T maple agave syrup or maple syrup

1 cup dark chocolate chips

1/2 cup banana chips, crushed

2T candied ginger, finely chopped

1/2 cup granola, such as Trader Joe’s Maple Pecan

1 cup potato chips, crushed

Procedure


  1. Heat oven to 375 degrees.
  2. Combine the butter and sugars in the bowl of a stand mixer fitted with the paddle attachment and cream together on medium-high for 2 to 3 minutes. Scrape down the sides of the bowl, add the egg and vanilla, and beat until well blended. Reduce the speed to low and add the flour, almond meal, baking powder, baking soda, and salt. Mix just until dough comes together, about 30 seconds. Do not over mix. Scrape down the sides of the bowl with a spatula.
  3. With a spatula, add the chocolate chips, banana chips, granola, maple agave syrup, ginger and potato chips. You’ll want to crush the ingredients a bit to make sure there aren’t large chunks, but do so judiciously, not incessantly.
  4. Refrigerate dough for 30 minutes to 1 hour.
  5. Arrange the chilled dough 4 inches apart on parchment or silicone baking mat-lined sheet pans. Bake for 15 minutes, or until the cookies are golden brown.


Cool the cookies completely before transferring to a plate or container for storage. At room temperature, cookies will keep fresh for 5 days; in the freezer, they will keep for 1 month.
Pastissets: A Party-Perfect Cookie Recipe from Spain

Pastissets

Last week, I was invited to a party. This was an exciting prospect, because typically at parties there is cake. Or as Julia Child once smartly and aptly put it, "a party without cake is just a meeting."

It was a potluck party, so naturally I decided to bring something sweet. Since these were new friends, I also wanted to kiss up a little bit. So in knowing that they had lived in Barcelona for a while (showoffs), I decided to find a recipe from Spain. Maybe a cake?

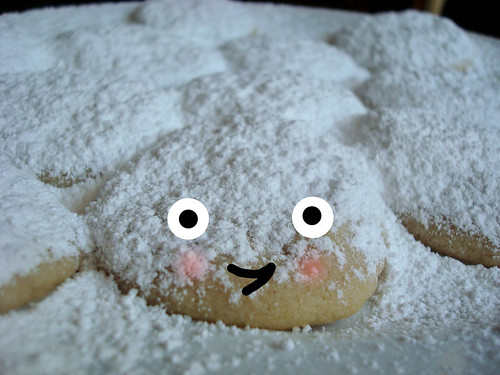
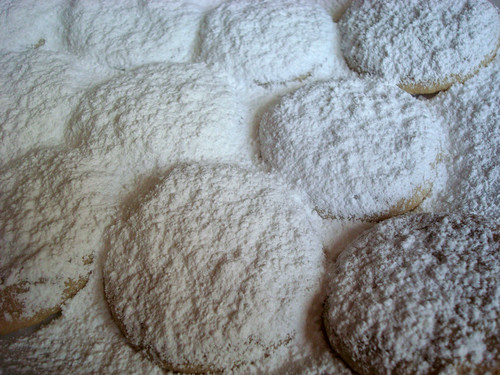
Well, almost: a cookie. In my brief research, I discovered a little something called pastissets. In looking at the recipe, which relied on lard for a tender texture and confectioners' sugar for a snowy coating, it struck me that these cookies seem very much like the love child of New Mexican biscochitos and Mexican wedding cakes (or snowballs, or whatever you want to call them). No nuts, but still that melt-in-your mouth texture. 

Pastissets

Apparently, in Spain sometimes pastissets are more like a sweet mini empanada cookie; it is in particular in Amposta that they're created in this way, sometimes with olive oil, sometimes with lard. The fact that some versions are made with anisette makes them only more similar to biscochitos!

I made mine with butter because I wasn't sure if any vegetarians would be in the house, and they went over quite well. I left some for my sweetie, who had to work, and he left me this note: 

Pastissets

So I would say they are a success.

Just to review: melt in your mouth. Nice and tender. Like Snowballs or Russian teacakes or Mexican wedding cakes but without the nuts!

I give them an A+. I hope you do too.

Pastissets

Makes about 24

  • 1 cup unsalted butter (original recipe called for 2/3 cup lard and 1/3 cup butter)
  • 1/2 cup sugar
  • 1 egg yolk
  • 1/2 teaspoon lemon peel, grated
  • 1/4 teaspoon cinnamon
  • 1 teaspoon vanilla extract
  • 2 cups flour
  • 2 teaspoons salt
  • confectioners' sugar, sifted ( for dusting)

Directions

  1. Preheat the oven to 350 degrees F.
  2. In a large bowl, cream the butter until smooth.
  3. Incorporate the sugar, egg yolk and lemon peel. Stir in the vanilla.
  4. In a separate bowl, combine the cinnamon, flour, and salt; work into the buttery mixture with your hands to form a smooth dough.
  5. Roll the cookies into 
  6. Pastissets
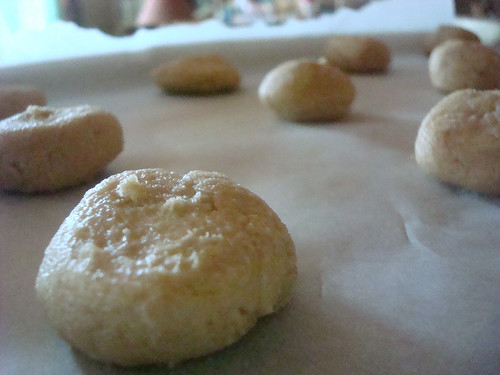
  7. Arrange cookies on a greased or parchment lined cookie sheet and bake for about 10 minutes, or until golden.
  8. Allow to cool briefly on the cookie sheet as they are delicate when warm. If one looks like it's trying to hide, eat that one first. 
  9. Pastissets
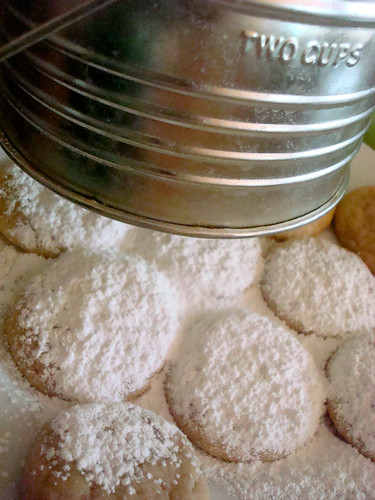
  10. Coat with confectioners' sugar twice: once after they've cooled for a few minutes, and again before serving. 
  11. Pastissets

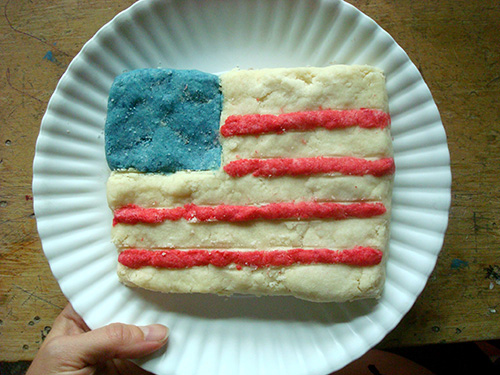
American Flag Shortbread Recipe

When the settlers came over from Europe, they didn't just bring a will for freedom and revolution: they brought over their shortbread recipes. 

Shortbread is perhaps one of the world's most perfect, and most simple, foods. Consisting primarily of flour, butter, sugar, and salt, it can be prettied up in any number of ways, but is in its essence a humble food. 

American Flag shortbread

This recipe takes but one liberty: the addition of cornstarch to mimic the lower-protein flours which might have been used in old-school Europe; but otherwise it is fairly straightforward.

American Flag shortbread

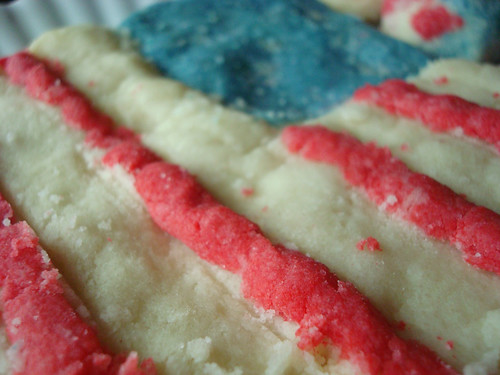
To make it a bit more festive, I reserved about 1/8 of the dough, which tinted red. I then made the majority of the dough into a rectangle, removing a portion from the left hand corner to make the blue portion of the flag. I tinted it after I cut it out; this was how I ensured I had enough dough.

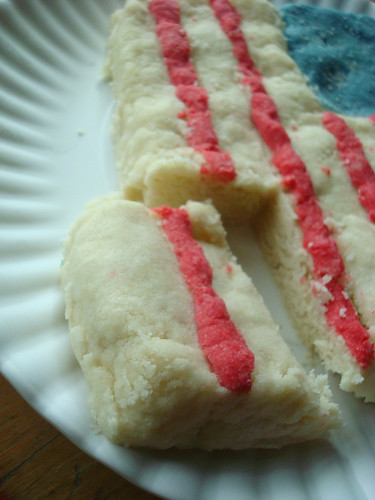
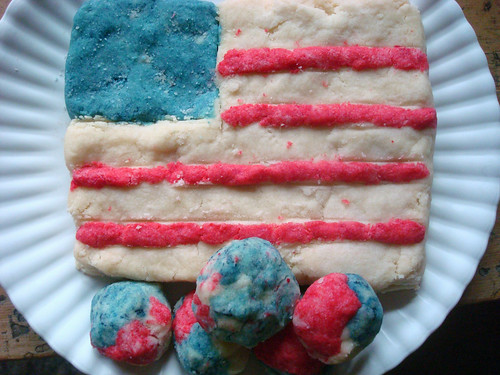
Now, I should tell you that decorating with tinted shortbread is tough because you can't really roll or shape it. So I gathered crumbles and kind of pressed them into stripes, and simply shaped and placed the blue portion where I had removed it initially. I used the leftover bits to form ugly multicolored balls of shortbread. They still tasted good. 

American Flag shortbread

It baked up pretty sweet, don't you think? Here's the recipe for shortbread--it's a keeper. 

How to make perfect shortbread

as seen on Craftsy

Ingredients:

  • 1 ¼ cups all-purpose flour (about 6 ounces)
  • 1 stick unsalted butter, softened (4 ounces)
  • ½ cup granulated sugar (about 2 ounces)
  • ¼ cup cornstarch (about 1 ounce)
  • Preheat the oven to 325 degrees F.

Procedure

  1. Cut the butter into pieces. Using a wooden spoon, mix the butter and sugar by hand until pale and creamy.
  2. Sift the flour, cornstarch and salt into the bowl of creamed butter and sugar, and mix well, continuing to use your wooden spoon. It will begin to come together in a somewhat crumbly dough, but it should very easily clump together if you gather it with your hand. If baking as a large round or as small cutout cookies, transfer to a parchment-lined baking sheet.
  3. Lightly flour a work surface. Place the dough on top. Roll out the dough until it is about ¼-inch thick.
  4. Decide what shape you’d like the shortbread in (follow the steps above, to flag-ify it). If you’d like it to be a round, shape it into a circle by hand. If you’d like it to bake in a pan, press it into a greased 8″ by 8″ pan. Or, simply cut the rolled dough using a lightly floured cutter. Score the dough if it will be sliced after baking, and lightly prick all over with the tines of a fork.
  5. Bake in the preheated oven for 25 minutes, or until the sides and bottoms are lightly browned but the top is just set. Step 7: Let cool on the pan for about 5 minutes before transferring to a wire rack to cool completely. Don’t get greedy, or you might burn your mouth.
Happy 4th of July! Don't forget to make some pop rocks cookies, too.

Millionaire's Shortbread Cookie Cups Filled with Milk

Milk filled cookie shooters

Cronuts. Brookies. Donnolis. S'moreos. The world of mash-up desserts, or the "hybrid trend", as it has been called by food consultants and PR peeps, has pretty much gotten out of control. But as annoyed as you may want to be with the trend, the fact is...if some is good, more has the potential to be amazing. And so we continue to--excuse the pun--eat it all up.

A recent dessert hybrid dreamed up by cronut creator Dominique Ansel was the chocolate chip cookie "milk shot"--a cup made of chocolate chip cookie, enforced so that it could hold milk long enough to take it as a "shot" and then eat the vessel from whence it came.

It never hit as big as the cronut, but I still think it's a pretty nifty idea, because how many desserts can actually allow you to utter the words "I'm gonna get milk and cookie CRUNK right now!"...? Seriously. No other dessert I can think of.

And an easy-to-make version hit my radar recently with an email from Pillsbury featuring several of their easy mash-ups (cannoli doughnuts, crescent bagels, etc). Their version included chocolate chip cookie dough baked in cupcake tins, then lined with chocolate, then filled with milk. Here's their version:


Milk Filled Chocolate Chip Cookie Cup

Looks yum, right?

But of course, I didn't want to do EXACTLY what they told me to, so I thought "why don't I do a Millionaire's shortbread spin?".

It was quite easy to do: I used sugar cookie dough instead of chocolate chip, then added a layer of caramel (since I think I'm pretty cool sometimes, I made my own) atop which I added a layer of chocolate. These fat cookie confections held the milk perfectly, and after a minute or two it begins to soak in to the rest of the cookie and soften the caramel. Milk filled cookie shooters You can either drink the milk then eat the cookie, or break it apart and then let the pieces "soak" in the spilled milk for a while longer.

Milk filled cookie shooters

No matter how you decide to eat it, the unrefutable truth is that these things are delicious. I mean, sugar cookie dough, caramel, chocolate, a touch of salt, and milk too? There is no part of this equation that is wrong or bad. The taste is classic, but the method of presentation and the mode of eating is fun. And isn't that what dessert is about, joy and fun?

Here's the recipe. 

Millionaire's Shortbread Cookie Cups Filled with Milk (printable version here)

You need: a cupcake tin (jumbo or regular, but not mini), parchment paper, spoons and spatulas

Ingredients

  • 1 box Pillsbury sugar cookie dough (or one batch of your favorite type), dough prepared per the package instructions but not baked
  • 1 bag chocolate morsels (12 ounces)
  • 1 cup sugar
  • Milk

Procedure

  1. Preheat the oven to 375. Generously grease the cupcake tin, sprinkle each cup with confectioners' sugar, and place a sheet of parchment along the bottom (for easy removal later). Why not just use cupcake cups? I didn't want the ridges on the sides. You can use the cups if you don't mind the ridges, though. No judgment. 
  2. Milk filled cookie shooters
  3. Grab big fistfulls of dough and press them into each of the cupcake cups. Milk filled cookie shooters Press a dent in the center. You want the cups to be about half full of dough. My entire batch was sufficient to fill a 6 cup "texas sized" cupcake pan. This is to say, these cups were no mere shot glasses. They were fatties. 
  4. Milk filled cookie shooters
  5. Now, bake the cookie cups. Since mine were so thick, they baked for about 25 minutes--longer than the time you'd bake the dough if you were making mere cookies. My advice? Keep an eye on their progress around the suggested cookie bake time, but then keep them in the oven until they are puffy and golden.
  6. Milk filled cookie shooters
  7. Once puffy and golden, remove from the oven. They will start to deflate in a matter of minutes. This is actually a good thing for you. 
  8. Milk filled cookie shooters
  9. After 5 minutes or so, approach with a spoon and knife. Milk filled cookie shootersFirst, use the knife to loosen the edges of each cookie cup to ensure easy removal later. But keep them in the cupcake tin. Now, use the spoon (or go ahead and use your impeccably clean hands) and press the cookies into a more pronounced cup shape. 
  10. Milk filled cookie shooters
  11. Let the cookies cool for about 30 minutes in the cups.
  12. Now, make your caramel. Simply put the sugar in a dry saucepan, and put it over medium-high heat. Caramelize it per the instructions in this tutorial. Once liquid, pour a little into each cookie cup and spread using a spoon to ensure even coverage inside of the cup. Milk filled cookie shooters Let the caramel set for about 30 minutes before proceeding.
  13. Now, melt the chocolate in the top of a double boiler. Once melted, pour some on top of the caramel layer in each cup and spread so it covers the inner cup evenly. Don't make it too thick or you won't have anywhere to put your milk.
  14. Milk filled cookie shooters
  15. Let the cookie cups set again, this time for 2 hours or so, until the chocolate has become firm. 
  16. Milk filled cookie shooters
  17. Once the chocolate is firm, you're ready to serve! Remove the cups from the cupcake tin. Place each serving in a shallow bowl (just nicer in case the milk seeps out). Fill each cup with milk--pour it right in. And serve!
  18. Milk filled cookie shooters
  19. It's nicest to let the milk sit for a minute or two before drinking and devouring--this will soften the caramel and chocolate and make it, in my opinion, a more enjoyable experience. Milk filled cookie shootersBut you follow your bliss. 

Enjoy!

How to Make Any Chocolate Chip Cookie Better

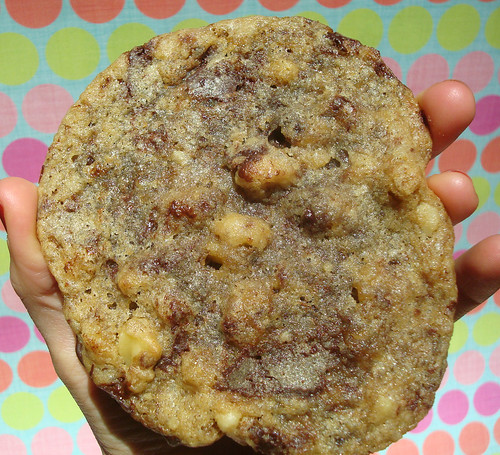
Choco-belly chocolate chip cookies

When is the last time you thought about the bottom of your chocolate chip cookie?

People have debated for years, decades, close to a century about how to make already-good chocolate chip cookies even better. Toast the nuts. Don't toast the nuts. Forgo the nuts entirely. Rest the dough. Add more brown sugar.

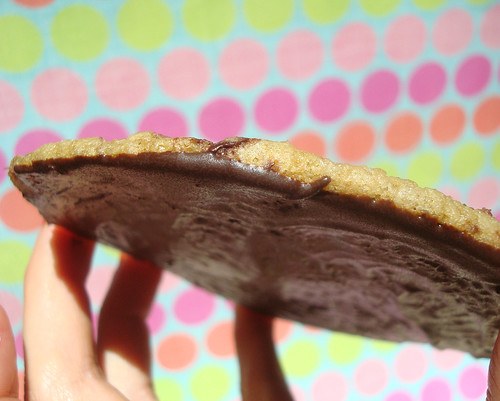
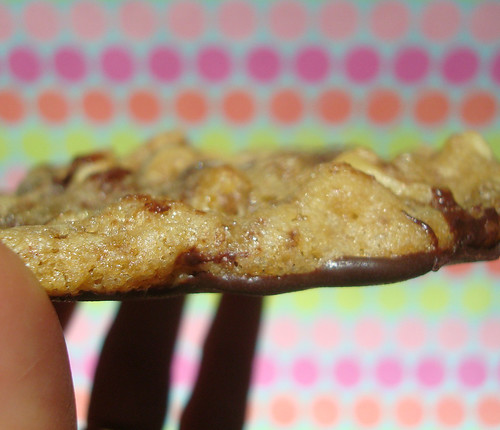
While well-intentioned, I humbly have to submit that this is the easiest, least controversial, and most taste-pleasing to make your cookies better: coat the bottoms of the cookies with chocolate.

Choco-belly chocolate chip cookies

Say what?

I know. But it is truly the gateway to chocolate delight. 

Choco-belly chocolate chip cookies

You see, the brilliance behind this method is that from the top, it looks like just an everyday chocolate chip cookie, but then when you bite into it, you're greeted with a delightful taste surprise. If you ask me, it tastes even better because there is the aspect of joy of discovery: you bite into a cookie expecting, you know, awesome chocolate chip cookie, and then--OMIGOD! It is so chocolatey that your head may be tempted to spin. 

Choco-belly chocolate chip cookies

It's an easy method to employ in your baking, and between you and me, it could be used for cookies other than chocolate chip. Some cookies such as chocolate dipped macaroons or sugar cookies are thinking along similar lines, but they lack the ninja-like stealth of the choco-bottom in terms of delightful taste surprise. 

I've elected to call these cookies "Choco-belly chocolate chip cookies" because indeed, this method of preparing cookies does take the oft-overlooked underbelly of the cookie and raise it to a thing of celebrated beauty.

So how do you do it?

I could be totally snarky and tell you "simply melt chocolate and brush or spread it on the bottom of your cookies", but I won't do that, because I want to share the cookie recipe, which is quite good, too. It makes a nice cookie: crispy on the edges, chewy on the inside. I liked 'em. DO listen to the chilling part of the recipe, because if you don't your cookies will spread considerably.

So here goes. Prepare your taste buds for a deliciously wild ride. 

Choco-belly chocolate chip cookies

Choco-belly chocolate chip cookies

adapted from a chocolate chip cookies recipe on Craftsy

  • 1 cup (2 sticks) unsalted butter, softened
  • 1 cup brown sugar
  • 1/4 cup white sugar
  • 1 egg
  • 1 egg yolk
  • 2 teaspoons vanilla extract
  • 2 cups all-purpose flour
  • 2 teaspoons cornstarch
  • 1 teaspoon kosher salt
  • 1 teaspoon baking soda
  • 1/2 cup walnuts or pecans, some coarsely and some quite finely chopped
  • 2 cups chocolate morsels, divided

Step 1:

Cream the butter in the bowl of a stand mixer. Add in both the brown and white sugar and mix to combine. Stir in the egg and egg yolk, one at a time, until fully incorporated. Stir in the vanilla.

Step 3:

In a medium bowl, whisk together the flour, cornstarch, salt, baking soda and pecans. Slowly add the dry ingredients to the wet until just combined. Fold in 1 cup of the chocolate chips.

Choco-belly chocolate chip cookies

Step 5:

Refrigerate dough for 30 minutes.

Step 6:

Preheat oven to 325 degrees. Remove dough from the fridge and scoop onto a parchment-lined baking sheet, about 2 inches apart. Bake for 12 minutes and remove from the oven. Cookies will look slightly underdone, but will continue baking on the hot cookie sheet. Once cooled, transfer to a wire rack to cool completely.

Choco-belly chocolate chip cookies

Step 7:

Once cooled, melt the remaining chocolate in the top of a double boiler.

Step 8:

Brush or spread a layer of chocolate (fairly thin, but enough to be opaque) on the bottoms of the cookies. Place them back on the wire rack, bottoms up. Let them cool until the chocolate has set. 

Choco-belly chocolate chip cookies

Enjoy. Like you needed to be told.

Best Health Food Ever: Millet Cookies

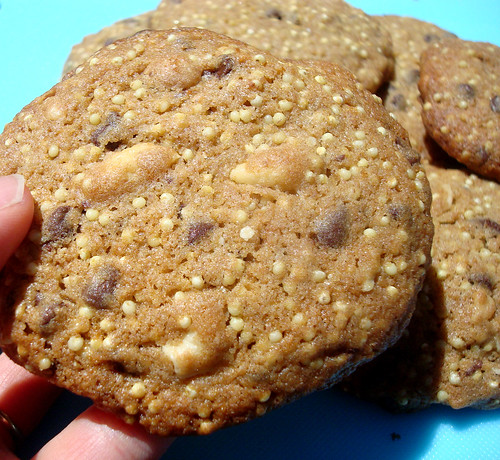
Millet cookies

I realize that I have something of a reputation for riding unicorns, wearing sparkles, and subsisting on a diet of mainly pink frosted treats. But the fact is this: I love a good hippie cookie every now and again. Whether it's the "Shazaam!" from my home base in New Jersey or a Power Cookie from Whole Foods, I enjoy these cookies with dessert-worthy delight. Something about the nuts, hearty hippie ingredients like nut or whole wheat flour, and a plethora of trail mix-esque mix ins just does it for me. 

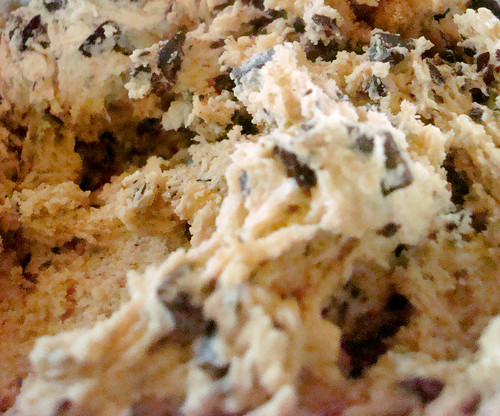
So the other day when I found a bunch of millet in my cabinet, I decided to see if I could make it into a tasty cookie creation. I'll tell you right now, so you don't stress about it, that the cookies tasted delicious.

Millet cookies

I found a recipe for oatmeal millet cookies on Grateful Table, which I proceeded to so completely change that I wouldn't even feel comfortable saying I adapted it...more like used it as a springboard. Still, I do want to give the website a shout-out because these cookies also look highly delicious.

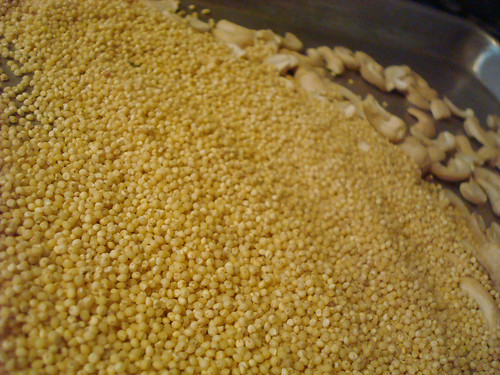
While I toasted some cashews and millet, I evaluated my ingredients. I realized I wanted to soften the butter which was totally cold, so I did something so forbidden: once the millet and nuts came out of the oven, I laid the cold butter on top of the millet. I turned the side every minute or so. Believe it or not, because it really seems like it shouldn't have worked, it did. 

Millet cookies

But I digress. Back to the cookies.

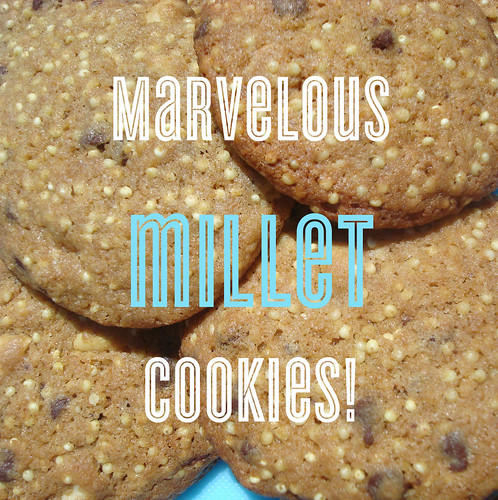
Toasty millet gives a fantastic crunch to the cookies, as well as a pleasingly nutty flavor that works in harmony with the flavor of the actual nuts and wheat flour. Perhaps because of all of the other ingredients, the wheat flour isn't as assertive tasting as it is in some recipes, and they maintain the identity of a cookie which happens to have healthy ingredients, rather than tasting like health food. 

Of course, the chocolate morsels don't hurt. Don't even think about skipping them. 

Millet cookies

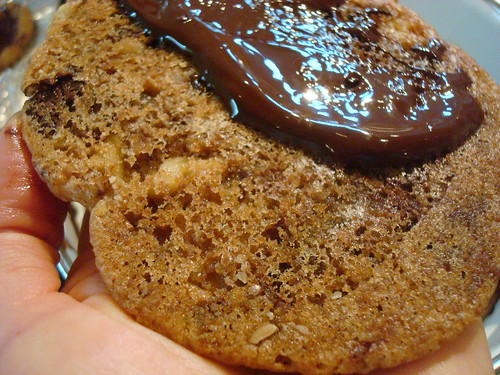
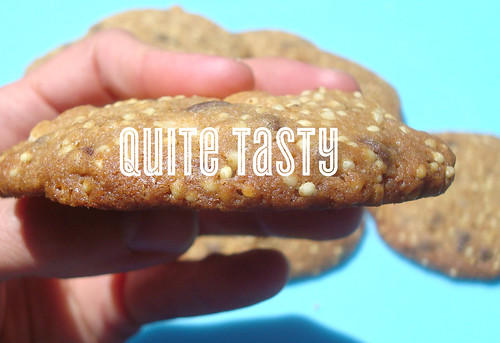
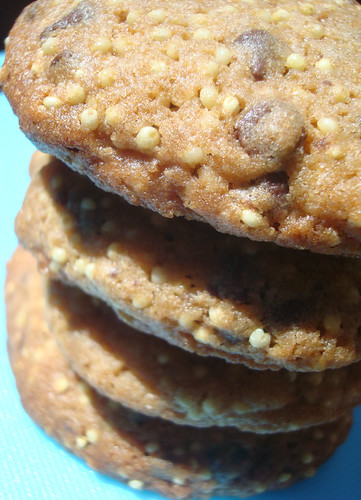
Nice and crispy on the outside, hearty and full flavored and slightly chewy on the inside. They may not be actual health food, but these cookies are awfully good.

Millet cookies

Millet cookies (not actually health food) - Printable version here

Makes about 30 cookies

Ingredients

  • 1 cup millet
  • 1 cup cashews, coarsely chopped
  • 1 1/2 cups whole wheat flour
  • 1/2 teaspoon baking soda
  • 1 teaspoon salt
  • 2 sticks unsalted butter, softened
  • 1 cup light brown sugar, packed
  • 2 large eggs
  • 1 teaspoon vanilla
  • 1 cup chocolate morsels

Procedure

  1. First, preheat the oven to 350. Line two baking sheets with parchment paper.
  2. Now, toast the nuts and millet on a baking sheet while the oven preheats. Because they toast at different rates, what I did was scatter the cashews on half of the tray and let them toast for about 5 minutes, then I took the sheet out, added the millet to the other side, then let the whole tray toast for five more minutes
  3. Millet cookies
  4. Remove the tray from the oven and put it somewhere so it can cool, so not on top of the oven (you don't want your mix-ins to be hot). Proceed with the rest of the steps as they cool.
  5. In a medium bowl, sift together the flour, baking soda, and salt. Set to the side.
  6. Cream the butter in a stand mixer until nice and fluffy, 3 to 5 minutes. Add the brown sugar and continue to mix until it becomes fluffy again, 3 to 5 more minutes. 
  7. Stop the mixer. Add the eggs one at a time, briefly mixing after each addition until incorporated. Stir in the vanilla. 
  8. Add the dry ingredients to the butter mixture, mixing as minimally as possible until everything is incorporated into a chocolate chip cookie-esque dough. 
  9. Now, add the toasted millet and cashews and the chocolate morsels. Fold gently into the dough until evenly incorporated. 
  10. Millet cookies
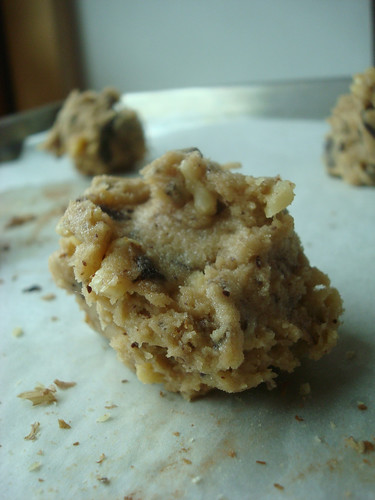
  11. Place the cookie dough with an inch or two of space around on all sides on the cookie sheet. Millet cookiesI made pretty fat cookies, a heaping tablespoon, but you make them however big you want them. 
  12. Bake for 12 to 15 minutes, or until toasty on the edges and set in the center. Remove from the oven. Let cool on the baking sheet for a minute or so before transferring to wire racks to cool completely. 

Millet cookies

Enjoy!

Cake it, Don't Fake It: How to Make Marquesote

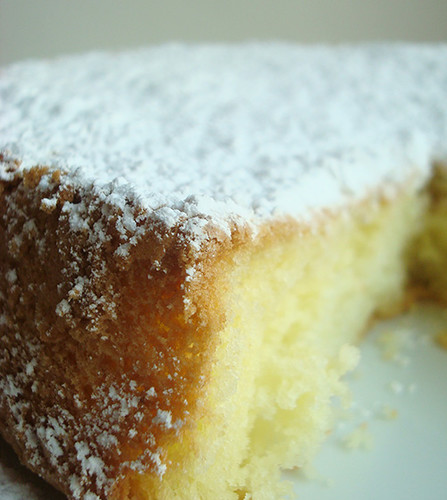
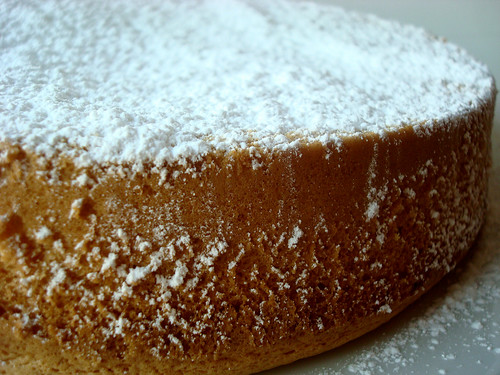
Marquesote

When I say the word "marquesote", what pops up in your mind?

Maybe you think of quasi-royalty, like a marquise, or it calls to mind matinees, like marquee. All of these associations are wrong.

Because what marquesote should conjure up in your mind is this: Mexican cake bread.

What is this marquesote-Mexican-cake-bread-thing, exactly? It's an interesting little morning bread, very light and not too sweet, somewhat dry, but perfect with a sprinkle of confectioners' sugar and a strong coffee. 

Marquesote

I came across the term "marquesote" while poring over New Mexico literature in the history museum. Turns out, because of the proximity to (old) Mexico, you'll see marquesote every now and again. In searching for recipes I found a number of them, so it was difficult to discern which was "authentic"--with or without yeast? With cake flour, all purpose flour, or, like the one I settled on, made with cornstarch? 

Marquesote

This version, which I adapted from a version on What to Cook Today?, makes a weird little cake. It's light as air, and highly delicious, but it goes stale so, so fast. This is not such a terrible thing if you're smart about it: enjoy it plain, or with confectioners' sugar or a smear of sweet butter, OR BOTH, right after you make it, but if it's more than a few hours old, resign yourself: you're going to have to enjoy it with ice cream, whipped cream, or some other tasty thing that will add moisture. Poor you. 

As a bonus, if it's up your alley, as far as my googling expertise goes, the fact that this recipe employs cornstarch instead of flour makes it gluten-free.

I tend to think it would taste great as a base for strawberry shortcake: more interesting than mere sponge cake, and perfect for soaking up all the tasty flavors. 

Give it a try and see which way you like it best. It's easy to make, and smells like heaven whilst it bakes. 

Marquesote

Marquesote

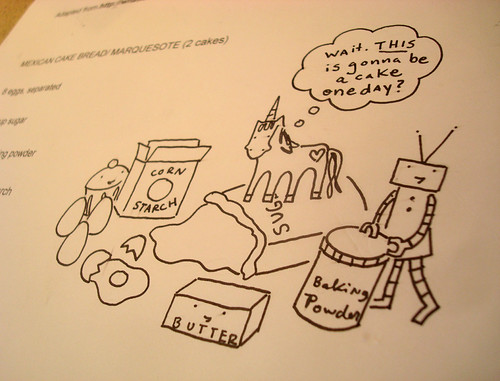
Adapted from What to Cook Today? - Makes 1 cake

Ingredients

  • 4 eggs, separated
  • 1/4 cup sugar
  • 1/2 Tbsp baking powder
  • 3/4 cups cornstarch
  • 1/4 cup butter, melted
  • 1 teaspoon vanilla

Procedure

  1. Preheat the oven to 375 F. Grease and flour a loaf pan or 9-inch cake pan.
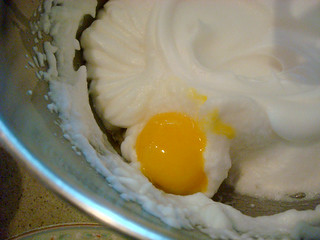
  2. In a large bowl, beat the egg whites until they form stiff peaks. Fold in the yolks one at a time, beating on low speed.
  3. Marquesote
  4. In a separate bowl, combine the sugar, baking powder and starch. Mix thoroughly. Fold this mixture gently into the eggs and add the melted and cooled butter and vanilla extract. Mix just until combined.
  5. Marquesote
    Marquesote
  6. Pour into the prepared pan and bake for about 25 minutes or until it is golden brown. It may begin to slightly shrink from the sides of the pan.
  7. Marquesote
  8. Immediately after removing from the oven, run a sharp knife along the perimeter of the pan to loosen the sides. Let cool for about 15 minutes, then invert the pan onto a serving platter. I served my cake upside-down like this, dusted with confectioners' sugar. Actually, more than dusted. What's the word for "dump a whole ton of sugar on top, but delicately so it looks like snow"?
  9. Marquesote


Enjoy!

Magical Unicorn Cloud Mousse

Hovering dessert

Picture a unicorn, surrounded by rainbows and munching on a cloud in the sky. Don't you want to know what that cloud tastes like?

Well, finding out is not all that difficult. Because this vanilla marshmallow fluff mousse tastes exactly like that imaginary magic cloud. In fact, so much that I'm going to dub this recipe Magical Unicorn Cloud Mousse.

Read more

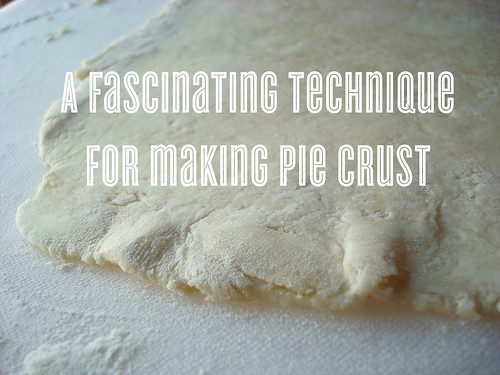
The Secret to Perfect Pie Crust? It's in Your Hands (Plus a Giveaway)

Pie crust technique

Note: this post includes a giveaway at the bottom! Lucky you.

You're always taught the same basic rules with pie crust. Cut small pieces of cold butter into a mixture of flour and salt; blend until the pieces are like peas. Add cold water, a little at a time, until the dough will come together in a clump. Gather, flatten into a disc, chill, and proceed. 

But recently, I learned a method that basically rocked my everloving, pie-eating world. Because it involves using your fingers to attain the perfect consistency.

This was very exciting to me because I actually kind of despise most kitchen tools. Especially the pastry cutter, because it is such a pain to wash. In general, the more functions I can get out of one tool, the more I like it. Wooden spoons and wire whisks? Awesome. Garlic press? Not so much. 

But enough about me--back to the pie. You're probably wondering some things. Let me try to answer:

Where the method came from

I learned this method at the Bake For Good event in Los Angeles, part of the Bake For Good Tour, where baker Robyn told us it was a method she'd learned from famed foodie Marion Cunningham.

By the way, if you want to know more about the event, check out this video.

Cherry cream walnut pie

How it works

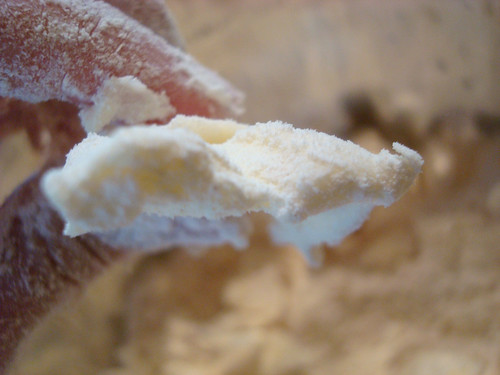
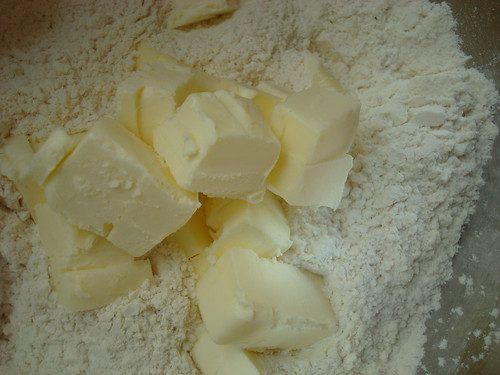
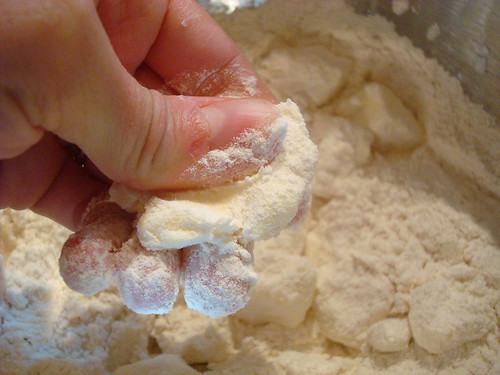
Basically, the method includes working in larger than usual hunks of butter, and instead of mashing them with a pastry cutter, you squeeze the butter pieces with your fingers to flatten them.

    Cherry cream walnut pie

Why you should immediately adopt this practice

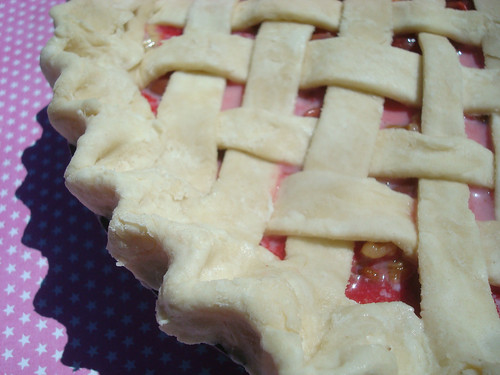
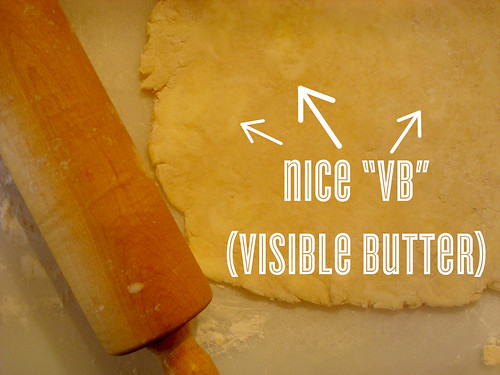
Those pieces of flat butter will make for the coveted "VB" (visible butter) in your rolled crust, and the taste is flaky and fantastic on your resulting pie.

Pie crust technique

I have co-opted and adapted it for my own use at home with a sort of mashup between traditional and by hand methods. Best of both worlds, and still, minimal stuff to clean.

And here, I will share it with you. Aren't you lucky?

Making Pie Crust with Your Hands

adapted from King Arthur Flour, who adapted it from Marion Cunningham

enough for a double crust pie

  • 2 1/2 cups flour
  • 1 1/4 teaspoons salt
  • 1 cup (2 sticks) cold unsalted butter
  • 1/4 to 1/2 cup very cold water

Procedure

  1. Sift together the flour and salt in a large bowl. Set to the side.
  2. Size your butter. One stick cut into small pieces, the other cut into fairly large pieces (double the size you'd usually cut for a pie crust.
  3. Cherry cream walnut pie
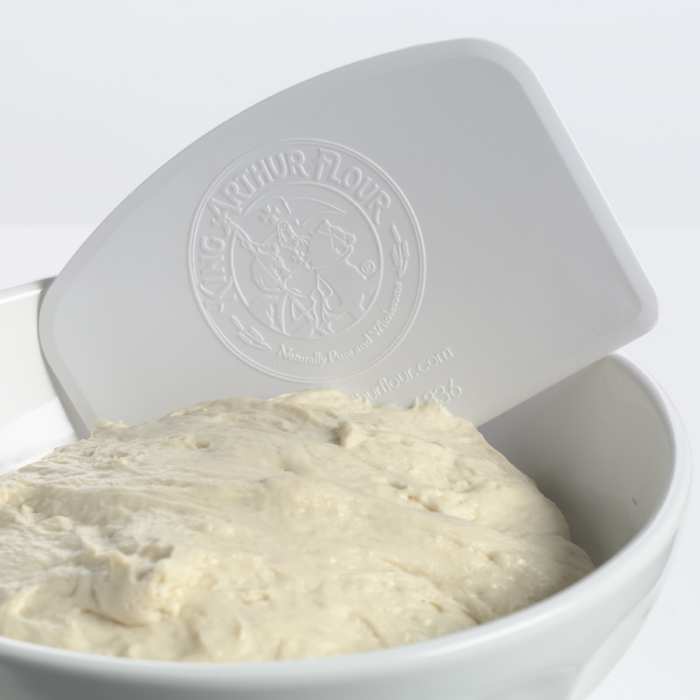
  4. Work in the stick of smaller butter with a plastic dough scraper (my new favorite tool and very easy to clean). It's not going to have the same impact that double the butter would in terms of working in, but go for the regular pea sized consistency.
  5. Now, add the bigger hunks of butter. Gently coat them with flour in the mixture, so they won't stick to you when you squeeze them. 
  6. Cherry cream walnut pie
  7. Now, one by one, squeeze all of those pieces of butter until they're flat like pancakes. Cherry cream walnut pie You don't have to be too precious about it. Grab, squeeze, then move on to the next one.
  8. Got 'em all? OK. Give the mixture another stir with your pastry scraper. Now, start adding the water. Switch back to your dough scraper.
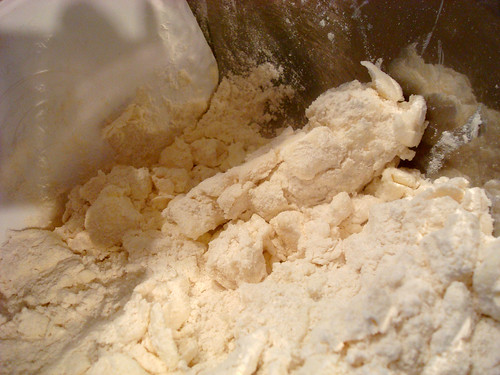
  9. Keep on adding it bit by bit until the dough forms a shaggy consistency, still floury but you can clump it together.
  10. Pie crust method
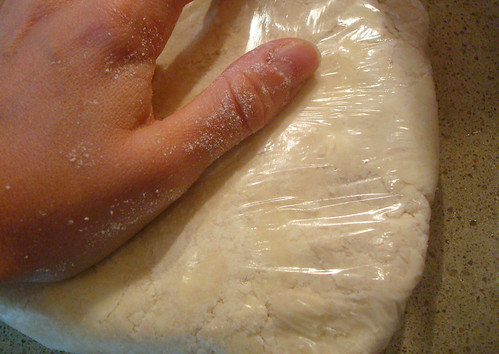
  11. Gather, form into a ball, and place on top of a sheet of plastic wrap. Wrap the plastic on top of it, not too snugly, and then flatten it into a disc with your hand. Doing it this way, I learned, helps the dough spread out into the plastic and is just less messy.
  12. Pie crust method

Proceed with your recipe as usual. 

GIVEAWAY!

Hooray! King Arthur Flour has offered to reward one lucky reader with one of their mega cool dough scrapers, a cookbook, AND some of their highly patented and extremely delicious boiled apple cider (perfect for flavoring apple pie and using as a slightly fancy pancake syrup). Want to win? All you have to do is leave a comment (don't panic if it doesn't pop up right away; comment moderation is enabled) answering the following question:

What's your favorite type of pie to eat, and how do you like it served?

Apple pie with cheese for breakfast? French silk pie à la mode for dessert? It's all game here. I'll choose a winner by EOD Pacific time one week from today!

Homemade Vanilla Kreme Style Donuts

Homemade vanilla kreme donuts

There are some pleasures in life that can only be described as guilty. You know they aren't great, in a technical sense, and yet, they are still so good. Among them, in my life: Beautician and the Beast, vanilla tootsie rolls, birthday cake from the grocery store bakery, Gossip Girl, and Vanilla Kreme Donuts from Dunkin' Donuts.

These super-sweet treats are a beautiful thing: rich in butter "kreme" filling, weighing about as much as a brick, and garnished with pretty rainbow sprinkles which sometimes changed colors during holiday seasons. They were my favorite as a child, and they are my favorite today. This is a sweet love which is perhaps not so guilty: it has been immortalized in love letter form, and I will proudly declare my love to anyone who asks.

And yet (proof that I am a complex person) I very much enjoy and appreciate a homespun treat, made with ingredients that I can pronounce. So I was particularly proud to have created a homemade version of the vanilla kreme donut. 

It's inspired by the Dunkin' creation, but made with "eat local" sensibilities: I made my own confectioners' sugar, used local butter and eggs; I used good quality flour and sugar and fried the doughnuts myself. 

Homemade vanilla kreme donuts

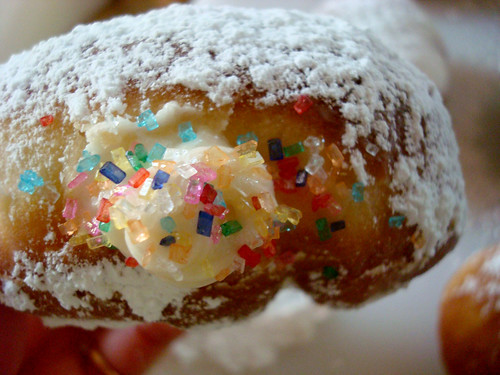
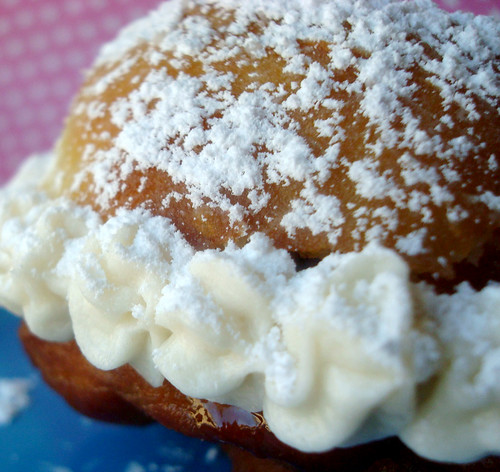
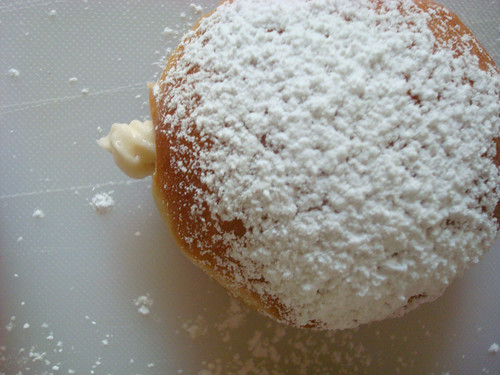
The resulting rounds of dough were truly a treat: a lightly crisp exterior and ethereally light interior, which I anchored right back to earth by piping a healthy amount of rich vanilla buttercream inside each donut. Finished by dusting the works with confectioners' sugar, piping a "puff" of buttercream outside of the hole and garnishing it with rainbow sprinkles, these donuts certainly fulfill the nostalgia part of the equation, with a more nuanced, "adult" flavor which will satisfy childhood Dunkin' Donuts lovers who have grown up into foodies. 

Donut stop buying the real thing (I know I won't) but please, do enjoy this tip of the hat to a favorite "fast-food" treat in homemade form.

Homemade vanilla kreme donuts

Homemade vanilla kreme donuts

makes about 18 (printable version here!)

  • 2 cups (about 8 1/2 ounces) all purpose flour, plus more for work surface
  • 1 packet active dry yeast
  • 1 teaspoon salt
  • 1/3 cup (about 1.58 ounces) granulated sugar
  • 2 large eggs
  • 3/4 cup (6 ounces) whole milk
  • 2 tablespoons unsalted butter
  • enough vegetable oil to fill a pan at least 3 inches deep
  • confectioners' sugar, for dusting
  • 3 cups vanilla buttercream
  • rainbow sprinkles

Procedure

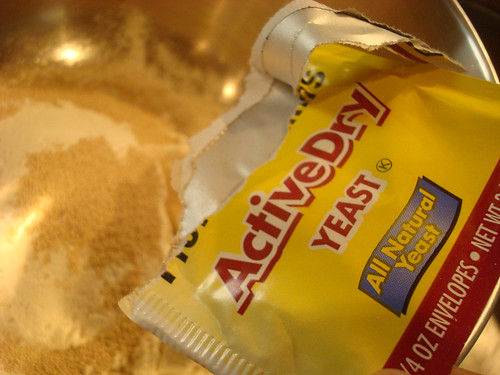
  1. Place the flour, yeast, and salt in the bowl of a stand mixer. Set aside.
  2. Homemade vanilla kreme donuts
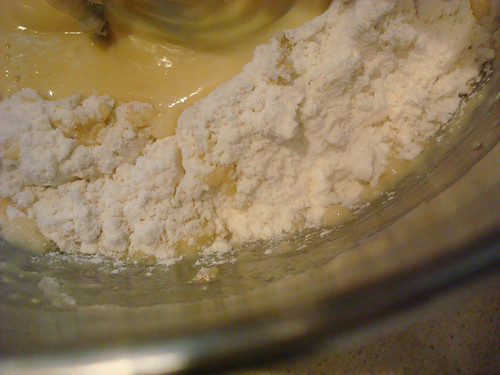
  3. In a medium saucepan, warm the milk, sugar, and butter until the butter has melted, or the mixture reaches about 105°F. Remove from heat and whisk in the eggs.
  4. Add the wet mixture to the dry, and using the paddle attachment, mix on low speed until the dough comes together. Homemade vanilla kreme donutsIncrease the speed to medium-high, and continue mixing until the dough is smooth and pulls away from the sides of the bowl, five to seven minutes. It will still be somewhat sticky. Form the dough into a ball and place in an oiled bowl. Cover with a towel and let it rise in a warm place for about an hour, or until doubled in size.
  5. Near the end of the rising period, prepare your work area. Dust a work surface with flour, and place the dough on top. Using a floured rolling pin, roll the dough to about 1/4 inch thick. Using a 2- or 3-inch round cutter (or even a floured drinking glass rim, or the top of a wide mouth mason jar top, as I did), cut out as many circles as you can and place on a lightly floured baking sheet. Homemade vanilla kreme donuts Re-roll the scraps and continue cutting out circles until you've used all the dough. Cover the rounds with plastic wrap and again let them rise, this time for about 30 minutes.
  6. Homemade vanilla kreme donuts
  7. Place paper towels under a wire rack. Have it near your frying surface. This is where you'll put the doughnuts to cool off.
  8. It's time to get frying. Heat your oil in a large deep skillet or deep pan until it has reached 350°F. 7. Transfer the rounds a couple at a time (you don't want them crowded) and fry until browned—about 1 to 2 minutes. Flip, and remember the second side takes less time to fry. Using a slotted spoon, transfer to the wire rack. Continue frying until you've finished them all.
  9. Homemade vanilla kreme donuts
  10. By the time you're done frying, the first of the fried doughnuts should be cool enough to handle. Using a chopstick, make a hole and slightly "shimmy" it without enlarging the hole too much, to make more space in the doughnut for the filling.
  11. Homemade vanilla kreme donuts
  12. Load up a piping bag with your buttercream, and pipe as much as will possibly fit in each doughnut. Homemade vanilla kreme donuts (You can also spoon it in if you prefer, slicing the doughnut in half and putting a layer of frosting inside, then sandwiching it. Pipe the sides to make it look pretty.) Dust with confectioners' sugar. Finish a pretty puff of buttercream with a star tip outside of the hole in which you piped, and garnish with rainbow sprinkles.

What's your favorite commercial donut?

Mother's Day Flower Pot Cupcakes Tutorial

Hey, I know you probably already bought your mom the best Mother's Day present ever. But just in case you've slacked...

here's a fantastic and exclusive tutorial just for CakeSpy readers, by Paul Bradford Sugarcraft School!

You may remember how they previously shared a tutorial on making a magical unicorn cupcake. Well, this one is just as sweet! 

For easy reference, here's a review of what you'll need to make these sweet cakes:

Tools

  • 6 silicon flowerpot cases
  • Medium calyx cutter
  • Medium daisy cutter
  • Sieve
  • PME cone tool
  • Small rolling pin
  • Piping bag
  • Sponge former
  • Tweezers
  • Large lily cutter

Ingredients

  • Basic Victoria sponge (or vanilla cake) recipe to fill 6 muffin/ plant pots
  • 400g/ 14oz Ganache
  • 50g/ 1.7oz white flower /gum paste
  • 50g/ 1.7oz green flower/gum paste
  • 12x 20g white wires
  • Green florist tape
  • 6 pose pics
  • PME pearl spray

Enjoy, and happy Mother's Day in advance!

Pure Sin: Butter Ice Cream Recipe

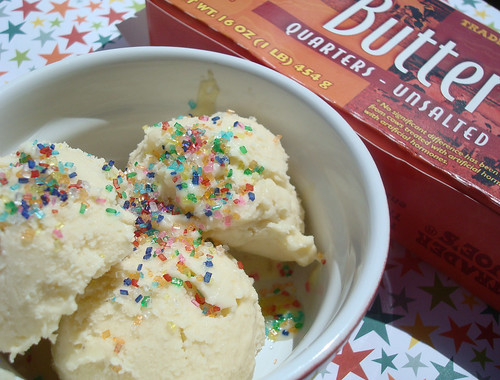
Butter ice cream

Don't be fooled. As sweet as the scoops above might look, the fact is that they are stuffed with sin. You see, dear readers, I have a confession to make. I have done something so, so, SO naughty.

I've made butter ice cream.

BUTTER ICE CREAM! 

You may be wondering, "is this for real?". Well, the answer, my friends...

Butter ice cream

While you absorb the gravity and general amazing-ness of this statement, let me explain. Don't start panicking, because there is a homemade butter ice cream recipe at the end of the story.

I was writing about how to make ice cream without an ice cream maker for an upcoming post on Craftsy, when it hit me: what if I used butter instead of cream to make the ice cream? After all, isn't butter the condensed best part of cream, anyway? The more I thought about it, the better an idea I decided it was.

So using the same method I used for the Craftsy writeup, I whipped up a batch of vanilla ice cream. But instead of heavy cream, I substituted an equal amount of butter. From there, I basically followed the same steps.

So, now that you've had some time to digest the words "butter ice cream", you're probably wondering "was it gross? Or was it awesome?". Because let's be honest, when somebody says something like "butter ice cream" it's probably going to be one or the other: awful of awesome. Something like butter ice cream is never just "well, it was ok". 

Butter ice cream

Listen. I need to tell you that there is a reason why this kind of ice cream is not sold in stores. It is absolutely made of sin. It tastes like the unholy love child of a rich buttercream frosting and frozen custard, which is to say, it tastes amazing. 

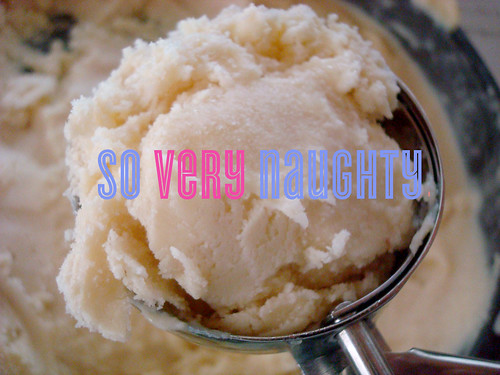
Now, there were some differences between the butter ice cream and regular ice cream. For one, it was flakier in the pan once frozen; I had to let it sit at room temperature for about 2 minutes before it would scoop properly. It doesn't have the same exact texture as ice cream. Oddly, the texture is more like a coconut milk or vegan ice creams I've tried in the past. But the taste is nothing like those varieties. 

Butter ice cream

Listen, I am not going to advocate eating buckets of the stuff, because quite frankly, you'd probably have a heart attack. But I am going to say that as a garnish for a treat, a thinly spread filling in an ice cream sandwich, or enjoyed in a single sinful scoop, this is a treat which ends up tasting way better than it has any right to. 

OK. Maybe you're sold, maybe not. But if you are curious, here's the recipe. 

Butter ice cream

BUTTER ice cream

Makes about 12 cookie scoop sized servings

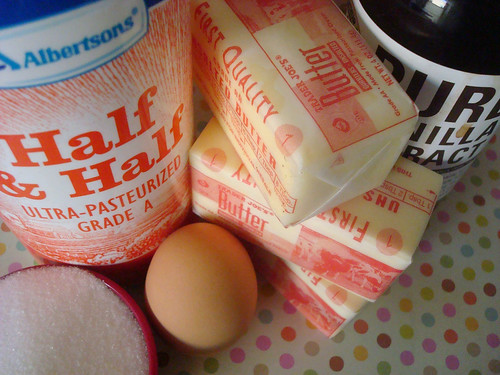
  • 1 egg, beaten
  • 1/2 cup sugar
  • 1/4 teaspoon salt
  • 3 sticks of unsalted butter
  • 1 cup half and half
  • 1 1/2 teaspoons pure vanilla extract

Procedure

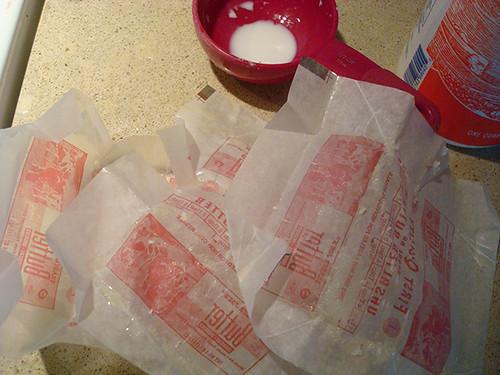
  1. Cut the butter into small pieces. Place the first five ingredients (everything but the vanilla) in a heavy bottomed saucepan. Stir CONSTANTLY. I found that if I didn't, burned bits of butter would form very quickly.  If they do, don't stop: we'll strain the mixture in a little bit.
  2. Butter ice cream
  3. Continue to cook until the temperature has reached 145 F (a few degrees over is fine). Keep a close eye on this as the smoke point for butter is 150 degrees F. Remove from heat, and if needed, strain the mixture into a different bowl through a sieve to strain out burned bits. Stir in the vanilla and place the bowl or pan in an ice bath.
  4. Butter ice cream
  5. While the mixture is cooling in the ice bath, place a stainless steel bowl (fairly shallow) or baking pan in the freezer to chill.
  6. Once the mixture has cooled, gently pour it into the cold pan. Take care that no drops of water from the bottom of the pan get in the mixture.
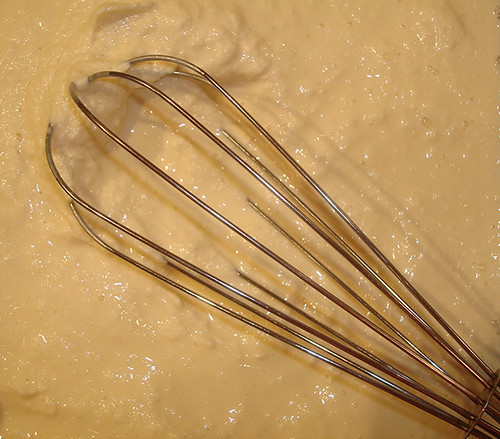
  7. Place the pan in the freezer for about 20 minutes. Remove the pan. Chances are, it feels a bit gluey. It's OK. Stir it as vigorously as you can, using a combo of rubber spatula (to loosen the mixture from the sides and bottom) and a whisk (to mix). Stir vigorously (but not so hard as to make the mixture go flying) for 1 minute or so. Return the mixture to the freezer.
  8. Homemade vanilla ice cream
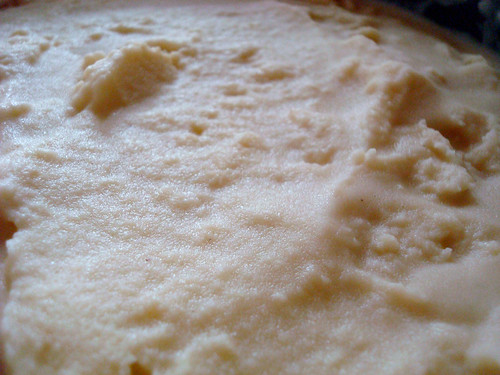
  9. Repeat this process every 20 minutes or so for 6 cycles. The mixture will be slightly thicker every time. If at any point it is too thick, place the mixture in the refrigerator to soften slightly before stirring, then do the step and return to the freezer.  Once the ice cream has completely frozen, your ice cream is ready. 
  10. Butter ice cream

Enjoy in moderation and good health. 

Butter ice cream

Bali Diary: Dosha Balancing Drink Inspired by Bali Buda

Bali

In case you've been living under a rock and didn't know I spent an extended time in Bali, well, let me tell you.

Bali was great. It was magical. I eat pray LOVED every minute of it. 

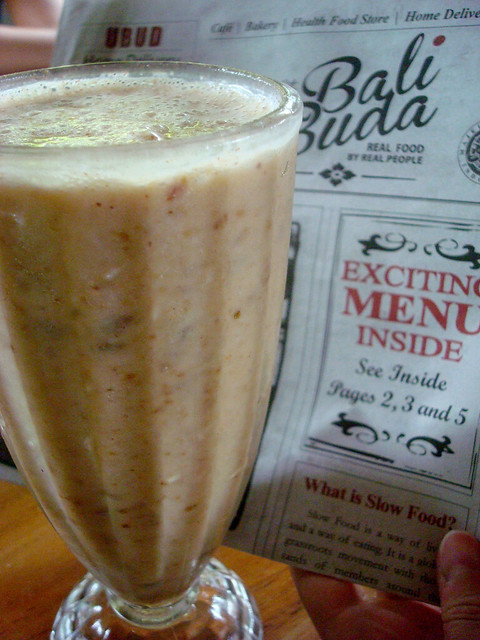
One thing that was especially eye opening to me was the fact that Health Food Can Be Delicious. For instance, one day I am at a cafe called Bali Buda (yes, that's how it's spelled). They have something on the menu called a "Dosha Balancing Drink". I had no idea what a dosha was, but I know that the items that were in it according to the menu, which included banana, dates, and almonds, all sounded quite to my liking.

Bali

I took one sip and said to my companion, "I have no idea what a doshi is but mine feel so balanced right now!". You see, I'd already forgotten what this beverage was balancing. But what I still don't forget is the taste. It was perfect. Very mellow and subtle, but so calming. Even though it was a chilled drink, it tasted like a comfort food, with the sweetness of the banana and dates working in sweet harmony with the almonds. You could not be in a bad mood while drinking this thing. 

I blinked out of my reverie as my companion spoke up.

"Dosha," she gently chided, and I received the reader's digest version of the dosha story. Basically, doshas (is it doshi, plural?), according to Ayurvedic medicine, are "each of three energies believed to circulate in the body and covern physiological activity."

Anyway, if you want to know more about the doshas in your particular life, there's a quiz on the Deepak Chopra site. I can't believe I just linked to Deepak Chopra on CakeSpy. 

Unicorn eating a banana

Anyhow, once you forgive me for linking to the Chops, do give this recipe a try. Even though it's health food, it's awfully good food. The sweetness of the bananas and dates work beautifully with the richness of the almonds; even though it has no dairy, it's amazingly creamy. I'm never going to tell you it could stand in for dessert, but it's very acceptable as a snack or breakfast. 

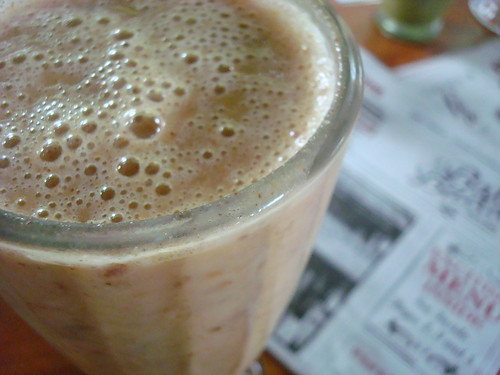
Dosha Balancing Drink (AKA banana date almond smoothie)

Inspired by Bali Budha; adapted from Deliciously Ella

Makes 2 delicate servings, or one very large one

  • 1/4 cup almonds
  • 2 large ripe bananas
  • 1 1/2 cups very cold almond milk
  • 8 medjool dates, pits removed
  • 2 teaspoons of cinnamon

Procedure

  1. If your blender is not incredibly strong, go ahead and coarsely chop the almonds to start. I don't really care if they have skins on or not.
  2. Undress the bananas and remove the pits from your dates.
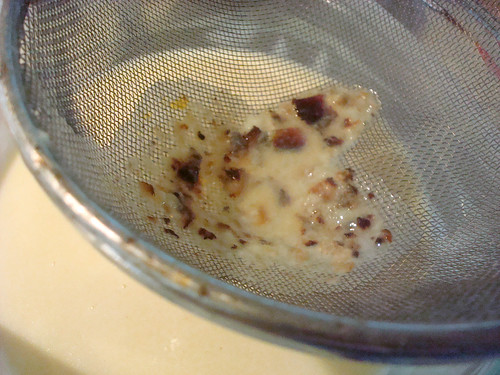
  3. Now, combine all of the ingredients in your blender. Blend for, I don't know, 1 minute or so, until it has reached your desired consistency. I like mine a little chunky, so I can use a spoon toward the end to snack on the lumps of almond and date bits. 

Enjoy in good health and highly balanced doshas. 

Recipe for Unicorns: Rainbow Gelatin Squares

Unicorn food

Good news for me: I got a review copy of a book in the mail. My bookshelf is happy!

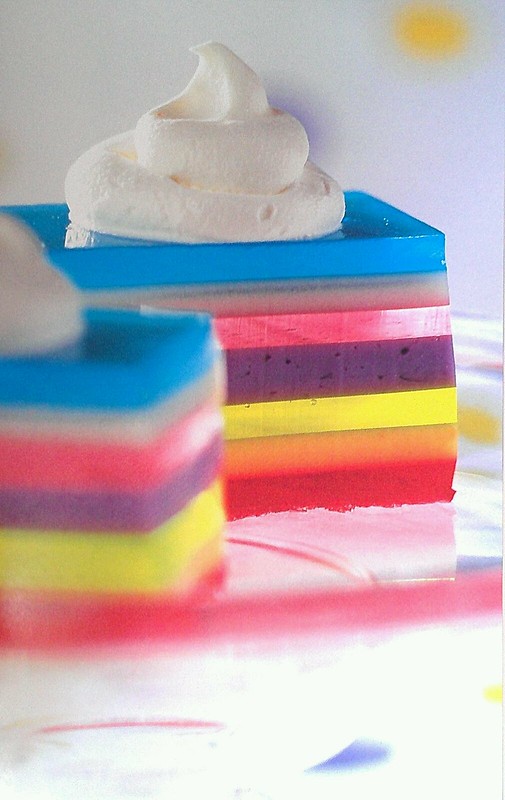
Good news for you: in this book, entitled The 250 Best Brownies, Bars and Squares, there is a recipe for UNICORN FOOD! 

Now, in the book they call it Rainbow Gelatin Squares, but I'm not fooled. And happily, I'm allowed to share the recipe! Here it is, courtesy The 250 Best Brownies, Bars and Squares. So here it is for you, so you can create this magic at home!

Unicorn food

Makes 30 or so

For the clear / translucent layers

  • 4 packages (4 servings each) gelatin mix, assorted flavors
  • 3 cups boiling water, divided
  • 3 cups cold water, divided

for the creamy layers

  • 3 packages (4 servings each) gelatin mix, assorted flavors
  • 2 1/4 cups boiling water, divided
  • 3/4 cup cold water, divided
  • 1 1/2 cups evaporated milk, divided

whipped topping and fruit to top, if desired.

You need: 13x9-inch cake pan, greased

  1. Prepare the clear/translucent layers. In a bowl, combine gelatin dessert mix with 3/4 cup boiling water, stirring until completely dissolved. Add 3/4 cup cold water and mix thoroughly. Pour into a prepared baking pan and refrigerate for 35 to 40 minutes, or until almost set. 
  2. Prepare the creamy layers. In another bowl, combine gelatin dessert mix with 3/4 cup boiling water, stirring until completely dissolved. Add 1/4 cup cold water and 1/2 cup evaporated milk. Mix thoroughly. Spoon over chilled translucent layer and refrigerate until almost set.
  3. Repeat the translucent and creamy layers, making 7 in all, chilling each layer before adding another. You can stack colors in whatever way you'd like. 
  4. When all of the layers are completed and the gelatin is set, cut into squares. Decorate squares with topping and garnish of your choice.

Millionaire's Shortbread Using Cookie Dough From a Tube

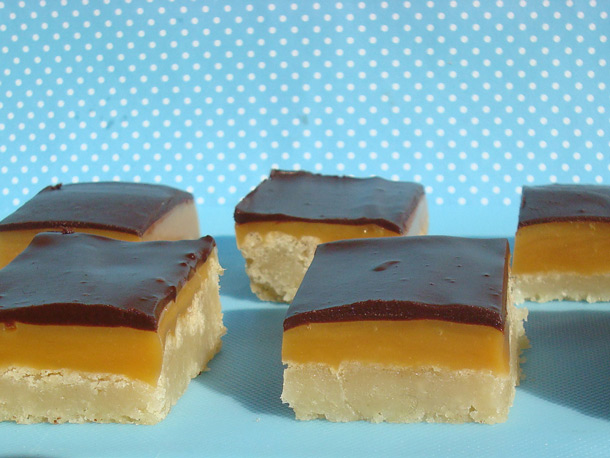
I know, I know--I'm amazing. I figured out a way to streamline the process of making Millionaire's shortbread by employing sugar cookie dough from the refrigerated tube. I win at life!

This easy Millionaire's shortbread recipe comes together quickly, and tastes awesome. How could it not--it has all of the major food groups: cookie, caramel, and chocolate! I strongly suggest you give it a try. Recipe here.