Cake Mix Bonbon Cookies

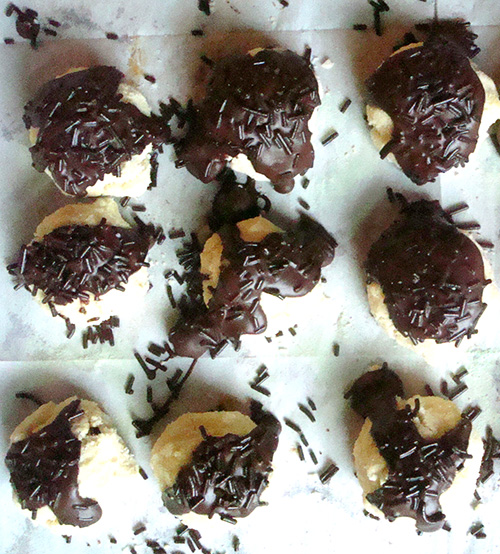
You'd never guess cake mix is the key ingredient of these pleasant little cookies. Vaguely shortbread-y, I made mine with peppermint extract for the holidays, but I'm putting vanilla for more everday use. 

I made these because I had a spare box of cake mix lying around (you know, food blogger problems) but was pleasantly surprised. I even included them on a few cookie samplers.

Enjoy!

Cake Mix Bonbon Cookies

Makes 30-40 cookies depending on size

  • 1 box cake mix (I used Immaculate Baking Yellow Cake Mix)
  • 1/4 cup sugar
  • 1/3 cup vegetable oil
  • 2 eggs
  • 1 teaspoon vanilla (or peppermint around the holidays)
  • 3-4 ounces of dark or milk chocolate (3 ounces = delicate drizzle; 4 ounces = more generous icing like pictured)

Procedure

  1. Heat oven to 350°F (325°F for dark or nonstick pans). In large bowl, mix cake mix, sugar, oil, vanilla and eggs with spoon until dough forms. It will be a somewhat crumbly dough.
  2. Shape dough into 1-inch balls. On ungreased cookie sheets, Place balls 2 inches apart.
  3. Bake 9 to 11 minutes or until set. Cool 1 minute; remove from cookie sheets to cooling racks. 
  4. Make the chocolate topping. Melt 3-4 ounces of chocolate, and drizzle on top of each cookie. 

Chocolate Cherry Cookies

Are you ever haunted by the memory of Christmas cookies past? 

I am. Let me tell you about it.

When I was young, there were two cookies in particular which I treasured above the others. They were chocolate chip pistachio cookies (recipe here) and chocolate cherry cookies.

While my mom was happy to hand over the pistachio recipe, she claims a cloudy memory about the chocolate cherry variety. What? They were the best!

I'll tell you about them, and maybe you know of something similar: a chewy yet slightly crumbly chocolate cookie with a cherry pressed inside, and a chocolate ganache type topping, baked right into the top of the cookie. 

I loved those cookies so hard.

This recipe, while not the same as those cookies in my memory, came out awfully good. They have the same flavor combination, and I made them with some Montmorency cherries from Stoneridge Orchards which were recently sent to me in the mail. They have a perfect, shortbread-meets sugar cookie texture base, and the cherry inside works very nicely with the chocolate, giving it an almost almond-y flavor. The chocolate topping bakes up fudge-like, and is extremely pleasant and if not gooey, then it adds a moist element to the cookie.

The candies are mainly for show, but I learned pretty quickly to not display two of them side by side, because, well, boobs. Well, OK, do it--it might make you laugh.

Chocolate cherry cookies

Makes 24

Very loosely based on this recipe 

  • 1/4 cup light brown sugar, packed
  • 1/4 cup granulated sugar
  • 1 cup butter or margarine, softened
  • 1 teaspoon vanilla
  • 1 egg yolk
  • 1-1/2cups all purpose flour
  • pinch salt
  • 1/4cup unsweetened baking cocoa
  • 24 dried cherries

For the topping

  • 1/4 cup butter
  • 1/4 cup chocoalte morsels
  • 1 cup confectioners' sugar
  • 24 cinnamon candies, for garnish

Procedure

  1. Heat oven to 350 degrees F.
  2. In large bowl, beat the sugars, 1 cup butter and the vanilla with electric mixer on medium speed until fluffy. Beat in egg yolk until smooth. Beat in flour, salt, and cocoa.
  3. Shape dough by rounded teaspoonfuls into 1-inch balls. Press a cherry on top of each cookie, and ease the dough around to cover it.
  4. On ungreased cookie sheet, place balls 1 inch apart. With index finger or thumb, make indentation in center of each ball. It might feel a little awkward because of the cherry inside, but I promise, you'll be OK.
  5. Make the topping. Combine the chocolate chips and butter in a microwave-safe bowl and heat in 20-second increments until melty. It will look ugly. Stir in the confectioners' sugar; as it mixes it will become less ugly.
  6. Top each cookie with a dollop of the chocolate mixture, and place a cinnamon candy on top of each.
  7. Bake 7 to 10 minutes or until set. Immediately remove from cookie sheet to wire rack. Cool completely, about 30 minutes.

What's your favorite holiday cookie?

Tapioca Pudding with Coffee Syrup and Caramelized Tapioca

Lucky you, dear readers! What we've got here is a guest recipe and excerpt from the fantastic new book Brazilian Food by Thiago Castanho and Luciana Bianchi

This is a really lovely book, with photos as vibrant as what I imagine Brazil to be (having never been, it's all imagination for me!). The recipes are accessible, flavorful, and interesting--and exotic. It's a cookbook to dream on, and I think it would make a nice holiday gift!

And, well. Even if none of that intrigued you, the fact is this: the cover features rainbows.

 Note: the photo and recipe in this post are used with permission from Brazilian Food by Thiago Castanho & Luciana Bianchi, Firefly Books 2014, $39.95 hardcover.

‘Bolo podre’ com calda de café e tapioca caramelizada 

Tapioca pudding with coffee syrup and caramelized tapioca 

This is a traditional pudding of the Amazon region. It does not contain wheat but granulated tapioca flakes, usually moistened with coconut milk. We eat it in the morning or late afternoon, but it is always accompanied by a cup of freshly brewed coffee. 

Serves 10 

* 2 vanilla beans   

1/2 cup (50 g) unsweetened, finely shredded dried coconut 

* 2 cups (500 ml) whole milk  

* scant 1 cup (200 ml) sweetened condensed milk  

* scant 1/2 cup (100 ml) unsweetened coconut milk 

* 1 cup (120 g) farinha de tapioca (granulated tapioca) or Farinha de Tapioca substitute (see page 82)  

* oil, for greasing  

Coffee syrup   

* 2 ¾  oz (80 g) rapadura or unleveled . cup (80 g) dark brown sugar 

* 1 cup (250 ml) hot espresso coffee 

Caramelized tapioca 

* unleveled . ¾ cup (100 g) farinha de tapioca (granulated tapioca) or Farinha de Tapioca substitute (see page 82) 

* unleveled . ¼ cup (60 g) superfine sugar 

1. Cut the vanilla beans in half lengthwise, and scrape out the seeds with the tip of a knife. Put the seeds, bean pods, shredded coconut, and all the milks in a saucepan. Place over medium heat, and cook, stirring constantly, until the mixture reaches scalding point. Discard the vanilla bean pods. 

2. Put the farinha de tapioca in a large bowl, and add the hot milk mixture. Stir well. Pour the pudding batter into a generously oiled 12 x 4.-inch (30 x 11 cm) loaf pan, and refrigerate it for 3 hours, or until it is firm. 

3. To make the coffee syrup, combine the rapadura and . cup (60 ml) of water in a saucepan. Heat for 2 minutes, stirring until the rapadura has dissolved. Add the coffee and remove from the heat. 

4. For the caramelized tapioca, combine the farinha de tapioca and sugar in a saucepan, and heat gently, stirring constantly, to melt the sugar. Cook until the caramel is a light golden brown. Pour the mixture into a nonstick baking pan and let cool. Store in an airtight container. 

5. Transfer the chilled cake to a serving board, and sprinkle with the caramelized tapioca. Serve in slices, accompanied by a drizzle of coffee syrup. 

Tips from Thiago: When pouring the pudding batter into the pan, press it down gently to pack it together and prevent it from falling apart when it is removed from the pan. 

Best-Ever: Pumpkin Pie with Sweetened Condensed Milk

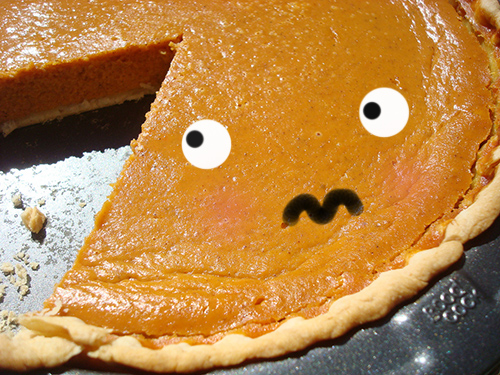
If pumpkin pie made with evaporated milk simply stopped existing today, I wouldn't really care. Because even though that's the "back of the box" classic version, I prefer mine with sweetened condensed milk.

Adding sweetened condensed milk not only saves you the trouble of measuring out sugar, as it provides all the sweetness your pie will need, but it also imparts a creamy, rich flavor. It's perfectly accented with a little salt, which takes the pie from earthy to ethereal, and completely crave-worthy. 

It's also almost sinful how easy this pie is to make, so instead of using pumpkin pie spice I used all the spices separately. It made the recipe seem more impressive, I think. 

I consider this the best way to eat pumpkin pie, and I hope you will, too. 

Pumpkin pie made with sweetened condensed milk

Makes one 9-inch pie (8 servings)

  • One 9-inch pie crust, unbaked (I prefer the King Arthur method)
  • 1 teaspoon ground cinnamon
  • 1/2 teaspoon ground ginger
  • 1/4 teaspoon ground cloves
  • 1 teaspoon salt (note: I like my pie fairly salty. If you don't, use 1/4 to 1/2 teaspoon)
  • 2 large eggs
  • One (15 ounce) can plain pumpkin puree
  • One (14 ounce) can sweetened condensed milk

Procedure

  1. Position a rack in the center of the oven; preheat the oven to 425 degrees F (212 degrees C).
  2. Roll the pie dough to a circle about 12 inches in diameter; place it into the pie pan and crimp the edges. Keep the dough refrigerated while you prepare the filling.
  3. In a small bowl, stir together the cinnamon, ginger, cloves and salt. Set aside.
  4. In a large bowl, beat the eggs; stir in the pumpkin and the sugar-and-spice mixture. Once well incorporated, stir in the sweetened condensed milk (it may incorporate better if you add the milk in three additions, ensuring that each addition is fully mixed in before adding the next). Pour the filling into the prepared pie shell.
  5. Bake for 15 minutes, then lower the oven temperature to 350 degrees F. Bake for an additional 40 to 45 minutes, or until a knife inserted into the center comes out clean. Cool on a wire rack to room temperature. Serve at room temperature, or refrigerate the pie and let it sit at room temperature for 30 minutes before serving. If desired, serve topped with whipped cream.

PS: Pumpkin pie not for you? Here are some other pies and ideas for Thanksgiving from around the web that I suggest.

Happy Thanksgiving, sweet ones!

Best of New Mexico: Homemade Blue Corn Pinon Bread

This one's dedicated to my Santa Fe friends.

If you've ever been to Santa Fe, New Mexico, you know that it is a special place indeed. The food reflect's the city's "tri-cultural" background: Native American, Mexican, and Spanish. With, of course, a touch of modern hippie and crystal-chaser in the mix. It makes for an interesting food scene, to say the least. (for my ultimate review of New Mexico sweets, check out this post!)

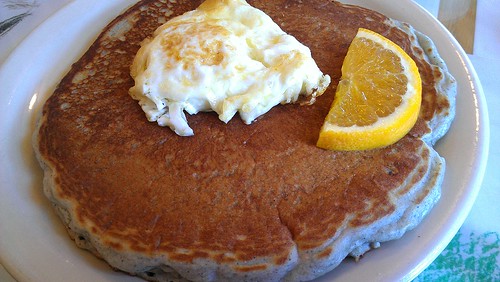
Two ingredients which are in frequent rotation in both baked goods and savories alike are blue corn and piñon nuts (pine nuts), respectively. One beautiful example of a delicious fusion of these ingredients was found in the beyond-locally famous atole-piñon pancakes served at Tecolote Cafe, a funky little breakfast place on Cerillos Road that is famous for their "no toast" policy. 

Tecolote Cafe, Santa Fe

Well, me and everyone in Santa Fe was saddened when Tecolote shuttered their doors earlier this year due to a lease matter. I mourned those pancakes. 

Well, I am happy to say that Tecolote has found a new home and will be re-opening soon. In the meantime, I will "toast" them with a food that is inspired by them but that will never-ever appear on their menu: blue corn piñon bread.

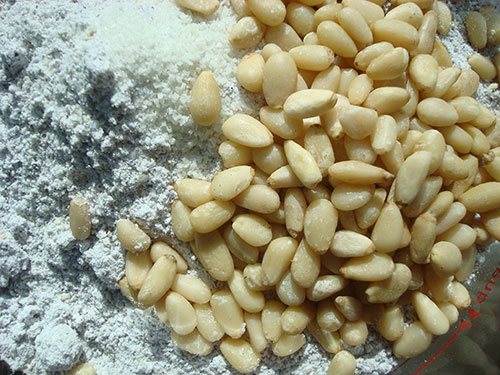
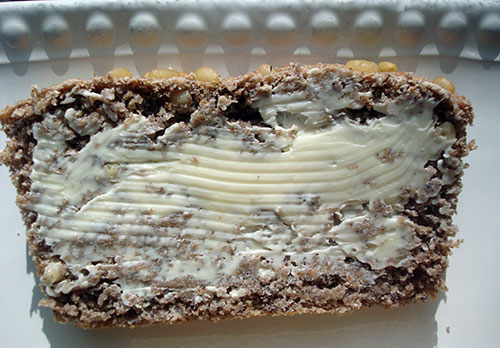
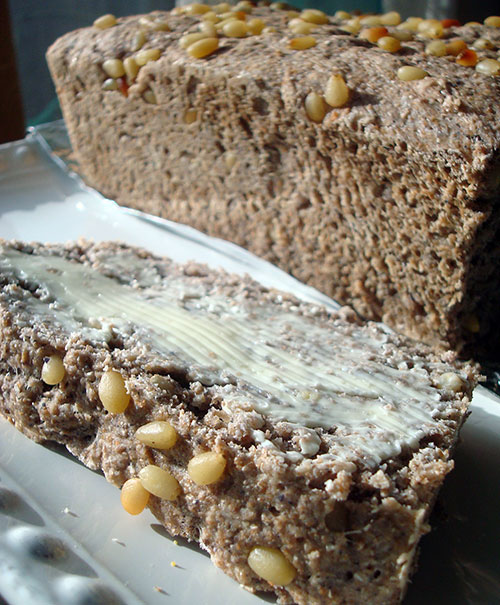
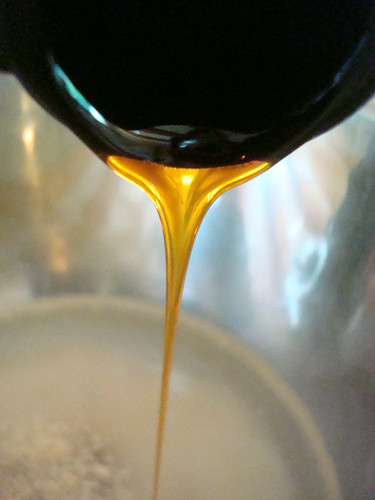
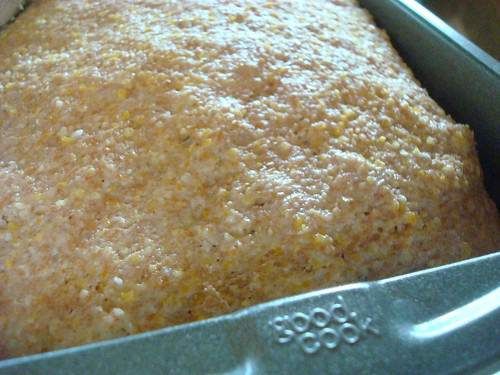
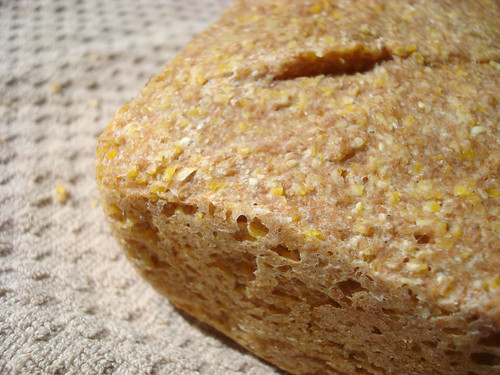
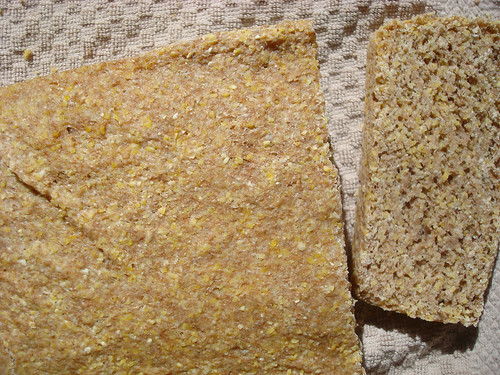
Made with part blue corn flour and plenty of buttery piñon both in the bread and on top, this is a beautiful loaf with a novel, slightly blue-purple tint when looked at from the right angle. Taste-wise, it's lightly nutty; the blue corn gives it an intriguing, earthy taste. With mellow little lumps of rich piñon punctuating every bite, it's an absolute delight served with butter and a little salt.

Since it's made with whole wheat flour, too, it has a firm enough structure so that it is also appropriate for any type of dish you'd make with sandwich bread. 

Blue Corn Pinon Bread

Adapted from King Arthur Flour

Yield: 1 large loaf 

  • 2 cups lukewarm water
  • 2 1/4 teaspoons instant yeast (1 packet)
  • 1 tablespoon honey
  • 2 teaspoons salt
  • 3 tablespoons soft butter
  • 3 cups whole wheat flour, sifted
  • 1 cup blue corn flour, sifted
  • 1/4 to 1/2 cup piñon, to taste

 Procedure

  1. Combine the water and yeast. Once the yeast begins to bubble lightly, proceed.
  2. Mix all of the remaining ingredients with the yeast mixture in the order listed, reserving 1/4 of the piñon to top the bread later.
  3. Knead, either by hand with a dough scraper or with a stand mixer, until it has progressed past a shaggy texture to a solid, slightly sticky mass. This can take up to 5 minutes by hand; less when using a mixer. It will never quite take on the smooth elasticity of wheat flour-only bread, but the extra moisture is necessary as the whole grains will absorb it. Place the dough into a lightly greased bowl, cover it, and let it rise at room temperature until it’s quite puffy and doubled in size, 1 to 2 hours.
  4. Gently deflate the dough with your hand (a gentle pressing, not a knockout punch), and shape it into a fat 9″ log (it may still be slightly sticky; I used lightly oiled hands). Place it in a lightly greased 9″ x 5″ loaf pan. Sprinkle remaining piñon on top.
  5. Cover the pan, and let the dough rise for 2 hours or even overnight, or until it has formed a crown which extends 1 inch or slightly more over the rim of the pan. Toward the end of the rising time, preheat the oven to 350°F. 
  6. Bake the bread uncovered for 20 minutes. Tent it lightly with aluminum foil, and bake for an additional 15 to 20 minutes, or until it is golden brown on top, and when knocked lightly, yields a slightly hollow sound.
  7. Remove the bread from the oven, and turn it out onto a rack to cool. When completely cool, wrap in plastic, and store at room temperature. 

Have you ever baked with blue corn flour before?

Easy Recipe: Horchata

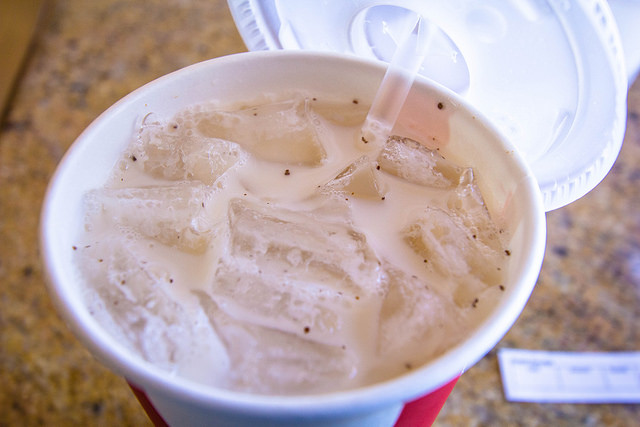
Have you ever heard of horchata? No, I am not insulting you. Horchata is a delicious, milky beverage which is actually not always made with milk, but often rice or nuts ground into a "milk". It's nearly always spiced with cinnamon, and is often sweetened. It's common in Mexico, and common enough in New Mexico that I have become quite intimately knowledgable of the stuff.

Photo via flickr member sstrieu

Now that you're intrigued...how about making some horchata?

It's so easy and tasty that there's no reason for you to say no. And I'd bet that it's pretty likely you have a lot of the ingredients on hand already!

There's nothing to lose. Make it now. This version does have milk, which I think makes it extra-nice. You don't have to add it if you don't wanna. And oh, if you wanna get really naughty, add some rum!

Easy Horchata

Makes 2 servings

  • 1/2 cup long grain white rice, UNCOOKED
  • 1 1/2 cups water
  • 1/4 cup whole milk* (see note above)
  • 1 teaspoon vanilla extract
  • 2 teaspoons cinnamon
  • 1/4 cup sugar
  1. In a blender, combine the rice and water. Mix on high for about 1 minute.
  2. Add the rest of the ingredients right to the blender, and let it steep for 3 hours at room temperature. This is letting the flavors come together in a very pleasant way.
  3. Strain the mixture, and pour it into a pitcher. Serve chilled (I prefer to chill it in the fridge rather than serving with ice, as I feel that it dilutes the mix).

Enjoy!

Tastes Like Joy: Creme de Noisettes Recipe

Hazelnut chocolate creme

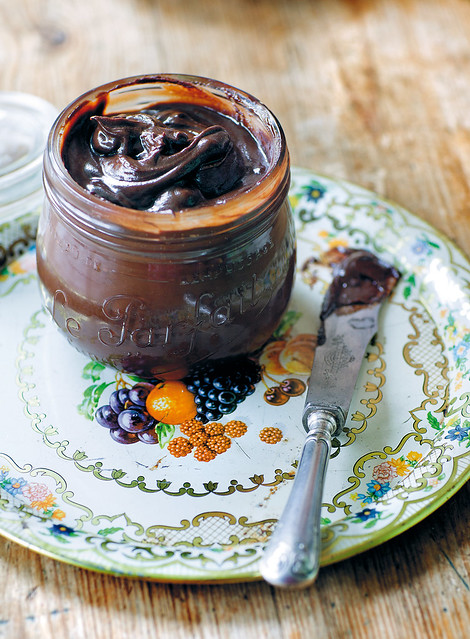
See that thing? Up there in the jar? That creamy, chocolatey looking stuff? Well, guess what--you now officially have the recipe. 

Not to break you out of the reverie, but I suppose I should tell you what it is, exactly. That little mason jar is filled with a chocolate-hazelnut slurry known as (doesn't it always sound better in French?) crème de noisettes. I never tried this when I was in France, but stateside, I've tried a little something called Nutella which brings it to mind. Ever heard of it?

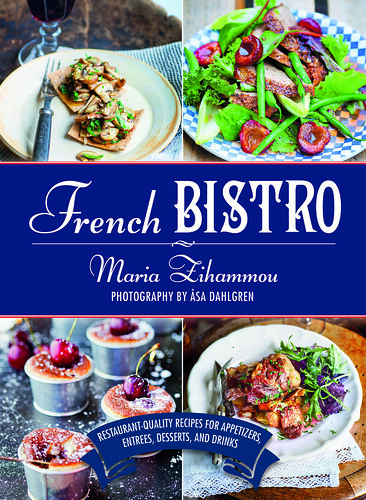
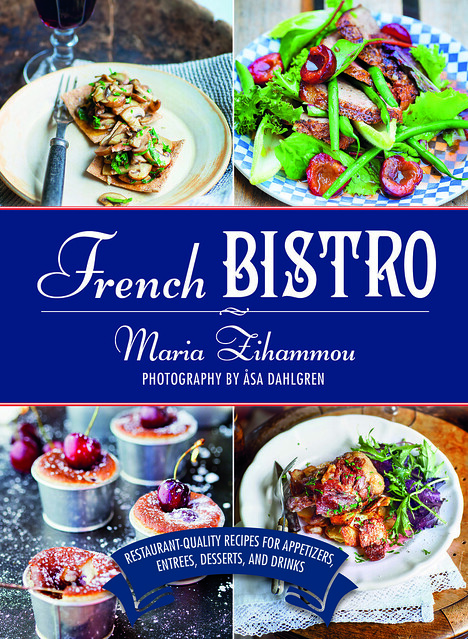
This lovely recipe is excerpted from French Bistro: Restaurant-Quality Recipes for Appetizers, Entrées, Desserts, and Drinks.

PS: want to read more about my overseas adventures? Here's a roundup of my last trip to Paris.

French Bistro Maria Zihammou

*crème de noisettes*

Hazelnut and chocolate crème

Hazelnut and chocolate is an unbeatable combination that I downright love. My kids do too! Here, I’ve blended the two flavors into a rich and dangerously delicious crème, which my kids love to eat on baguette dipped in hot chocolate. I prefer it on a croissant, dipped in café au lait.

Makes 1 Jar 

  • ½ cup (100 ml) Nutella
  • 7 oz (200 g) dark chocolate, 70% cacao
  • 3½ tbsp (50 g) butter
  • ¼ cup (50 ml) cream
  • 2 tbsp molasses
  • 1 tbsp water
  • 3½ oz (100 g) hazelnuts

Procedure 

  • Place the Nutella in a saucepan. Coarsely chop up the chocolate and place it in the pan. Cut the butter into small pieces and add it too, along with the cream, molasses, and water. Warm over low heat to make a smooth sauce. Move the saucepan off to one side.
  • Roast the nuts in a dry pan for 3–4 minutes. Mix them well and blend them into the sauce. Pour the crème into a jar with a tight lid. If stored in the fridge, it should keep for at least one week.

Enjoy!

Haters Gonna Hate, and Pop-Tart Stuffed Biscuit Donuts

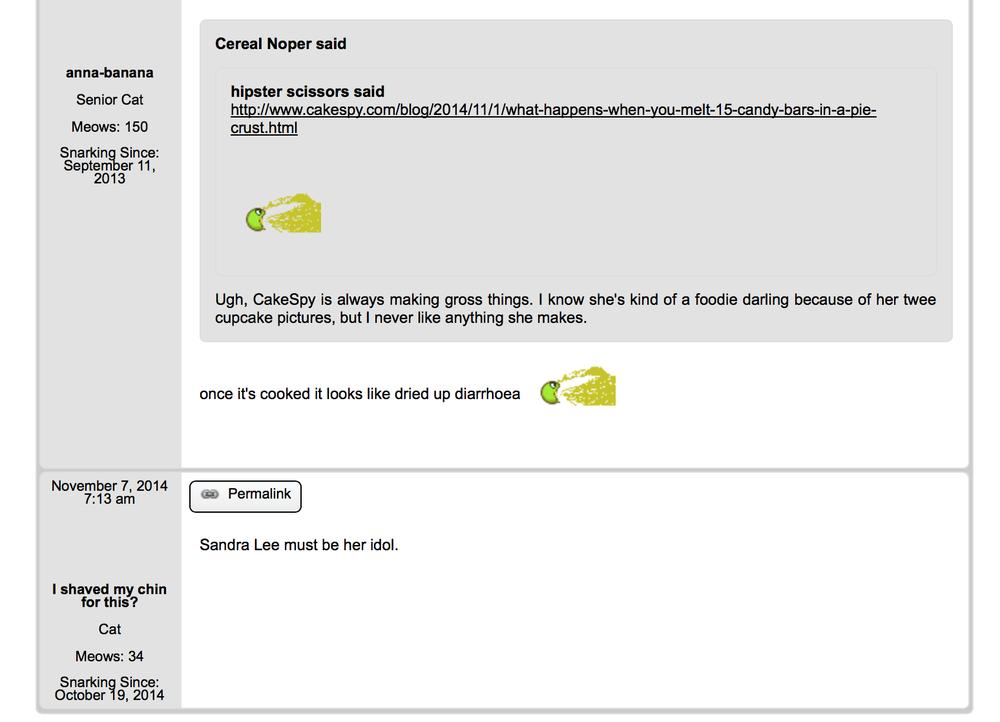
This week, I took a peek at my website statistics, and saw an oddly high number of click-overs from one particular web forum. Curious, I clicked over to see what was going on.

Turns out, it was a thread about totally disgusting food blogger creations, and I was prominently featured. One of my recipes even warranted a little animated vomiting emoticon (oddly adorable), and a proclamation that "Sandra Lee must be her idol". 

You could call these commenters nasty or rude, and I certainly wouldn't correct you.

The funny thing is, though, these so-called "haters" have actually done me quite a service with their attentions--they significantly upped my web traffic, which ultimately translates to more income for me in various ways. Most obviously, more views means more ad revenue--to a reasonable degree, ads don't care if you're horrified by the content, they just care about if their ad is viewed. But this attention can also lead to increased income in other, indirect ways. For instance: maybe someone will click over to see exactly what is so hate-worthy and then think "the recipes are awful but gosh, this artwork is cute" and click over to my webstore and buy a print.

It reminds me of when I was in art school, and there was a very controversial show at the Brooklyn Museum. It got a lot of negative attention, but this didn't mean the show was a failure. It was crowded ALL THE TIME. My takeaway was this: it doesn't necessarily matter if the reaction is good or bad to your art. The idea is that you want to GET a reaction. So, you know, the fact that people are reacting in horror to my candy bar pie or my deep-fried cupcakes on a stick doesn't bother me--I consider it a badge of pride that I am being noticed.

Don't get me wrong: I'm not totally zen about it. If I ran into one of these commenters in person, I would hasten to do something small and snide, like not hold a door open for them or hustle so I could get into the grocery line before them with a cart full of pop-tarts and pop-n-bake biscuits.

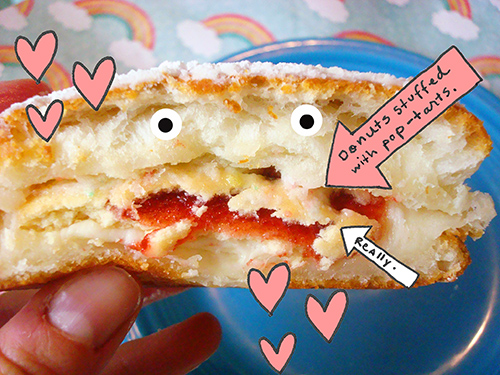
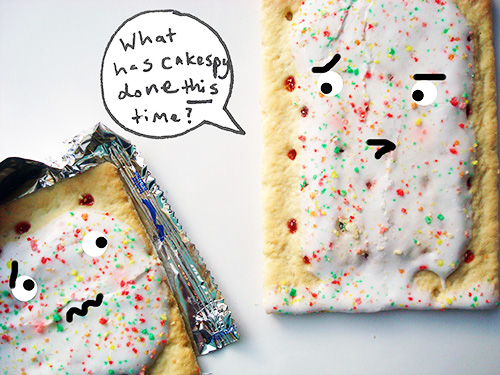
With all of the above in mind, particularly the part about pop-tarts and pop-n-bake biscuits, I'd like to present a recipe for the haters: Pop-Tart Stuffed Biscuit Donuts. 

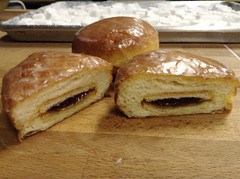
The recipe was inspired by an actual, classy recipe, which was made by a pastry chef reader, Stephany Hicks from South Carolina. She called them "Pie-Nuts" and made them with a real yeast raised doughnut dough and homemade pies inside. Because she's classy and talented.

Pie-nutsOf course, I went right in and made them somewhat trashy (I can't help it! I'm from New Jersey!) by substituting pie with pop-tarts, and doughnuts with pop-n-bake biscuit dough. Luckily, Stephany wasn't offended. She found it amusing, bless her sweet little soul.

How did they taste? 

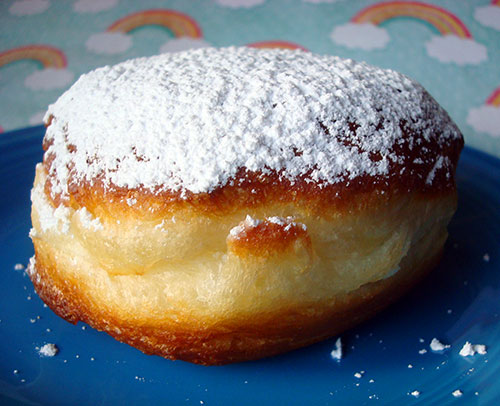
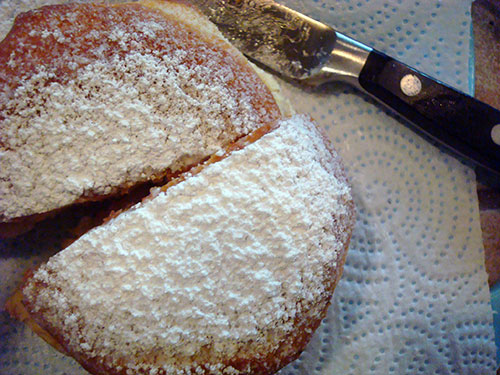
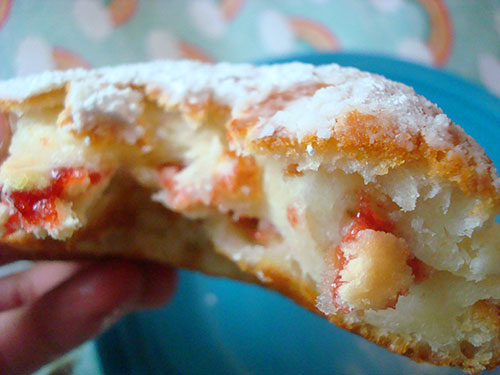
Calorie-laden, slighty synthetic, and very sweet. The type of food that you know isn't necessarily good, but that somehow you can't...stop...eating. That is to say, awful and awesome, all at the same time. But...you already knew that, didn't you?

A dedication

This recipe is dedicated to everyone who has taken enough time to take issue with what I do--I paid for the ingredients with the money I earned from your web traffic. I think that deserves a new emoticon:

Note: I've called these "donuts" rather than "doughnuts"...because when paired with Pop-Tarts, it just felt more appropriate.

Pop-Tart Stuffed Biscuit Donuts 

Makes 4

Adapted from How to Make Doughnuts Using Biscuits from a Tube 

  • 1 tube of pop-n-bake biscuits (with 8 biscuits)
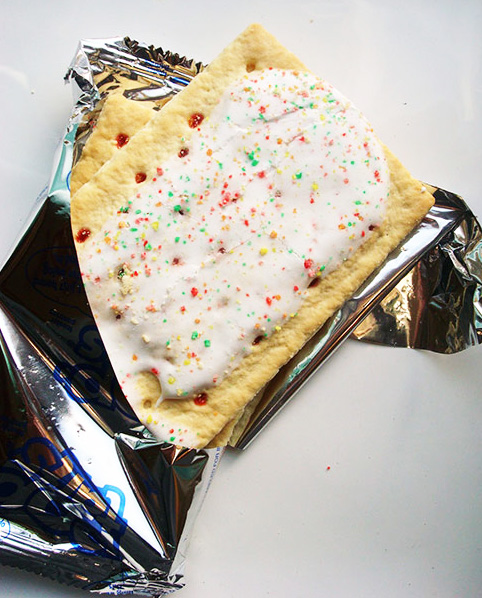
  • 1 Pop-Tart, cut into 4 equal pieces (I used a strawberry frosted--classic)
  • vegetable oil, for frying
  • a skillet for frying
  • confectioners' sugar, for dusting

Procedure

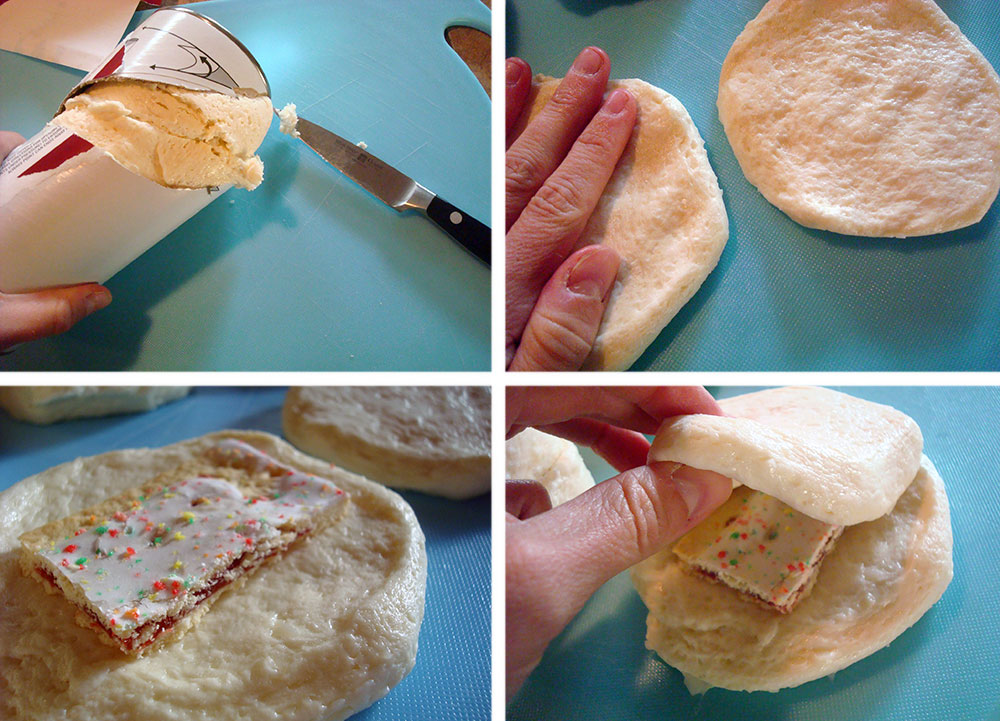
  1. Open up your tube of biscuits. Take out the biscuits, and flatten each one with your hand.
  2. Place a piece of pop-tart in the center of one of the flattened biscuits, and place a second on top. Seal the edges to keep the pop-tart contained.
  3. Repeat with the remaining biscuits and pop-tart pieces.
  4. Pour the oil in your skillet until it is about 1/2 inch thick. Heat the oil on medium heat until it has reached 375 degrees. Don't have a thermometer? You can also break a small piece of dough off and toss it into the pan. If it starts bubbling assertively right away, you're probably ready to rock and roll.
  5. Gently transfer one donut at a time into the pan. When they start to rise in the oil and turn brown, flip 'em. These are bigger than your typical donut, so they might require a little more frying time. 
  6. Once fully fried, transfer to the paper towels to blot excess oil.
  7. Gently cut one of the donuts open to check that it is cooked through. If they seem doughy inside, pop them in a 350 degree oven for 5-10 minutes until completely set inside.
  8. Once finished, dust with confectioners' sugar and serve warm.

What kind of Pop-Tart would you put in these donuts?

Red Velvet Cereal and More

I need to tell you something. It's this:

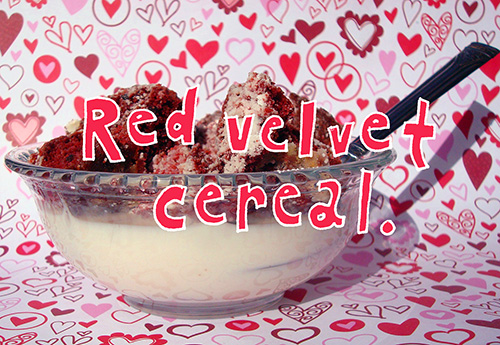
Red Velvet Cereal.

Here's the deal. When you are testing recipes, sometimes you end up with extra layers of cake. Even good, high-demand cakes, like red velvet.

I realize that having extra, leftover red velvet cake layers sounds like a luxury--nay, an impossibility. How could a red velvet cake layer be around the house and not be slathered in cream cheese and eaten?

But, well, it did happen. Maybe never again, but it did happen just this once. And I have come up with the most brilliant solution for using this cake.

Why red velvet cereal?

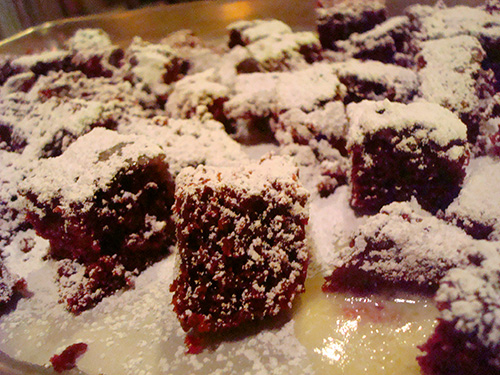
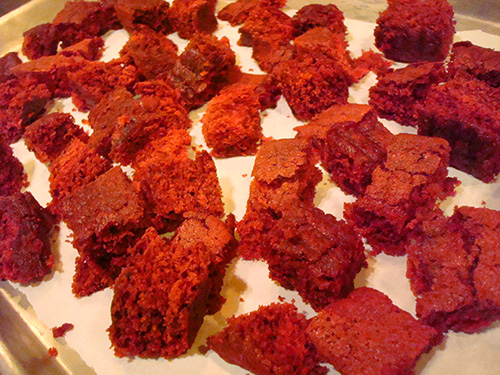
It started with the idea that I would do a sort of twice-baked thing with the cake cubes: red velvet croutons! Why not--you could eat them like cookies, right? 

So I put a bunch of red velvet cake cubes on a baking sheet, drizzled it with butter and confectioners' sugar, and put it in the oven until it was all nice and crispy.

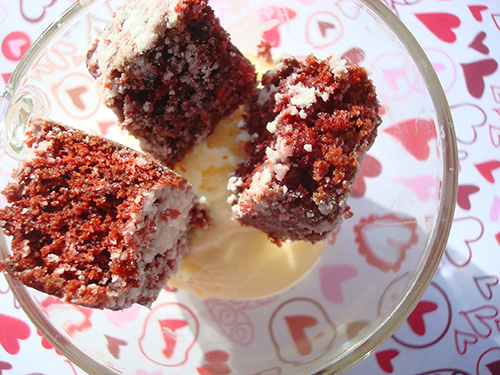
Then I set to using the "croutons" in various ways, all of them pleasant...

An ice cream topping: 

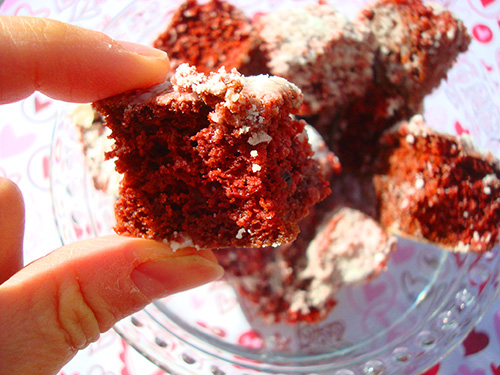
as simple sweet snacks (like cake chips):

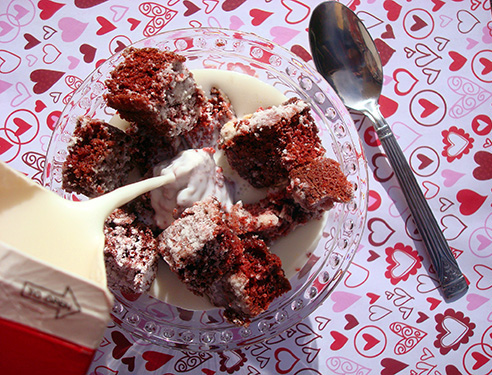
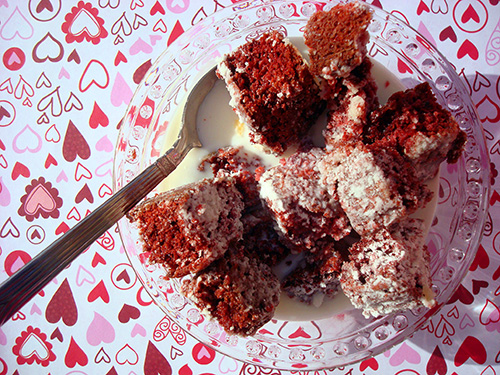
but then, I realized that hey, I could probably put milk on these and eat them as cereal.

And after that moment, all other uses for these red velvet cubes of joy disappeared. Because clearly, red velvet cereal was the winner.

Advantages of red velvet cereal

Not quite a believer yet? Well, let me try to sway your affections by telling you some of the distinct advantages of red velvet cereal. 

  • It is toasty, but the cubes soften quickly in the milk to a lightly crisp, pleasing consistency.
  • Since I've used high quality ingredients and employed homemade red velvet cake, that this might even be healthier than, say, Cookie Crisp or Froot Loops. It certainly has less hard-to-pronounce ingredients.
  • It tints the milk a light and beautiful pink. 
  • It has the advantages of cake for breakfast, but carries less possibility of harsh judgment because it is cereal
  • RED VELVET CEREAL!

If you'd like to make this magic happen at home, here's how you do it.

Red Velvet Cereal

Makes many cubes of cereal

  • 1 8 or 9-inch red velvet cake layer, unfrosted
  • 2 tablespoons melted butter
  • confectioners' sugar

Procedure

  1. Preheat the oven to 325 degrees F. Line a baking sheet with parchment paper.
  2. Cut the cake into cubes, about 1 inch. Place them on the baking sheet.
  3. Drizzle with butter, and dust with confectioners' sugar. Place in the preheated oven.
  4. Heat for 20 minutes, then remove from the oven and flip the croutons. Put back in the oven for 20 more minutes, or until nice and crispy.
  5. Remove from oven and let cool completely. 

 Would you eat red velvet cereal?

Breakfast by Fabio: Buttermilk and Black Pepper Biscuits

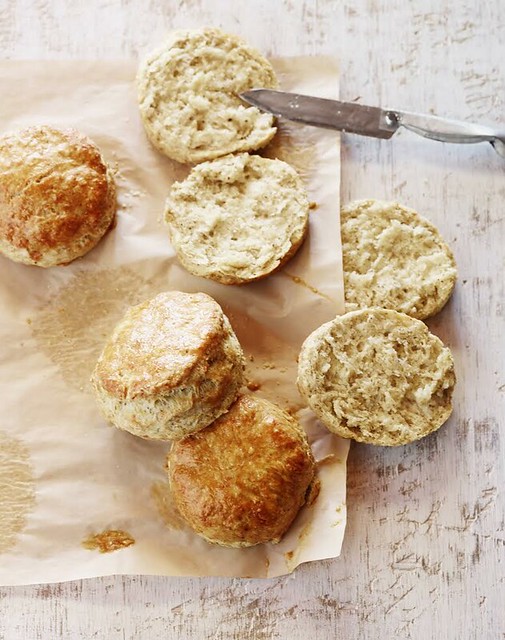
Biscuits from Fabio book

There are carbohydrates that are biscuits, and then there are carbohydrates that are not biscuits.

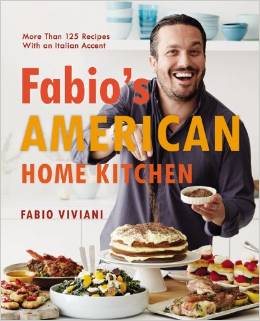
These are biscuits. They are from the new book Fabio's American Home Kitchen: More Than 125 Recipes With an Italian Accent. Look at this guy, I trust his biscuits!

Sounds like the perfect holiday weekend breakfast to me!

Buttermilk and Black Pepper Biscuits

America loves biscuits. I love them with gravy, I love them without. I love biscuits with savory ingredients like roasted ham and sun-dried tomatoes on them. But when you add a lot of black pepper to the biscuits, that’s really taking it to the next level. This is a very simple recipe, perfect for the morning.

MAKES 1 DOZEN BISCUITS

  • 2¼ cups flour, plus more for dusting
  • 2¼ teaspoons baking powder
  • 2 teaspoons sugar
  • 1 teaspoon kosher salt
  • ½ teaspoon baking soda
  • ¼ cup grated Parmesan cheese
  • 3 teaspoons freshly ground black pepper
  • 6 tablespoons (¾ stick) cold butter, cut into small pieces
  • 1 cup buttermilk

Procedure

  1. Preheat the oven to 450°F. Butter a baking sheet.
  2. Sift together the flour, baking powder, sugar, salt, baking soda and Parmesan and pepper into a bowl.
  3. Work in the butter with your fingers, or pulse in a food processor, until the mixture resembles coarse meal. Mix in buttermilk until just combined.
  4. Turn out the dough onto a lightly floured surface and pat into a 7-inch disk about 1 inch thick. Cut out 12 rounds with a floured 2-inch biscuit cutter, collecting and reshaping the scraps as necessary.
  5. Arrange the biscuits on the buttered baking sheet. Bake until cooked through and golden brown, 10 to 15 minutes, rotating sheet halfway through.

Photo and recipe from Fabio's American Home Kitchen: More Than 125 Recipes With an Italian Accent by Fabio Viviani; published by Hachette Books, a division of the Hachette Book Group. Copyright ©2014 FV Legacy, LLC. All Rights Reserved.  Used with Permission. 

Lemon Heaven: Crêpes au Citron Recipe

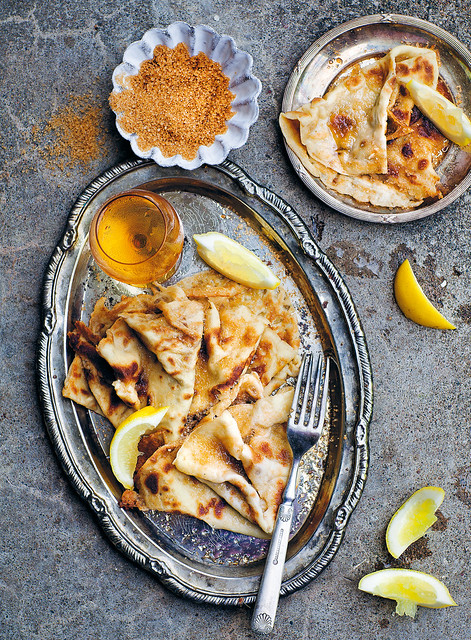
Crepes with lemon sugar

Crêpes au citron: roughly translated, it means "lemon heaven". Technically, they are crepes made with lemon, but I have made my decision. 

This lovely recipe is excerpted from French Bistro: Restaurant-Quality Recipes for Appetizers, Entrées, Desserts, and Drinks.

French Bistro Maria Zihammou

*crêpes au citron*

Crêpes with lemon sugar

What would a French cookbook be without crêpes? Those soft, buttery, and thin pancakes you can buy just about anywhere in France. So simple and delicious with just freshly squeezed lemon and raw sugar on top . . . or filled with my amazingly good noisette crème.

serves 4 people

  • 3 eggs
  • 1¼ cups (300 ml) wheat flour
  • 3½ tbsp (50 g) butter, melted
  • 1 pinch salt
  • 1 cup (250 ml) milk, 2%
  • 1 cup (250 ml) cold water
  • butter, for pan-frying
  • 2 lemons, cut into wedges
  • ½ cup (100 ml) raw sugar

Procedure

  • Whisk the eggs until fluffy. Add the flour gradually and continue whisking until all clumps have disappeared. Add the butter and salt; whisk together. Finally, pour in the milk and water, and whisk the mixture into a runny pancake batter. Place in the fridge to cool for at least an hour.

  • Pour a thin layer of batter into a frying-pan with butter, and cook until it takes on a light golden color. Serve with sugar and lemon.

Enjoy!

Simple, French, Perfect Tarte au Citron, or Lemon Tart

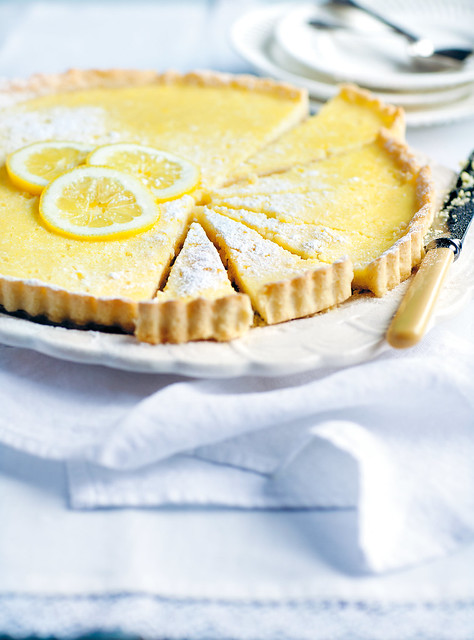
Lemon tart - Maria Zihammou

When I went to Paris, I learned once and for all that there is a difference between the tarte au citron (lemon tart) and its American cousin, Lemon bar. What is the difference? Well, the tartes are French, and therefore slightly better in every way. Here's how you make them. This lovely recipe is excerpted from French Bistro: Restaurant-Quality Recipes for Appetizers, Entrées, Desserts, and Drinks.

PS: want to read more about my overseas adventures? Here's a roundup of my last trip to Paris.

French Bistro Maria Zihammou

Lemon tart

Lemons are always in my kitchen at home—a favorite ingredient that I just can’t do without. They have a wonderful, fresh sourness that’s lovely in a creamy tart that might otherwise be too heavy and sweet. Delightfully delicious, citrusy lemon tart that simply melts in your mouth. Mmm. . .

6-8 people

dough

  • 7 tbsp (100 g) butter, room temperature
  • 1½ cups (350 ml) wheat flour
  • 1 egg yolk
  • 1 tbsp powdered sugar
  • 1 tbsp cold water

filling

  • 5 eggs, preferably organic
  • 4 organic lemons
  • 1 tbsp lemon zest
  • ½ cup (100 ml) whipping cream
  • ½ cup (100 ml) granulated sugar
  • powdered sugar, for decorating
  • whipped cream, for serving, optionally

Procedure

  1. Preheat the oven to 350°F (175°C). Start by making the dough. Mix the butter, flour, egg yolk, powdered sugar, and water. Knead together with a light touch to form a smooth dough. Press out the dough in a spring-form pan, about 9½ inches (24 cm) in diameter. Pre-bake the crust for about 10 minutes until it’s a light golden color. Take it out and let it cool.

  2. Meanwhile, make the filling: whisk together the eggs in a bowl. Squeeze in the juice from the lemons, and grate 1 tbsp of lemon zest into the bowl. Add the whipping cream and sugar, then whisk thoroughly.

  3. Fill the cooled crust with the lemon cream and cook the tart for about 30 minutes, until the cream has set and feels a bit firm. Allow the tart to cool, and decorate it with the powdered sugar. Good on its own, or with whipped cream.

Excerpted with permission from French Bistro: Restaurant-Quality Recipes for Apetizers, Entreés, Desserts, and Drinks by Maria Zihammou. Photography by Åsa Dahlgren. Copyright 2014, Skyhorse Publishing, Inc.

What Happens When You Melt 15 Candy Bars in a Pie Crust

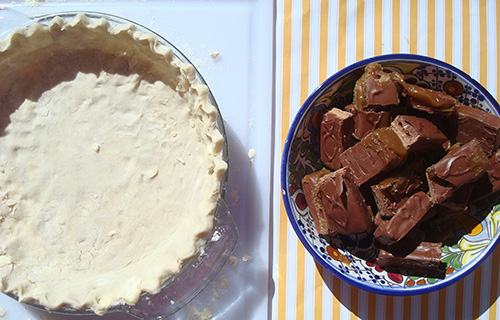
Have you ever wondered what happens when you fill a pie crust with 15 candy bars* and then bake it?

* = if we're talking about Fun-Size candy bars, which I personally so often am around this time of year, you want to make that 30-36 or so. 

Well, if you have ever found yourself plagued by this candy bar quandary, you're not alone. I too have been baffled-- but lucky for you, I recently rolled up my sleeves and proactively worked to find out. 

Not only was I seeking a piece of tasty pie--but peace of mind.

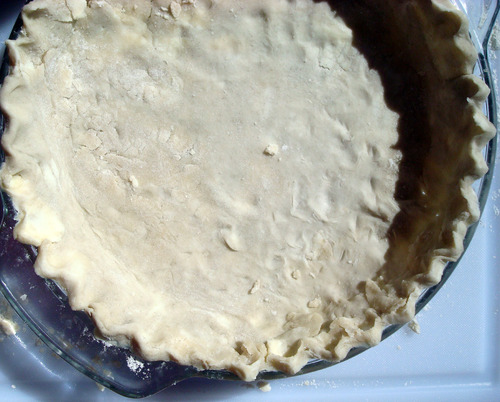
First, I made up a pie crust. I used the recipe and method I mastered via King Arthur Flour. 

Next, this is where I must make a confession. I didn't specifically have the number fifteen in mind with my candy bars. Basically, I just kept unwrapping the bars I had received in the mail from Legit Organics, cutting in half, and adding candy bars til the pie crust was full.

It was full at around 12 candy bars. But it occurred to me (I'm always thinking, see) that once the candy began to melt, it would reduce in volume. So to be safe, I added three more candy bars. I'm not going to keep you in suspense: it was the right decision.

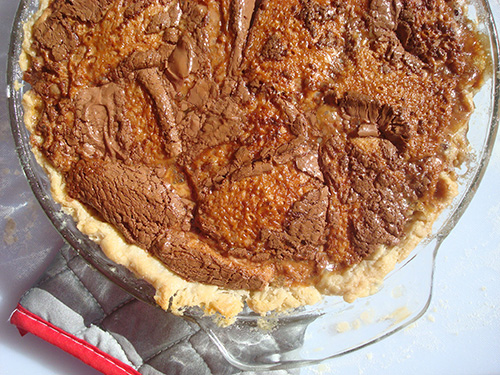
I put the whole thing in a preheated 350 degree oven. At 30 minutes it looked mostly done, but at 35 it was perfectly toasty. 

When I took it out of the oven, it looked like this. What the picture doesn't convey is that it was making a snappy bubbling sound that lasted a good minute. It was beautiful. 

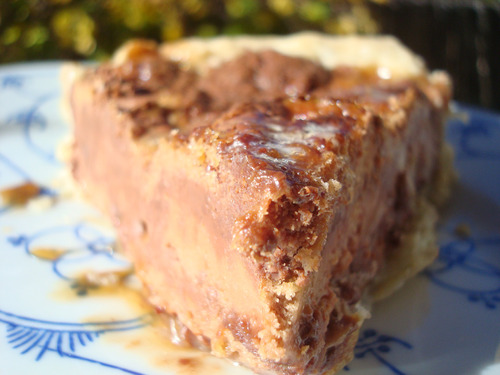
I can pretty much say this is the best use ever of 15 candy bars (more Fun-Size). The pie is one of those desserts that makes you say "oh, it's too much!" but then somehow you're reaching for your second slice. Don't say you don't know what I mean.

(note: This pic had a bit of ice cream on top but I wiped it off to get a clear shot of the pie (hence the small white mark on the front).

Here's how you do it.

15-Candy Bar-Pileup Pie 

  • 1 unbaked pie crust
  • 15 regular sized candy bars, cut in half, or 30-36 Fun-Size candy bars, in harmonious flavors

 Procedure

  1. Preheat the oven to 350 degrees F.
  2. Place your candy bars in the crust. Pile them high enough so that they slightly form a  crown over the edges.
  3. Just for safety, put the pie plate on top of a baking sheet. Place the whole thing in the oven.
  4. Bake for 30-35 minutes, or until the bars are melted and bubbly and the crust is browned to your liking.
  5. Remove from the oven and let cool to room temperature before serving. This can take up to an hour. 

Enjoy!

Pillsbury Bake-Off Countdown: Strawberry-Mascarpone-Hazelnut Chocolate Tart

Hazelnut strawberry tart - bake-off

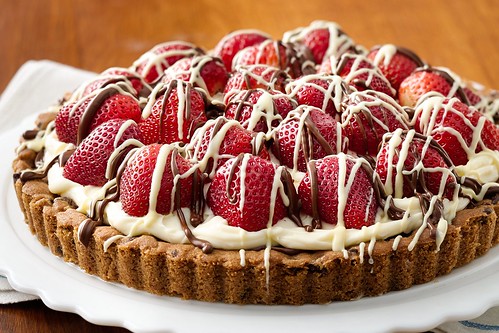
What I love about this tart is...well, more than one thing. I love how it marries health food (strawberries) with dessert food (everything else in the recipe). I love how it looks super fancy but comes together rather quickly. And, I love that it has a cookie dough crust. YUM. Thanks to Pamela Shank of Parkersburg, West Virginia for coming up with this clever and pretty Bake-Off entry!

Strawberry-Mascarpone-Hazelnut Chocolate Tart

  • Prep Time: 30 Min
  • Total Time: 1 Hr 55 Min
  • Makes: 8 servings

Ingredients

  • 1 roll Pillsbury refrigerated chocolate chip cookie dough
  • 2 (8 oz) containers mascarpone cheese
  • 1/2 teaspoon vanilla extract
  • 1cup powdered sugar
  • 1/2 cup chocolate hazelnut spread
  • 3 cups halved large strawberries (about 2 pints)
  • 1/4 cup white chocolate candy melts or coating wafers (1 1/2 oz) or 1/4 cup white vanilla baking chips

Procedure

  1. Heat oven to 350° F. Press cookie dough evenly in bottom and 1 1/2-inches up side of ungreased 9-inch tart pan with removable bottom. Bake 15 to 25 minutes or until golden brown and edges are set. Cool completely in pan on cooling rack, about 1 hour.
  2. Meanwhile, in a large bowl, beat mascarpone cheese, vanilla and powdered sugar with electric mixer on medium speed, 2 minutes or until well blended; set aside.
  3. Reserve 2 teaspoons of the hazelnut spread. Spread remaining hazelnut spread evenly in bottom of cooled cookie crust. Spoon and carefully spread mascarpone mixture over hazelnut spread to within 1/4 inch from edge. Arrange strawberries over mascarpone.
  4. In small microwavable bowl, microwave reserved hazelnut spread uncovered on High 20 to 30 seconds or until drizzling consistency. Drizzle over strawberries. In another small microwavable bowl, microwave candy melts uncovered on High 30 to 60 seconds, stirring once or until drizzling consistency. Place melted candy melts in small resealable food-storage plastic bag. Cut off small corner of bag. Squeeze bag to drizzle melted candy melts over strawberries. Store in refrigerator.

Note: the Pillsbury Bake-Off is coming in November! Check out my coverage of the 45th and 46th Bake-Off, and follow the recipes posted so far by clicking the bakeoff tag below.

Pillsbury Bake-Off Countdown: Hummingbird Macaroons

Hummingbird Macaroons

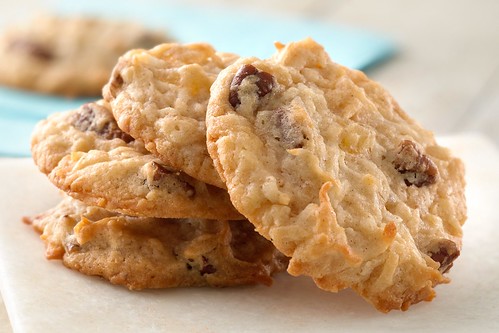
You probably didn't need to be told that Hummingbird cake is simply the bomb. That might be a cheesy thing to say, but it's such a beautiful cake it moves me to corniness.

But did you know that hummingbird macaroons are also exceedingly amazing? If you didn't, it's time to give this recipe from Melanie Eichman of San Antonio, Texas a try. It yields soft cookies that are bound to make you hum with joy.

Hummingbird Macaroons

  • Prep Time: 20 Min
  • Total Time: 1 Hr 15 Min
  • Makes: 30 cookies

Ingredients

  • 1 roll Pillsbury refrigerated sugar cookie dough
  • 1/4 cup mashed very ripe banana (1 small)
  • 2 cups flaked coconut
  • 1/2 cup finely chopped dried pineapple
  • 1/2 cup chopped pecans
  • 1/2 teaspoon Watkins™ Ground Saigon Cinnamon
  • 1/2 teaspoon Watkins™ Original Double Strength Vanilla Extract

Procedure

  1. Heat oven to 350°F. Let cookie dough stand at room temperature 10 minutes to soften. Line cookie sheets with Reynolds® Parchment Paper.
  2. In large bowl, break up cookie dough. Add remaining ingredients; beat with electric mixer on medium-low speed 1 to 2 minutes or until well blended. Drop dough by rounded tablespoonfuls 2 inches apart on cookie sheets.
  3. Bake 11 to 16 minutes or until edges are golden brown. Cool 3 minutes; remove from cookie sheets to cooling racks. Cool completely, about 15 minutes. Store covered.

Note: the Pillsbury Bake-Off is coming in November! Check out my coverage of the 45th and 46th Bake-Off, and follow the recipes posted so far by clicking the bakeoff tag below.

Pillsbury Bake-Off Countdown: Creamy Cashew Turtle Pie

Creamy Cashew Turtle Pie

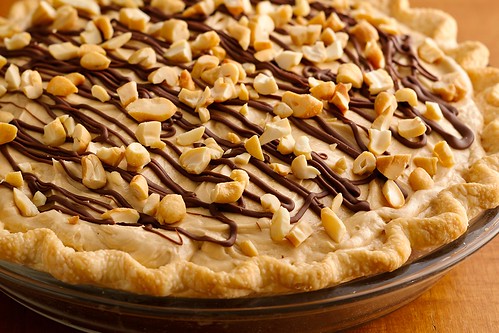
Things that I love definitely include pie crust, chocolate, cashew butter, cashews, salt, cream cheese, and caramel. Guess what? This pie has them ALL. Thank you to Tina Repak-Mirilovich of Johnstown, Pennsylvania for coming up with such a gem of a recipe. Good luck at the Bake-Off!

Creamy Cashew Turtle Pie

  • Prep Time: 25 Min
  • Total Time: 1 Hr 50 Min
  • Makes: 8 servings

Ingredients

  • 1 Pillsbury Refrigerated Pie Crust, softened as directed on box
  • 3/4 cup milk chocolate chips
  • 1 1/3 cups cashew butter
  • 1 cup chopped salted cashews
  • 1 package (8 oz) cream cheese, softened
  • 2/3 cup caramel topping
  • 1 container (8 oz) frozen whipped topping, thawed

Procedure

  1. Heat oven to 450°F. Make pie crust as directed on box for One-Crust Baked Shell, using 9-inch glass pie plate. Cool completely on cooling rack, about 20 minutes.
  2. In small microwavable bowl, microwave 1/2 cup of the chocolate chips uncovered on High 30 to 60 seconds, stirring once, until chips can be stirred smooth. Add 1/3 cup of the cashew butter; mix well. Spread chocolate mixture over bottom of cooled pie crust. Sprinkle 3/4 cup of the cashews over chocolate mixture. In large bowl, beat cream cheese, remaining 1 cup cashew butter and the caramel topping with electric mixer on medium speed 1 to 2 minutes or until blended. Gently stir in whipped topping until well blended. Spoon and spread cream cheese mixture over cashews. Refrigerate 1 hour.
  3. In small microwavable bowl, microwave remaining 1/4 cup chocolate chips uncovered on High 30 to 60 seconds, stirring once, until chips can be stirred smooth. Place chocolate in small resealable food-storage plastic bag. Cut off small corner of bag; squeeze bag to drizzle chocolate over pie. Sprinkle with remaining 1/4 cup cashews. Refrigerate at least 30 minutes before serving. Store loosely covered in refrigerator.

Note: the Pillsbury Bake-Off is coming in November! Check out my coverage of the 45th and 46th Bake-Off, and follow the recipes posted so far by clicking the bakeoff tag below.

Pillsbury Bake-Off Countdown: Tropical Honey Butter Breakfast Rolls

Honey butter tropical rolls (Bake-Off)

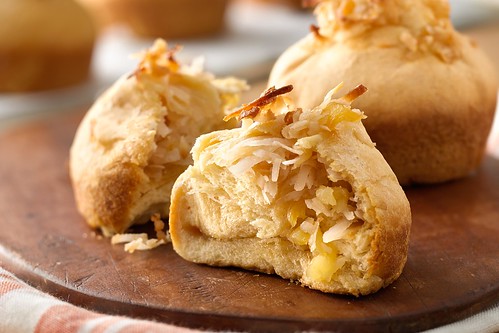
When it gets cool outside, I begin to crave foods that make me think of warmer climates. So these rolls are just perfect for me: kissed with coconut and pineapple, they make me feel like I'm back in Bali for a moment. Now that's sweet! This recipe is via Rhodora Keegan of Virginia Beach, Virginia.

Tropical Honey Butter Breakfast Rolls

  • Prep Time: 25 Min
  • Total Time: 55 Min
  • Makes: 8 rolls

Ingredients

  • 2 cups coconut (6 oz)
  • 1/2 cup well-drained crushed pineapple, patted dry with paper towel (from 8-oz can)
  • 1/3 cup packed dark brown sugar
  • 1/2 teaspoon Watkins™ Coconut Extract
  • 1 can Pillsbury™ Grands!™ Flaky Layers refrigerated honey butter biscuits (8 biscuits)

Procedure

  1. Heat oven to 350°F. Place 2-inch square of Reynolds® Parchment Paper in bottom of each of 8 jumbo muffin cups or 6-oz custard cups. Spray each cup with Crisco® Original No-Stick Cooking Spray.
  2. In medium bowl, mix coconut, pineapple, brown sugar and coconut extract until well blended. In small bowl, place 3 tablespoons coconut mixture; set aside.
  3. Separate dough into 8 biscuits. Press each biscuit to form 5-inch round. Spoon about 3 tablespoons coconut mixture onto center of each biscuit round. Fold biscuit in half over filling, stretching gently if necessary. Press edges firmly to seal; shape into ball. Place 1 ball in each muffin cup, seam side down. Spoon about 1 teaspoon reserved coconut mixture onto center of each biscuit; press lightly.
  4. Bake 18 to 22 minutes or until deep golden brown. Immediately loosen with tip of knife; gently remove from pan. Cool 5 minutes. Serve warm.
Note: the Pillsbury Bake-Off is coming in November! Check out my coverage of the 45th and 46th Bake-Off, and follow the recipes posted so far by clicking the bakeoff tag below.


Pillsbury Bake-Off Countdown: Strawberry-Cinnamon Roll Belgian Waffles

Cinnamon roll waffles

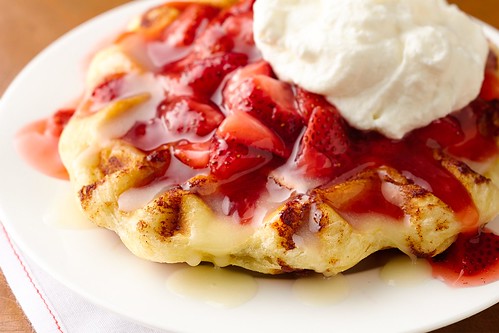
Breakfast is served. And is it ever beautiful: these "waffles" are made using cinnamon rolls! How's that for a decadent delight? Dressed up with strawberries and whipped cream, they're the perfect cold-weather breakfast to carb-o-load for a race you're never gonna run. This one comes from Kelly Humphreys of Vancouver, Washington. Good luck at the Bake-Off!
Strawberry-Cinnamon Roll Belgian Waffles

  • Prep Time: 30 Min
  • Total Time: 30 Min  
  • Makes: 5 waffles

Ingredients

  • 3/4 cup plus 2 tablespoons sugar
  • 2 tablespoons cornstarch
  • 3 cups fresh or frozen (thawed and drained) strawberries, coarsely chopped
  • 1 cup heavy whipping cream
  • 1/2 teaspoon orange extract
  • 1 can Pillsbury Grands! Flaky Supreme refrigerated cinnamon rolls with icing (5 rolls)
  • 3 tablespoons butter, melted

Procedure

  1. Place large bowl and beaters in freezer or refrigerator to chill.
  2. In 2-quart saucepan, mix 3/4 cup of the sugar and the cornstarch. Stir in strawberries and 1/4 cup water. Cook over medium heat, stirring constantly, until mixture thickens and boils (mixture will become translucent during cooking). Boil and stir 2 minutes. Pour strawberry sauce into heatproof bowl; set aside.
  3. Heat Belgian waffle maker. (Waffle maker without a nonstick coating may need to be sprayed with Crisco® Original No-Stick Cooking Spray before cinnamon roll is added.)
  4. Meanwhile, in chilled bowl, beat whipping cream, remaining 2 tablespoons sugar and 1/4 teaspoon of the orange extract with electric mixer on low speed until mixture begins to thicken. Gradually increase speed to high and beat just until stiff peaks form. Do not overbeat, or mixture will curdle. Refrigerate.
  5. Separate dough into 5 rolls; reserve icing. Place 1 roll in center of each waffle section. Close lid of waffle maker. Bake 2 to 3 minutes or until deep golden brown. Repeat with remaining rolls.
  6. Meanwhile, in small microwavable bowl, microwave reserved icing uncovered on High 10 seconds; stir in melted butter, remaining 1/4 teaspoon orange extract and 1/8 teaspoon salt.
  7. To serve, place each waffle on serving plate; drizzle with icing. Top with strawberry sauce and whipped cream.

Note: the Pillsbury Bake-Off is coming in November! Check out my coverage of the 45th and 46th Bake-Off, and follow the recipes posted so far by clicking the bakeoff tag below.