Mini Peanut Butter Baked Alaskas

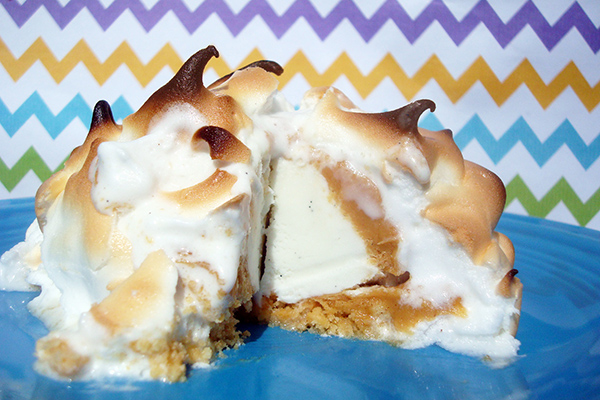
I will have you know, fine people, that I made mini peanut butter baked Alaskas for one of my favorite companies ever, Peanut Butter and Company. It was an honor!

Baked Alaska, to the uninitiated, is not only dessert, but SCIENCE. Cold ice cream sits atop a cake (or in my recipe, a cookie) base, and is coated all over with a meringue mixture. The meringue totally seals the ice cream in, and allows the whole thing to be popped in a very hot oven long enough to crisp the meringue, making for an improbable and impressive dessert that is hot and cold all at once.

And this version is even better because it features delicious peanut butter. And because it's served in mini portions (no sharing!).

For the recipe and more, click here.

Incredibly Delicious: Congo Bars

Congo bars aren't really all that African. Honestly, they're more like blondies, with the addition of coconut. So how on earth did their tropical name come to be? Well, I can share a few theories. 

1. Coconut is key. This hard-shelled fruit or nut (I'm not actually sure which it is, in spite of this helpful blog post) is most readily found in the tropics. The Congo is a tropical rainforest area in Africa, and coconuts do grow there, among other crops. 

2. "Congo" sounds way cooler than other tropical names. As I mentioned, the Congo is hardly the only area where coconuts grow. Personally, I picture the person who dreamed up the name making a list of tropical places and then eliminating names one by one because they didn't sound quite right. I mean, do "Jamaica bars" or "Phuket bars" sound as cool as "Congo Bars"? I personally think not.

3. Someone wanted to call them "bongo bars" because the sight of them makes your heart beat like a drum, but accidentally misspelled it on the recipe card.

Personally, I'll go with a variation on #2: it just sounds cool. 

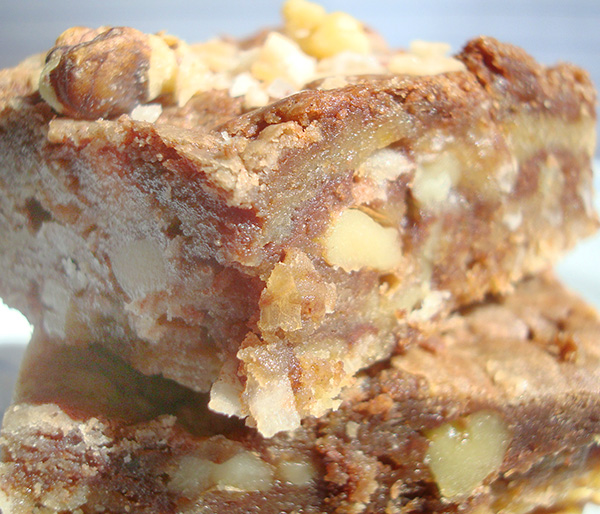
Really, though, who cares about why they're called Congo bars? The important stuff is how insanely delicious they are. Congo bars are a gloriously tricked-out version of the classic blondie, characterized by a satin-finish top which gives way to a decadent butterscotch-flavored, brown sugar-rich interior, generously flecked with chocolate morsels, nuts, and coconut. Curious name aside, you'll adore eating these sweet treats.

Recipe here.

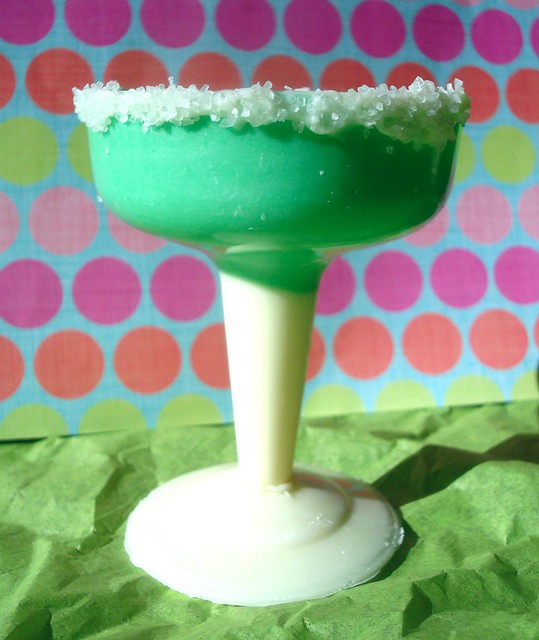
White Chocolate Dessert Cups that Look Like Margarita Glasses

Edible dessert cups

Today, let's forget about everything else and focus on a life skill that will serve you as long as you are breathing and are able to feel delight:

How to make edible dessert cups that look like margarita glasses.

This is a riff on a "How to make edible chocolate dessert cups" post I wrote for Craftsy--whilst I was writing it, I realized that, OMG, the plastic champagne coupes I was using as molds actually kind of resembled margarita glasses, too. So I decided to amp up the association by tinting the chocolate so that it would resemble a margarita in a cup.

Don't try to take a sip: this is solid white chocolate, decorated with a salty (that's real salt--I think dessert loves salt!) rim. While yes, it's fine for out-of-hand eating, I think it's extra special when you fill it with a pudding (how about a margarita pudding?), mousse, or even whipped cream. It's a whimsical and true delight-giving treat. 

How to make a chocolate cup

Makes 4-6 dessert cups

Adapted from Taste of Home

Ingredients

  • 12 ounces (1 bag) white chocolate morsels
  • flavorings or food colorings of your choice (optional)
  • coarse sugar for the "rims"

Equipment

  • Dollar store champagne coupes with removable bases

1. Divide the chocolate into two portions: 1/4 and 3/4. I found it easier to melt each batch separately; the small portion plain, and the larger portion with green coloring. You can learn how to melt white chocolate here.

2. Separate the removable bases from the cups of your champagne coupes. Start with four of them, and if you still have a good amount of the mixture when you’ve filled all of them, you can use the other two coupes (this will depend on how thickly you apply the candy).

3. Fill each hollow stem with your melted white chocolate mixture, up the stem. Switch to the green chocolate. Now, use a pastry brush or spoon to brush the sides and "bowls" of the cups (author's note: I started with a spoon for filling the stem, and then graduated to a pastry brush to apply chocolate to the sides of the cup). Set the tops back on the bases (they'll remain upright this way), and place in the refrigerator for about 15 minutes, or until set.

4. Once your 10 minutes are up, remove from the refrigerator and give them a generous second coat with the green, putting emphasis on the sides of the cup. Place back in the refrigerator on the bases until set.

5. Remove the tops from the bases; the chocolate should be set to the point where you can set the coupes on their sides while you proceed. Grab those bases, and invert them.

6. Fill each of the bases with most of the remaining melted white mixture, leveling the top. Place them with the coupes in the refrigerator. You should have a little white chocolate left — keep it on hand.

Chocolate bases

7. Once everything is set (that is to say, the chocolate is completely hard and firm), remove from the refrigerator (to keep things cool, remove the coupes and bases one at a time). Gently, using a sharp knife, ease the edges of the plastic from the chocolate. The pieces should come out without too much trouble.

If the plastic cracks or breaks, that’s ok — you only spent a dollar on these! If there is some breakage on your candy cups, don’t panic. You can place the cracked bit in place, and press it together using the remaining white chocolate mixture as “glue”.

Base attached to top

8. Use a little white chocolate or icing along the edge of the top of the cups, and adhere some coarse sugar along the rim.

9. Adhere the bases and cups using the remaining white chocolate as glue. Let them set again in the refrigerator for about 20 minutes before filling with the dessert of your choice. If not using immediately, let them rest in the refrigerator until ready to serve your dessert so that any ambient heat doesn't make the base and top separate.

What is your favorite whimsical dessert?

Besitos de Coco: Coconut Kisses from Puerto Rico

I'm pretty sure that a cookie in Puerto Rico known as "Besitos de coco" translates as "awesomely ginormous coconut macaroons baked in cupcake tins". I should, of course, note that this is without the aid of a dictionary or translation, it is just what comes from my heart.

Fine. If you want to get all technical, it means "coconut kisses". But these are not a peck on the cheek. They're a big fat kiss, from someone you love, and not your aunt or Grandma. A kiss with a little squeeze. 

Technically, you can make these any size, from fairly small to very large. That's why I left off a count on the recipe, because if you want modest portions you'll get many; if you want jumbo confections, you'll get 12 or so.

Besitos de coco

Adapted from Sandra's Kitchen

  • 5 1/2 cup sweetened shredded coconut
  • 2/3 cup all-purpose flour
  • 1 teaspoon salt
  • 1 teaspoon vanilla
  • 1 can (14 ounces) sweetened condensed milk 

Procedure

  1. Preheat the oven to 325. Line a cupcake tin with liners.
  2. In a large bowl, combine the coconut, flour, and salt. Mix to incorporate.
  3. Now, stir in the condensed milk and vanilla. Stir until totally combined (the mixture like a slightly more liquid consistency than rice krispie treats). 
  4. Place a heaping tablespoon of the coconut into each cup, or get fancy and load it into a piping bag with a jumbo star tip like they do in Rincon. 
  5. Bake for 40 minutes, or until browned and toasty on top. Let cool in the pans completely before removing. These freeze beautifully, or will keep at room temperature in a sealed container for several days. 

Do you like coconut in your sweets?

The Only Flourless Chocolate Cake Recipe.

If you believe my mother (and she's a pretty honest person), my first word as a baby, aside from "mama" and "papa"...was "chocolate". Apparently, it occurred following an incident where my grandma gave baby-me a fat spoonful of chocolate frosting, against my mother's wishes. As the story goes, my eyes lit up and I said the magic word: "chok-lit". True story.

So clearly, chocolate has played an important role in my life. It's been a lifelong friend.

In spite of that, however, I don't consider myself a "chocoholic". I would more often choose a blondie than a brownie, and I like the cookie part better than the chocolate chip part of cookies. But when I do get a chocolate craving, it is fierce, and I want chocolate and nothing else in my mouth.

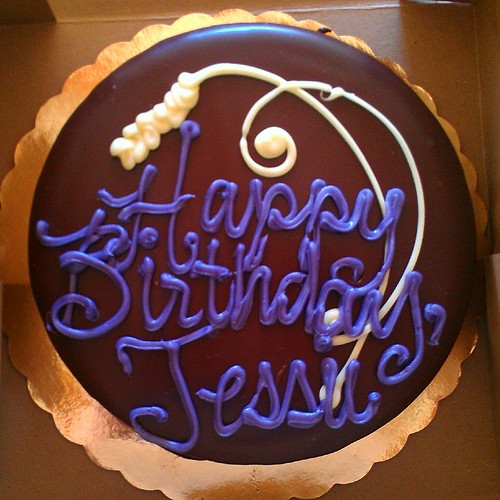
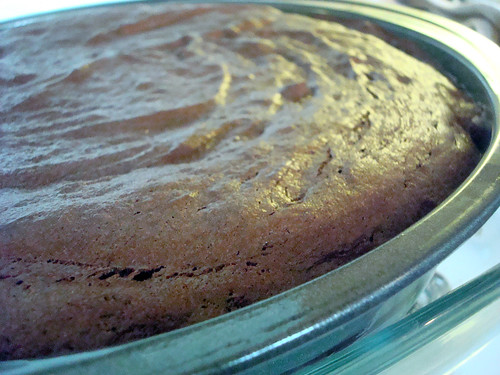
In Santa Fe, where I currently reside, I have been introduced to one of my favorite chocolate cakes, which always satisfies chocolate cravings: the flourless decadence cake at Whole Foods. It's a very dense chocolate cake with (because, why not) a thick ganache topping). I don't know exactly what it is about this cake, but it is GOOD. Here's a picture of it:

Birthday cake

When I recently wrote an article for New Mexico Magazine (out in January!), one of the recipes I developed was for a decadent flourless chocolate cake. When I made it, I was surprised at how close the cake part was to the Whole Foods variety, so I tried a new variation which featured not only flourless chocolate cake, but an all-over ganache topping.

Well, my friends, it worked, and I believe I have found the perfect homemade hack of the Whole Foods decadence cake.

Flourless chocolate cake

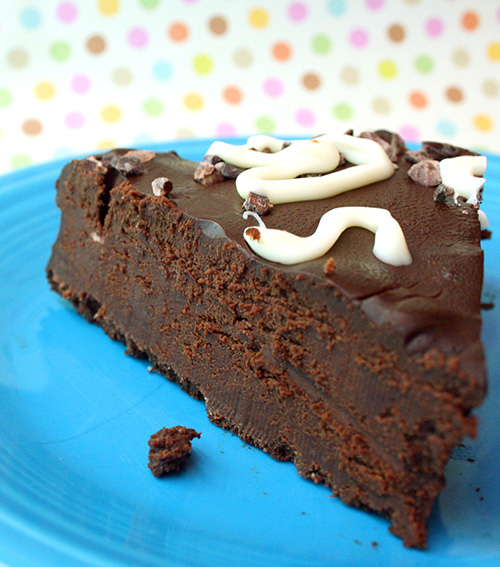
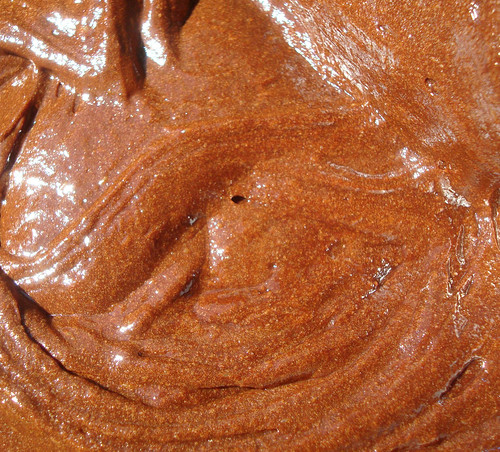
I don't know how to express it in words, quite, but I will try. This cake is very, very, very, very, very, very, very, very, very, very, very chocolatey. If you have a chocolate craving, this will do the trick. There's more than a full pound of chocolate encased in its glossy ganache-coated exterior. This cake means chocolate business.

The salt is key in this recipe, as it brings out the chocolatiness. If you want, you can add a teaspoon of coffee powder to amp up the chocolate flavor even more, but I don't find it necessary.

If you love chocolate, this is the only flourless chocolate cake recipe you'll ever need. If you don't love chocolate, this might be he one that makes you a believer.

Process shots from cake making: Flourless chocolate cake

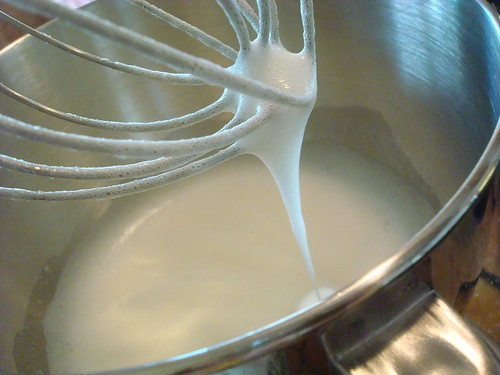
Whipping the egg whites

Flourless chocolate cake

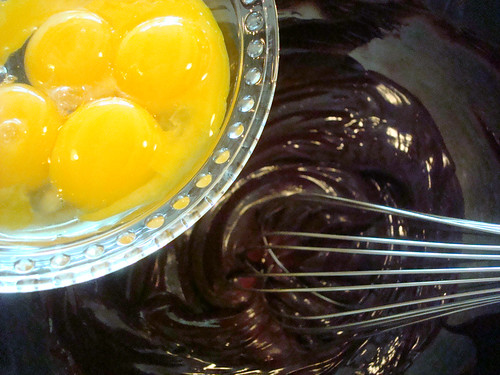
Adding the eggs to the chocolate Flourless chocolate cake

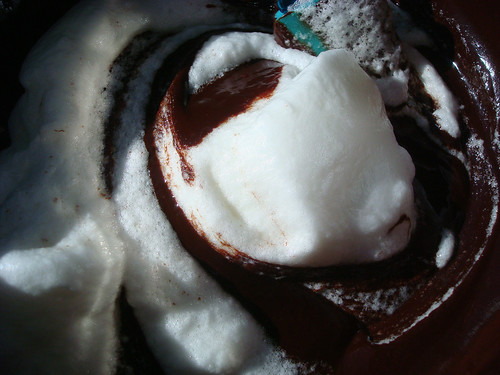
Folding the egg whites into the chocolate

Flourless chocolate cake

Pour into the pan

Flourless chocolate cake

Baked cake

The only flourless chocolate cake recipe.

Makes one 9-inch round cake

For the cake

  • 1 pound bittersweet or semisweet chocolate, coarsely chopped
  • 11 tablespoons (1 stick plus three tablespoons) unsalted butter, cut into ½ inch cubes
  • 5 large eggs, divided
  • 1 teaspoon vanilla extract
  • ¼ teaspoon salt
  • 2 tablespoons sugar

For the sauce

Procedure

  1. Preheat the oven to 325°F. Grease a 9-inch round cake pan and line the bottom with parchment paper. Grease the top of the parchment paper.
  2. In the top of a double boiler or in a large bowl set atop a saucepan of lightly simmering water with 2 inches between the top of the water level and the bottom of the bowl, melt the chocolate and butter. Stir frequently until the chocolate and butter have melted to the point where there are only a few small lumps. Remove from heat and continue stirring until these unmelted bits have melted in the residual heat.
  3. Whisk in the egg yolks into the still-warm chocolate mixture. Whisk quickly so that the eggs will be incorporated without beginning to cook (nobody likes scrambled eggs in their cake). Stir in the vanilla extract.
  4. In a separate bowl using a hand mixer, or the bowl of a stand mixer, beat the egg whites and salt until soft peaks form. Once soft peaks form, stop the mixing and add the sugar. Scrape down the sides of the bowl if necessary to make sure no sugar has stuck to the sides of the bowl. Continue mixing until the whites have attained firm peaks, but not so long that they become dry.
  5. Using a rubber spatula, fold the egg white mixture into the chocolate mixture in two separate additions (it’s just easier to manage that way). Mix only until there are no more traces of white and the mixture is fully combined.
  6. Using the same rubber spatula, scrape the thick chocolate mixture into your prepared baking pan.
  7. Place the pan in a larger baking dish or roasting pan, and fill the larger pan with water until it reaches halfway up the cake pan’s height.
  8. Place the entire unit (cake pan within bain-marie) into the oven. Bake for 30 minutes. The top and sides will be set, but the middle may jiggle a bit. This is OK.
  9. Remove the cake from the pan of water (the water level should have reduced making it easier to remove). Let the cake cool in the pan. When ready to remove from the pan, run a sharp knife around the perimeter of the cake pan to loosen the edges. Place a serving platter on top of the cake pan, and flip both the pan and the plate so that the cake is on top. It should come out easily. The parchment may stay in the pan or it may come off with the cake; remove from the cake if so. Store in the refrigerator until the cake has completely set.
  10. While the cake cools, make the ganache as specified in the recipe. Let it cool until it has thickened to a spreadable but thick consistency, and spread all over the cake. 
  11. Keep the cake in the refrigerator until ready to serve; let it come to room temperature before serving.

Do you like flourless chocolate cake?

"The Cake"

I need to tell you about something called The Cake.

Here's the story: my darling one has a handwritten book of family recipes, and one is definitely more captivating than any others, because its name is simple, mysterious, and a bit imperious...

It has a credit of Claire Goddard. I have never had the pleasure of meeting Claire, but based on her cake, I'm pretty sure I would like her. 

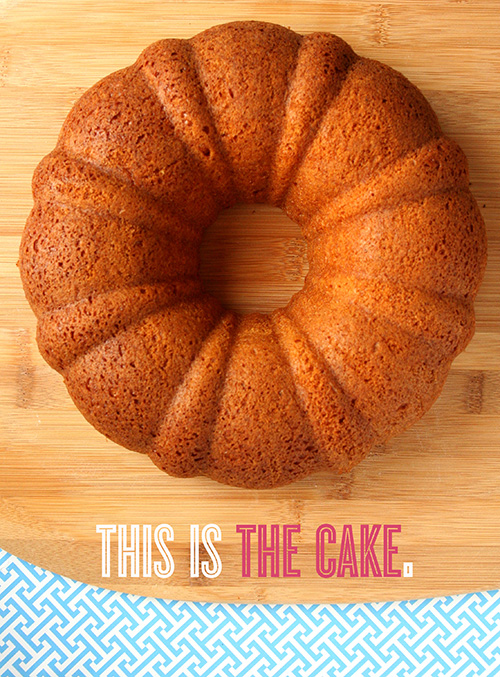
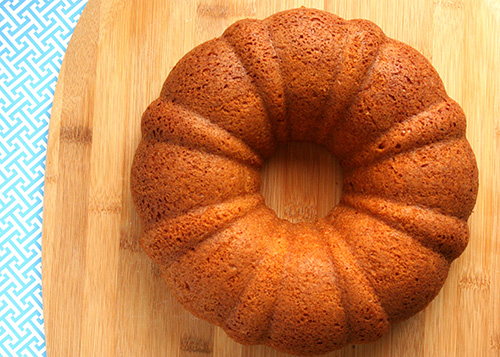
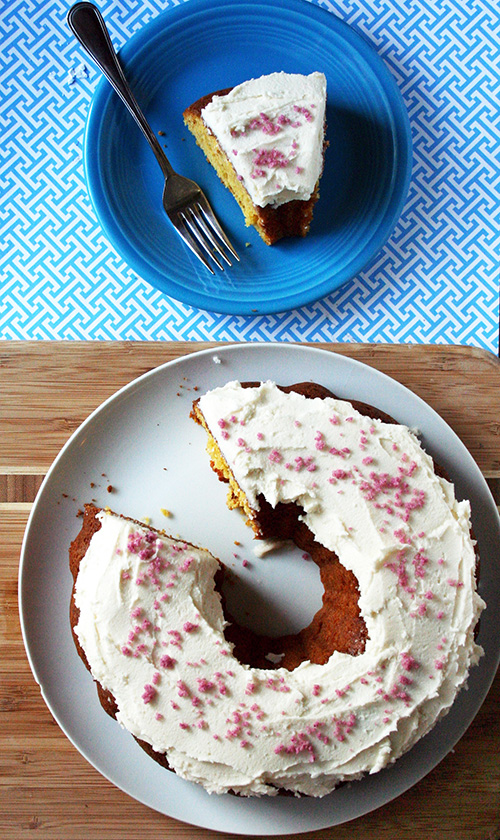
This cake is pretty, but perhaps not exceptional to look at: it just looks like a pleasant cake baked in a doughnut shape.

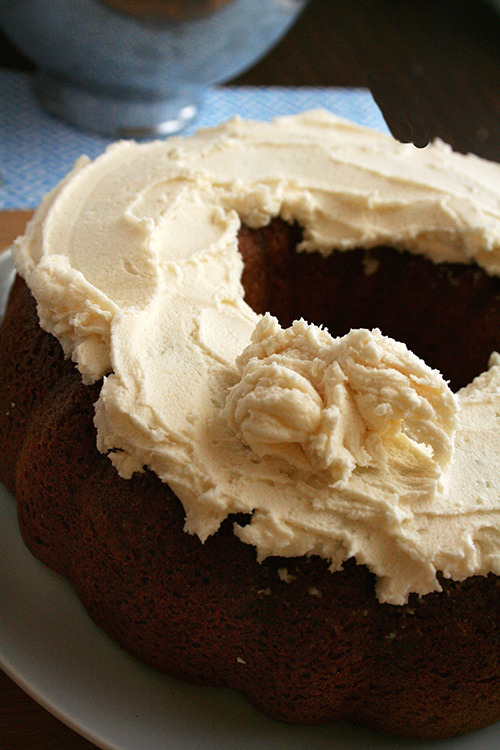
But one bite will tell you that there is something special about the cake. It's rich, probably owing to the high amount of eggs, and it is a bit tipsy, owing to the whopping 3/4 cup sherry (or rum, thankyouverymuch). It also has that certain addictive quality that boxed yellow cake always seems to impart on a cake (evidence: gooey butter cake). It's the sort of cake that doesn't need frosting...

but hey, why not?

Even in spite of the above selling points, I'm not sure how exactly to explain the pleasure of The Cake. It isn't the fanciest dessert you've ever had, but it's got star quality--a certain je ne sais quoi that you can't quite put your finger on, but you're drawn to nonetheless.

The Cake is worth your time--I promise. A little treasure from my family's memory box to yours.

"The Cake"

Slightly adapted from Claire Goddard

Note: the original recipe calls for 3/4 cup vegetable oil; we used part coconut oil. You can use 3/4 cup vegetable oil if you prefer.

I used Pillsbury Super Moist Yellow Cake Mix for this recipe. 

  • Serves 6-8 
  • Prep: 10 minutes
  • Baking time: 45-50 minutes

Ingredients

  • 1 box yellow cake mix
  • 1 package vanilla instant pudding
  • 4 unbeaten eggs
  • 1/2 cup vegetable oil
  • 1/4 cup coconut oil plus 1 tablespoon 
  • 3/4 cup sherry or rum
  • 1 teaspoon nutmeg
  • 1 1/2 cups buttercream frosting, for topping (optional but suggested)

Procedure

  1. Preheat the oven to 350 degrees. Grease a tube or bundt pan; set to the side.
  2. Combine all of the ingredients in the bowl of a stand mixer. Beat on medium speed for 5 minutes.
  3. Transfer to a greased tube pan (we used a bundt pan). 
  4. Bake for 45-50 minutes. Let cool for about 20 minutes before inverting on to a serving rack. Serve as-is, or covered with frosting (that is my suggestion) or with ice cream. 

Do you have any mysterious family recipes?

Stacked Cinnamon Roll Christmas Tree

When Pillsbury sent me their latest grouping of seasonal recipes, I knew I had to share this one. It's so cute, and it's composed of cinnamon rolls. I mean, I don't see any other necessary components to make this awesome.

This recipe is courtesy of Pillsbury - check out their other holiday ideas. Enjoy!

Cinnamon Roll Christmas Tree

Ingredients

  • 1 can (12.4 oz) pillsbury refrigerated cinnamon rolls with icing
  • 1/2 teaspoon colored sugar

Procedure

  1. Heat oven to 400°F. Spray large cookie sheet with cooking spray. Separate dough into 8 rolls. Use kitchen scissors or knife to cut each roll into 4 pieces.
  2. Shape each piece into small ball, and place on cookie sheet. Place 10 balls in a single layer, clustered and touching together to form a round disk shape. Continue with a formation of 8 balls, then 6 balls, then 4 balls, 3 balls and finally a single ball. There will be a total of 6 disks (including the single ball), which will form the layers of the tree after baking.
  3. Bake 8 to 10 minutes or until browned. Cool on cookie sheet 2 minutes. Meanwhile, transfer icing to microwavable liquid measuring cup. Microwave uncovered on High 10 to 15 seconds or until pourable.
  4. Use large, flat spatula to transfer largest disk to serving platter or cake plate. Drizzle with small amount of icing, then top with next largest disk. Drizzle with small amount of icing. Continue with remaining disks, ending with single ball. Drizzle remaining icing over tree. After drizzling, immediately sprinkle with colored sugar.

What's your favorite holiday breakfast?

Chocolate Babka is the Best Thing Ever

RECIPE HERE!

The best thing ever? Cake that masquerades as "breakfast bread". And my new favorite? Babka. Chocolate babka, to be specific.

Chocolate babka first entered my consciousness when it was the subject of a Seinfeld episode. It wasn't until a couple years later, when I lived in New York City, that I tried the stuff--from Zabar's, naturally. 

I'll tell you how I felt about babka: I liked it. 

Babka makes for sweet eating: a lightly sweetened yeast bread with a feathery texture which is weighted down to seriously sweet territory with an inner swirl of dark chocolate. It makes for an addictive combination, let me tell you. 

Apparently, the babka we eat stateside is a bit different from "the original", you know, from the old country. I'm willing to believe that one is good, too, but I am pretty sure I'd still prefer the American version, stuffed with chocolate. 

When I paired up with Colavita to make some recipes for their website using their olive oils, I was super-psyched to try out babka sans butter. I have to say, the olive oil works tremendously in this recipe--it has a smooth, lightly fruit-like flavor that brings out the best parts of the bread and chocolate, marrying them in the most delicious way. 

To read more about babka, check out the post on the Colavita blog. And here is my awesome babka recipe.

Breakfast is Served: Panettone French Toast

There are some people who make the most ridiculous claim. This is it: "I forget to eat breakfast".

I, personally, have never in my life forgotten to eat breakfast. There have been maybe a handful of times when I didn't eat breakfast for various reasons, but never because I forgot.

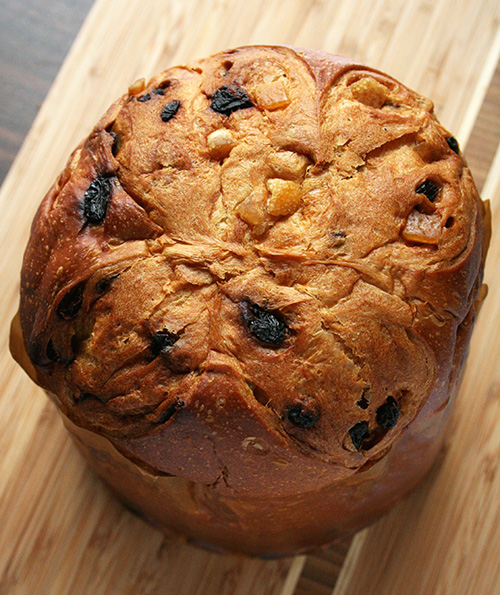
I love breakfast--it's one of the best parts of the day for me. So when I got sent a big ol' box of panettone in the mail from Bauli as part of their #BauliBakeOff event, I immediately began to think of ways to breakfast-ize it. 

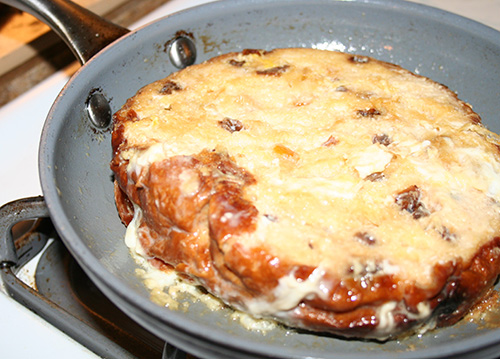
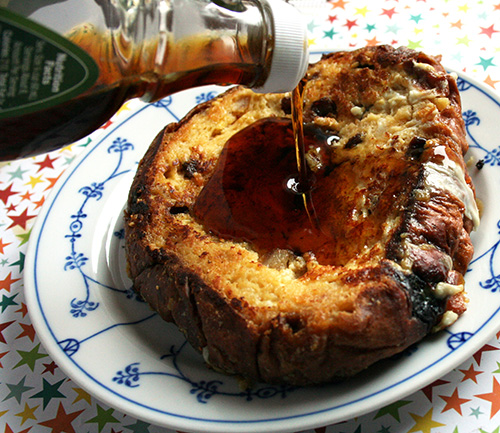
I decided to stay really simple and make panettone French toast. This is fusion at its best: Italian meets French, Christmas meets brunch. The absorbent, fluffy bread soaks up the milk and egg mixture like a pro, and fries up toasty on the edges, and custard-y on the inside. It is so good, I can ignore the vaguely fruitcake-esque characteristics of the panettone which, on lesser days, can irritate me. 

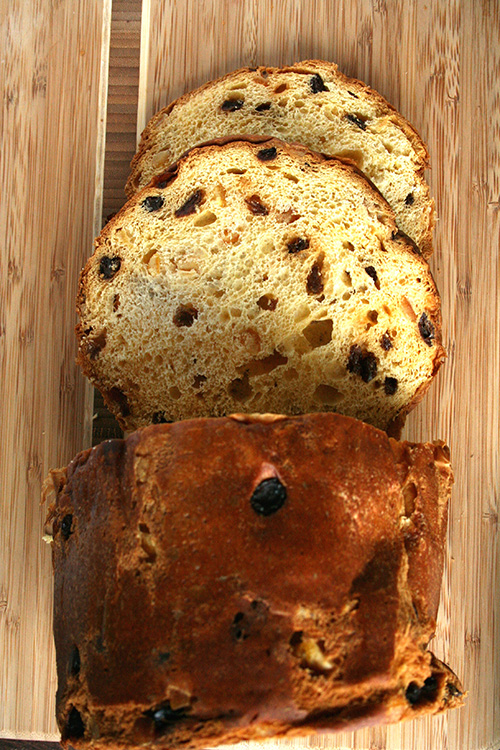
This is a simple recipe, but very delicious. I sliced the panettone into huge coins, so it makes for a fun presentation, too, with each serving about the size of a salad plate! 

Panettone French toast

Makes 4 very generous servings

  • 1 cup milk
  • 2 eggs
  • 1 teaspoon vanilla extract
  • pinch salt
  • 1/4 cup granulated or brown sugar
  • 1 panettone di Milano (you'll use about half of it)
  • maple syrup, for serving (optional)

Procedure

  1. Combine the first five ingredients (everything but the bread) in a large, flat vessel such as a pie plate or a 9x9-inch baking pan. Whisk together until combined.
  2. Slice the panettone into nearly inch-thick slices, like coins, starting from the top. 
  3. Place the first slice in the soaking mixture, and let it soak for 20-30 seconds. Flip it and let it soak on the second side.
  4. Place a frying pan large enough to accomodate the large slices on a burner. Turn the heat on high, and melt a generous knob of butter in the pan. Once it's sizzly, place the soaked slice on the burner. Immediately reduce the heat to medium. Fry on one side until golden and toasty (about 2 minutes on my stovetop) and then flip and repeat on the second side.
  5. While the first slice fries, soak the second slice. Make yourself a little assembly line so that while one slice fries, you are soaking the slice on deck.
  6. Serve immediately. This tastes great with maple syrup.

What's your favorite "alternative" carb for French toast?

Best-Ever: Peanut Butter Filled Cookies

We love to stuff. We stuff our stockings. We stuff our bras (or at least we did when we were 13). Why not stuff our cookies?

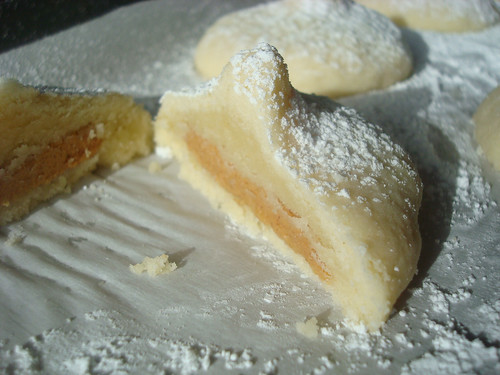
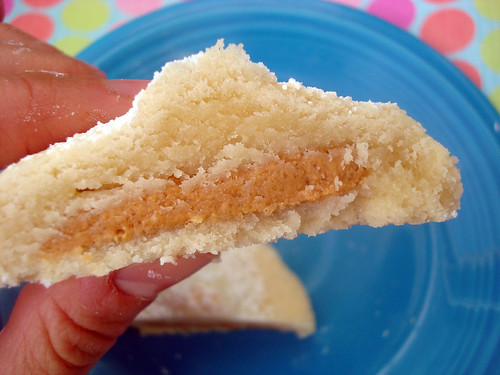
These cookies--and yes, it brings me a shiver of joy to say it--are stuffed with peanut butter. Delicious, creamy, dreamy, peanut butter. This means that when you grab one of these cookies, you're already excited, I mean, cookie! right? But then, when you bite into it, you find that the crumbly exterior gives way to a soft and gooey peanut buttery center. And that is the point which, in some sort of sweet and slightly salty and rich and peanut buttery bliss, you think "it would be OK if I died right now, because I've had this moment". 

Stuffed cookies

Am I talking them up too much? Go ahead, find out for yourself. Here's the recipe. 

Stuffed cookies

Peanut butter filled cookies

Makes about 20 cookies

  • 1 1/2 cups all purpose flour
  • 1/2 cup cornstarch
  • 1 teaspoon salt
  • 2 sticks unsalted butter, softened
  • 1/2 cup sugar
  • 1 egg
  • 1 teaspoon vanilla extract
  • 1 jar peanut butter (I used Mighty Maple peanut butter by Peanut Butter and Company) (you won't use quite the whole thing)
  1. Preheat oven to 325 degrees F.  Line two baking sheets with parchment paper.
  2. Combine the flour, cornstarch, and salt in a medium bowl. Set aside.
  3. In a stand mixer fitted with the paddle attachment, cream the butter on medium-high speed. Once nice and creamy, add the sugar and beat for 3-5 minutes; it will become somewhat fluffy. Add the egg and vanilla extract, mixing until combined. Pause to scrape down the sides of the bowl and mix again to ensure everything is mixed in.
  4. Add the flour mixture in 2-3 increments, mixing at low speed after each addition until combined, and pausing to scrape down the sides of the bowl with each addition. The mixture will come together to form a soft, malleable dough.
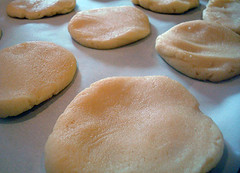
  5. Pull a piece of dough, about 2 tablespoons worth, from the bowl. Form a 2-3 inch flat but fairly thick, circle of dough (you can do this one at a time, or make all of your rounds and then proceed).
  6. Stuffed cookies
  7. Place a spoonful of peanut butter on top of the circle of dough. Pull the sides of the dough over the filling to form a soft dome, making sure the dough is covering the peanut butter on all sides (it can melt through if not--you might overload the first one but you'll get a handle for the right amount fast). Pinch the top to seal the cookie–it will resemble the shape of a Hershey’s kiss. You can also seal the cookie flat on top, just do make sure it’s sealed.
  8. Stuffed cookies
  9. Place the cookies on the prepared sheets, 1 1/2 inches apart to accommodate slight spreading. Bake for 14-18 minutes, or until with a dull finish on top (a golden touch on top is fine, but don’t let them get completely golden or browned). Let them cool on the pans.If desired, dust with confectioners’ sugar. Once they have set for about 10 minutes, you can serve. Keep stored in an airtight container at room temperature for up to 3 days.
  10.  Stuffed cookiesStuffed cookies

Have you ever made stuffed cookies?

Cornmeal Pecan Cookies Recipe

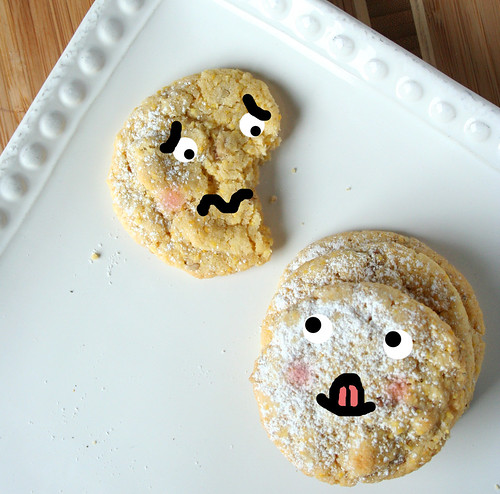
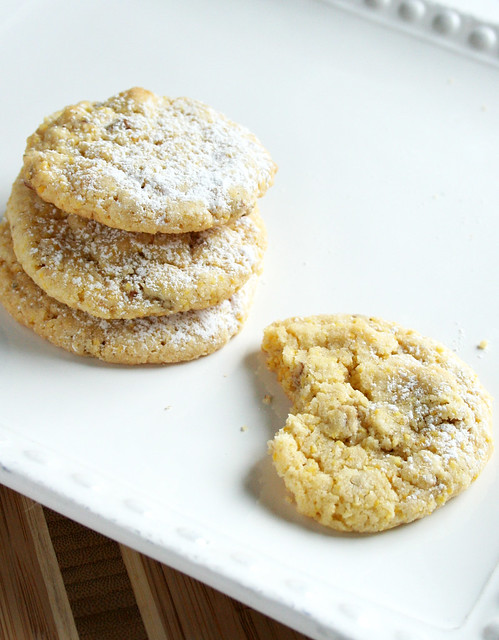
Cornmeal pecan cookies

It's been proven time and time again in my life: cornmeal in cookies is a Very Good Idea.

By "time and time again" I mean every time I go to a bakery that has cornmeal-containing cookies. Momofuku Milk Bar and Amy's Bread in NYC are two places I can suggest reliably fantastic cornmeal cookies. They're not the only bakeries that sell cornmeal cookies; in fact, I can't think of a time I haven't enjoyed a cornmeal cookie that I purchased.

Cornmeal pecan cookies

I have made cornmeal cookie bars before, too. Were they ever good. 

In my opinion, the success factors are as follows: the corn-ishness adds a natural sweetness that is a pleasant departure from just sugar-sweetness, and the pleasingly slight gritty texture adds intrigue.

I know I'm not the only cornmeal cookie fan out there, so it's very likely that this recipe will be a welcome addition to many a corn cookie lover's repertoire. These corn cookies have a leg up on most because in addition to sweet cornmeal, they also include pecans, which makes them a touch crunchy. And I don't know why I haven't rhapsodized about the combo of pecan and corn before--united by a buttery front, these are twin quasars of awesome in every bite of these cookies. I want to make cornbread with pecans now! Corn and pecan everything!

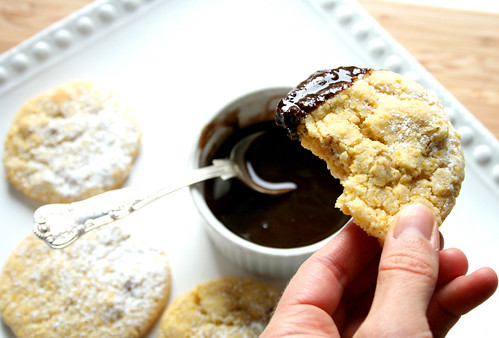
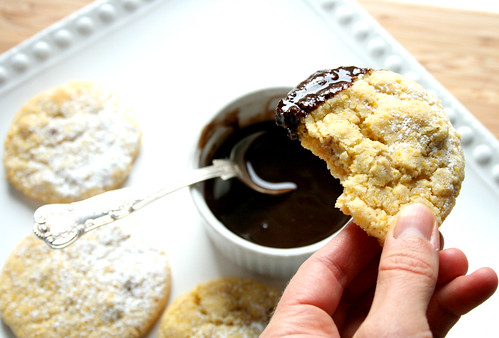
I served the cookies with a side of coconut oil chocolate dipping sauce. It was a very good decision. 

Cornmeal pecan cookies

Oh, and it's also a good cookie recipe to use up egg yolks if you've been making meringues or another recipe that only contains whites! 

Cornmeal Pecan Cookies

Makes about 40

  • 1 1/2 cups flour
  • 1/2 cup yellow cornmeal
  • 1 teaspoon baking powder
  • 1/4 teaspoon salt
  • 3/4 cups butter, at room temperature
  • 3/4 cup sugar
  • 2 egg yolks
  • 1 teaspoon vanilla
  • 1/2 cup toasted chopped pecans

Procedure

  1. Preheat oven to 350 degrees F and line baking sheets with parchment.
  2. In a large-ish bowl, stir together the flour, cornmeal, baking powder, and salt together. Set to the side.
  3. In the bowl of an electric mixer fitted with the paddle attachment, on medium speed, cream the butter and sugar until nice and fluffy. Add the egg yolks and vanilla and mix until blended, about 1 minute.
  4. Reduce speed to low, and mix the flour in, until just incorporated. Fold in the nuts.
  5. Scoop out heaping tablespoonfuls of dough, and form into balls. Place on the baking sheet about 2 inches apart. 
  6. Bake for about 15 minutes, or until lightly browned on the edges and set in the center. Let cool on the racks for about five minutes and then transfer to a wire rack to cool completely. If desired, dust with confectioners' sugar. These cookies will keep for a couple of weeks in a sealed container at room temperature, or up to several months in the freezer.

Do you like cornmeal cookies?

Olive You: Lemon Pistachio Tuiles With Olive Oil

These might just be the most dignified cookies I've ever made: lemon pistachio tuiles with olive oil. 

Before the cookies, though, let me explain a bit about my experience baking with olive oil.

I made these cookies for what is quickly becoming one of my favorite companies to work for: Colavita. I've long purchased their olive oil, because I think you get a pretty good bang for your buck--they have a very good flavor but won't break the bank. I am a big fan of olive oil on bread or salads. When olive oil is drizzled over a pizza before serving...well, let me just tell you, that is my happy place.

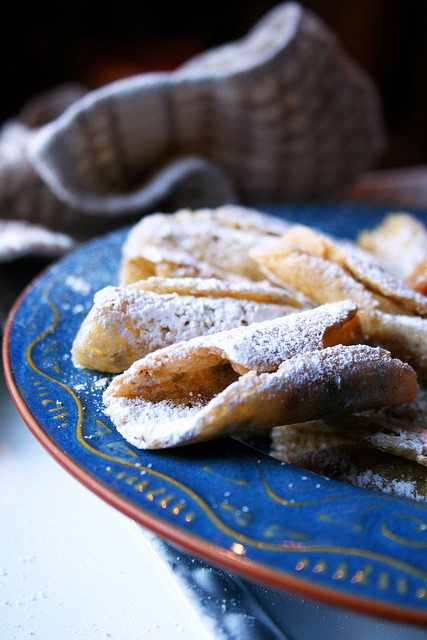
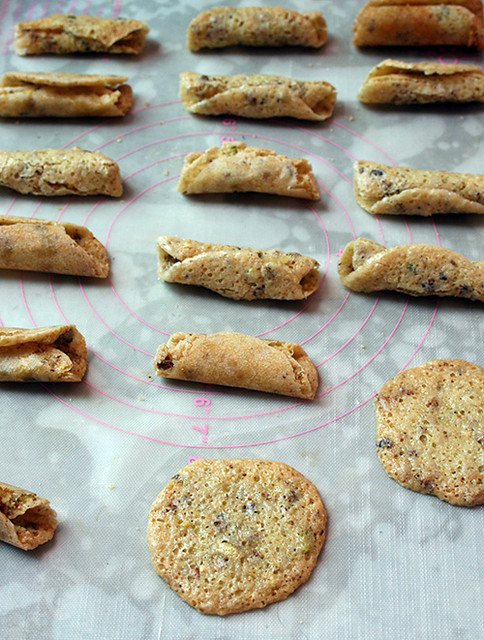
Tuiles

I'm a little newer to baking with olive oil, but the more I do it, the more I love it. It gives cakes an intriguing texture, and a flavor that is something different entirely than a butter cake. I'm not saying I'm abandoning butter--that is never going to happen. But I am saying that if you want a totally new taste experience, try pound cake made with olive oil. Seriously. 

Tuiles

So, back to the cookies. 

First things first: how do you say the name of this cookie? Tuile rhymes with “wheel”, and ideally should be uttered in your Frenchiest accent. “Tuile” comes from the French word for “tile”; allegedly, the cookies’ resemblance to a particular type of roof tile are said to have inspired the name. While that particular connection may be a bit tenuous, the cookies are a sophisticated delight, lightly crunchy and bursting with flavor.

I made these with Colavita’s Limonolio Extra Virgin Olive Oil, which contains fresh lemon, and makes these cookies practically sing with zingy flavor. These crunchy cookies aren't just lemon-flavored, though: that zippiness is rounded out with lightly salty, rich pistachios. For a simple presentation, dust them with confectioners’ sugar, or if you’re in the mood to gild the lily, dip or drizzle your “tuiles” in decadent Perugina chocolate.
Tuiles


See the full recipe and tutorial.

Merriest Christmas: Peanut Butter Snowballs

If you need a little Christmas, right this very minute, then this peanut butter snowball recipe is just the ticket to get you on a one way trip to holiday tastiness. It's also my latest creation for Peanut Butter and Company.

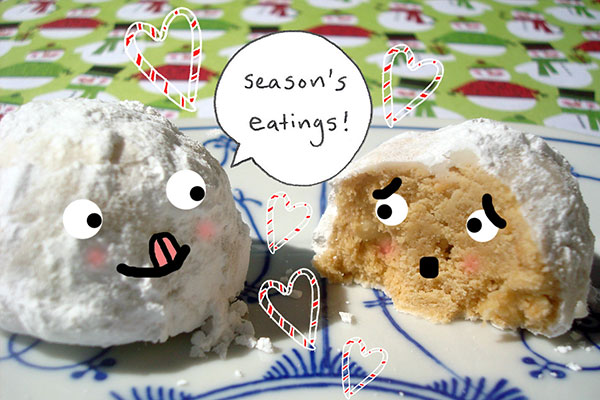
These cookies share the classic shape and crumbly texture of snowballs (also called Russian teacakes, Mexican wedding cakes, Armenian sugar cookies, bullets, and, oddly, moldy mice), but they have a taste that is full of peanut buttery goodness. Using crunchy peanut butter ensures good structure and offers enough bulk that they hold their shape; the lack of eggs and leavener keeps the cookies delicate, and distinctly different in character from the type of peanut butter cookies which are cross-hatched with the tines of a fork.

These cookies are a classic kissed with peanut butter to create a true holiday delight. Truth be told, though, I doubt anyone would turn these away at any time of the year!
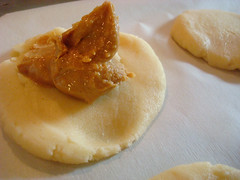
Recipe here!
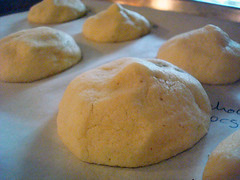
The Best Chocolate Coconut Oil Maple Syrup Dipping Sauce

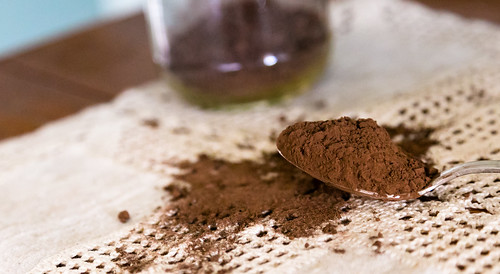
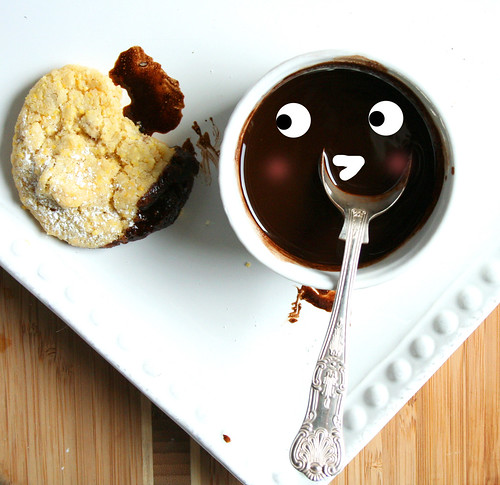
Chocolate coconut sauce and cornmeal cookies

Well, did I intrigue you with the title? I hope so, because this sauce is IT, dudes and dudettes.

What can you dip in chocolate coconut oil maple syrup sauce? Any and everything you can think of. Cookies, ice cream, cake, pie. I haven't tried it with a hamburger and fries yet but I'm pretty sure it would manage to improve that, too. Seriously--this stuff is just that good.

Chocolate coconut sauce and cornmeal cookies

This recipe was included in a preview review copy of a coming-soon novel entitled Criminal Confections (A Chocolate Whisperer Mystery). The book is super cute, exactly the type of mystery-meets-chick lit-meets foodie fiction type of book I read when I am alone (if I'm in public, it's War and Peace or something that makes me look smart, of course). I haven't finished the book so I haven't come to the recipe within the story yet, but it was included on the marketing sheet that came with the book, and I thought it sounded interesting.

Chocolate coconut sauce and cornmeal cookies

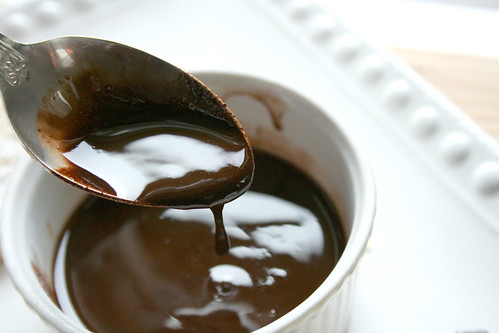
This sauce comes together in oh, about two minutes, and offers many delicious rewards. I have been enjoying it as a dipping sauce served alongside cornmeal pecan cookies (I'll post that recipe soon), but like I said, it really does make everything better.

"Hayden Mundy-Moore's Chocolate Butter"

Notes from the author: the keys to this recipe are the coconut oil and pinch of salt. The coconut oil gives the chocolate butter just the right luscious consistency. The salt (flaky sea salt is great if you've got it!) adds complexity. Natural cocoa powder and Dutch-processed cocoa powder both work well in ths recipe. Honey can be substituted for maple syrup, if you prefer.

from Criminal Confections (A Chocolate Whisperer Mystery)

  • 1/4 cup refined coconut oil
  • 1/4 cup pure maple syrup
  • 1/4 teaspoon vanilla extract
  • 1/2 cup unsweetened cocoa power
  • pinch of salt

Melt the coconut oil in the microwave or on the stovetop over low heat. Stir in the rest of the ingredients and whisk until smooth. It will become thicker as it cools. Enjoy!

What's your favorite dipping sauce for sweets?

Recipe Redux: Butterscotch Chip Microwave Fudge

Fudge? That you can make in the microwave? Who has ever heard of such a thing?

Um, you have. On this very site, several years ago. It's OK. I understand that if you're new to the site you haven't spent all day sifting through my archives. I also understand that if you're a longtime reader...well, you forget things.

But this recipe is good enough to bring back. I made it "new" by employing butterscotch chips instead of peanut butter this time. And let me tell you, it stands the test of time. It appeals to me both on a level of novelty (it's fudge! made in the microwave!), but also on a level of taste (it's chocolatey! It's very, very sweet! It has butterscotch chips inside and on top!). 

Basically, what I am getting at here is that this recipe is fun, it's tasty, and it's worth your time. It's also easy enough that if you had a cookie swap to go to in an hour, you could still make it RIGHT NOW. 


Butterscotch Chip Microwave Fudge

Makes about 16 squares

  • 4 cups confectioners' sugar, sifted
  • 1/2 cup unsweetened cocoa powder, sifted
  • 1/2 cup half and half, divided
  • 1/2 cup unsalted butter, cut into 1/2 inch cubes
  • 1 teaspoon vanilla extract
  • 3/4 cup butterscotch chip morsels, divided into 1/2 and 1/4 cup

Procedure

  1. Line an 8x8-inch or 9x9-inch pyrex pan with parchment paper or waxed paper.
  2. In a large microwave safe bowl, stir together the confectioners' sugar and cocoa. Pour 1/4 cup of the half and half over the mixture and place butter in bowl. Do not mix (it will be too thick to mix, anyway). Microwave on high until butter is melted, about 2 minutes. Stir in the vanilla and 1/2 cup of the butterscotch morsels (the residual heat will melt them just enough). Stir vigorously until smooth. You can also put the mixture into a stand mixer if that sounds exhausting. If your mixture is too dry, add up to 1/4 cup more half and half, a little at a time, until the mixture comes together in a fudge-like consistency.
  3. Spoon the mixture into your prepared pan and using a rubber spatula, spread the mixture so that it is evenly distributed. If desired, sprinkle the top with the remaining chips.
  4. Chill in the refrigerator for an hour, or the freezer for half an hour, before serving. Makes about 16 squares.

Have you ever heard of or eaten microwave fudge?

Impress Your Friends: Stained Glass Cookies

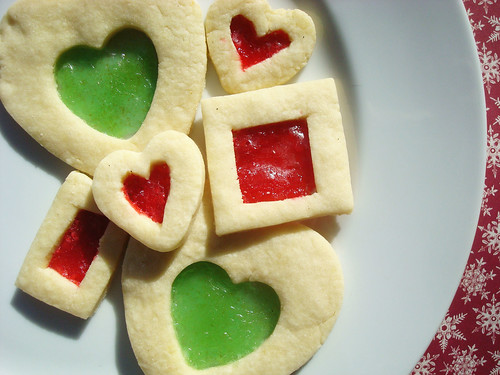
Stained glass cookies

Let's be honest. When we share our baked goods with others, it's not *only* to unselflessly share sweetness and love. 

It's also to show off. And for a cookie that is really good for showing off, look no further than these stained glass cookies.

Guaranteed you'll get "oohs", maybe some coos, and a lot of questions about how on earth you did it. You don't have to tell; I'm not the boss of you.

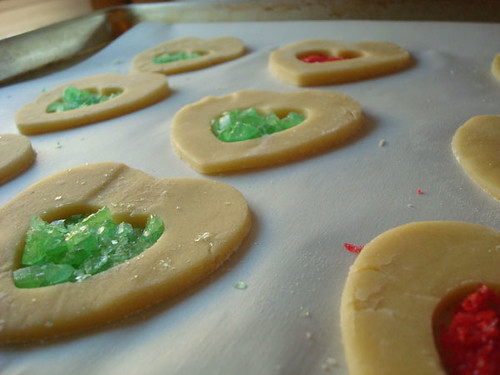
But I will tell you how to do it, right here, right now. You start with a cutout cookie, fill it with crushed candy, bake it up, and voila. Total magic. And they taste good, to boot: buttery cookies with a sweet candy middle in whatever flavor you could possibly desire.

How's that for a Christmas miracle? 

Stained glass cookies

Stained Glass Cookies

Makes about 36 2 ½” cookies

  • ¾ cup (1 ½ sticks) unsalted butter, at room temperature
  • ¾ cup granulated sugar
  • 1 large egg
  • 1 teaspoon vanilla or almond extract
  • ½ teaspoon salt
  • 2 ½ cups all-purpose flour, sifted
  • 6 to 8 ounces assorted translucent hard candies, such as Life Savers, divided by color and crushed finely

Procedure

  1. In the bowl of an electric mixer fitted with the paddle attachment, cream the butter on medium-high speed until creamy and smooth, about 2 minutes. Add in the granulated sugar and continue to beat on medium-high speed until light and fluffy, 2 to 3 more minutes.
  2. Reduce speed of the mixer to low, and stir in the egg, vanilla and salt. Scrape down the sides of the bowl if necessary using a rubber spatula. Stir until combined.
  3. With the mixer still on low, mix in the flour in 2-3 increments, pausing to scrape down the sides of the bowl as needed. Once it’s all been added, only mix until the dough comes together and there are no powdery traces of flour left. The dough may feel crumbly, but it should be easy to clump together.
  4. Divide the dough into two halves, and flatten into two disks. Wrap each in plastic wrap, and refrigerate until quite firm, at least three hours or up to overnight.
  5. Near the end of your cooling period, heat the oven to 350 degrees F. Line two baking sheets with parchment paper.
  6. Work with one disk of dough at a time to keep the dough from softening too much. Turn it out onto a lightly floured surface. Using a lightly floured rolling pin, roll the dough to an approximately 1/8″ thickness. Using 2″ to 2 1/2″ cookie cutters, cut the dough into shapes and place on your parchment-lined sheets. Using smaller cutters, cut the centers from each cookie.
  7. Note: If the dough is too firm to roll directly from the refrigerator, let it soften for a few minutes and then try again. It should become easier to roll after a few minutes at room temperature.
  8. Spoon about 1 teaspoon of crushed candy into the center of the cookie (a little more or less depending on the cutout size). You want to evenly cover the cutout portion with crushed candy, so that you can’t see the parchment below the candy and so that it reaches every nook and cranny of the cutout. If any candy-powder gets on the top of the cookies, dust it off.
  9. Bake until just golden at the edges and set on top, 7 to 10 minutes. Let the cookies cool on the baking sheets for 5 minutes before transferring with a spatula to wire racks to cool completely.

Store the cookies, layered between sheets of waxed or parchment paper, for up to a week in an airtight container.

Easy Homemade Naan Bread

I love Indian food. But I'd be lying if I tried to tell you that I was more excited about chicken tikka masala or vegetables jafrezi than I was about the naan.

I'm all about the naan.

Naan is an ideal vehicle for eating: it's puffy and substantial, yet not so filling that it keeps you from enjoying the other parts of the meal. It's not wimpy, like pita bread (no offense). It's substantial. It's griddled with butter. I love it. 

And as I now know, you can make this magic at home. I have seen a lot of naan recipes which require baking powder, but I find it far easier to work with just yeast. I prefer my naan made with whole wheat flour, not only for health, but for flavor: I am addicted to that lightly nutty, fascinating flavor which it imparts on the carbohydrate discs. 

This bread is freaking awesome. I've used it for everything from making flatbread pizzas to serving eggs for breakfast. I hope it will bring you as much joy as it has brought me!

Easy homemade naan bread

  • 1/3 cup whole milk
  • 2-4 tablespoons warm water 
  • 1 packet active dry yeast (0.25 ounces)
  • 1/2 cup plain full fat greek yogurt
  • 2 cups whole wheat flour (can substitute all purpose flour)
  • 1/2 teaspoon salt
  • melted butter, for the griddle

Procedure

  1. Combine the milk and 2 tablespoons of water. Add the active dry yeast. Give it a moment to start bubbling lightly, and add the yogurt, flour, and salt. Mix until it comes together into a cohesive mixture. If needed, add the remaining water.
  2. Roll the dough into a ball. Place it in an oiled bowl, cover with a towel, and leave it at room temperature to rise for an hour to an hour and a half. 
  3. Gently deflate the dough, and remove it from the bowl. Divide it into 8 equal portions.
  4. Roll each portion into a circle, approximately 5 inches in diameter.
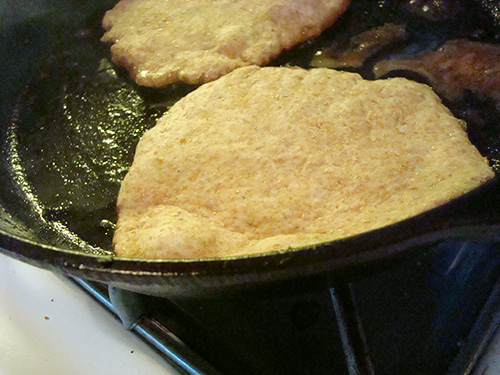
  5. Fire up a skillet larger than the bread and generously butter it. Once sizzling, place a round of bread on top. Once it begins to bubble on the surface, flip it and cook slightly less time than the first side. Using tongs, remove and place on a plate. Continue buttering the grilling surface before adding each new round of bread.

Do you love naan bread?

I Love H: Award-Winning H-Bars Recipe

I love love.

I also love cookies.

And furthermore, I adore a good story.

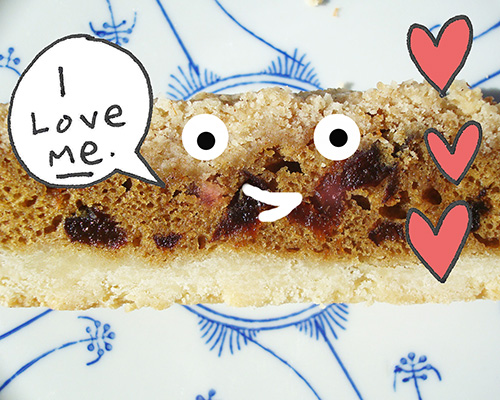
Naturally, I gravitated toward this recipe, since it combines all of the above in one tasty form. Adding to its intrigue was the fact that is was an award-winner: these bars are featured in the new book Holiday Cookies: Prize-Winning Family Recipes from the Chicago Tribune for Cookies, Bars, Brownies and More


These so-called "H-Bars" have a mysterious story: 

Victoria Weisenberg won first place in 2012 for this recip and her tale of using them to woo "a very special man". Weisenberg created the recipe as a Hanukkah give for her former beau and said the "H" stands for the first letter of his first name, though she opted to leave that name a mystery.

This story is what intrigued me about the bars, which I might have otherwise passed over owing to the fact that they are made with a raisin filling. This t-shirt design sums up my thoughts on raisins in cookies:

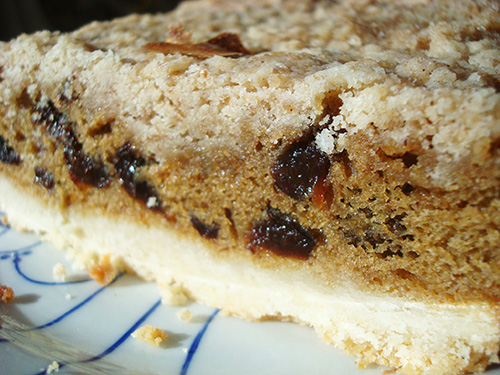
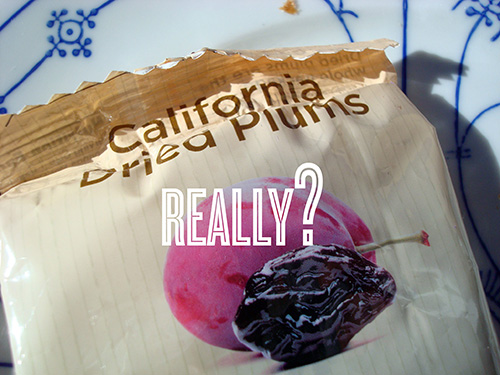
Luckily (great timing!) I just received a package from the California Dried Plum Board (no, really). It didn't take me long to decide to swap the prunes for the raisins. I'm glad I did: they add a wonderful moisture and mellow flavor to the bars. 

Yes, really.

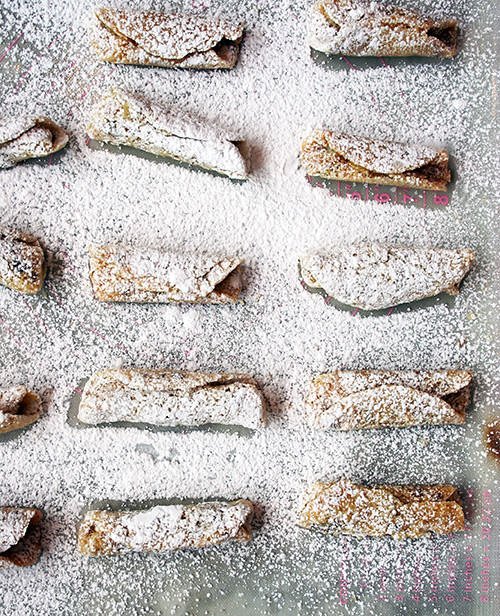
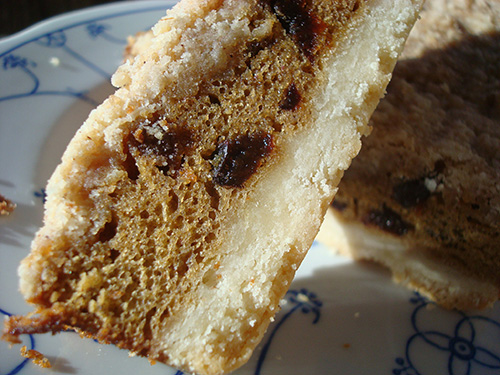
The only other thing I did differently is I baked the bars in a loaf pan rather than the size specified in the recipe. Doing such, I had to increase the bake time by about 5 minutes. I have left the instructions intact though; if you want to make them look like mine, use a loaf pan, increase the bake time, and slice into fingers instead of bars. 

Award-winning H-Bars

  • Yield: 20 bars
  • Prep time: 30 minutes
  • Bake time: 37 to 40 minutes per batch

Shortbread base:

  • 1 stick (½ cup) unsalted butter, softened
  • 1 cup flour
  • ¼ cup granulated sugar

Middle layer

  • ⅓ cup flour
  • ¾ teaspoon cinnamon
  • ¼ teaspoon salt
  • 1 cup brown sugar
  • 2 eggs, lightly beaten
  • ½ teaspoon vanilla
  • 4 ounces chopped dried plums (original recipe calls for ⅔ cup golden raisins)

Topping:

  • ½ cup flour
  • 1/3 cup granulated sugar
  • ½ stick (¼ cup) unsalted
  • butter, softened
  • 1 teaspoon cinnamon

Icing (I omitted this)

  • ½ cup confectioners’ sugar
  • 1½–2 tablespoons milk
  • ¼ teaspoon vanilla

Procedure

  1. Grease or coat with cooking spray a 7½-by-11-inch baking pan. Heat oven to 325 degrees.

  2. For the shortbread, combine butter, flour and granulated sugar in a medium bowl until crumbly. Pack into the prepared pan; bake, 15 minutes.

  3. For raisin layer, stir together flour with the baking powder, cinnamon and salt in a small bowl. In another bowl, beat brown sugar, eggs and vanilla together until blended. Stir in dry ingredients and dried plum bits. Pour over the baked shortbread layer.

  4. For the topping, combine ingredients in a bowl until mixture is crumbly. Sprinkle evenly over the middle layer. Bake, 22 to 25 minutes. Cool.

  5. For the icing, combine confectioners’ sugar, 1½ tablespoons milk and vanilla in a small bowl. Add more milk, if needed, until you get a smooth, easy-to drizzle mixture. Drizzle over the top. Cut into 20 bars.

Food processor method: You do not have to wash the bowl of the processor between steps. Combine ingredients for the bottom layer with a few pulses until crumbly. Pack in pan. Bake as above. Prepare topping in the processor in the same way. Place in a bowl and set aside. Then, place brown sugar, eggs and vanilla in processor bowl and process until blended. Add dry ingredients and pulse a few times. Stir in raisins. Continue as above.

Do you like raisins in baked goods?