Discover This: Vietnamese Coffee

I have a funny story to tell you about coffee in Vietnam.

Photo credit: Colin Erricson

Ok, so here it is. I had a friend who went to a Starbucks in Vietnam (I know, hilarious already!). And apparently there was a bit of confusion when it came to the type of milk she'd prefer. After trying to explain, the employee said "oh, you want breast milk?". 

But I digress. Because we're here to talk about Vietnamese coffee, which is made with the magic of sweetened condensed milk. Yes, it comes from a can, but good-golly does it do something magical to coffee. Seriously--this stuff is amazing, and you might not ever go back to breast milk. 

This recipe is excerpted from the newly-released Simply Vietnamese Cooking by Nancie McDermott. Enjoy!

Vietnamese Coffee, Iced or Hot

Vietnamese coffee is a lingering souvenir of the French colonial presence in Vietnam. Along with delicious baguettes and the fabulous sandwiches they inspired, ca­phé sua da long ago made itself at home, embraced with such passion that it has become something very Vietnamese. You can make it at home with ease, with or without the signature top­ hat contraption used to prepare ca­phé in Vietnamese establishments. If you lack the metal filter but long for the taste, pour 2 tbsp (30 mL) of sweetened condensed milk into a coffee cup or sturdy bistro glass. Brew some espresso, add it to the cup and stir like crazy. Voilà ca­phé sua! Pour over ice and it’s ca­phé sua da.

Serves 1

  • 2 tablespoons sweetened condensed milk
  • 2 tablespoons finely ground dark roast coffee
  • 3/4 cup boiling water

1. Spoon condensed milk into a coffee cup or a short drinking glass and place Vietnamese coffee filter on top. For iced coffee, fill a tall glass with ice cubes and set aside. Remove coffee filter’s lid, unscrew inner press and set both aside. Add ground coffee and then screw the press lightly in place to pack coffee down a bit. Add boiling water, cover with lid and let water drip through coffee, 3 to 5 minutes.

2. Remove lid and rest upside down. Then place drained filter basket on inverted lid to catch any last drops of coffee. Stir well to mix coffee with milk. For iced coffee, pour coffee into ice­filled glass and serve. For hot coffee, skip the glass of ice or da and sip (carefully) your steaming ca­phé sua.

Tips

If you’re buying ground coffee, look for espresso so that it will be strong and robustly flavored. If you’re buying whole beans, look for French roast or Italian roast and grind the beans as finely as possible.

You’ll find the top­hat contraption in many Asian markets and through mail­order sources. 

Courtesy of Simply Vietnamese Cooking by Nancie McDermott © 2015 www.robertrose.ca Reprinted with publisher permission. Available where books are sold.


What Happens When You Bake Cannoli as Mini Pies?

A cannolo (did you know that's the singular, and cannoli is plural? That's fairly new info to me) is a thing of beauty. But really, is fried and filled the only way to enjoy these Italian treats?

While some are of the mentality that "you shouldn't mess with a classic", I disagree. How on earth will you ever make new culinary discoveries if you're too scared to experiment in the kitchen?

This is all to say that recently, when developing a delicious olive oil cannoli recipe for Colavita, I went through many batches of the little tube-like treats, and along the way I found myself thinking "what if I baked the components as mini custard pies?". 

Here's what I did.

Basically, I started out the normal way. I made a batch of cannoli shell dough, and I made a batch of cannoli cream. 

But then, instead of frying and rolling the shells into tubes, I simply pressed them into cupcake liners, so that they looked like mini pie crusts.

Then I filled each shell with cannoli cream.

Then I baked them in the oven at 400 degrees for about 15 minutes. 

And here's how they came out. 

They looked absolutely beautiful.

Taste-wise, they provided an interesting experience. It really brought my attention to the fact that the frying is really a vital part of the cannoli experience. Because while these were quite pleasurable as little cheesecake-like tartlets, I would not have taken a bite and said "this is cannoli-flavored!". 

The shells were a tad...sturdy. I think that while they require a certain structure to be fried, in baked form they were a bit on the dry side. Not terrible, but not "wow" worthy, and perhaps a little bland. Like I said - that frying in oil goes a long way, flavor and texture-wise. 

I'm delighted to report, though: the filling was absolutely gorgeous. Cannoli cream, when baked, really is a thing of beauty. It formed a pleasant little golden crust on the top, and it was almost like eating the center out of one of those cream cheese muffins (really? come on. Cake.) they sell at Starbucks and such. Good stuff. 

You know what helped with the slightly dry crust issue, too? A nice dousing with the way-more-flavorful-than-it-sounds water ganache I have become addicted to. 

Cannoli baked as mini pies? Great idea, but the crust needs adapting. For better results, I'd use the regular cannoli cream, but use a classic pie crust recipe for the shells instead.

OK. So, to review, in case you want to give this a try:

How I did this:

I prepared the cannoli shells per this recipe, but did not fry them.

Instead of frying them, I pressed them into cupcake liners. I didn't use the entire batch to bake, but if I had, it would have yielded about 18 pies. 

I then filled each shell with cannoli cream (from the same recipe). 

I preheated the oven to 400 degrees F, and when it was preheated, I baked the pies until golden - about 15 minutes. And then I topped them with ganache, because, why not? Well, let me tell you, I  couldn't resist digging in while they were still warm like that (though the rest did "set" more once cooled).


And voila! 

Have you ever baked a recipe that is supposed to be fried? 

Very Nice Peanut Butter Cookies

It's a funny thing about peanut butter cookies. I almost despise myself for saying it, but sometimes I actually forget that peanut butter cookies exist.

But then, sooner or later, peanut butter cookies re-enter my life, and I'm all like "oh baby, where have you been?". This leads to a full-fledged love affair with peanut butter cookies wherein I'm eating them every day for two weeks, and then some shiny thing or perhaps a batch of blondies distracts me and I forget about them all over again. Repeat cycle.

When I was recently assigned to make homemade nutter butter cookies for Craftsy.com (recipe coming soon) I spent some time experimenting with peanut butter cookie recipes to use for the sweet sandwiches. 

Ultimately, this particular variety of peanut butter cookies spread too much to be ideal for homemade nutter butters, but they had such a perfect taste that I simply had to share the recipe. 

The original recipe I started from calls for 2 1/2 cups of flour; I made a slight switch and used 2 cups of flour and 1/2 cup of cornstarch. This made the cookies incredibly tender, even while having a crunch to the exterior. It really gave them a unique texture, sort of like a sugar cookie or snickerdoodle, but with a taste that is 100% peanut butter cookie. 

Peanut butter cookies have a nostalgic taste for me. They make me ache for other flavors, like milk with ice cubes (something I used to do when I was a kid), or for chocolate, or for strawberry jam. They don't necessarily any of these things, and often I don't add any accompaniment, but they evoke other flavor memories for me, which makes the process of eating a peanut butter cookie thoughtful and sweet. 

These aren't necessarily a classic peanut butter cookie, but with the sugar cookie-like texture and peanut buttery flavor, they will taste familiar. I think you'll like them. Give 'em a try!

Tender peanut butter cookies 

Makes many - printable version here

  • 2 cups flour
  • 1/2 cup corn starch
  • 1 tsp baking soda
  • 1 tsp baking powder
  • 1 teaspoon salt
  • 1 cup butter, room temperature
  • 1 cup creamy peanut butter (I used Peanut Butter and Co's The Bee's Knees)
  • 1 cup granulated sugar
  • 1 cup light brown sugar, packed
  • 2 eggs
  • 2 teaspoons vanilla
  • 1/3 cup or so granulated sugar, for topping 

Instructions

Sift together the flour, corn starch, baking soda, baking powder, and salt. Set to the side.

In a stand mixer fitted with the paddle attachment, cream the butter, peanut butter, and sugars until light and fluffy, about 2 minutes on medium-high speed.

Stop the mixer, and add the eggs, one at a time, then mixing on low speed, pausing to scrape the sides of the bowl of the mixer with each addition. Stir in the vanilla. 

Stir in the flour mixture in 2 to 3 increments, mixing on low and pausing to scrape down the sides of the bowl. Mix until combined and cohesive, but don't over mix. Separate the dough into two rounds, wrap them in plastic wrap, and gently flatten. Place in the fridge for at least 2 hours, or as long as overnight. This will help the flavors come together and minimize spreading as the cookies bake. 

When you're ready to go, preheat the oven to 375 degrees F. Line two baking sheets with parchment or silicone heatproof sheets (I used both sheets twice to bake all the cookies!) Pour the topping sugar into a shallow bowl and have it at the ready.

Work with the dough one round at a time, keeping the second round in the fridge until you're ready to use it. Pinch off about 1 tablespoon's worth of dough, and roll it into a ball. Press one side of the ball into the sugar (it's ok if this slightly flattens it) and place it on the baking sheet, sugar side up. Repeat with the remaining dough. Place the cookies 2 inches apart, as they will spread. 

Using a fork, press the tines on the top of each cookie both vertically and horizontally, so they have a cross hatch pattern on top. This will flatten the dough a bit more; totally fine. 

Bake for 6-8 minutes or until lightly golden on the edges. Cool on the sheet for a couple of minutes, then transfer to a wire rack to cool completely. 

cspbcook5.jpg

Store in an airtight container at room temperature for up to 5 days, or freeze the cookies for up to 3 months. 

Do you like peanut butter cookies?

How To Make Tall, Star and Heart-Shaped Pancakes

News flash, you guys: your pancakes could be cuter and cooler. I can help you make it happen, because as it happens, I have pancake prowess. 

Perhaps you saw my amazing post on Craftsy about how to make extra-tall, puffy pancakes. If not, you should take a few minutes and go over there to check it out. Don't worry, I'll wait.

OK, now that you're back, let me tell you how to parlay this pancake tutorial into adorably shaped morning cakes. 

Basically, what you're going to do is prepare the batter the same way as in the tall pancake tutorial (with less liquid than normal pancakes). 

Then, you're going to spray a skillet with non-stick spray, or grease it with butter.

And then you'll very generously grease the inside of cookie cutters.

And then you'll pour the batter right inside of the cookie cutters. Since it's fairly thick it will stay put. Fill them about 3/4 full. Maybe a little more.

Cook for oh, 5 to 6 minutes on each side. If a tiny bit of batter seeps out, don't worry. I had minor seepage but it ultimately turned out fine. 

Remove from heat, and hang on for a sec because the cookie cutters will be HOT. 

Use a knife to remove. Enjoy your awesomely shaped pancakes!

How to make star and heart-shaped pancakes

You'll need: heart and star shaped cookie cutters. Or other cookie cutters. But keep in mind that the more complex the shape, the harder the pancakes are to remove later. 

Amount may vary based on your recipe - printable version here

Step 1: start with your favorite pancake recipe (or use the recipe in this post).

If you're using a different recipe, instead of reducing the liquid by a certain amount, what I suggest is that you measure out about half of the liquid required in the recipe, and then add it little by little. You just want to add enough so that the batter comes together thickly. 

Step 2: heat up a skillet on medium-high heat. Spray with non-stick spray or put a pat of butter on it. 

Step 3: Generously (GENEROUSLY) grease the inside of your cookie cutters. Place them on the hot surface.

Step 4: Spoon the batter into the cookie cutters. Immediately reduce heat to low.

Step 5: Let them bake for about 5 minutes, then flip (still in the cookie cutter). If not browned let them cook a little longer.

Step 6: Remove the entire cookie cutter unit from Heat. Let cool for a minute or two, then use a knife to loosen the pancake out. Since you greased the insides of the cutters VERY GENEROUSLY they should come out without too much resistance.

Step 7: repeat with any remaining batter. Enjoy! 

Have you ever made shaped pancakes? 

Make Everyone Love You With Mini Cherry Pies

I have figured out a sure-fire way to impress people, and it doesn't involve having a degree from Harvard. My method is far more pleasurable and much less expensive: make mini pies.

I'm telling you. If you present a classic pie recipe served in individual, cupcake-sized portions, you are going to win friends and influence people. It's as easy as that.

Personally, one of my favorite parts about mini pies is that there is a high crust to filling ratio. I am a crust (and carb, in general) freak, so I always want more pie crust. In the mini portion, the amount of pie crust compared to filling is upped, which means that crust fiends like me can have some carbs in every bite. EVERY BITE!

I made this batch with cherries, which are currently in season and just fantastic. Dressed up lightly with a kiss of sugar and a little flour to thicken the mixture, the true cherry flavor shines through, and tastes terrific paired with the buttery crust.

It is my strong suggestion that you pair these mini pies with ice cream or whipped cream, but then again, I understand if you go without, because then they are health food. 


Mini Cherry Pies 

Makes about 12 - printable version here

Note: I had enough to make 12 mini pies plus lattice top crusts for each. I had some dough left over, which I never mind because I used it to make roly polies

For the crust:

One batch all-butter pie dough recipe (sufficient for a double crust pie)

For the filling:

  • 1 pound cherries, pitted and diced into small pieces 
  • 1/4 cup granulated sugar
  • 1 1/2 tablespoons flour
  • Pinch of salt

To top:

1 egg, beaten 

Other supplies:

  • A cupcake baking tin
  • 12 cupcake liners

Instructions

Preheat the oven to 400 F. Line the cups of your cupcake tin with liners (I like silicone cupcake liners for this baking project).

In a large bowl, toss the diced cherries, sugar, flour and salt, making sure everything is combined. Set the mixture to the side for the moment. 

Roll out the pie dough, one ball at a time, on a floured surface, until it is about as large as you would roll it to fill a pie plate. The edges don’t have to be perfect. 

Slice off a bit of the crust (maybe a handful-worth) and set to the side, to use for the lattice toppings later. 

Cut circles of dough about an inch wider than the circumference of one of your cupcake liners. Re-roll the scraps to get a few more cutouts. 

Press the circles into the cupcake liners, patting them into shape as you would a pie crust.

Spoon the cherry mixture into the pie shells. Using the leftover dough, make mini lattice tops. 

Brush the tops with your egg wash, and sprinkle with sugar, if desired. 

Bake for 20 to 30 minutes or until the tops and sides of the crust are browned. Remove, let cool in the cupcake tin, and then serve. 

Psst! You could also use the same ingredients to make pie pops!

Have you ever made mini pies?

Dessert Sauce of the Gods: Olive Oil Ganache

Olive oil ganache, you guys. Believe it. Live it. Love it. Let me explain.

OK. Now that I have your attention, let me tell you how this ambrosial treat came to reside on top of my brownie. 

First, I was working on a roundup of creative ganache varieties for Craftsy (it came out great, by the way). 

Then, I received a big box in the mail from Bertolli olive oil. In it, they had gifted me a big ol' bottle of their 150th anniversary edition olive oil. Well gee whiz, thanks!

They also sent me a gift card for ingredients and an invitation to enter their #vivabertolli contest by entering a creative recipe made with their products plus any other ingredients which I was to purchase with the card.

Well, I knew right away what I had to explore with that olive oil, and its name was ganache. 

So I bought some chocolate and then with the rest of the gift card bought myself new shoes. (TRUTHSIES) 

But even though the ingredients don't cost $50, this recipe tastes like a million bucks. It has all the chocolatey goodness of ganache, but a smooth, silky, nutty flavor from the olive oil. It tastes very fancy, like a dessert you'd pay $15 for at a posh eatery. Of course, theirs would be delivered with a random swipe of coulis on the plate. I prefer the less delicate approach of using the ganache to drown my brownie.

Oh, I should tell you, this ganache will eventually set firm, just like regular cream ganache. While it's still warm you can use it as a delightful dessert sauce or filling, or you can wait til it cools a bit and use it to top a cake or to combine with buttercream for a unique treat. 

Oh, and while I didn't give her any, Olive the pug approved.

Olive oil ganache

Printable version here

  • 6 ounces chocolate, coarsely chopped
  • 3 ounces extra virgin olive oil (I used the Bertolli 150th anniversary stuff)

Melt the chocolate in a heatproof bowl set atop a bowl if simmering water (DIY double boiler).

Once melted, remove from heat and let it chill out for maybe 5 minutes, so it's not piping hot.

Pour in the olive oil and mix. Use a whisk, or use a spatula (not sure why I did but I did)

Once mixed, let the mixture sit at room temperature until it has firmed to the amount needed for your project. Give it a stir every 5 minutes or so to discourage separation. 

Enjoy!

Have you ever made ganache with butter or olive oil?

What Happens When You Make Ganache with Fruit Instead of Cream?

File under mind-blowing: you can make ganache with puréed fruit instead of cream (the chocolate, of course, remains constant).

I first learned this when I was exploring cream-free ganache varieties for a Craftsy post.

I came across the idea of making ganache with fruit butter, and I thought, gee whiz, in spite of sounding kind of like health food, this additionally seems like a tasty and interesting idea.

And then came the question: what would happen if I made ganache with mashed bananas instead of cream? 

So, I mashed up a very ripe banana...

Then I melted some chocolate in a double boiler. 

Then I combined them until they were completely mixed. 

Since I hadn't actually puréed the banana, I had more just mashed it, there were some textural bits of banana in the mix. I didn't mind at all, though. It was kind of nice in this instance. 

The texture was like a thick mousse or frosting. You could probably use/serve it as either; it will eventually set firm.

This ambrosial mixture could be a dessert as-is, could be used as a frosting, as a filling, or as a swirl-in for ice cream.

What happens when you make ganache with fruit instead of cream? Good things.

Here's how to make it happen in your house. 


Fruit ganache

Printable version here

Note: this makes close to 1 cup. If you want a larger amount, simply double/triple/quadruple the quantities. 

Also, you could substitute any pureed fruit you'd like in the place of banana. Let me know how it turns out if you do!

  • 3 ounces banana, mashed (about 1 large) 
  • 4 to 4.5 ounces chocolate, coarsely chopped
  1. Mash the banana, or puree it in a blender if you want a really smooth finished result.
  2. Melt the chocolate in the top of a double boiler. I did a DIY double boiler, placing a heatproof bowl above a pot of simmering water. This also made it easy to add the banana right to the chocolate once it was melted.
  3. Combine the banana and chocolate and stir until completely combined. 
  4. There you go! Banana ganache. You can let it set until it's firm enough for whatever you want to use it for. 

PS. Here's how the ganache looks like after it has "set" - it firms into a set, frosting-like consistency.

Have you ever made a fruit ganache? 

The Best Part About Making Pie? Not the Pie.

The best part about making pie is not the finished pie. It's the treasures that can be created with the pie dough scraps. I'm telling you, people: it's all about the roly poly. 


You might call them something other than "roly polies". I've heard "snails". I've heard "doodandles". But in my house, they were called roly polies. So that's what you're getting here.

The most traditional version I grew up making is detailed in this post. The classic little roll-ups include butter, cinnamon, and sugar rolled up into pie crust strips. They're an undeniable classic.

But every now and again, I like to take a little riff on the original.

On a recent pie-baking adventure, I decided to make some roly polies using olive oil, brown sugar, and walnuts, and they came out SO freaking good that I really wanted to remember it in the future.

It's reliable that I will remember it if I put it on my site--I'll be honest, I am constantly googling my own recipes! I figure if I write it down, I'll have it on the web so I can remember it, and you might benefit, too. See how I think of you at all times, dear readers? 


Brown sugar walnut olive oil roly polies

Note: I am not including specific measurements here because everyone ends up with different quantities of pie crust scraps. Use your best judgment!

Printable version here

  • Pie dough scraps, cut into long strips (the pie dough you see here has part whole wheat flour)
  • Olive oil
  • Brown sugar
  • Salt
  • Coarsely chopped toasted walnuts 

Since you're already baking pie, your oven is probably set to 400 or so degrees F. If for some reason it's not, set it at 400 and let it preheat.

Brush the pie dough scraps with olive oil. Sprinkle with brown sugar and a pinch of salt. Gently place some walnuts on top.

Roll the little strips of pie dough, snail-style, as if they were the most precious little dollhouse cinnamon rolls ever. Try not to let any walnuts fall out, because they are DELICIOUS once baked. 

Place the roly polies on a baking sheet and put them in the preheated oven.

Let them cook until browned and toasty. This can vary between 5 and 10 minutes depending on the size. 

Remove from the oven, let cool slightly, and enjoy warm. 

Have you ever made treats like this? If so, what do you call them?

What Happens When you Put Whipped Cream in an Ice Cream Maker?

I've decided to start a new hashtag. My own hashtag. It is this: #whathappenswednesday . Because it seems that every Wednesday lately, I've been posting some sort of experimental recipe that began with the question "what happens..."

The most recent mystery that popped up in my mind was this: "what happens when you put whipped cream in an ice cream maker?". I'm not talking about whipping cream. I'm talking about whipped cream, as in, ready to use to top a sundae or piece of pie.

What happens when you put whipped cream in the ice cream maker and churn it?

I didn't know the answer, but I wanted to.

So in the name of education, I hastened to the grocery store to buy some heavy whipping cream.

And I whipped it, with normal whipped cream makings: some sugar, a touch of vanilla, and a pinch of salt. 

And then I transferred it all into the chilled drum of my ice cream maker, and let it churn.

When it finished churning, it looked something like this, and removed from the ice cream maker in a single unit. 

It had the consistency of soft ice cream, and was able to be spooned with an ice cream scoop. So I put it into a cup, added some rainbow sprinkles (NECESSARY)...

and took a big bite.

Well, no surprise here: sugar and cream and vanilla, all chilly and served with sprinkles, it was an instant classic, according to my mouth. It was thick but also somewhat light. It was like ice cream, but it wasn't. It was like whipped cream, but it wasn't that either. It had a consistency somewhat like mousse that you've left in a slightly too-cold fridge. I say this as a good thing.

Gosh it was good. 

I put a portion of the whipped cream-ice cream in the freezer, and a portion in the fridge. I also used a rubber spatula to scrape out the bits on the sides of the ice cream drum into their own cup and put these in the freezer. Look, you can see my reflection in the spoon as I was scooping here. Yes, my dress matched the sprinkles! Unintentionally, but this fact does not displease me.

After a few hours, the version in the fridge was sort of like wilted whipped cream--it still held a shape, but it was droopy. Not the same as regular whipped cream.

The version in the freezer had maintained its shape but had become very hard. When left to thaw for a few minutes, it came back slightly more rigid, but still just as delicious, flavor-wise. 

Interestingly, the little crumbles I scraped from the sides of the ice cream maker drum had remained flaky, and I thought, gosh, they reminded me of something. Then it hit me: they reminded me of butter that had been left in the freezer and how it flakes when you cut it. 


And then I had a big whammo moment: basically, what I had done here by churning the whipped cream was basically make a sort of frozen sweet churned butter.

Since I hadn't removed the solids from the whey like you would making butter, it remained lighter than butter, but still, it had sort of the same consistency. 

Frozen compound butter, whipped cream ice cream, frozen whipped cream, I don't care what you want to call it. It's suitable as a rich little dessert all by itself, or you could use it an alternative topping to regular whipped cream or ice cream. 

I am calling this experiment a success in sweet excess. 

Here's how you do it.

Ice cream-churned whipped cream

Makes 2 to 4 servings depending on how hungry you are - printable version here.

  • 1 cup heavy whipping cream
  • 2 tablespoons confectioners' sugar (or more, to taste)
  • 1 teaspoon vanilla extract
  • 1/4 teaspoon salt 
  • Rainbow sprinkles, for serving

Whip the cream until soft peaks have formed. Add the sugar, vanilla, and salt. Continue whipping until you've attained firm peaks.

Transfer the whipped cream to the drum of your ice cream maker. Churn according to the manufacturer suggestion (I did about 15 minutes in my Kitchen Aid ice cream maker)

Remove from the ice cream maker, and serve immediately. Top with rainbow sprinkles (not optional).

wcreamice3.jpg

Note: I suggest storing leftovers in the freezer in individual portions and letting them thaw slightly before eating. 

Hey, if you enjoyed reading about this ice cream maker experiment, you might like these experiments too:

What happens when you make Jell-o with evaporated milk?

What happens when you put Jell-o in an ice cream maker? 

Would you use this churned whipped cream as a dessert by itself, or as a topping? 

Turtles Without Nuts: Fruit Cup Turtles Recipe

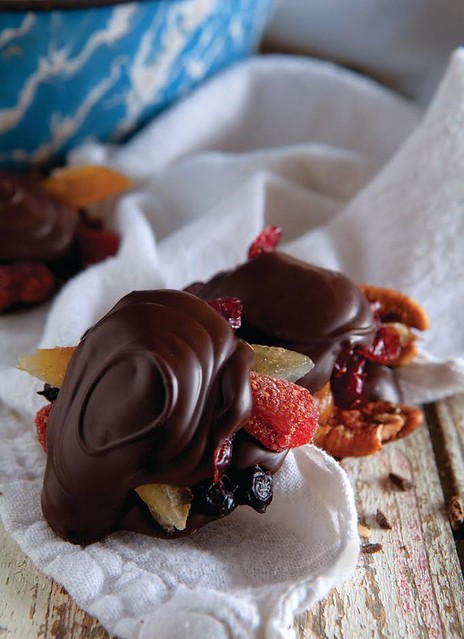
Turtle Tuffle bark

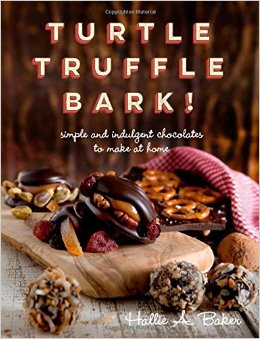
A turtle without nuts? Believe it. This controversial confection is a key player in the new book Turtle, Truffle, Bark: Simple and Indulgent Chocolates to Make at Home.

Is it ok to make turtles with fruit instead of nuts? I say as long as the caramel is present, proceed. What do you think? Here's the recipe. 

Turtle Tuffle bark

Fruit Cup Turtles

Eek! A turtle without nuts? Well, why the hell not?
These days, we’ve got such an assortment of dried fruits to choose from, it boggles the mind. I can’t get

enough of those dried tart cherries, so let’s throw those in, along with chopped papaya and a bit of chopped, candied lemon peel. Let’s pretend these turtles are health food, and top them with toasted pumpkin seeds.

Chocolate color? Choose your poison. There is absolutely no way to do these wrong. Take two of these and call me in the morning!


  • 2 cups dried tart cherries
  • 2 cups chopped papaya
  • 1 cup chopped lemon peel
  • 3/4 pound caramel
  • 1 pound tempered chocolate
  • 1/2 cup roasted, salted pumpkin seeds


Line a sheet pan with parchment paper. Spread cherries in an even layer on the parchment. Layer papaya on top of the cherries. Sprinkle lemon peel on top of cherries and papaya. Set aside.

Place prepared caramel into a bowl. Put bowl in microwave, and heat on high for 45 seconds to 1 minute. Take out of microwave, stir well with medium­sized spatula, and put back in for 30 seconds. At this point, your caramel should be in liquid form.

Scoop a dollop of caramel from the bowl with your small silicone spatula, and using your other spatula, ease the caramel off the spatula and onto the fruit. Try to make them anywhere from 1 1/2 to 2 inches in diameter, depending on the size of the turtles you’d like to make. You’ll end up with 20 to 24 caramel turtle middles.

When caramel is completely cooled, you can start assembling your turtles.

Line one or two 18x13 sheet pans with parchment paper. Using a candy funnel, deposit dollops of chocolate on the parchment paper. Each one should be approximately 1 1⁄2 inches in diameter and there should be about an inch between each dollop. Make about six dollops, then place a caramel middle on each one. Continue making bottoms, topping with caramel, every six or so. When you have all your bottoms and middles done, go back to where you started and top the caramel with chocolate. You want to use enough chocolate to mostly cover the caramel. Sprinkle pumpkin seeds on top.

When turtles are completely hardened, they will last in an airtight container for three weeks. 

Excerpted with permission from Turtle, Truffle, Bark: Simple and Indulgent Chocolates to Make at Home

Chocolate Milk Poke Cake

Seven minute frosting

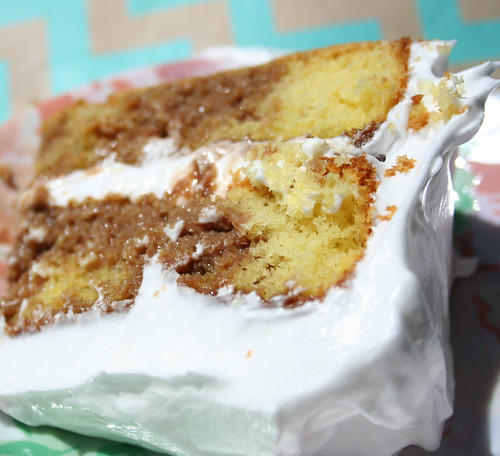
I don't like the term "poke cake" because quite frankly, it sounds kind of dirty. Like, I feel like I should be blushing when I talk about them. But I love, love, love eating them. Because poke cakes aren't anything dirty at all: they're simply cakes which have been poked with a skewer of some sort so that they can be more receptive to delicious soaking liquids (tres leches cake would be a famous poke cake, btw. So would Better than Sex Cake).

Seven minute frosting

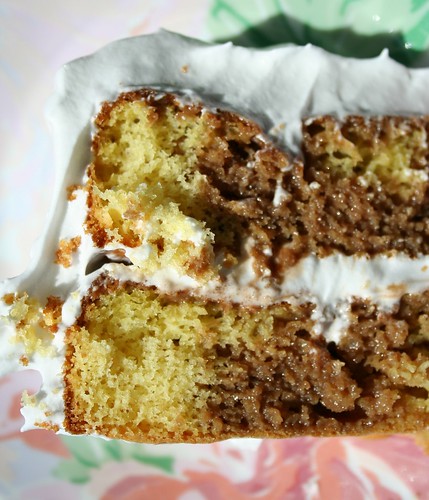
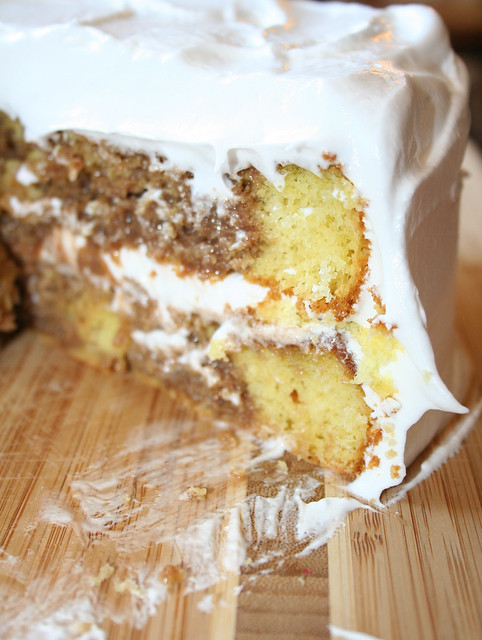
And I have to say: this poke cake is spectacular. It starts with a cake mix, but it's fancied up right quick by using melted butter and milk instead of the water and oil called for on the package, and then once baked, it's poked and soaked (see? dirty-sounding!) with an absolutely dazzling chocolate and sweetened condensed milk mixture. Even served just like that, this cake could make you cry with joy.

But save the tears, because there's still frosting! I used seven minute frosting, but you can use whatever type of buttercream or topping you'd prefer.

Seven minute frosting

It's a joy to dig into this cake, because it has all the joy of a yellow cake but the moisture and decadence of a gooey chocolate dessert. 

I'll leave it at this: it's a great cake. And anyone you make it for should consider themselves very lucky! 

Chocolate milk poke cake

Printable version here

Makes one, two-layer, 8-inch cake

For the cake

  • 1 box cake mix (I used Pillsbury yellow cake)
  • 1 stick butter, melted
  • 3 eggs 
  • 3/4 cup milk
  • pinch salt

For the topping

  • 4 ounces dark chocolate
  • 1 can (14 ounces) sweetened condensed milk 
  • Pinch salt 

To top it all off

  • 1 batch seven minute frosting (recipe here) or buttercream of your choice

Procedure

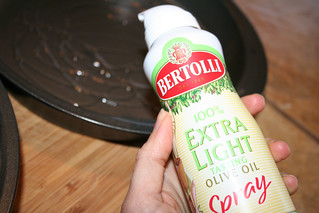
  1. Preheat the oven to 350 degrees F. Generously grease two 8-inch cake pans. I greased mine with some Bertolli spray because it had recently been sent to me and I thought it would be nice to say thanks. They didn't pay me to say that. 
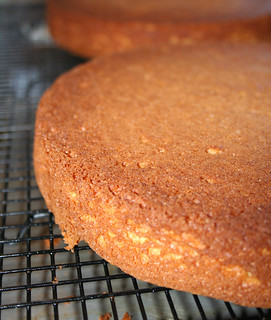
  2. Poke cake
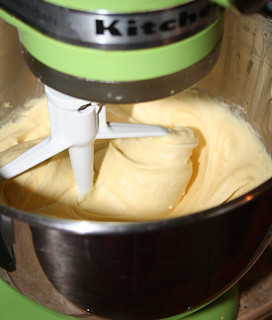
  3. Combine all of the cake ingredients in the bowl of a stand mixer. Blend on medium speed until smooth and lump-free.
  4. Poke cake
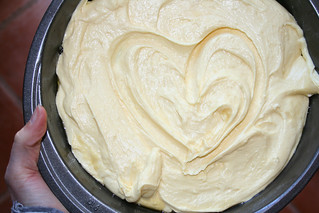
  5. Divide into the two cake pans, and bake for 30 minutes or until golden and a cake tester inserted in the center comes out mostly clean.
  6. Poke cake
  7. Remove from the oven, and after a few minutes, invert on to a wire rack set above a baking pan (to catch drips in the next step). 
  8. Poke cake
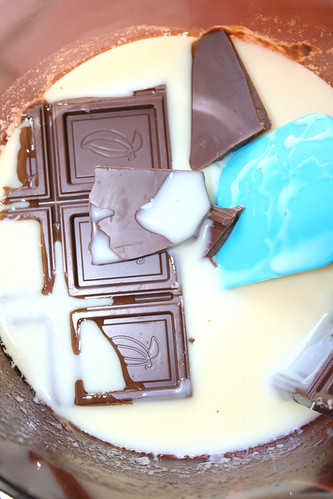
  9. In a medium saucepan over medium heat, combine the sweetened condensed milk and chocolate, stirring frequently, until the chocolate has melted. Remove from heat and stir in the salt. You can also do this while the cake bakes (that's what I did). 
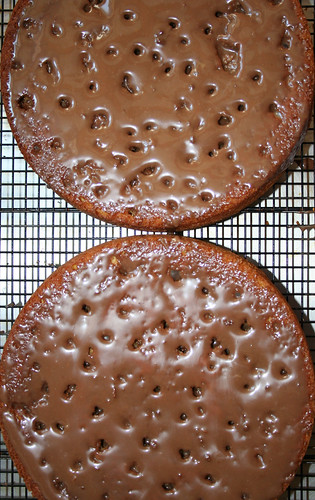
  10. Poke cakePoke cake
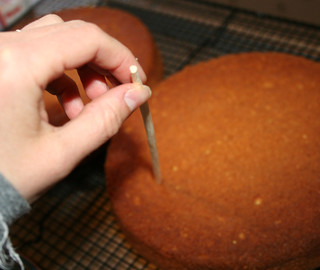
  11. Poke the cake all over at 1 inch intervals using a chopstick--but don't go all the way to the bottom.
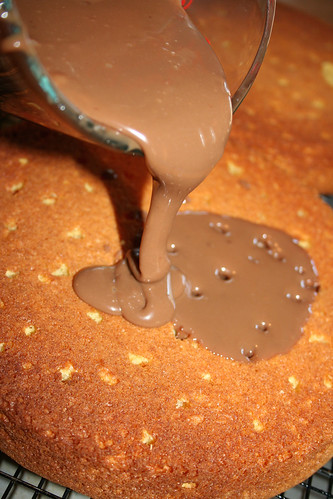
  12. Pour the chocolate mixture gently on top. If you're careful you shouldn't have too much loss of chocolate goo. Because it is tasty, and you want it in your mouth, not on the bottom of a pan. 
  13. Poke cake
    See how interesting they look?
Poke cake
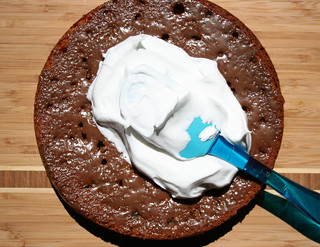
    Let the cakes set for a while. Meantime, make some frosting. I used seven minute frosting but you can use whatever kind you like.
    Frost the top of one of the layers, stack the second, and frost the sides and top. Enjoy! 
Seven minute frosting

Have you ever tried a poke cake?

Grandma's Killer Chocolate Cake from Author James Patterson

Mystery Writers of America cookbook excerpt

Here's a riddle: what kind of cakes do mystery writers like?

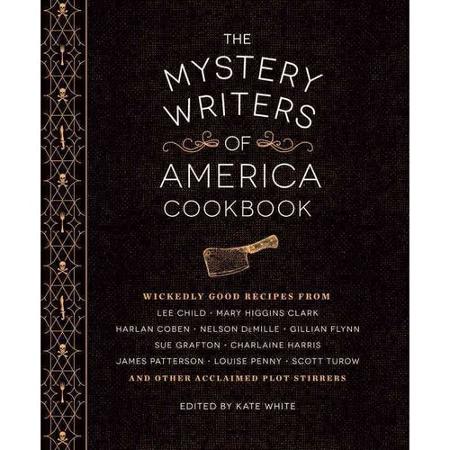
Happily, the new book The Mystery Writers of America Cookbook: Wickedly Good Meals and Desserts to Die For is ready and willing to answer this question in the most delicious way. It is a collection of recipes culled from famous mystery writers, and it makes for mighty sweet eating. 

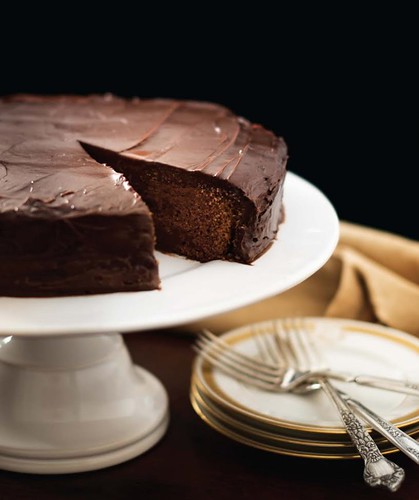
When choosing an excerpt recipe to feature here, my eye was drawn right away to "Grandma’s Killer Chocolate Cake: via mystery writer James Patterson. I hope you'll enjoy!

Grandma's Killer Chocolate Cake

Recipe headnote:

Here’s one “killer” Alex Cross always loves to catch—Grandma’s Killer Cake! A special family recipe dating from the 1940s, this decadent cake seems to get better with age; it is tastier on day two. And you need to be a good detective around the house after it has been made, sitting there in its glass­domed cake stand, staring back at you with deadly temptation, because a piece seems to mysteriously disappear every time I go into the kitchen. Not to be caught red­handed, so looms the “Killer Cake Killer”!

YIELD: 1 SINGLE­ LAYER 9x12 INCH CAKE OR 1 DOUBLE LAYER 9­ INCH CAKE

CAKE

  • 2∕3 cup butter
  • 2 cups granulated sugar
  • 2 eggs
  • 2 cups flour
  • 11∕3 cups buttermilk
  • 11∕3 teaspoons baking soda dissolved in 2 ∕ 5 cup hot water 31∕2 squares bitter chocolate, melted gently
  • 1 teaspoon vanilla extract

FROSTING

  • 1∕2 cup butter
  • 3 squares bitter chocolate
  • 2 cups granulated sugar
  • 2∕3 cup milk 1 teaspoon vanilla extract
  • 1 teaspoon almond extract


1. Preheat oven to 350°F. Cream butter and sugar together. Add eggs.

2. Blend in flour and buttermilk in alternating additions, starting and ending with the flour. Add baking soda mixture, followed by chocolate and vanilla extract.

3. Pour batter into one 9­by­12­inch pan or two round 9­inch springform pans. Bake for 30 minutes, or until a toothpick inserted into the center comes out clean. Remove from oven and let cool.

4. Combine all frosting ingredients in a saucepan, bring to a full boil, and boil for 2 minutes. Let cool. You can put saucepan on ice if necessary to cool quickly.

5. Remove the cake from the pan, frost, and serve.

About the author: James Patterson has sold 300 million books worldwide, including the Alex Cross, Michael Bennett, Women’s Murder Club, Maximum Ride, and Middle School series. He supports getting kids reading through scholarship, Book Bucks programs, book donations, and his website, readkiddoread.com. He lives in Palm Beach with his wife, Sue, and his son, Jack.

Excerpted from The Mystery Writers of America Cookbook: Wickedly Good Meals and Desserts to Die For edited by Kate White. Reprinted with permission from Quirk Books. 

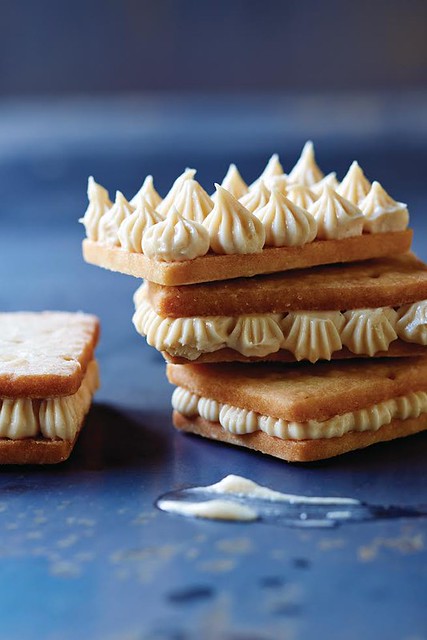
Fleur de Sel Shortbread with Vanilla Halvah

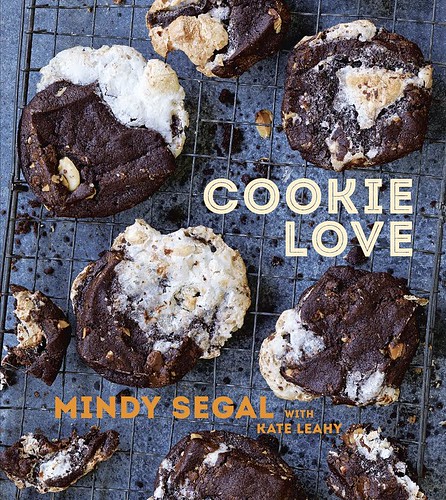
Cookie Love by Mindy Segal

You guys. I was super excited to receive a review copy of Mindy Segal's new book, Cookie Love. Why?

Well, a few reasons. 

For one, she's the proprietress of Chicago foodie landmark Hot Chocolate. Even if you've never been there, if you go to their website, the establishment is explained thusly: "Restaurant. Dessert Bar. Pastries." You should already be halfway in love. If you ever go, I promise you'll be the rest of the way in love.

Second, the recipes look AWESOME. You could seriously just buy this book and look at the pictures for the rest of your life, it would be worth the investment just for that.

But your life would be even better still if you made these cookies: Fleur de Sel Shortbread with Vanilla Halvah. 

Discover them here with this awesome excerpt recipe. 

A note from Mindy: 

I AM ALWAYS ON a quest to find more ways to use halvah in desserts. Coffee, chocolate, and cocoa nibs are my usual pairings with the Middle Eastern sesame confection, but one day I shifted gears in favor of vanilla and fleur de sel. It worked—halvah anchored the vanilla-flecked frosting, for a sweet, salty, nutty result. To finish the cookies, I dip them partially in dark milk chocolate and then place a shaving of halvah on top. The frosting is seasoned well to balance its sweetness, but because the cookies themselves carry a noticeable salt level, you may prefer to add less. 

Fleur de Sel Shortbread with Vanilla Halvah

makes approximately 28 sandwich cookies

SHORTBREAD
11⁄2 cups plus 2 tablespoons (13 ounces) unsalted butter, at room temperature 11⁄4 cups confectioners’ sugar, sifted
2 extra-large egg yolks, at room temperature
2 teaspoons pure vanilla extract
3 cups unbleached all-purpose flour
2 tablespoons sea salt flakes

FROSTING
8 ounces plain or vanilla halvah, cubed
2 ounces white chocolate, melted
11⁄4 cups (10 ounces) unsalted butter, at room temperature 1 cup confectioners’ sugar, sifted
1⁄2 teaspoon pure vanilla extract
1⁄2 teaspoon kosher salt
1⁄2 teaspoon sea salt flakes, or to taste

TO FINISH
Piece of plain or vanilla halvah, for garnish 8 ounces milk chocolate, melted

Step #1: Make the Shortbread
In the bowl of a stand mixer fitted with the paddle attachment, mix the butter on medium speed for 5 to 10 seconds. Add the sugar and mix on low speed to incorporate. Increase the speed to medium and cream the butter mixture until it is aerated and looks like frosting, 3 to 4 minutes. Scrape the sides and bottom of the bowl with a rubber spatula to bring the batter together.

Put the yolks in a small cup or bowl and add the vanilla. In a bowl, whisk together the flour and salt.

On medium speed, add the yolks, one at a time, and mix until the batter resembles cottage cheese, approximately 5 seconds for each yolk. Scrape the sides and bottom of the bowl with a rubber spatula to bring the batter together. Mix on medium speed for 20 to 30 seconds to make nearly homogeneous.

To cut out the cookies, you will need a rectangular cutter approximately 13⁄4 by 21⁄2 inches. To pipe the frosting, you will need the Ateco tip #32. 
Cookie Love by Mindy Segal page1image22832

Add the flour mixture all at once and mix on low speed until the dough just comes together but still looks shaggy, approxi- mately 30 seconds. Do not overmix. Remove the bowl from the stand mixer. With a plastic bench scraper, bring the dough completely together by hand.

Stretch two sheets of plastic wrap on a work surface. Divide the dough in half and place each half on a piece of the plastic wrap. Pat each half into a rectangle, wrap tightly, and refrigerate until chilled throughout, at least 2 hours or preferably overnight.

Let the dough halves sit at room tempera- ture until the dough has warmed up some but is still cool to the touch, 15 to 20 minutes.

Put a sheet of parchment paper the same dimensions as a half sheet (13 by 18-inch) pan on the work surface and dust lightly with flour. Put one dough half on top.

Using a rolling pin, roll the dough half into a rectangle approximately 11 by 13 inches and 1⁄4 inch thick or slightly under. If the edges become uneven, push a bench scraper against the dough to straighten out the sides. To keep the dough from sticking to the parchment paper, dust the top with flour, cover with another piece of parchment paper, and, sandwiching the dough between both sheets of parch- ment paper, flip the dough and paper over. Peel off the top layer of parchment paper and continue to roll. Any time the dough starts to stick, repeat the sand- wiching and flipping step with the parchment paper.

Ease the dough and parchment paper onto a half sheet pan. Repeat with the remaining dough half and stack it on top. Cover with a piece of parchment paper and refrigerate the layers until firm, at least 30 minutes.

Heat the oven to 350°F. Line a couple of half sheet pans with parchment paper.
Let the dough sit at room temperature for up to 10 minutes. Invert the dough onto a work surface and peel off the top sheet of parchment paper. Roll a dough docker over the dough or pierce it numerous times with a fork. Using a 1 3⁄4 by 2 1⁄2-inch rectangular cutter, punch out the cookies. Reroll the dough trimmings, chill, and cut out more cookies.

Put the shortbread on the prepared sheet pans, evenly spacing up to 16 cookies per pan.

Bake one pan at a time for 10 minutes. Rotate the pan and bake until the cookies feel firm and hold their shape when touched, 3 to 5 minutes more. Let the cookies cool completely on the sheet pans. Repeat with the remaining pan.

Step #2: Frost the Cookies
Blend the halvah in a food processor until fairly smooth. Drizzle in the white chocolate and blend until incorporated. The halvah will turn into a thick paste.

In the bowl of a stand mixer fitted with the paddle attachment, mix the butter briefly on medium speed for
5 to 10 seconds. Add the sugar and beat until the butter mixture is aerated and pale in color, 3 to 4 minutes. Scrape the sides and bottom of the bowl with a rubber spatula to bring the frosting together. Briefly mix in the vanilla and salts until incorporated, approximately 1 minute. Add the halvah paste and mix until smooth, with a little texture left from the halvah.

Fit a pastry bag with the Ateco tip #32 and fill with the frosting.
Make pairs of similar-size cookies. Turn half of the cookies over. Leaving an 1⁄8-inch border, pipe rows of dots 
onto the cookies. The frosting should be approximately as thick as the cookie. Top each frosted cookie with a second cookie and press lightly to adhere.

Step #3: Finish the Cookies
Freeze the piece of halvah until chilled, 30 minutes.

Line two half sheet pans with parchment paper. Dip a quarter of the long side of each sandwich cookie into the milk chocolate, shake off the excess, and place on the prepared pans. Using a vegetable peeler, shave
a piece or two of halvah and place onto the chocolate- dipped part of each cookie. Refrigerate until the chocolate is firm, approximately 1 hour.

The cookies can be refrigerated in an airtight container for up to 1 week. 

Enjoy! 

Buy the book here: Cookie Love