January 25: National Irish Coffee Day

I'd like to wish you a pleasant and cozy National Irish Coffee Day. If you're snowbound and have the ingredients, it's a great day to indulge. 

4407149076_35ebe9d28b_z.jpg

But first things first: what is Irish coffee, anyway? 

Not to be confused with Irish cream, which is a type of liqueur, an Irish coffee is a sort of alcoholic latte. Traditionally, it's coffee served with liquor (usually Irish whisky) and served with cream or whipped cream on top. It has a reputation as an after-dinner drink, but I think it is a perfect buzzy brunch beverage, too. 

Should you be so inclined, here's how to put together a tasty Irish coffee. I veer slightly from tradition by slightly whipping the cream, but I think you'll forgive me when you try it. 

Photo licensed via Creative Commons by Flickr member Ruth Hartnup

Photo licensed via Creative Commons by Flickr member Ruth Hartnup

Irish Coffee

Serves 2

  • 1/2 cup heavy cream
  • 3 ounces whisky (preferably Irish)
  • 2 teaspoons natural sugar 
  • 10 ounces hot, very strongly brewed coffee
  1. Whip the cream until it thickens slightly. Like, not even soft peaks but getting close. 
  2. Pour 1 1/2 ounces of whisky into each mug. Add 1 teaspoon of sugar each. Stir to dissolve. Add 5 ounces of coffee each to both of the mugs, and once again stir.
  3. Spoon the cream on top of each Irish coffee, to taste. Don't stir the cream. It might be a little more cream than you need, but you can use the rest on the cake you are having with your Irish coffee (right?). 

Do you like Irish Coffee?

January 21: National Granola Day, and a Chocolate Bundt Cake Recipe

Well, today is both National Granola Day and National New England Clam Chowder Day. I care maybe a little bit about the former, not too much at all about the latter. Sorry to devotees of both of those foods. I wish you a wonderful day.

bunt5.jpg

But as for me, I think I will stick with a big bundt. Big bundt cake, that is. 

Because I like big bundts and I cannot lie! 

And as bundt cakes go, this one is extra-special. It looks like a regular (awesome) chocolate bundt cake, and then you cut into it and see that it has a full inch or more of chocolate buttercream hidden under the frosting. Sort of hi-hat style. OMG.

I'm super proud of this chocolate cake, which has a fascinating flavor owing to the use of extra virgin olive oil in both the ganache and the cake part. It gives it a nutty, unique, and totally addictive flavor. The inch-plus of chocolate buttercream certainly hurts nothing. 

I enjoyed a slice of this cake with a big slice of milk the other day while watching Sleepless in Seattle, and I need to tell you that it was the most pleasurable moment of my week. 

Make this cake! Here's the recipe.

Can You Make Swiss Meringue Buttercream in Small Batches?

Have you ever made Swiss Meringue Buttercream?

If not, I do suggest it, because this egg white-augmented buttercream has a fantastic flavor, and agreeable texture which is well suited for covering or filling cakes and piping into designs. And it also holds its shape, so while it doesn't have extreme super powers, it won't lose its shape or melt quite as quickly as a pain old American buttercream would in hot or humid conditions.

So who reading has made Swiss meringue buttercream?

I'd be willing to bet that some of you have, but a lot of you haven't, because it seems confusing and really hard. It also seems very high-stakes, because if you've perused recipes online, they all seem to yield a ridiculous amount of buttercream--on a recent search, I saw recipe yields of 9 cups, 10 cups, and so on. I suppose this is because it's often used to frost wedding cakes, which would require a larger quantity. But what if you only one to frost one cake, and don't need a vat of Swiss meringue buttercream in your house? 

That led to the big question for me: what would happen if I tried to make small-batch Swiss meringue?

Sounded like a #whathappenswednesday experiment to me. I decided to halve or possibly third a recipe and find out. 

While many recipes looked appetizing, it was Ron-Ben Israel's that kept my attention, primarily because the quantities were perfect for reducing: it called for 9 egg whites, 1 1/2 cups sugar, and 6 sticks of butter. I used just a third of each of those ingredients: 3 large egg whites, 1/2 cup sugar, and 2 sticks of butter (and a dash of salt, added in - my addition). 

I followed the recipe if not the quantities to the letter, first lightly cooking the egg whites and sugar...

beating the mixture until it cooled and formed soft peaks and then firm peaks...

and then adding butter. 

The only weird part of the recipe was when I added the butter and the mixture looked all mangled and ugly for a few minutes. But I was assured by the recipe (and by other sources) that this was normal with a regular batch, too. I kept beating and the buttercream smoothed out and made a great topping for this cake. 

So, the answer is YES! It is possible to make Swiss meringue buttercream in small batches. Here's how.

Small-batch Swiss Meringue Buttercream

Adapted from Ron-Ben Israel - printable version here

  • 3 large egg whites, room temperature
  • 1/2 cup sugar
  • 2 sticks unsalted butter, softened but still cool, cut into 1/2-inch pieces 
  • pinch salt

Place the egg whites and the sugar in a large metal mixing bowl (I used a bowl which would fit in my stand mixer for an easy transition) set above a pot of simmering water. With the water simmering all the while, whisk the mixture until the sugar melts (no grittiness!) and the mixture becomes warm and very thin in consistency, like a just slightly thick pouring consistency. 

Remove the bowl from heat, and whisk on high speed until stiff peaks form (I transferred the bowl to the stand mixer and did this in minutes). 

Now, add the butter and salt, and mix on low speed. The butter is going to look weird and lumpy at first. Don't panic.

Keep mixing. The mixture will start to look curdled and wrong. DO NOT PANIC.

Keep on mixing! Once you don't see any big lumps of butter, you can increase the mixing speed to medium-high. Eventually (it can take a few minutes), the mixture will become smooth and silky in texture. From here, you can add in flavorings, or add a touch of milk if needed to thin the buttercream. I like a fairly thick buttercream, so I left it pretty thick.

If you're not using this buttercream right away, you can refrigerate it. Re-beat before using to maintain the smoothness. Also re-beat if it begins to look lumpy as you're icing your cake. 

Have you ever made Swiss meringue buttercream?

January 12: National Curried Chicken Day, and a Recipe for Chocolate Cake

January 12 is National Curried Chicken Day. I am going to tell the truth: I do not care about this national holiday at all, so instead I am going to be posting a chocolate cake recipe.

Listen. It's not that I am directly opposed to curried chicken; in fact, if you said "hey, let's go to this place that has the best curried chicken in the world!" I'd be calling shotgun and jumping in the car. But as a holiday, not so much. So having acknowledged that it is a date of note for curried chicken, I am going to go ahead and share a chocolate cake recipe with you.

This is a chocolate cake that I have tweaked slightly from Hershey's packaging, and I think it's a swell one. While my primary chocolate cake love is a dense, rich, flourless chocolate cake, sometimes you need a cake that is well suited for layering and frosting. This is that cake. Easy to make and devoid of any hard to obtain ingredients, it's a good one to keep on file. 

I actually cut these cakes into mini cakes and made homemade Ring Dings - the recipe for that will come soon. But in the meantime, the basic chocolate cake recipe! 

Basic Chocolate Cake

Makes one 2-layer chocolate cake - printable recipe here 

  • 2 cups flour
  • 1/2 cup dark cocoa powder
  • 1 teaspoon baking soda
  • 1 teaspoon salt
  • 2/3 cup unsalted butter, softened
  • 1-2/3 cups sugar
  • 3 large eggs, at room temperature
  • 1 teaspoon vanilla 
  • 1 -1/3 cups whole milk
  1. Make the cakes. Preheat the oven to 350 F. Grease, flour, and line with parchment paper two round cake pans.
  2. In a large bowl, sift together the flour, cocoa powder, baking soda and salt. Set to the side.
  3. Cream the butter and sugar on medium speed for about 3 minutes--to make it nice and fluffy. Pause mixing. Add the eggs, one at a time, pausing to mix on low for a few moments before adding the next egg. Scrape the sides of the bowl as needed. Stir in the vanilla. 
  4. Add the flour mixture alternately with the milk, in 2-3 additions each. Mix until the batter is smooth and lump-free. Divide the batter between your two prepared pans. 
  5. Bake for 25-30 minutes (rotating the pans at the 15 minute mark), or until a cake tester inserted in the center of each cake comes out clean. Remove the cakes from the oven, and loosen the edges of the cake with a sharp knife. After a couple minutes, invert the cakes on to wire racks and let cool completely.
  6. Once cooled, level the cakes. Frost as desired. 

This cake can be made in advance. Simply bake, level, and cover in plastic wrap then stick it in the freezer for up to 3 weeks. Let thaw before frosting. 

How will you celebrate National Curried Chicken Day? 

Chocolate Nugget Cookies

These are like nuggets of pure joy. Why?

Well, because they are chocolate cookies--already joyful--that once you bite into, you realize are also filled with chocolate. This upgrades them to pure joy territory. That answers that, doesn't it?

This cookie recipe wasn't without some ups and downs. I thought I had the recipe just right, but then I wanted to test it one more time (and bring some cookies to my neighbors and show off my mad skillz). On the second batch, I freaking forgot to add sugar, a sad tale you can read about here. I decided to look at that as an opportunity to grow, so I blogged about it, tossed out the offending cookies, and made a brand new batch.

There was sugar in this batch, you can rest assured.

The batch following the sugar debacle confirmed it: these cookies are winners. With a slightly sandy (in a good way) dough, they have a rich chocolate flavor from the Hersey's Special Dark cocoa I used, a texture with a touch of resistance and a touch of crumble, and a touch of salt for contrast. The chocolate filling gives them moisture and makes them fun and prize-like to bite into. And as for chocolate on the top? Well, why not? 

These cookies are a winner, and as long as you remember the sugar, I'm sure they will impress all of your friends. Give 'em a go, yo!

Note: the goo factor is strongest when the cookies are warm. If they have cooled, you can put them in the microwave for 10 seconds before serving to re-activate the ooze of the chocolate. 

Chocolate nugget cookies

Printable version here

  • Makes 12 large cookies
  • Active time: 25 minutes
  • Total time: 40 minutes, plus cooling time

Ingredients

  • 1 ¼ cups all purpose flour
  • ¼ cup dark cocoa powder
  • ¼ cup cornstarch
  • ¼ teaspoon salt
  • 1 cup (2 sticks) unsalted butter, softened
  • ½ cup sugar
  • 1 egg
  • 1 teaspoon vanilla
  • 1 bar (3.5 ounces) dark chocolate (this is the typical size of a gourmet chocolate bar that you can buy in the grocery store. The one I used had 10 equal sized portions)

Unwrap your chocolate bar, and separate the bar into 10 equal squares, or as even as you can cut them. Set four of the squares to the side, to be used later on in the recipe.

With the remaining six squares of chocolate, cut each square into fourths. They don’t have to be perfect, but get them as even as you can. Set these 24 small squares to the side until step 8 in the recipe.

Preheat the oven to 325 degrees F. Line a baking sheet with parchment paper or a silicone mat.

In a large bowl, sift together the flour, cocoa powder, cornstarch, and salt. Set to the side.

In the bowl of a stand mixer, cream the butter. Once fluffy (2-3 minutes on moderate speed in your mixer) add the sugar, egg, and vanilla. Let mix for a minute or so on low speed to combine.

Pause mixing for the moment. Add the dry mix to the wet, and resume mixing on low until the mixture comes together into a pliable dough.

Divide the dough into 1 ½ inch balls. Lightly flatten each ball with your hand.

Grab those 24 small squares of chocolate you portioned out in step 2 of the recipe. In the center of each flattened portion of dough, place two of the squares, one on top of the other.

Using your hands, mold each portion of dough into a ball around the chocolate, making sure there are no cracks or holes, and that the dough completely covers the chocolate on all sides.

Space the chocolate-filled balls of dough on your prepared baking sheet, spacing them evenly in three rows of four each.

Bake in the preheated oven for 14 to 18 minutes. It can be hard to detect doneness based on browning as the cookies are dark, so look for a matte appearance on the top of the dough. A gentle touch of the dough with your finger should not leave an imprint.

Remove the cookies from the oven, and let cool on the sheet for about five minutes before transferring to a wire rack to cool completely.

When the cookies have cooled, coarsely chop the four chocolate squares you set to the side in step 1 of the recipe. Melt the chocolate, and use this to drizzle the tops of the finished cookies. Garnish as desired.

Enjoy!

Inspired By Dunkin' Donuts: Homemade Chocolate Kreme-Filled Donuts

I have a deep, dark, secret love of something truly naughty. It's the "kreme" filled donuts served at Dunkin' Donuts. It's a love I have documented, and one that dates back to my elementary school days.


Techically, my favorite is the vanilla kreme. But it's really just by a hair. I love chocolate kreme, too. If they were my children, the difference in love is so little that I wouldn't feel I was lying too much if I said I loved them equally. 

Every now and again, nothing but a good-ol' mass produced donut will do.

But something I simply cannot abide is when I have taken the time and space to indulge in a mass produced donut, and I get one that doesn't have enough kreme filling.

The point of this donut is the kreme! And in recent years, I've noticed an alarming trend: an ongoing reduction in kreme-to-donut ratio. Seriously--the last time I got a vanilla kreme donut, it basically only had a puff of kreme on the exterior of the donut. Nothing inside. To say this made me a sad panda would be a massive understatement.

So I have taken a bold step and begun making my own kreme-filled donuts. They are better than the ones served at Dunkin'; I am not being arrogant in saying this, it is a simple fact. The ingredients I am using are better, and since I can eat them right after they're made, they're fresher. This is actually a variation on the homemade sufganiyot recipe I dreamed up for Colavita recently, and let me tell you, donuts made with olive oil are very, very special. It gives them a taste unlike anything else.


But a superior product is not why I started making kreme-filled donuts at home: it's mainly so I can jam them with as much buttercream filling as I want and desire. 

These chocolate kreme-filled donuts will please your palate if you love the Dunkin' variety like I do, and you can stuff them with as much filling as you like. 

Oh, and you may also enjoy the companion recipe for Vanilla Kreme filled donuts

Chocolate kreme donuts at home

printable version here

  • Makes 18-24 (2.5-inch) donuts
  • Active Time: 1 hour, 20 minutes
  • Total Time: 3 hours, 30 minutes, plus cooling times

For the donuts

  • 2 cups (about 8 1/2 ounces) all purpose flour, plus more for work surface
  • 1 packet active dry yeast
  • 1 teaspoon salt
  • 1/3 cup (about 1.58 ounces) granulated sugar
  • 2 large eggs
  • 3/4 cup (6 ounces) whole milk
  • 1 1/2 tablespoons extra virgin olive oil
  • For frying: enough olive oil to fill a deep skillet 2 inches deep

For the filling

2 cups chocolate buttercream (for an authentic Dunkin' experience, use a shortening-based recipe)

To top

Confectioners’ sugar; sprinkles

Equipment:

  • rolling pin
  • a deep skillet, for frying
  • a slotted spoon for removing donuts from the frying oil
  • a pastry bag with a round tip, large enough to pipe your buttercream into the donuts
  • a wire rack
  • paper towels

Time to make the donuts. Place the flour, yeast, and salt in the bowl of a stand mixer. Set aside.

In a medium saucepan, warm the milk, sugar, and olive oil until the mixture reaches about 105°F. Remove from heat and whisk in the eggs.

Add the wet mixture to the dry, and using the paddle attachment, mix on low speed until the dough comes together. Increase the speed to medium-high, and continue mixing until the dough is smooth and pulls away from the sides of the bowl, five to seven minutes. It will still be somewhat sticky.

Form the dough into a ball and place in an oiled bowl. Cover with a towel and let it rise in a warm place for about an hour, or until doubled in size.

Near the end of the rising period, prepare your work area. Dust a work surface with flour, and place the dough on top. Using a floured rolling pin, roll the dough to about 1/4 inch thick. Using a 2- or 3-inch round cutter (or even a floured drinking glass rim, or the top of a wide mouth mason jar), cut out as many circles as you can and place on a lightly floured baking sheet.

Re-roll the scraps and continue cutting out circles until you've used all of the dough. Cover the rounds with plastic wrap and again let them rise, this time for about 30 minutes. They will begin to look slightly puffy.

Place paper towels under a wire rack. Have it near your frying surface. This is where you'll put the donuts to cool off after frying.

It's time to get frying. Heat your oil in a large deep skillet or deep pan until it has reached 350°F.

Transfer the rounds a couple at a time (you don't want them crowded) and fry until browned—about 1 to 2 minutes. Flip, and remember the second side takes less time to fry. Using a slotted spoon, transfer to the wire rack. Continue frying until you've finished them all.

By the time you're done frying, the first of the fried donuts should be cool enough to handle. Using a chopstick or small knife, make a hole and slightly "shimmy" it without enlarging the hole too much, to make more space in the doughnut for the filling.

Load up a piping bag with your buttercream, and pipe a little over a tablespoon-ful into each doughnut. (You can also spoon it in if you prefer, slicing the doughnut in half and spooning the filling inside). Once filled, place the donuts back on the wire rack. Dip the exposed ends of the buttercream in rainbow sprinkles for extra joy.


Dust the finished donuts with confectioners’ sugar, and enjoy.

Make This: Easy Stollen Recipe

Stollen is an old recipe--rumor has it that it's been alive and kicking since the 1300s. Seriously! While original loaves are said to have weighed a hefty 30 pounds, things have lightened up a bit since then.


This is a rich, yeast-raised and milk-and egg enriched dough which is dotted with dried fruit. Some recipes have you using gross candied fruit (I think it's gross anyway) but I used my homemade dried cranberries and some turkish apricots. It is worth tasting this tradition.

Check out the recipe here!

A Simple Way to Dress up a Plain Yellow Cake

So, I recently wrote about how to make an egg-free vanilla cake for Craftsy. This is a useful thing to have on hand, because you never know when you'll start baking only to find that you have no eggs--or, it's good to be prepared in the event someone can't consume eggs. 

But the egg-free cake isn't necessarily what I want to tell you about today. I want to tell you about what I did after I completed baking it.

Actually, the process started while the cake was still baking. I thought: "I know what to do with this cake. I am going to make it a dulce de leche poke cake."

I happened to have a 14-ounce can of dulce de leche I'd found in the International Aisle at the grocery store in my cabinet. I cracked it open and poured it into a pan, reserving a small spoonful for myself, for SNACKING.

Then I added about 1/2 cup of whole milk and a pinch of salt.

I heated the mixture on low, and added a little more milk (sorry, I didn't measure) to give the mixture a thick but pourable consistency (you can kind of play it by ear). I didn't let it boil, just warmed it enough so that the mixture was smooth and combined. 

Around then, the cake was done.

Here's what I did then. First, I poked the cake all over. 

pokecakedulce.jpg

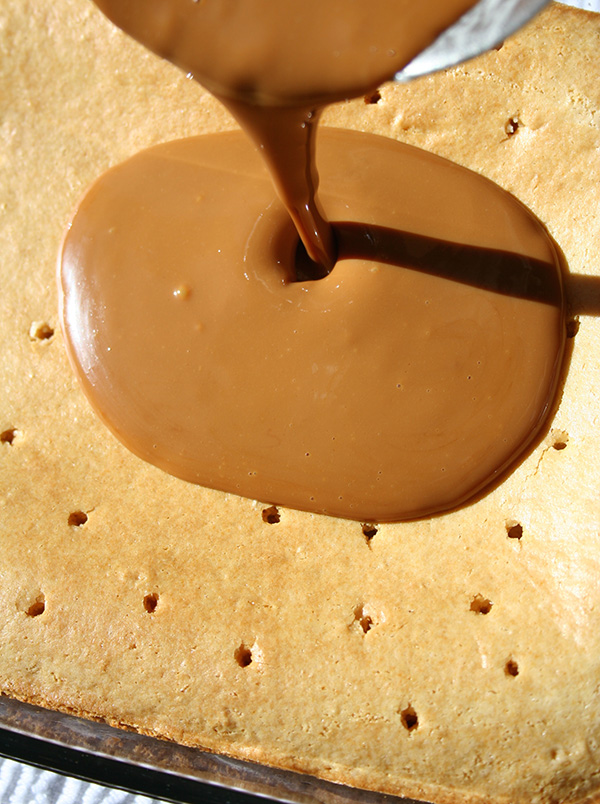
Then I poured the silky dulce de leche mixture on top.

dulcacakepour2.jpg

It was thick on top at first but then it gradually soaked and settled into the cake, leaving a glaze-like finish on top but a full, saturated texture inside of the cake.

It was beautiful to watch.

I finished it with some toasted pecans and some sea salt.

And it was heaven. 

So, I suppose the point of this blog post is to tell you that if you ever need inspiration for how to gussy up a yellow cake (egg-free or no), please do this. Just heat up some dulce de leche with enough milk to thin it, then pour it over the cake which you've poked with the tines of a fork or a skewer. Then enjoy.

I would cue the "the more you know" music here, but I will have to settle for an image I found from the web:


Enjoy this inspiring idea! 

Cookie-Pie With Three Types of Chocolate

This was a mistake. It was supposed to be scones. But as you can see, this is not scones. It is a cookie-pie topped with three types of chocolate. 

Let me explain. I was working on the recipe for chocolate cranberry scones that I published a while back, but on my way, I had some recipes that didn't work out. Well, this recipe didn't work out as scones, but it  came out as some non-scone thing that was highly delicious.

Working to try and transform a cookie mix into scones wasn't extremely easy, as it turned out. At first, I started with traditional scone-making methods: working cold butter into the dry mixture, making a well and adding cream, et cetera. Unfortunately, when using a cookie mix instead of flour as the base, these traditional scone-making methods left me with a batter that was too gooey to be shaped into a traditional circle for scones.

So I decided to transfer the mixture to a pie plate, and baked it up.

Ooh. Definitely not scones, but I was intrigued.

I decided to make it even better by adding some chocolate ganache on top.

Then I decided to drizzle it with some white chocolate cream.

And then (why not) I drizzled it with some semisweet chocolate. 

It came out like some work of abstract pie art. Oooh, ooh, ooh. 

And it tasted AWESOME. Like a wedge of soft chocolate chip cookie studded with cranberries, and saturated in chocolate. I mean, AWESOME.

Since I had made the chocolate sauce more on the liquid side, It really seeped into the cookie mixture, and when sliced, it looked like this. 

It would be a great idea to make this recipe, which was a mistake that turned out to be quite serendipitous and delicious.

Cookie-Pie with Three Types of Chocolate

Printable version here

  • 1 pouch (13.8 ounces) Phil-em up Cookie Mix by Among Friends Baking Mixes
  • 1 stick cold butter, cut into small pieces
  • 1/4 cup plus 2 tablespoons cream
  • 1 egg
  • pinch salt
  • 1 teaspoon vanilla

To top:

  • 3/4 cup milk
  • 3 ounces dark chocolate, chopped

To further top:

  • 1/2 cup milk
  • 4 ounces white chocolate, chopped

To yet further top:

2 ounces semisweet chocolate, melted 

Make it:

Preheat the oven to 375 degrees F.

In a large bowl, combine the cookie mix and butter. Use a pastry cutter to combine, until the butter is no larger than the size of small peas.

In a separate small bowl (I used my measuring cup), whisk together the cream, egg, salt, and vanilla.

Pour the wet mixture into the dry, and stir to combine.

Transfer the mixture into a pie plate, and bake for 18-25 minutes, or until golden to your liking.

Make the first chocolate topping. Place the chocolate in a heatproof bowl. Heat the milk to simmer, then pour over the chocolate. Stir until combined. Pour over the cookie-pie. It will begin to seep into it after a minute. Pour gradually if it doesn't seem to be absorbing quickly.

Make the white chocolate topping, following the same steps as you just did for the dark chocolate. Pour right over the chocolate on the cookie-pie.  
Let the pie set in the fridge for several hours. Finish by drizzling with the final topping, the melted chocolate.

Have you ever had a happy accident while baking?


Blogsgiving Dinner: Blue Corn Honey Wheat Bread with Greek Yogurt

I love making bread. I love the tactile nature of kneading. I love the way it makes your house smell while it bakes. I love the way a pat of butter melts right on top of a slice just out of the oven.

Bread is a wholesome, communal food, and I personally think it's very important to have homemade bread at Thanksgiving. Unfortunately, it's often overlooked in favor of homemade stuffing, turkey, and side dishes--people forget about the bread and just buy store bought. 

I think this should be changed! You're already spending time in the kitchen making stuff for Thanksgiving - why not spend just a little more time and have some awesome bread? 

I knew this was the perfect entry for Blogsgiving Dinner, a fun little online party hosted by Meghan from Cake ‘n Knife and Susannah from Feast + WestThere are more than 60 blogs sharing recipes this week! And I'm one of them.

Now, regarding this recipe. I like bread that is on the more moist side, which is difficult, because I also like really whole grain-rich breads, which tend to run on the drier side. But guess what? I've had an epiphany. Add Greek Yogurt to your bread, and it will instantly be more moist. 

I had a bunch of Greek yogurt in the house because I was working on a pie recipe that I will post very soon. I over-bought Greek yogurt. . Like, more than I could eat, more than my sweetheart could eat. So I had to get creative. I started putting Greek yogurt in EVERYTHING. In chocolate sauce? In oatmeal? In a bowl of fruit? Yes, yes, yes. And, in my bread.

This is an adaptation of one of my favorite bread recipes ever. It's easy, it's accessible, and you don't even get your hands too dirty. 

The Greek yogurt addition was, I'll just say it, brilliant. Not only does it impart a nice level of moisture to the bread, but it also gives it a pleasant tanginess. Like, if I were to taste this bread and you wanted to know what it was, I might guess it was some sourdough variant. 

The blue corn and whole wheat flour mixture is my favorite, giving the bread a sort of earthy, wholesome taste that goes perfectly with all of your Thanksgiving fixings. Promise me you'll try this one, ok?

Blue corn honey wheat bread with Greek yogurt

Adapted from King Arthur Flour

Yield: 1 large loaf 

1 3/4 cups lukewarm water
2 1/4 teaspoons instant yeast (1 packet)
1 tablespoon honey
2 teaspoons salt
2 tablespoons olive oil
3 cups whole wheat flour
1 cup blue corn flour
1/4 cup Greek yogurt (I used Greek Gods honey yogurt)

 Procedure

  1. Combine the water and yeast. Once the yeast begins to bubble lightly, proceed.
  2. Mix all of the remaining ingredients with the yeast mixture in the order listed.
  3. Knead, either by hand with a dough scraper or with a stand mixer, until it has progressed past a shaggy texture to a solid, slightly sticky mass. This can take up to 5 minutes by hand; less when using a mixer. It will never quite take on a smooth elasticity as if you were using all-purpose flour, but it will become smoother. Place the dough into a lightly greased bowl, cover it, and let it rise at room temperature until it’s quite puffy and doubled in size, 1 to 2 hours.
  4. Gently deflate the dough with your hand (a gentle pressing, not a knockout punch), and shape it into a fat 9″ log (it may still be slightly sticky; I used lightly oiled hands). Place it in a lightly greased 9″ x 5″ loaf pan. If you'd like, press seeds, nuts, etc, on the top of the loaf. 
  5. Cover the pan, and let the dough rise for 2 hours or even overnight, or until it has formed a crown which extends 1 inch or slightly more over the rim of the pan. Toward the end of the rising time, preheat the oven to 350°F. 
  6. Bake the bread uncovered for 20 minutes. Tent it lightly with aluminum foil, and bake for an additional 15 to 20 minutes, or until it is golden brown on top, and when knocked lightly, yields a slightly hollow sound.
  7. Remove the bread from the oven, and turn it out onto a rack to cool. Go ahead, give it a taste if you can’t resist (who can resist warm bread?). When completely cool, wrap in plastic, and store at room temperature. 

ABOUT BLOGSGIVING DINNER: The idea is based on an old-fashioned potluck dinner party. Each blogger is bringing one or more dishes to the party, so be sure to stop by each one and get some ideas for your own Thanksgiving meal. We’ll be posting to social media with the hashtag #blogsgivingdinner, but you can see all the whole menu in Part 1 and Part 2 of the recipe round-up.

What kind of bread do you serve at Thanksgiving?

Mint Chocolate Cream Pie via Sally's Candy Addiction

Can we all just agree, right here, right now, that we all deserve a slice of pie? Right now?

Photo credit: Sally's Candy Addiction

Photo credit: Sally's Candy Addiction

This pie comes by the way of the new book Sally's Candy Addiction. This book is like an extended love letter to candy, and includes recipes for homemade candies, creative confections, and--my favorite--pies and cakes made with candy. 

This recipe in particular struck my fancy because it reminded me of the sweet pleasure that was Andes mints, which were always in a bowl at my late grandmother's house. Those sweet chocolate-mint delights were always a forbidden pleasure that we couldn't have at home but was a-ok at grandma's house. This pie offers a sweet memory as well as a new creation to enjoy. Thanks, Sally!

MINT CHOCOLATE CREAM PIE

Prep time: 45 minutes
Total time: 6 hours, 45 minutes Makes: 8 servings

Every time I’ve made my chocolate cream pie, guests leave happy with the written recipe in hand. The last time I made it, I decided to add peppermint extract and chopped Andes® mints. The chocolate filling is a cross between thick chocolate pudding and smooth custard. The top is covered with fresh whipped cream and, when chilled properly, the pie slices easily and neatly. If I’m going to use the word “addictive” to describe any recipe in this cookbook, it’s this mint chocolate pie.

Crust

  •  20 Oreo® cookies (regular, Double Stuf, or any creme‐filled chocolate cookie)
  •  1⁄4 cup (1⁄2 stick; 57g) unsalted butter, melted

Filling

  •  2 1⁄2 cups (590ml) whole milk
  •  1⁄3 cup (67g) sugar
  •  1⁄8 tsp salt
  •  6 large egg yolks
  •  2 tbsp cornstarch
  •  6 tbsp butter (3⁄4 stick; 85g), cut into 6 equal pieces
  •  8oz semi‐sweet chocolate, finely chopped
  •  1 tsp vanilla extract
  •  1⁄2 tsp peppermint extract

Topping

  •  1 cup (240ml) cold heavy cream
  •  1 tbsp confectioners’ sugar
  •  1⁄2 tsp vanilla extract
  •  1⁄3 cup (60g) chopped Andes® Crème de Menthe Thins

 Special Equipment

  •  food processor or blender
  •  9‐in (23cm) pie dish
  •  handheld or stand mixer fitted with a whisk attachment
  1. Preheat oven to 350°F (180°C).
  2. Make the crust: In a food processor or blender, pulse the whole Oreos® into a fine crumb. Pour the cookie crumbs into a medium‐size bowl and stir in melted butter until combined. Press the mixture evenly into the bottom and up the sides of a 9‐in (23cm) pie dish. Use the bottom of a small glass or measuring cup to firmly press it down. Bake until the crust appears set, about 12–14 minutes. Remove from the oven and allow to cool in pie dish on a wire rack as you prepare the filling.
  3. Make the filling: Combine the whole milk, sugar, and salt in a medium‐size saucepan over medium heat. Whisk until all the sugar has dissolved, then bring to a gentle simmer, whisking occasionally.
  4. Working quickly as the whole milk mixture begins to simmer, whisk the egg yolks and cornstarch together in a medium‐size heatproof bowl until thick and smooth. Very slowly whisk in 1 cup (240ml) of the simmering whole milk mixture to slightly warm the egg yolk mixture. Then slowly whisk the egg yolk mixture into the remaining whole milk mixture in the saucepan. While continuing to slowly whisk, cook until the mixture is thick and big bubbles begin to burst on the surface. Remove pan from the heat and whisk in the butter, chocolate, and vanilla and peppermint extracts until completely smooth.
  5. Pour filling into the cooled crust, smoothing the top with a rubber spatula. Place a sheet of plastic wrap on top of the surface and refrigerate until filling is set, about 4–6 hours.
  6. Make the topping: When ready to serve the pie, with a handheld or stand mixer fitted with a whisk attachment, beat the cream, confectioners’ sugar, and vanilla extract on low speed in a large bowl until combined, about 1 minute. Increase the speed to high and beat until soft peaks form, about 2–3 minutes. Spread whipped cream over pie and garnish with chopped Andes® mints. Use a sharp knife to make neat cuts and serve chilled.

MAKE‐AHEAD TIP: The crust and filling can be prepared and assembled up to 4 days in advance. Cover tightly and store in the refrigerator. Prepare the whipped cream and garnish immediately before serving. Cover leftovers tightly and store in the refrigerator for up to 1 week. 

Sally's Candy Addiction, First published in the United States of America in 2015 by Race Point Publishing, a member of Quarto Publishing Group USA Inc.
© 2015 text and photos by Sally McKenney