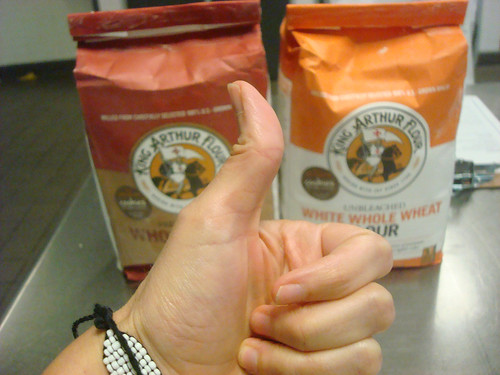
A few months ago I get an email from King Arthur Flour asking if I'll join their "Bake For Good" event in Seattle. Now, without even knowing what that was, my initial impulse was to say "yes! YES!". You see, I am a big fan of King Arthur Flour. One of the benefits of being a blogger is that you're allowed to be a groupie for things like flour companies.
Only there were two problems. One was that I don't live in Seattle any longer, and they weren't paying for airfare. Second (bigger issue) was that I would be in Bali on the days of the event. So with a heavy heart I had to say no. I realize that you probably feel terrible for me that I had to turn something down because I would be in Bali.
Happily, there was a solution which made everyone happy: an event a couple of weeks later, in LA. I said yes, bought a plane ticket, and proceeded to not look up anything about the event I was attending.
A few days before, I acquinted myself with the event, and was very impressed with what I found.
What is Bake For Good?
According to the King Arthur blog, "Bake for Good is the umbrella name we give to everything we do here at King Arthur Flour to make the world a better place – through baking."
Loved it already. Don't you?
So, as part of their do-gooding outreach, King Arthur Flour decided to do several events, tour-style in the midwest and on the west coast, where they are not as well known. This had a double benefit--people in these areas could learn about their fantastic products, and they could do some good while they were out and about.
On this particular tour, they would meet up with bloggers for two days in each city. The first day they taught us how to make bread and pies, and then we immediately put our newfound knowledge to work and baked up a storm.
The next day, we took our baked goods to a shelter, and rounded it out with a full dinner. Let me tell you, this was a fantastic treat for them as well as for us. There was nobody who didn't win in this equation.
Now that I have given you the basics, I will tell you about my adventure.
Day 1: Meet, greet, bake.
Day 1 started out bright and early, at 7.30 AM. As I approached the group, one lady said "Hello, Jessie!". I returned the greeting, cautiously. How did she know my name? Turns out, Susan Reid, one of the King Arthur Flour bakers and editor of The Baking Sheet newsletter, had done her homework. She not only knew everyone's name and face, but details about us (that I was from NJ, for instance). This was very impressive and just a little creepy--but in an awesome, how can I be more like that? kind of way.
The group was composed of seven talented food writers and bloggers including myself. I was lucky enough to meet Julianne of Beyond Frosting, Nicole of Pinch My Salt, Jennie and Corelyn of Garlic My Soul, Farley of Over Over Under and LA Weekly, and Jessica of Beer and Baking. I already had a good opinion of these people going into the event, but it only became a better opinion once I got to know them better. Good people!
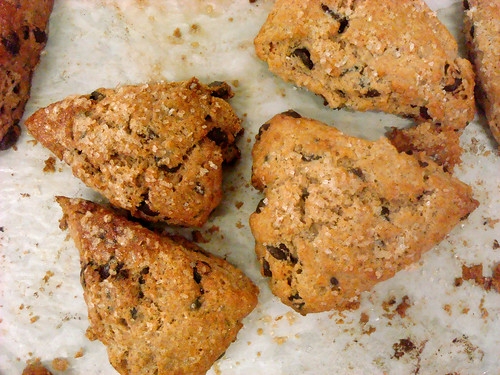
They warmed us up by letting us taste the still-warm chocolate chip scones you see above. Good. Good. Good.
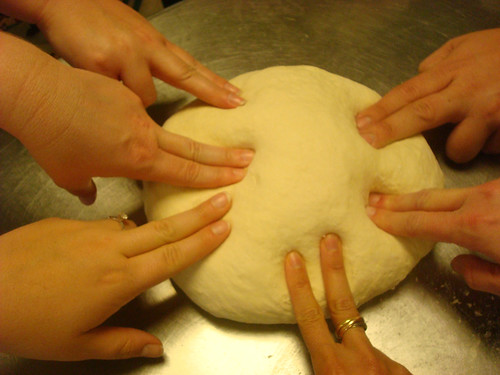
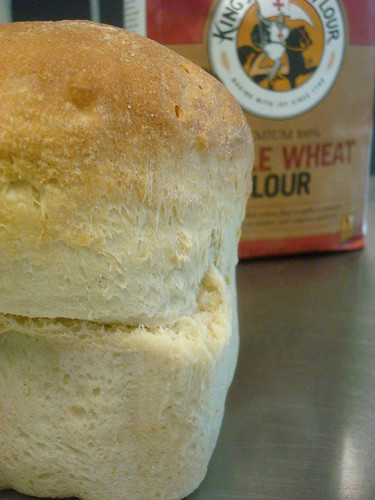
We started out our baking with a bread tutorial from Robyn, another of the King Arthur Bakers. This woman was like a baking encyclopedia. She knew everything. She showed us the proper way to mix bread dough, knead, and shape it. Really, it was a great bonding experience.
In spite of knowing everything, she was very inclusive of people who knew less. One thing I've always felt a deep shame about is my lack of proper training--I can get it done, baking-wise, but I don't always follow the proper procedure. When I asked things like "Is it OK that at this point I would normally just use my hands to mix the dough?" which were clearly NOT THE RIGHT ANSWER, she lovingly would assure me that I was doing fine without turning into a crazy pastry chef who yells "sacre bleu, you are doing eet all wrong!".
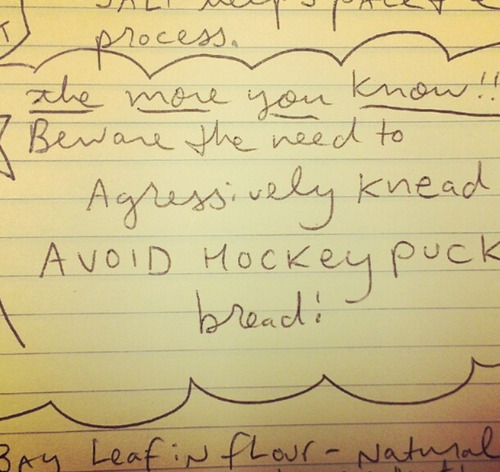
BTW, I made copious notes.
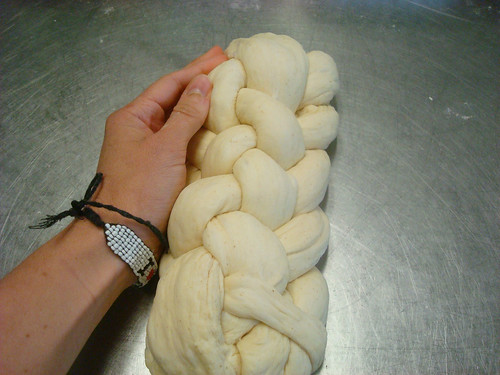
Under Robyn's tutelage, we quickly found ourselves making rolls...and then a braided loaf...and then a mega-braided (6 strands, baby!) loaf. Say what?
After a break, we were back to the dough and it was time for pie.
Pie Time
Now, unless you've been living under a rock, you probably know that People Are Scared Of Pie Crust. I don't see why--I'm not. But at the same time, while it's turned out fine, I've never been properly trained.
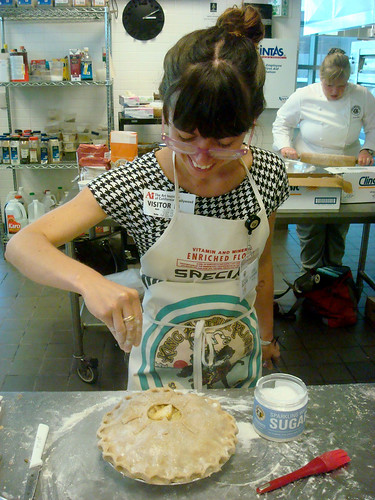
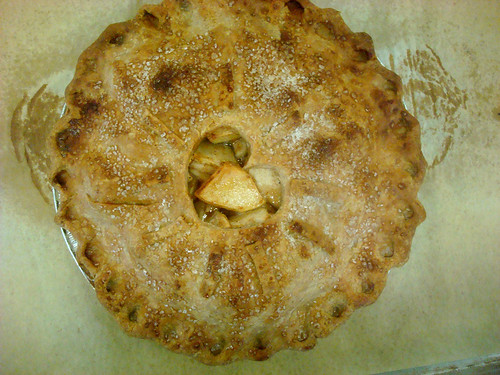
Robyn showed us not one right way but two, and explained that there isn't one way. Before we knew it we were rolling and patting our crust into the pan with delightfully visible butter in the crust.
But the coolest parts, to me, were these.
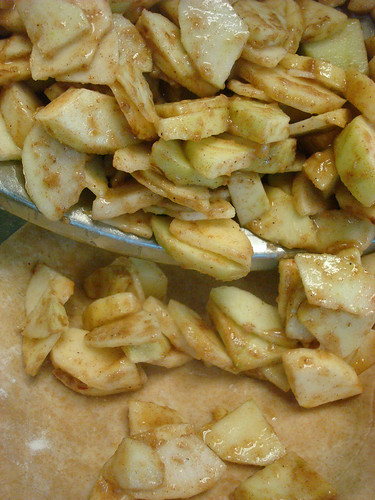
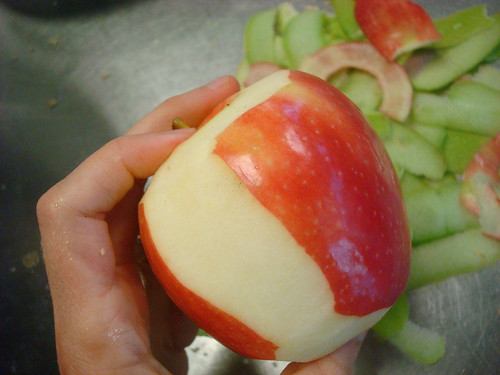
1. Robyn showed us how to peel an apple with high speed. First, peel the top, and don't lift the peeler. Drag it down and peel around the bottom. Now, bring the peeler in strokes along the sides, letting it lift between strokes. Seriously. So fast.
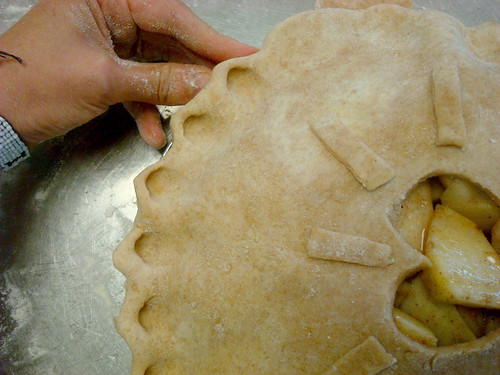
2. She showed us how to flute the crust. I never knew how to do this pointy style.
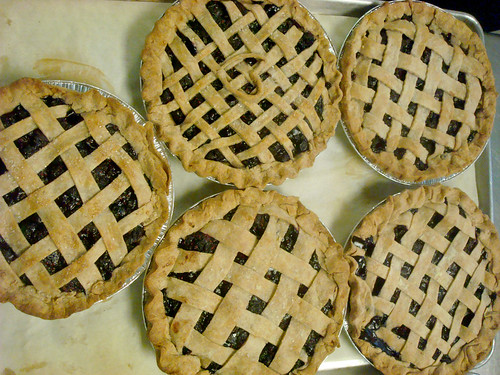
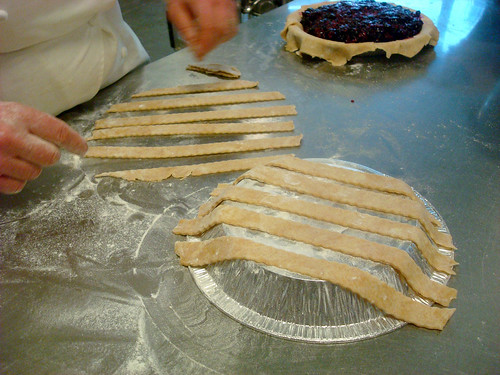
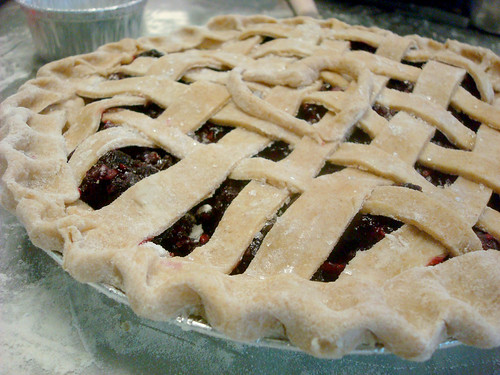
3. Susan stepped in and showed us how to do a lattice crust. She told us that the way I have always done it--right on the pie--is not necessarily incorrect, but that to keep things from getting messy, it's easier to do it on an upside down pie plate. How right she was! Plus, this has an amazing "voila" moment when you transfer it. It's exhilarating and fun.
We baked up our treats and felt very satisfied. We packed them up for day two, and retired to dinner.
We all went to a place called Little Beast for dinner. It was adorable - the amount of mason jars present in this restaurant was up through the stratosphere. Pinterest would love this place. But more importantly, it was freaking delicious. I had a really amazing chocolate mousse for dessert. It was served in a mason jar, natch.
I wore a sequined unicorn dress, if that matters.
There was a moment of stress when someone suggested the table share desserts. "I cannot tell a lie," I bravely confessed, "I do not share dessert." so I had this baby all to myself. I'm pretty sure everyone else was jealous.
 Photo via Beer and BakingDay 2: Sharing and caring
The next day was a bevy of doing good and meeting others who do good.
We started by visiting Homeboy Industries. Seriously, if you have never heard of this place, you need to. They do fantastic and inspiring things.
In a nutshell, Homeboy "serves high-risk, formerly gang-involved men and women with a continuum of free services and programs, and operates seven social enterprises that serve as job-training sites."
Former gang members--some previously jailed--are given a second chance by working at this world class bakery, working their way to recovery. As they gain experience and skill, they also gain entry back into the "real" world. We got to speak to several of the bakers and they were all amazingly inspiring, having come from the bottom to where they are today. Without a doubt every single person was a hard worker, and thankful for the opportunity.
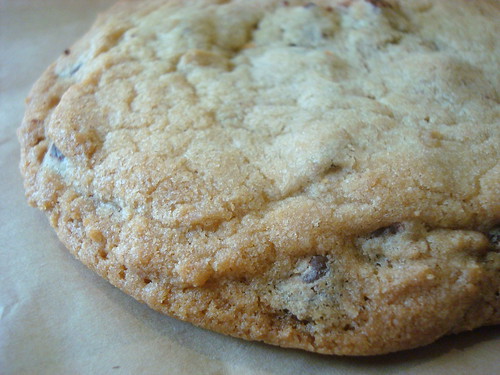
And equally as important as their message...the cookies are great!
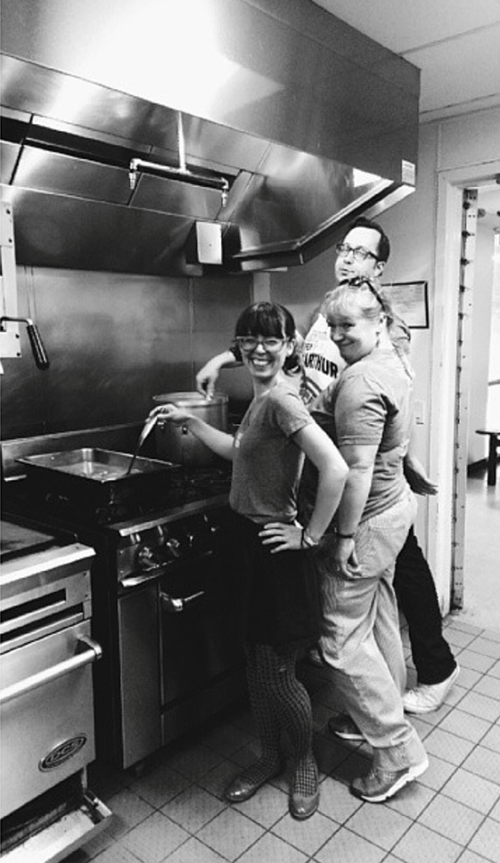
After leaving Homeboy, we headed over to PATH to cook a dinner for the residents. We created a number of Susan's recipes, including mac n cheese, Spanish rice, lime-scented chicken, and veggies. We worked together in the tiny kitchen and made it happen, serving our wares along with the bread and the pies we'd made the day before. Talk about a good feeling, especially when we saw the smiles on the residents' faces. The shelter residents, I learned, rarely see food of this caliber, much less homemade desserts.
IMPORTANT: We all felt good at the end of the day.
- - - - - -
RECIPES
You didn't think I'd leave you hanging, did you? Here are the tasty recipes we made. Both are courtesy of King Arthur Flour.
BREAD:
Yield: 1 large loaf, about 18 servings.
- 1 1/3 to 1 1/2 cups lukewarm water*
- 1 heaping tablespoon honey
- 2 1/4 teaspoons instant yeast
- 1 3/4 teaspoons salt
- 2 tablespoons soft butter
- 4 cups King Arthur Unbleached All-Purpose Flour
- 1/3 cup Baker's Special Dry Milk or 1/2 cup nonfat dry milk granules
*Use the lesser amount in summer or humid climates; the greater amount in winter or drier climates.
- Mix all of the ingredients in the order listed, and mix and knead — by hand, or using a stand mixer — to make a smooth dough. It won't be particularly soft nor stiff; it should be smooth and feel bouncy and elastic under your hands.
- Place the dough in a lightly greased bowl or other container. Cover it, and let it rise at room temperature until it's very puffy, 1 to 2 hours.
- Gently deflate the dough, and shape it into a fat 9" log. Place it in a lightly greased 9" x 5" loaf pan.
- Cover the pan, and let the dough rise for 60 to 90 minutes, till it's crowned 1" to 1 1/2" over the rim of the pan. Towards the end of the rising time, preheat the oven to 350°F.
- Bake the bread for 20 minutes. Tent it lightly with aluminum foil, and bake for an additional 15 to 20 minutes, till it's golden brown. An instant-read thermometer inserted into the center will read 195°F to 200°F.
- Remove the bread from the oven, and turn it out onto a rack to cool. When completely cool, wrap in plastic, and store at room temperature.
For the crust
- 2 1/2 cups Perfect Pastry Blend or King Arthur Unbleached All-Purpose Flour
- 3/4 teaspoon salt
- 1/3 cup vegetable shortening
- 1/2 cup (1 stick) cold unsalted butter
- 7 to 10 tablespoons ice water
filling
- 8 cups sliced apples
- 2 tablespoons lemon juice
- 3/4 cup sugar
- 2 tablespoons King Arthur Unbleached All-Purpose Flour
- 2 tablespoons cornstarch
- 1/4 teaspoon salt
- 1 teaspoon cinnamon
- 1/4 teaspoon nutmeg
- 1/4 teaspoon allspice
- 1/4 cup boiled cider or undiluted apple juice concentrate
- 2 tablespoons butter, diced in small pieces
Procedure
- In a medium bowl, whisk together the flour and salt.
- Cut in the shortening until it's in lumps the size of small peas.
- Dice the butter into 1/2" pieces, and cut into the mixture until you have flakes of butter the size of your fingernail.
- Add the water, two tablespoons at a time, mixing with a fork as you sprinkle the water into the dough
- When the dough is moist enough to hold together when you squeeze it, transfer it to a piece of wax or parchment paper. It's OK if there are some dry spots in the pile. Use a spray bottle of water to lightly spritz these places; that way you'll add just enough water to bring the dough together without creating a wet spot.
- Fold the dough over on itself three or four times to bring it together, then divide it in half and pat it into two disks 3/4" thick.
- Roll the disk on its edge, like a wheel, to smooth out the edges. This step will ensure your dough will roll out evenly, without a lot of cracks and splits at the edges later. Wrap in plastic and refrigerate for 30 minutes before rolling.
- Lightly grease a 9-inch pie pan that's at least 2 inches deep. This will make serving the pie easier after it's baked.
- Combine the sliced apples and lemon juice in a large mixing bowl.
- In a small bowl, whisk together the sugar, flour, cornstarch, salt, and spices. Sprinkle the mixture over the apples, and stir to coat them. Stir in the boiled cider or apple juice concentrate.
- Roll out half of the pastry to a 13" circle. Transfer it to the prepared pan, and trim the edges so they overlap the rim of the pan by an inch all the way around.
- Spoon the apple filling into the pan. Dot the top with the diced butter.
- Roll out the remaining pastry to an 11" circle. Cut decorative vent holes, if desired. Carefully place the pastry over the apples.
- Time to preheat the oven to 425°F.
- Roll the overhanging bottom crust up and over the top crust, pinching to seal the two.
- Flute the edges of the pie, then place it in the refrigerator for 10 minutes to firm up the crust while the oven finishes heating.
- Place the pie on a parchment-lined baking sheet. Bake the pie for 20 minutes at 425°F, then reduce the oven temperature to 375°F and bake for 40 minutes more, until you see the filling bubbling inside the pie. Check the pie after half an hour of baking time, and cover the edges with foil or a pie shield to keep them from browning too quickly.
- When the pie is done, remove it from the oven and cool it completely before slicing.
To learn more about Homeboy Industries and PATH, click on the respective hyperlinks.
To learn more about the Bake for Good program, visit the King Arthur site.

