Chocolate Cookies With Real Pieces of Cookie Monster

Cookie monster cookies

As Aunts go, I am probably the worst and most evil one in the world. I realize that you probably think I am joking, but allow me to illustrate this statement with an example.

So. My young nephew, Dylan (code names: Dilly, Dil, Dillybar), age three, just loves a flavor of ice cream from Hoffman's Ice Cream called Cookie Monster. It's a blue ice cream with all sorts of cookies mashed into it. The last time I took him for ice cream, I asked if he knew why it was blue. He indicated that he did not in fact know, so I revealed "that's because it's made with real pieces of the Cookie Monster!".

Now, I'll tell you what happened then. Dylan stopped eating ice cream, and his lower lip kind of started trembling. I'll tell you the truth--he was closer to crying than not.

"Oh my god! I mean, gosh!" I said. " Aunt Jessie was just kidding. It's blue because it's cookie monster's favorite flavor!".

Thankfully, this weak save was sufficient and the happy ice cream twinkle came back into his eye and he continued eating. I did notice, however, that the next time we went to Hoffman's he ordered Mint Chocolate Chip. 

Now, don't tell my sister (Dylan's mother) because I'm sure that she will agree that this is proof that I am the absolute worst Aunt ever, not only because I scared her son but because I took him out for ice cream at a non-approved snack time. 

Chocolate Cookies

But since I apparently cannot learn my lesson, I made these chocolate cookies recently and couldn't resist adding some blue candy melts. You know, to give the look of real pieces of cookie monster melted into the batter. I'm dedicating them to young Dylan, and can't wait to tell him that they're made with real pieces of cookie monster.

Joking aside, these cookies are fantastic. They are surprisingly light in texture for their extreme chocolate to other ingredients ratio, but very flavorful. I added a dash of dark coffee to the mix to heighten the chocolate flavor, I trick I learned from the BAKED brownie recipe. It worked well.

This is a great cookie to have in your jar. And they taste great without the candy melts, too.

Chocolate Cookies

Chocolate Cookies With Optional Real Pieces of Cookie Monster

Makes about 24 - printable version here

  • 1 2/3 cups (10-oz. pkg.) Dark Chocolate Morsels
  • 1 cup all-purpose flour
  • 1/4 cup unsweetened cocoa
  • 1 teaspoon baking soda
  • 1/2 teaspoon salt
  • 1/2 cup (1 stick) butter, softened
  • 1/2 cup packed light brown sugar
  • 1/4 cup granulated sugar
  • 1 large egg
  • 1/2 teaspoon vanilla extract
  • 1/2 teaspoon strong brewed coffee (optional)
  • 1 healthy handful light blue candy melts

Procedure

  1. Preheat oven to 325° F. Line baking sheets with parchment paper.
  2. Melt the morsels in in a saucepan or in the microwave. If on the stovetop, stir frequently to prevent scorching. Set aside.
  3. Sift the flour, cocoa, baking soda and salt into a medium bowl.
  4. Cream the  butter, brown sugar and granulated sugar until smooth and light, 3 to 5 minutes.
  5. Add melted chocolate and mix well. Add egg and vanilla extract, mixing until well blended, about 1 minute. Add flour mixture, mixing just until blended. If you want, press a couple of blue candy melts into the cookies.
  6. Chocolate Cookies
  7. Shape into balls and place them on to your prepared baking sheets.
  8. Bake for 16 to 18 minutes or until wooden pick inserted in center comes out with moist crumbs and the tops have a cracked appearance.
  9. Chocolate Cookies
  10. Cool on baking sheets for 5 minutes before transferring to a wire rack to cool completely.


Double Trouble: Double Crust Chocolate Chip Cookie Dough Pie

Frisbee pie

Have you ever eaten a chocolate chip cookie and found yourself thinking “if only this had more carbohydrates...”?

If so, you're not alone, and boy, oh boy, do I have a recipe for you. Double Crust Chocolate Chip Cookie Dough Pie.

Cookie Pie

It starts with rich, decadent chocolate chip cookie dough that is given a bear-hug by a deliciously carbohydratey pie crust.

PieThis treat is truly a delight, and works beautifully when served a la mode. And by "a la mode" I mean with ice cream, lots and lots and lots and lots of it.

A perfect late summer treat. Enjoy!

pie

Double Crust Chocolate Chip Cookie Dough Pie

For the crust


  • 2 cups all-purpose flour
  • 1 teaspoon salt
  • 1 cup shortening
  • 1/2 cup water

For the filling

  • 16 ounces chocolate chip cookie dough
  1. In a large bowl, combine flour and salt. Cut in shortening until mixture resembles coarse crumbs. Stir in water until mixture forms a ball. Divide dough in half, and shape into balls. Wrap in plastic, and refrigerate for 4 hours or overnight.
  2. Roll out one of the balls of dough to about 10 inches in diameter. On top of this, pat the cookie dough into a circle, leaving about 1 ½ inches in diameter uncovered.
  3. Brush part of the egg wash around the uncovered diameter.
  4. Roll out the second round of dough to about 10 inches; place this on top of the cookie dough topped round, and press down on the sides, crimping the edges with your fingers or a fork.
  5. Poke the top of the dough several times with a fork for ventilation. Brush with the remaining egg wash.
  6. Bake in a 400 degree oven for 15-20 minutes, or until golden in the middle and medium- brown on the edges.
  7. Serve with ice cream.

The Bake-Off is Coming: Hot Pink Raspberry and Cream Cake Recipe

Hot Pink Raspberry Cake - Bake-Off

CakeSpy Note: OMG! The 46th Annual Pillsbury Bake-Off is coming! Since I so deeply loved attending the 45th Bake-Off, I thought I would get you excited early by sharing some of the finalists' recipes. Narrowed down from zillions of entries, I'll profile some of the 100 finalists--but of course, based on the subject matter of this site, I will focus on sweets! You can follow them by clicking the bakeoff tag below the post to see which ones have been posted so far. Enjoy! 

Darn-tooting you love this cake. It's the perfect color: pink! Since we eat with our eyes first, why not treat yourself to something as sweet, both literally and figuratively, as this Hot Pink Raspberry and Cream Cake? This Bake-Off finalist recipe comes from Dawn Onuffer of Crestview, Florida. The tartness of the raspberries is a wonderful complement to all of those luscious, creamy layers. Enjoy!

Hot Pink Raspberry and Cream Cake

Active time: 30 mins

Total time: 1 hour, 40 mins

Ingredients

  • 1 1/4 cups Pillsbury BEST® Self-Rising Flour
  • 2 eggs
  • 1 cup Pillsbury® Funfetti® Hot Pink Vanilla Flavored Frosting
  • 3/4 cup sugar
  • 1 package (8 oz) cream cheese, softened
  • 1 container (8 oz) frozen whipped topping, thawed
  • 2 cups fresh raspberries

Procedure

  1. Heat oven to 350°F. Line bottoms of 2 (8-inch) round cake pans with parchment paper; spray paper with nonstick spray.
  2. In a medium bowl, beat flour, eggs, frosting, 1/4 cup of the sugar and 1/3 cup water with electric mixer on low speed 30 seconds. Beat on high speed 2 minutes, scraping bowl occasionally, until blended. Pour and spread batter evenly in pans.
  3. Bake 18 to 20 minutes or until toothpick inserted in center comes out clean. Cool in pans 15 minutes. Carefully invert cake layers from pans onto cooling racks; remove parchment paper. Cool completely, about 30 minutes.
  4. To make filling, in medium bowl, beat cream cheese and remaining 1/2 cup sugar with electric mixer on medium speed until smooth. Beat in whipped topping on low speed until blended.
  5. To assemble cake, place 1 cake layer top side down on serving plate. Spread half of filling to edge; top with 1 cup of the raspberries; pressing berries into filling. Sprinkle with half of the pink decorator sugar. Place remaining cake layer, rounded side up on raspberries; press gently. Spread remaining filling on cake. Top with remaining raspberries and pink decorator sugar. Store in refrigerator.

CakeSpy for Craftsy: Pistachio Recipes

Pistachio recipes

If you love pistachios, you’re in good company. Apparently, the Queen of Sheba loved pistachios so much that she demanded that the entire region’s pistachio harvest be set aside for her. Talk about a nutty sense of entitlement! However, these days one need not be royalty to eat like the Queen.

To celebrate this tasty nut, I put together a collection for Craftsy including 13 delicious pistachio recipes, including tasty vittles for morning, afternoon, night, and including snacks and desserts!

For the full roundup, visit Craftsy!

Recipe for Magic: Frosting Made with Ice Cream

Magical frosting

From the moment I had the thought, it pretty much haunted my every moment until I had the ingredients and was situated near my stand mixer.

The thought was simple: "what would happen if I used ice cream instead of butter in my frosting?".

Well, I guarantee you that the time between thought and action wasn't long, and now I can tell you exactly what happens. Magic, that's what.

Cupcake and Ice Cream

Here's how it went down. First, I raided my fridge and was happy to see that I had an almost full container of vanilla ice cream. And then I raided my cabinet and was happy to see I had two bags of confectioners' sugar. 

Ice cream and sugarIce cream

Basically, my plan was to follow my usual buttercream recipe, but use ice cream instead of butter. Simple, right?

I got to work by first measuring out, as well as I could, a cup of ice cream. I put it in the stand mixer. By this point it was getting slightly soft, so I figured I would just go for it. I put the mixer on low speed and let the ice cream whir for a couple of minutes.

Creaming the magical frosting

It softened right away, but wasn't totally melty just yet. I figured it was about time to start adding confectioners' sugar. 

I added about 4 cups' worth and started mixing. At first I had no idea how it would all incorporate. It seemed thick and like it wasn't incorporating well.

But then the sugar started to yield to the ice cream (possibly this was the ice cream getting more melty, too). 

Magical frosting

It became thick, like the consistency of dulce de leche.

Magical frosting

So I did what I felt was right: I added more sugar. I kept 4 more cups on deck.

More

I added it gradually, but I did in fact add it all. And after a while it began to get thick. Not fluffy, but substantial enough to be called frosting. I kept on mixing for a while to see if it would fluff, but that it did not, so I stirred in some food coloring to make it pink (why not?) and called it good.

Magical frosting

So, the frosting was spreadable. It was like the consistency of, I'm not exactly sure how to describe it. It would spread like frosting, but it had a bit of an almost...chewy texture to it. Like, frosting that had the tiniest bit of taffy mixed in or something like that. 

Since I had taken on this project with such haste that I had no cake or cupcakes handy, I used the frosting on some shortbread cookies, kind of like a quick version of pink frosted cookies. 

Magical frosting

How to describe the taste of this frosting? It may look like buttercream, but it is most assertively not. It is much thicker, for one thing. It'll stick to your teeth for sure. Slightly gooey, yet stable--it will retain its shape at room temperature. It is very, very sweet. 

Magical frosting

And yet somehow, not as cloying as I thought it might be, considering the fact that using ice cream instead of butter means a lot more sugar total in the final product. It's unique, and very vanilla-y (this may alter depending on the type of ice cream and brand of vanilla, of course). It's more luxuriant than buttercream, too. You wouldn't want it piled high the way you might like a fluffy beehive of buttercream on top of a cupcake, but you might be surprised by how much of this stuff you can put away.

I'm going to call this mission: success. I can't wait to try it on cupcakes or a cake!

Magical frosting

Ice Cream Frosting

  • 1 cup vanilla ice cream (not melted. Kind of pack it down in the cup but you don't need to be too fussy about it)
  • up to 8 cups confectioners' sugar
  • 1 teaspoon vanilla
  • food coloring, if you want
  1. Put the cup of ice cream in the bowl of an electric mixer. "Cream" it for a minute or two--the ice cream will get really soft really fast.
  2. Add about 4 cups of confectioners' sugar. Beat on LOW, otherwise you'll have a snowstorm in your kitchen. Keep a spatula nearby and keep on scraping it down. It will start out thick but then all of the sugar will be absorbed. Add more sugar in, adding in small increments until the frosting becomes thick and spreadable (it will have a thicker consistency than a butter-based buttercream).
  3. Stir in the food coloring and mix til combined.
  4. Now, use your frosting the usual ways you would: to frost cupcakes or cookies, or make cake sandwiches or the like. Or use it to top an ice cream cake, but don't think about that too hard or your MIND MIGHT EXPLODE.


Enjoy!


Baker's Dozen: A Batch of Sweet Links!

Birthday Cuppie

CakeSpy turns 6!

Winemaking goo finds new life in baked goods.

Lemon "MaryAnn Cake" - a great high altitude friendly recipe.

Chocolate hummus. Exactly what it sounds like.

Cupcake sales decline, business owners seek new trends.

Please, someone make me a pistachio croissant right now.

In case you missed it: how to make homemade graham crackers.

This week I received a press release about a new popover company. I found it interesting because I've never seen popovers in the freezer section before. Have you?

IT IS OFFICIALLY TIME FOR A CAKE SHAKE.

Wait...doughnuts will keep for 2-3 months in the freezer?

Speaking of doughnuts, I just googled "pizza doughnuts" and came up with this.

Most difficult desserts? TLC has a top 10.

A firm reminder to buy my first book: CakeSpy Presents Sweet Treats for a Sugar-Filled Life!

What a Sweet Trip it's Been: CakeSpy Timeline So Far

Sweet treats from Bakerella!

This month, CakeSpy (the website, not the author) celebrated its sixth birthday! It seemed like the right time to take stock of where I've been and where I'm going.

It was more than a little emotional for me to go through the archives and relive the CakeSpy adventure--starting the site, thinking of friends I've made, quitting my day job, opening a gallery, traveling the world on cake adventures, releasing two books...like, whoa! It is amazing to think what has happened in my life since I opened this little corner of internet real estate.

So why not come along with me for a stroll down memory lane and revisit the good (and very sweet) times we've had so far? Let's first go way, way back to 2007...

Early 2007: I was the product manager and art director at a refrigerator magnet company (it's true) called iPop. While I loved the people I worked with, I felt like I wanted to break off, do my own thing, have my own company. But what in the world would I do? 

June 2007: After reading Purple Cow: Transform Your Business by Being Remarkable by Seth Godin (note: this would later come full circle, when I was mentioned in the updated version of this very book!), I was inspired to look at what I really loved in life, and to start doing it. So, I had a little sit-down with myself in the Olympic Sculpture Park in Seattle and thought "in an ideal world, what would my job include?". The answer came to me right away: writing, illustrating, and baked goods. Now, I had no idea how this could turn into any money, much less success, but I decided to start a blog while I figured it out. Blogs were what people were starting to do, right?

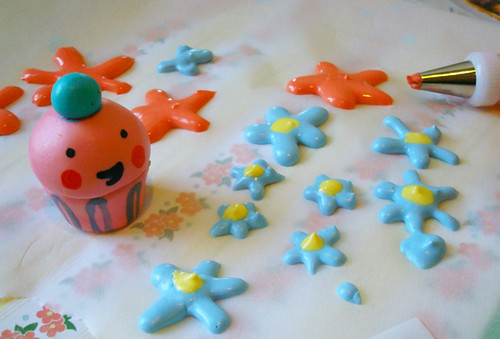
I decided I would write my blog kind of like DailyCandy, a website I was writing for at the time--but on my website, it would be all sweets. Every day (or close to it) I would try to present a sweet find, be it a bakery, service, recipe, or perhaps sweet artwork. And like DailyCandy it would be punctuated by illustrations--of a little cupcake I've been drawing for years. 

I wanted a name that reflected me as a seeker of sweetness, but that wouldn't corner me into just one category. Something that would draw in possible readers who would wonder..."What's that?". It came to me after about a day: CakeSpy. I'd start my own dessert detective agency!

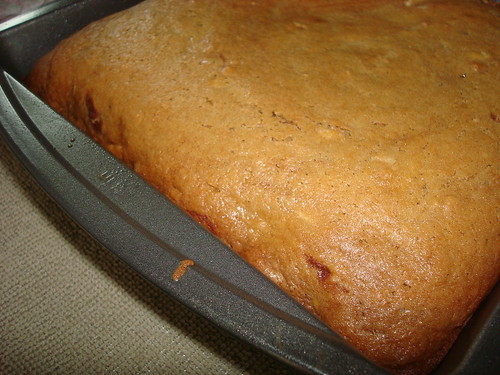
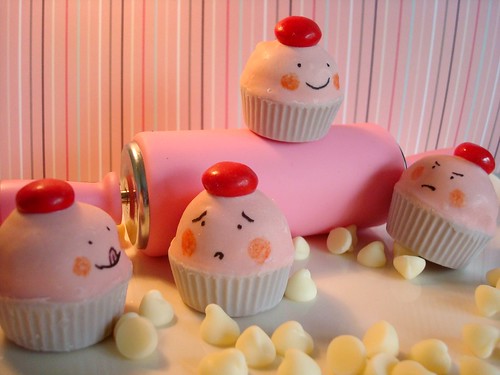
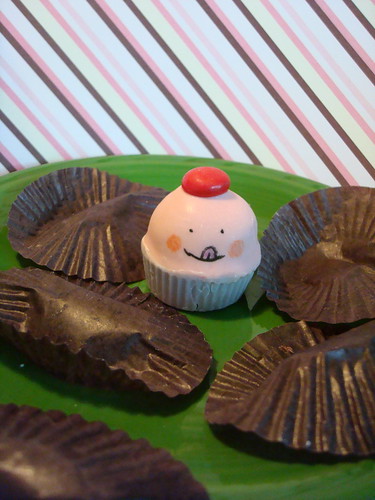
August 2007: On a fairly unremarkable day, I made my first posting. It was about a now-defunct (I think) Etsy seller who sold cupcakes baked in jars. I'd never witnessed such a thing at that point so I thought it was the coolest thing ever. 

September 2007: I do my first ever interview, with Jennifer Shea of Trophy Cupcakes. It's still a favorite interview of mine. It also alerted me to how interesting the world of commercial baking can be.

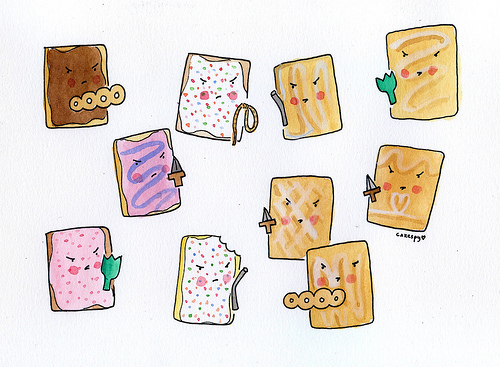
November 2007: I write about the history of the Pop-tart, which was one of my most popular posts to date (first time I realized more people than my immediate family were reading my site) and gets me fascinated about the secret lives of other baked goods.

Also, this is the month I open my Etsy store, selling original artwork and notecards. I ultimately change to Big Cartel.

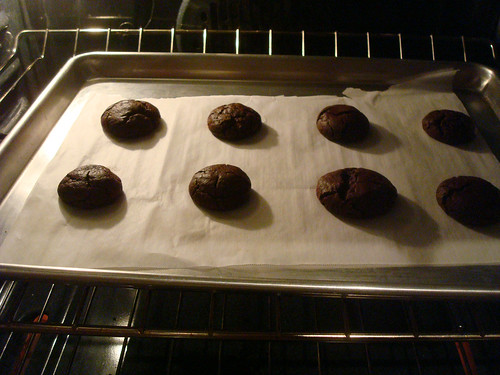
December 2007: My first experiment post: How (not) to Ship a Cupcake, goes my version of "viral"--I get several thousand hits. I really start to think I must be on to something, since up until this point basically just my mom and co-workers are reading my website. 

January 2008: My next experiment post, and still a favorite: Rice Krispies treats made with all types of cereal.

You know you're kind of a big deal when...

March 2008: I had an art opening in Tacoma, and for the first time was "Word of the day".

I begin contributing to Taste of Home Magazine, largely thanks to my friend Sandy Ploy.

Oh no!

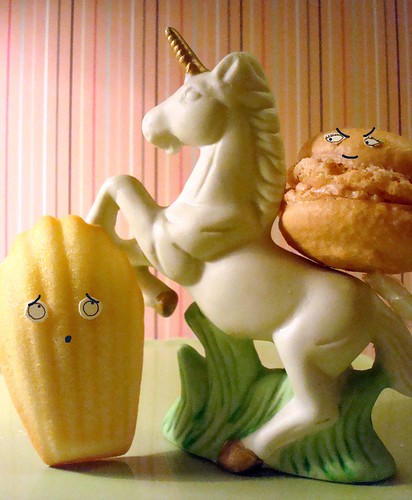
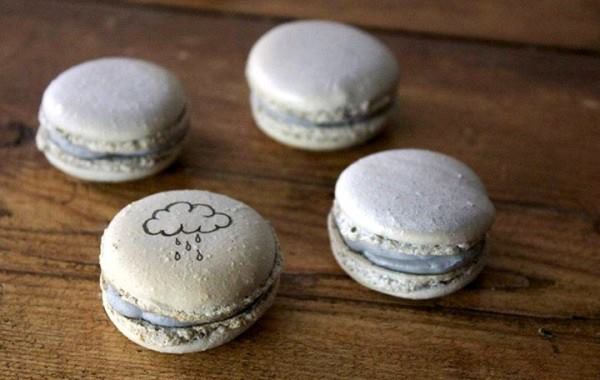
April 2008: A unicorn figurine prominently figures into the website for the first time, in a post about madeleines and macarons.

I quit my day job to pursue CakeSpy full time!

June 2008: I took a scooter ride in Queens and ate some cookies with the same name as my friend.

I chase a pie in Brooklyn which may or may not really exist.

July 2008: I was featured in an article about frosting shots. 

Awesomest Birthday Present EVER!

August 2008: CakeSpy turns 1 year old! Here's the post about the party.

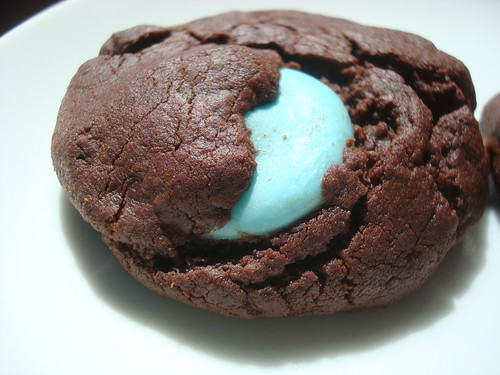
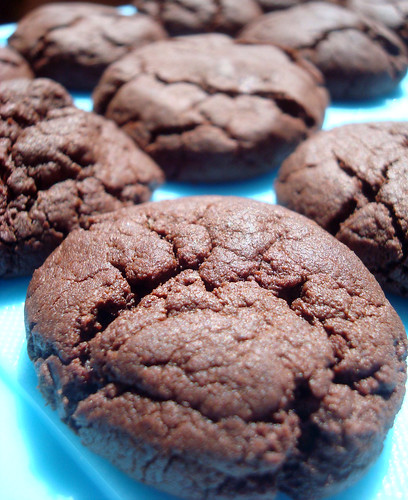
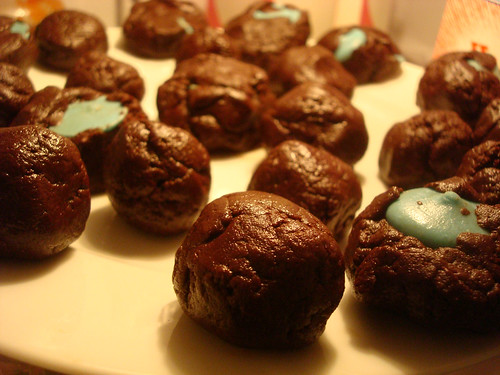
I wrote a still-favorite post about Bonbon cookies

CakeSpy begins contributing to Serious Eats! I went on to contribute for several years. 

Sweet treats from Bakerella!

September 2008: Bakerella made cake pops that looked like Cuppie! 

CakeSpy debuts holiday card designs.

October 2008: I license my artwork to a rubber stamp company.

I meet (and fall in love with) the owners of BAKED.

#22: Feed it to a snake

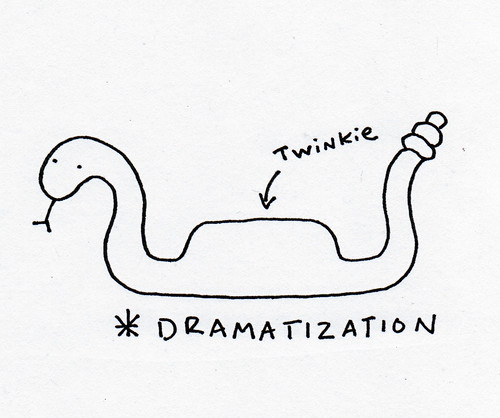
November 2008: 50 Ways to Kill a Twinkie.

December 2008: The best things I ate in 2008.

January 2009: My famous cupcake street art installation makes people's day sweeter!

February 2009: My artwork is used as part of a marriage proposal!

Cookie Cake Pie

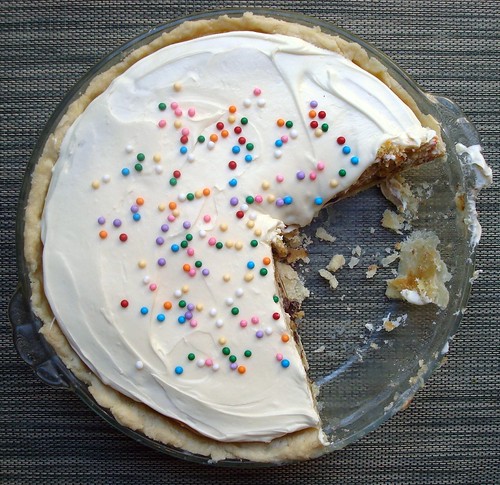
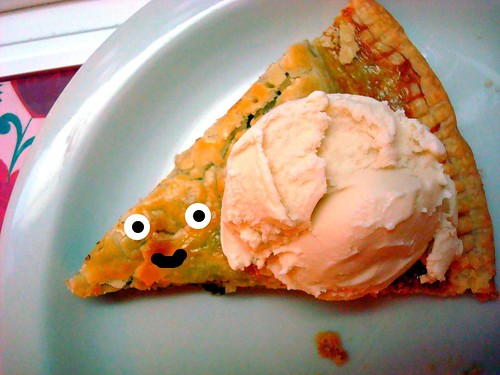
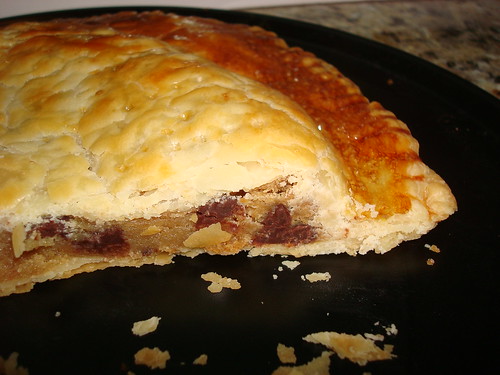
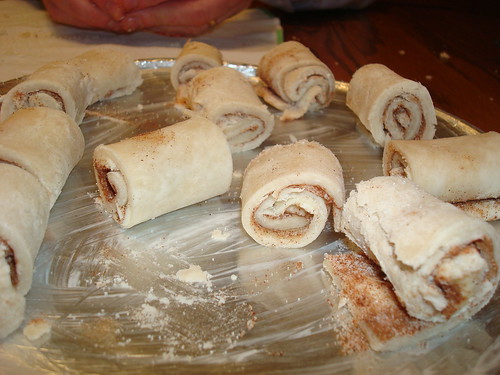
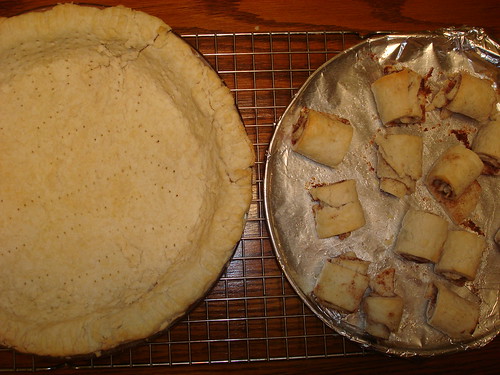
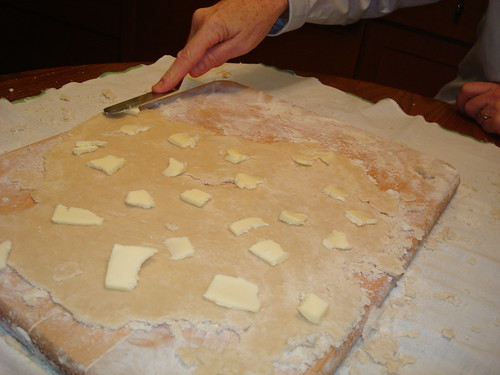
May 2009: My most popular recipe to date: Cookie Cake Pie.

August 2009: CakeSpy turns two! I celebrate by exploring the edi-mology (get it?) of the word cake.

November 2009: Important life skill: how to make marzipan turkeys.

December 2009: Best of 2009!

February 2010: CakeSpy goes to Paris. I visited one bakery in each arondissement. Here's the roundup.

March 2010: I did a mural in a bathroom in Minneapolis

CakeSpy goes retail! I purchased a gallery in Seattle and for the next two years, ran my own store. Wow! 

Spring 2010: My friend Bakerella gets a book deal!

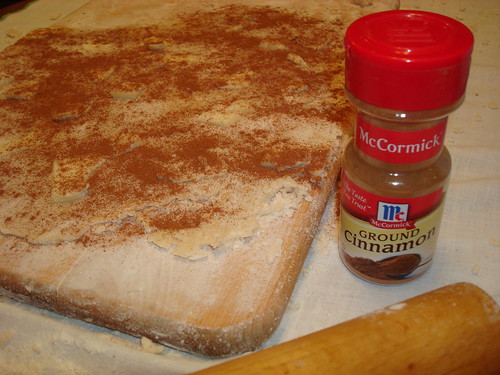
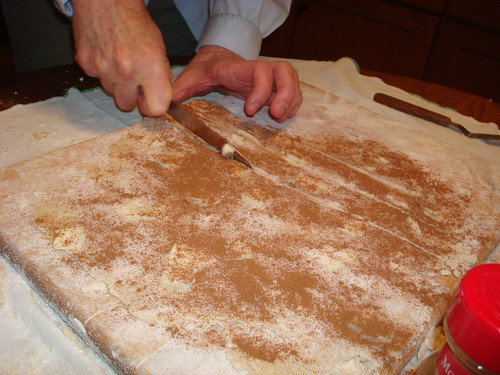
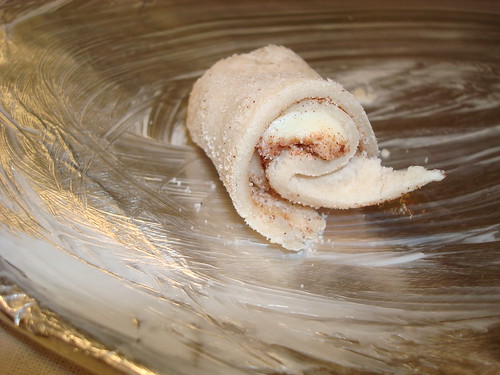
June 2010: I made a very large cinnamon roll.

August 2010: CakeSpy turns three! 

CakeSpy featured on CNN!

October 2010: I had an amazing trip to California.

November 2010: I visited every bakery on Broadway in Manhattan, in one day.

December 2010: I sign a book deal for my first book. CakeSpy Presents Sweet Treats for a Sugar-Filled Life is in the works!

Also: Best of 2010!

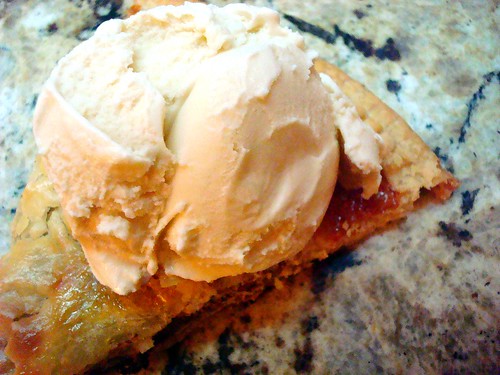
January 2011: I ate Pumpple!

Ask a Spy: How do I become a Superstar Dessert Blogger?

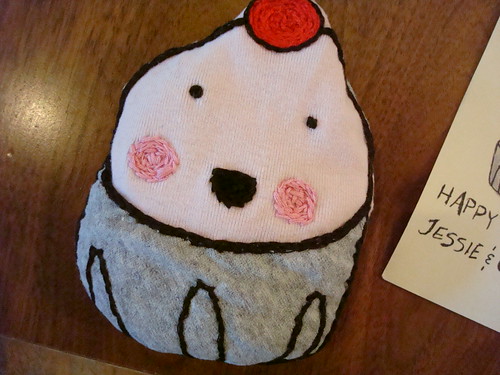
February 2011: I entered (and later on won a prize--my socks in production!) the Sock it to Me Design a Sock contest

March 2011: I am working on coloring book pages for Taste of Home magazine!

I was featured on the cover of a magazine.

April 2011: I was featured in a Brazilian newspaper.

May 2011: Did I mention I ate a whoopie pie in Maine for the first time?

June 2011: My book cover is finalized!

I visit the Wilton Headquarters in Illinois.

July 2011: I do a mural in a bathroom in Seattle.

August 2011: CakeSpy turns four! I go to Nanaimo, home of one of my favorite sweets, to celebrate.

September 2011: I take an epic road trip to Chicago and eat pastries all along the way.

Duncan Hines invites me to the Emmy Awards!

October 2011: MY FIRST BOOK COMES OUT!!!!!!!!!!!!!!!!!!!!!!!!!!!!!!!!!!!!!!!!!!!!!!!!!!! CakeSpy Presents Sweet Treats for a Sugar-Filled Life!!!!!!!!!!!!!!!!

Oh, snap!

For the party, New York Cupcakes made me the best batch of cupcakes...EVER!

Bakerella visited my store and posted about it.

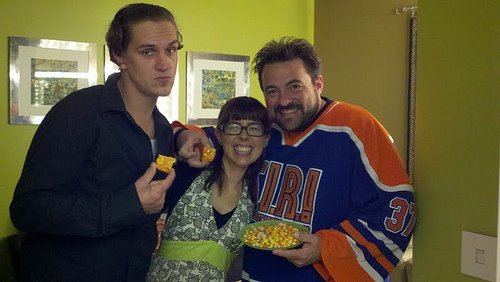
November 2011: Book tour for CakeSpy Presents Sweet Treats for a Sugar-Filled Life. Yes, I do meet Jay and Silent Bob on tour.

December 2011: Best of 2011!

December 2011: I get my second book deal, for The Secret Lives of Baked Goods: Sweet Stories & Recipes for America's Favorite Desserts.

I'm featured on Joy the Baker's podcast!

January 2012: I run the best contest ever: So you Wanna Be a CakeSpy?

March 2012: CakeSpy attends the Pillsbury Bake-off!

Joy the Baker comes to CakeSpy shop!

June 2012: Sneak peek at book two's photo shoot! These are photos that will end up in The Secret Lives of Baked Goods: Sweet Stories & Recipes for America's Favorite Desserts.

Frosting Cake

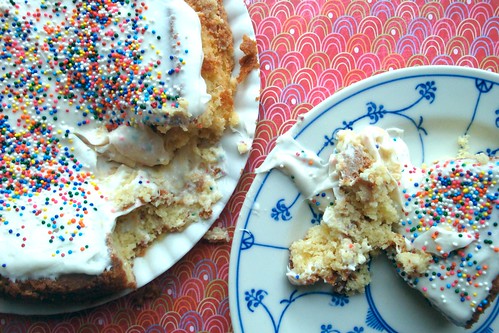
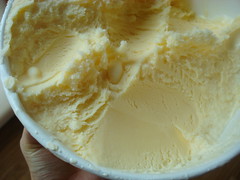
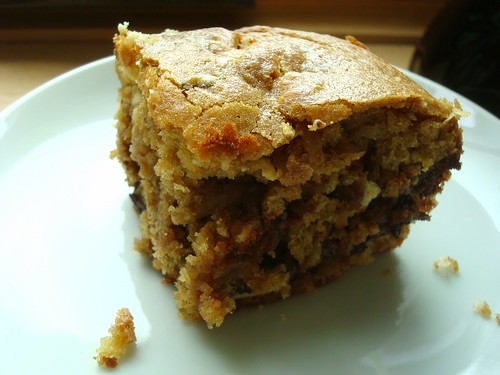
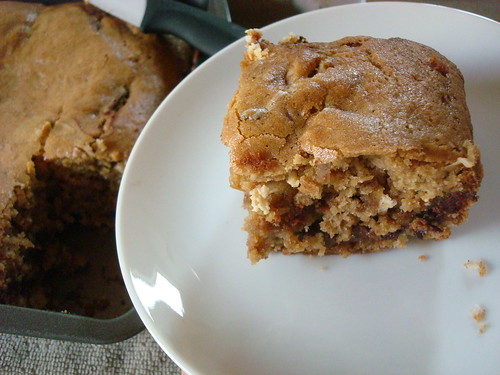
July 2012: I bake cake with frosting in it, just to see what will happen.

September 2012: After a couple of awesome years with the store, I have decided to move away from Seattle, so I close the doors. This is bittersweet, but it's time. Miss all my customers!

November 2012: I debut a magical new pin.

December 2012: Most delicious moments of 2012!

January 2013: I educate children about how to steal candy.

February 2013: I do a mural in Lewes, Delaware.

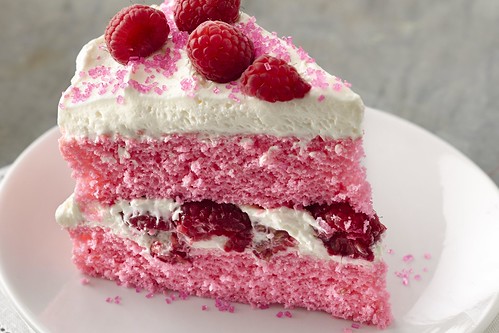
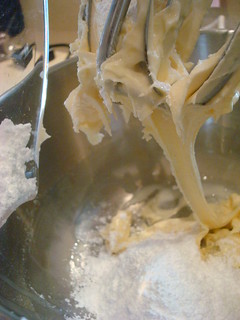
March 2013: I share my favorite buttercream recipe.

I begin contributing to Craftsy.com.

April 2013: I was hired by SILK soymilk to do this fantastic post. Love it!

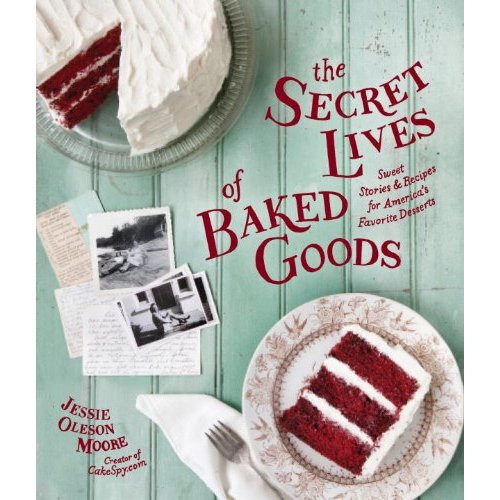
May-July 2013: My second book comes out! The Secret Lives of Baked Goods: Sweet Stories & Recipes for America's Favorite DessertsI go on book tour.

Book tour, part one.

Book tour, part two.

Book tour, part three.

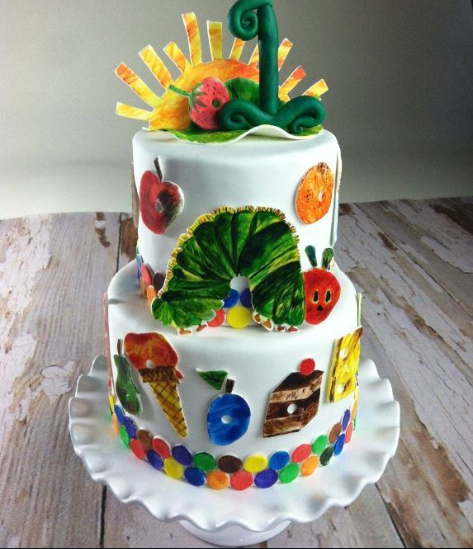
August 2013: CakeSpy turns six! I'm hoping to start on a new book project soon. Life is good.

Thank you for making it sweet. I couldn't have done it without you, readers! 

- - - 

GIVEAWAY ALERT!!!

To thank you for your years of readership, howsabout a giveaway? To thank you for your years of readership, I have decided to give away two copies each of both of my books: CakeSpy Presents Sweet Treats for a Sugar-Filled Life and The Secret Lives of Baked Goods: Sweet Stories & Recipes for America's Favorite Desserts. Since I'm feeling very giving, this giveaway is open to US and international entrants.

All you have to do? Tell me your favorite thing about CakeSpy (yes, it's self-serving!). It could be a recipe, an illustration, a product, a post, or one of my books...you name it! Leave it as a comment on this post (it may not show up right away as comment moderation is enabled) and I'll choose winners. 

UPDATE! I Decided to extend the contest cos I'm having so much fun with the responses. You now have til MY birthday, August 26 (monday), 5pm PST!  

CakeSpy for Craftsy: First Birthday Cakes

A baby’s first birthday is a cause for celebration, and that means you’re going to need a fantastic cake! From simple but sweet to over-the-top and elaborate, here are some first birthday cakes to inspire you to create a masterpiece for this milestone event. Guaranteed to please babies and adults alike! And since babies are being born all the time, it follows that they'll all turn one not too long after. So it's good to have these ideas handy!

Here's a collection of fantastic first birthday cake ideas I put together for Craftsy!

The Bake-Off is Coming: Sweet and Salty Cookie Pie Recipe

Cookie Pie

CakeSpy Note: OMG! The 46th Annual Pillsbury Bake-Off is coming! Since I so deeply loved attending the 45th Bake-Off, I thought I would get you excited early by sharing some of the finalists' recipes. Narrowed down from zillions of entries, I'll profile some of the 100 finalists--but of course, based on the subject matter of this site, I will focus on sweets! You can follow them by clicking the bakeoff tag below the post to see which ones have been posted so far. Enjoy! 

I don't know about you, but this recipe SPEAKS to me. As a bona fide carb-o-holic, the fact that this dessert contains cookie dough baked atop pie crust with a bunch of other tasty stuff added (like choco-hazelnut spread, which makes everything better) is very, very appealing.

It also vaguely brings to mind my own Cookie Cake Pie, which is a personal and web reader favorite from this site.

This version combines sweet and salty with some serious carb-on-carb action. It comes at you from Bobbie Harms of Boulder, Colorado. The recipe headnote reads, "Is it a cookie? Is it a pie? It's a cookie pie with rich chocolate and a sprinkle of sea salt." Yes!

Sweet and Salty Cookie Pie

  • Prep Time: 15 Min
  • Total Time: 1 Hr 20 Min
  • Makes: 12 servings

Ingredients

  • 1 Pillsbury® refrigerated pie crust, softened as directed on box
  • 1/3 cup Jif® Chocolate Flavored Hazelnut Spread
  • 1/2 cup miniature semisweet chocolate chips
  • 1/2 package (12 cookies) Pillsbury® Ready to Bake!™ refrigerated sugar cookies
  • 1/2 cup toffee bits
  • 1/4 teaspoon kosher (coarse) or sea salt

Procedure

  1. Heat oven to 350°F. Unroll pie crust on ungreased cookie sheet; prick generously with fork. Bake 5 minutes.
  2. Spread chocolate hazelnut spread evenly over crust to within 1/4 inch of edge. Sprinkle with chocolate chips.
  3. Cut sugar cookies in half horizontally. Place over chocolate hazelnut spread, 1/2 inch from edge and about 1 inch apart. Sprinkle with toffee bits and salt.
  4. Bake 20 to 25 minutes or until pie crust edges are golden brown. Cool 30 minutes; cut into wedges.

Sweet Book: The S'mores Cookbook by Susan Whetzel

S'mores cookbook

A couple of years ago, I met Susan Whetzel (blog code name: Doughmesstic) while visiting the Wilton headquarters in Illinois. I can tell you firsthand that this woman is smart as a whip, super fun, and damn, can she make some delicious sweets. Just look at her site, or her tasty book  The Everything Ice Cream, Gelato, and Frozen Desserts Cookbook.

So I already liked Susan, but now I like her even more, because she's just released a book called--wait for it--The S'mores Cookbook: From S'mores Stuffed French Toast to a S'mores Cheesecake Recipe, Treat Yourself to S'more of Everything

I love it!

Here's a sneak peek of what you can look forward to finding in the book, or, as I think of it, here is a pictorial list of reasons why you should buy the book.

S'mores cookbook Dark chocolate s'mores pie! S'mores cookbook No-bake oatmeal s'mores cookies! S'mores cookbook S'mores frappuccino! S'mores cookbook S'mores mousse cups! S'mores cookbook S'more's trail mix granola! Health food! S'mores cookbook Crustless s'mores cheesecake! (Perfect for the low-carb set!)

Buy it here: The S'mores Cookbook: From S'mores Stuffed French Toast to a S'mores Cheesecake Recipe, Treat Yourself to S'more of Everything

CakeSpy for Craftsy: Homemade Graham Crackers

Homemade Graham Crackers

Yesterday, a post of mine appeard on Craftsy, celebrating National S’mores Day with a roundup of creative s’mores recipes. Today, it seems, would be a great day to reflect on this wonderful national holiday by taking a look at the interesting history of the graham cracker and sharing a recipe to make your own.

Just because National S’mores Day is over, don’t stop the celebration. Use these homemade graham crackers as the base for your own unique s’mores variation!

This totally yum recipe--not to mention a fascinating history on Graham crackers--appears today on Craftsy!

Gimme S'more! Happy National S'more Day

Did you know August 10th is National S’mores Day? It’s true. America’s deep love of the campfire treat is official and on the record.

Nobody is quite sure how the campfire confections composed of melted marshmallow and chocolate sandwiched by graham crackers entered our orbit. It’s mostly an anecdotal recipe, passed on by word of mouth, likely even before a recipe surfaced in the first publication of the Girl Scout handbook called Tramping and Trailing with the Girl Scout in 1927.

What is not in question, though, is that the concept of the s’more quickly transcended mere Girl or Boy Scout outings, becoming a treat enjoyed by all ages, at any time of the year, whether served at an outdoor cookout, or made in the microwave or toaster oven.

In celebration of National S’mores Day, I put together several ideas for toasting (get it?) the treat by enjoying it in some creative and unexpected ways. Check them out on Craftsy!

Baker's Dozen: A Batch of Sweet Links!

DONUT HAT! Buy it here.

Everything you ever wanted to know about flour.

Unicorn-related: can this kid write to ME?

Also unicorn-related. Look: a Unicorn-related thing I need.

Inspiring interview with a Philadelphia bakery.

I dig it: Funfetti banana bread.

Remember when I made Funfetti Gooey Butter Cake?

My friend Jameson went to Victoria...which is not too far from Nanaimo...

Strawberry shortcake. A little history, a hella delicious recipe.

In case you missed it: roly polies are the best thing ever.

Now, this makes me happy: whoopie pie cake.

Guess what? Kim of Ninja Baking tried out one of the recipes from my new book on her great site!

Wait. What? Yankee Candle has a whoopie pie scented candle??

In case you need it: aphrodisiac recipes (cakes are included).

A book that focuses on how to ship sweets: The Flying Brownie: 100 Terrific Homemade Food Gifts for Friends and Loved Ones Far Away

CakeSpy for Craftsy: NYC Cakes!

New York City is such an inspiring place. The bustle. The buildings. The people. All of that artistic energy makes for great inspiration when translated into cake decorating. Although its nickname may be the Big Apple, this skyscraper-rich city has also inspired some totally sweet cakes.

To celebrate the amazing cakes made in honor of NYC, I've created a totally sweet roundup of NYC cakes for Craftsy. From downtown to uptown, and even to some of the outer boroughs, too, these cakes are wonderful odes to the city that never sleeps. 

For the full roundup, visit Craftsy!

Fat and Sweet: Roly Polies Recipe

Making Pie crust with Spymom

Growing up, when SpyMom brought out the pie plate and the rolling pin, the entire family got very excited. 

You may assume that it was because it was pie time.

I know what time it is.

But, well, you'd be wrong. Because although we weren't going to turn away one of SpyMom's pies, what we really craved were the precious bits created with the leftover scraps of dough, which she'd polka-dot with butter then sprinkle with cinnamon and sugar and then roll into spirals, baking them in the residual heat of the oven and presenting them to her hungry masses under the name Roly Poly. 

I have no idea why SpyMom called them Roly Polies--she said that she had started making them because that's how she'd been taught to use the leftover pie dough from a neighbor, when she was a girl. It's likely owing to their short and squat nature. After all, when I just now looked up the definition of "roly-poly" in the dictionary (it was there!), it said "A short plump person or thing."

Making Pie crust with Spymom

I don't know how to scientifically explain how such a simple thing as coating pie crust with butter, cinnamon, and sugar creates a treat with an almost crack-like addictive quality. But just take a bite. You'll lose yourself in the gooey midsection of this pie crust cookie-treat, which is soft, but lightly salty, and gooey. You'll want more. I guarantee it.

And to prove it, I will present evidence of how beloved these treats have become in my family. No longer are they the way to use up leftover pie crust: my mom will actually make up an extra batch just to make roly polies.

Making Pie crust with Spymom

Me, I'm just as happy cutting simple strips. You can see for yourself the next time you've got some extra pie crust rolling around--but be warned, you may be setting yourself up for a lifetime of craving.

Roly Polies

Ingredients

  • Leftover pie crust
  • Butter
  • Cinnamon
  • Light or dark brown, or granulated sugar

Is your oven already heated? If not, preheat it to 400 degrees F.

Making Pie crust with Spymom

Dot the crust all over with butter. Making Pie crust with Spymom

Now, coat it with cinnamon. If you want, give it a sprinkle of sugar, too. Making Pie crust with Spymom

Now, slice it into strips.

Making Pie crust with Spymom

And then roll them up.

Making Pie crust with Spymom

Place them on a greased baking sheet. Making Pie crust with Spymom

Bake for 5-10 minutes, or until golden.

Enjoy! Did you have any treats like this in your house while you were growing up?

CakeSpy for Craftsy: Royal Icing Flowers

Working with Royal Icing

When most people think of decorating with royal icing, they probably think of using it sort of like paint, as it's ideal for making highly detailed images on cookies or cakes. But did you know that it’s also the perfect medium for making decorative and dimensional flowers, too? It's not hard, either, I promise--and they keep basically forever! So whip up a batch and you'll have go-to decorations for some time.

Royal icing flowers

Learn how, in this fun step by step tutorial I did for Craftsy!

Does Baking Help Depression? Depressed Cake Shop Pop Up Event

CakeSpy Note: Sweeties, here's an event that I think might interest you. If you're in LA, then very cool--you can attend! But even if not, it's an interesting event to read about. All photos are via the Depressed Cake Shop Pop Up page.

Where cake meets performance art meets do-gooding...there's the Depressed Cake Shop Pop-Up.

This is a pop-up baking event dreamed up by Emma Cakehead (a version of the pop-up has already happened in the UK and San Francisco, which collectively raised more than $10,000) at which bakers will be selling grey (as in the hue and the theme) cakes and artwork to bring awareness about mental illness and benefit NAMI Westside LA, an organization that educated, supports, and advocates to improve the lives of families and those afflicted with mental illness. 

An odd pairing? Perhaps not as much as it initially might sound. Many of the bakers who have gotten involved have battled their own demons with depression. They have been quite vocal about how baking has changed their lives for the better.

Can baking help your mental state? Here are some bakers' thoughts.

"Baking has given me something to focus on, to put my energies toward when the rest of my life seems a bit crazy. It is calming and a huge positive addition, in more ways than just calories. My day job is full of numbers and when I bake I get to do the complete opposite and let my creativity free." - Alicia Hansen, owner of Ali's Cake Pops

"I bake whenever I feel like my world is spinning out of control. It centers me and forces me to focus on one thing for long enough to calm down again. Plus, it makes me happy seeing people eating things I've created. It's also good for clearing my mind when I feel blocked on photo shoot ideas." - Jaxx Victoria, baker and photographer

"Baking saved me from myself." - Zainah Ismail, baker in Cardiff, UK

"Baking has kept me from crawling up into a ball and not re emerging. I started a food blog which I love and a lolly business Holly's Lollies with a dedicated black charity lollipop. It keeps me focused and happy." - Holly Brook, and owner of Holly's Lollies

"I bake primarily to relieve stress. The attention to detail needed (especially in the decorating) gets me out of my head. As a bonus the joy it brings to others (when I give away my creations) lifts my heart." - Laura Makey, baker and woman in charge of San Diego pop-up.

"t was just something I started to do so I wasn't doing nothing. Beating things in a bowl is exactly the right combination of mindless and distracting, and the decorating was a skill to practice. When you have to get the icing right on the next batch, you look forward to something. Then there's always cake to eat at the end." - Amy Conkerton, baker in Birmingham, UK

"Baking gave me identity, hope and I became proud of me. I learnt how to be happy. No one can take that away from me." - Allison Henry, baker in London

"It gives me an opportunity to follow lists and instructions and lose myself in detail already set out by someone more experienced, which I find comforting in my loneliness. I love to share the results with friends and family too; there's something very heartwarming about feeding loved ones." - Vicky Cooper, baker in London

"Through baking, and the feedback I received, I felt confident enough in my skills to go ahead with my dream of opening my own cafe. Now I have my own business that fits in with my family life, rather than shift work that was so difficult for us all." - Nell Watkins, baker in the UK

"Making cakes allows me to put the devil in the detail instead of keeping it inside." - Mi Tulip, baker in London

How can you attend? Here are the details:

Date: August 23+24
Location: Buckwild Gallery, 12804 Venice Blvd., Los Angeles, CA (very close to Venice, CA)

Not content to be a bystander? Here's how you can get involved.

Be added to the guest list here.
Join the fan page here.
To donate work or become a baker, email Rebecca Swanner at secretmarmalade@gmail.com or comment on the Facebook wall.

Ingredient Availability Cake: Brown Sugar Congo Cake

Brown sugar congo cake

Something I really, truly love is the phenomenon of how recipes evolve over time. What makes a recipe change? I suppose a number of things play into it: modern tastes, ingredient availability, time constraints, technological advances. Sometimes all of these things. Sometimes just one. 

I bring this up because it's a very roundabout path that led me to sharing this cake recipe with you. 

Brown sugar congo cake

What happened first, many years ago, before I was a professional CakeSpy, was that a little boy brought Congo Bars (made by his mother perhaps) to a class event. A little girl who may have already taken a shine to the boy for SURE took a shine to these bars, and kept the recipe. When she went to college, she began baking, but the recipe changed because of her limited equipment and ingredients. One notable change, for the better, she thought, was swapping out vanilla for kahlua or Baileys or liqueur. It didn't hurt anything, she realized.

I'm not this girl, but I met her recently. She brought these Congo Bars to my book signing in Collegeville, PA, and was kind enough to share the recipe with me.

But then, the other day, when I pulled out the recipe, I realized there were several alterations I'd have to make. For one thing, the recipe didn't include how many eggs went into it, so I took a guess and decided on three, because I have a blondie recipe that has that many eggs. Why not?

Second, I realized that I only had one stick of butter; the recipe called for two. So I wondered...what would happen if I used half butter and half cream?

Brown sugar congo cake

Third, I decided that since I was messing with the formula anyhow, why not try making them more in the method of the Katharine Hepburn brownies from my book? So, I messed with the recipe again in that way.

The resulting recipe differed quite a bit from the delicious Congo Bars that were brought to the event, so I am going to save that recipe and share it with you another time. But I can say that while my result was very different, it was still pretty darned good. So here's the recipe as I made it, which I'll dub Brown Sugar Congo Cake.

Brown sugar congo cake

This light and fluffy cake is nicely chewy in the areas that have chocolate or gooey fillings, and it actually seems appropriate as a morning cake. I found it was especially lovely when topped with cream cheese or almond butter. 

Brown sugar congo cake

I should also tell you that the brown sugar I used was hard as a rock. But it wasn't a worry! All I did before making the recipe was heat the oven to 300, and then place the rock of brown sugar on a large plate and into the oven. After a few minutes the heat made it soften enough that I could break it up. Keep in mind, though, that this method must only be used pretty directly before baking, as the sugar will re-harden after an hour or so if not used. 

Brown sugar congo cake

Brown Sugar Congo Cake (Printable version here)

Makes 9 servings

Ingredients

  • 2 cups flour
  • 1 tsp baking powder
  • 1/4 tsp baking soda
  • a hefty pinch of salt
  • 1 stick butter
  • 1/2 cup heavy whipping cream
  • 2 cups brown sugar (light or dark. Your preference. I used light.)
  • 3 eggs
  • 2 tbsp. Coffee Liqueur or any liqueur that strikes your fancy.  
  • 12 oz chocolate chips or discs (semi-sweet)
  • 1/2 cup toasted sweetened shredded coconut
  • 1/2 cup toasted almonds
  • 1/2 cup toasted pecans

Procedure

  1. Preheat your oven to 345 degrees (yep-- not 350).
  2. Brown sugar congo cake
  3. Sift together the dry ingredients; set to the side. Grease (with BUTTER) an 8x8-inch pan very well, especially the corners.
  4. In a large saucepan over medium-low, melt together the butter and cream, until the butter has completely disappeared. Add the brown sugar, stirring until completely dissolved into the mixture. Remove from heat.
  5. Add eggs, and mix until smooth. Add the dry ingredients in 3 batches.
  6. Brown sugar congo cake
  7. Mix in chocolate chips and any other stuff you want to add.
  8. Brown sugar congo cake
  9. Pour mixture into pan and spread evenly.
  10. Brown sugar congo cake
  11. Bake in your preheated oven for 30-35 minutes, or until golden on top and a cake tester comes out mostly clean.
  12. Brown sugar congo cake
  13. Remove from oven. Let them cool, and serve! Great in the morning with cream cheese or almond or peanut butter; great at night with ice cream.