Let me tell you a story about how deeply, to-the-core evil, I am. It involves pop-tarts.
OK, so when I was young, and it would have to have been before I was six, because this was before my little sister was born, my mom would, on occasion, take out a shiny two-pack of chocolate pop tarts. She would open it, and give one of the precious pop tarts to me, and the other to my older sister.
Here's what I would do with that pop-tart. I would hold it in my hand while watching my sister eat hers. And only when she was just about done would I start eating mine. The entire reason for my doing this was to hold it over her. I didn't have many ways to exert power as the little sister who was more bookish than scrappy, so I held on to these little opportunities with all my might.
Amazingly, I have no recollection of her ever shoving me and or grabbing my tart and running with it. I would have deserved it.
I still have a lot of love for pop tarts, but I have no delusions about them being actual food. However, when you make your own toaster pastries, you can enjoy the nostalgia but actually up the flavor game.
When I was assigned to make a chocolate pie crust for Craftsy, the recipe yielded two crusts. With one, I rolled it out in the traditional way and blind-baked it; it was the perfect shell to fill with a creamy chocolate filling.
But with the second crust, I rolled it out, cut it into rectangles, and made myself some choco pop tarts.
Man, was this a good decision. BURSTING with chocolatey flavor, they satisfied my nostalgia, but tasted totally grown-up. And they delighted everyone who came into contact with them. I would say that I win! You can win, too. Here's the recipe.
Chocolate Pop Tarts
Makes 6 pop tarts - printable version here
- 1 portion chocolate pie dough (from this recipe)
- about 12 squares of dark chocolate (I used squares from Perugina dark chocolate bars)
- 10 ounces dark chocolate, coarsely chopped
- 5 ounces heavy cream
- White nonpareil sprinkles
Preheat the oven to 400 degrees F. Line a baking sheet with parchment paper.
Roll out the pie crust into a vaguely rectangle-like shape; standard or slightly thin pie crust thickness, about 1/8 inch thick (remember, you're stacking double portions to form the tarts). Cut out 12 equally sized rectangles.
Oh, and if you have leftover bits of dough, don't toss it. Roll them up with some butter and sugar and cinnamon and make roly polies! Bake them in the oven while you bake the tarts.
Press 1 1/2 squares of dark chocolate in the center of each of the 6 rectangles.
Place a second rectangle on top, and crimp the edges to seal them, using the tines of a fork. Press the tines in the center of each tart to create a little escape valve for steam. By this point I had transferred the tarts to the lined baking sheet.
Place the tray in the oven; bake until the tarts are "set" - on the low end, 6 minutes, or longer depending on your oven. Just keep an eye on them. Once they have a dull finish on top and look toasty on the edges, remove from the oven.
Let them cool on the tray for a few minutes, then transfer to a wire rack.
While they cool completely, make the topping. Place the chocolate in a heatproof bowl. Heat the cream to the simmering point. Pour the cream over the chocolate and mix until smooth.
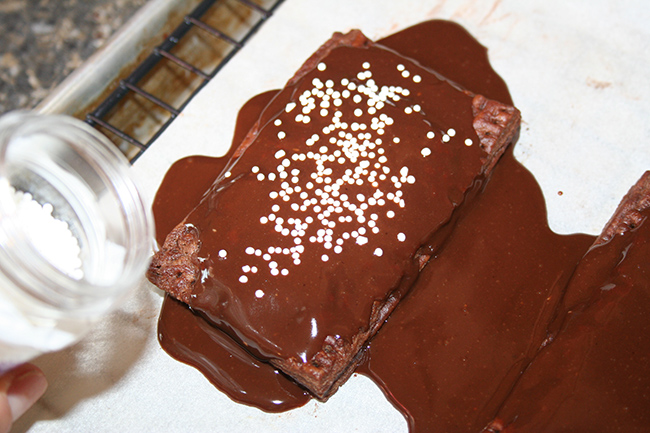
Spread/pour some of this ganache on top of the tarts.
I like to do this while they're on parchment over the wire rack because nothing will drip through; once that chocolate sets it is still delicious, even if messy. Immediately top with sprinkles (while the topping is still wet). Let the topping set for a while, then enjoy your tarts.
Hoarding your tart until your companion has finished theirs = optional.
Want more pop tarts? Here's a recipe for traditional pop-tarts, inspired by my friend Peabody.


